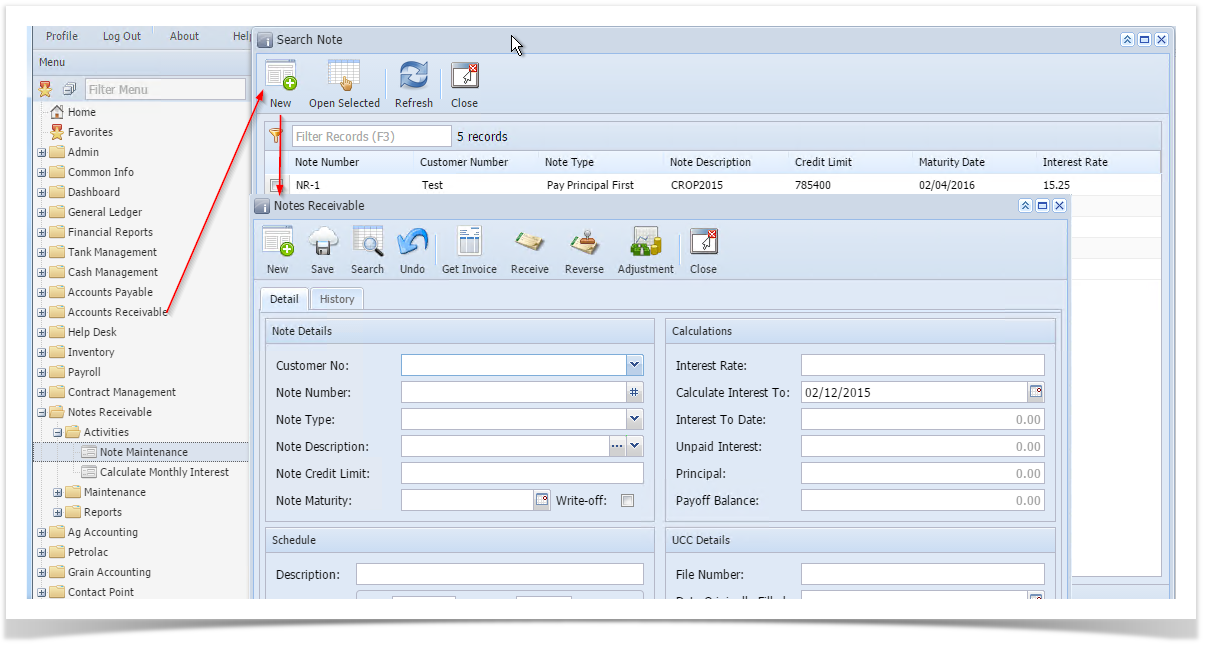
- From the Notes Receivable Activities menu, click Note Maintenance. If there's an existing Note record, Search Note screen will open. Otherwise, Notes Receivable screen will open automatically.
- If Search Note screen opens, click on New button to open blank Notes Receivable screen.
- Customer No: Select Customer No by clicking the combo box button on Customer No textbox, customer combo box list will be opened. Double click on the required customer.
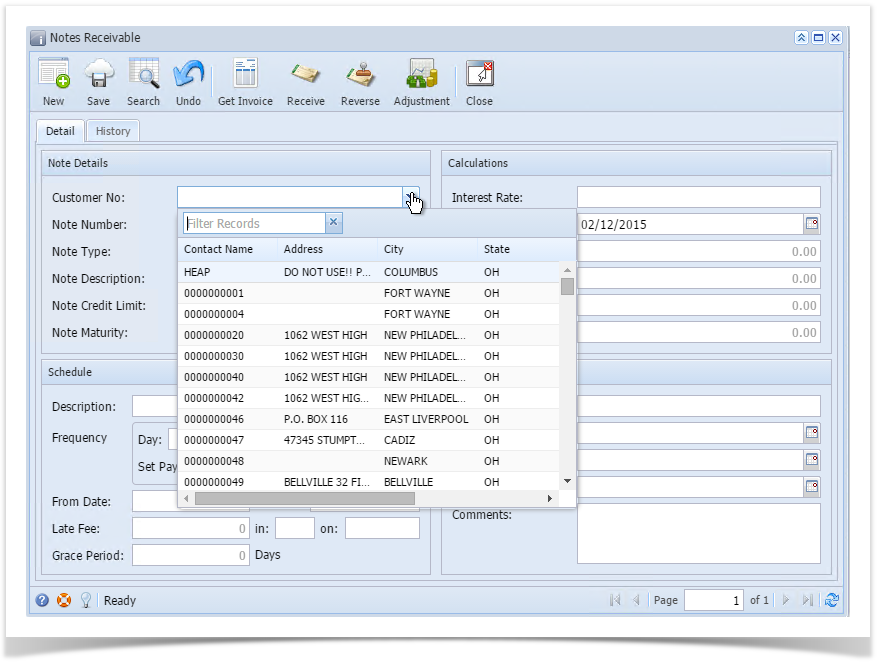
Alternatively, user can enter the valid customer number in Customer No textbox.
Press Tab then entered customer number is valid then focus will be moved to Note number textbox.
- Note Number: Click on the # button, Note number will be auto-generated based on the Note prefix mentioned in Starting Numbers.
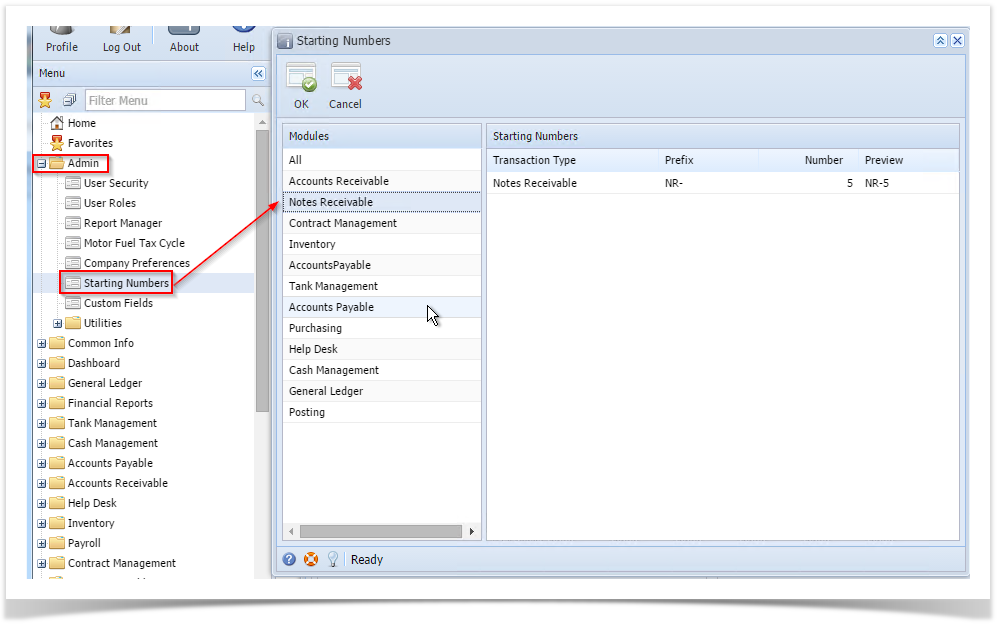
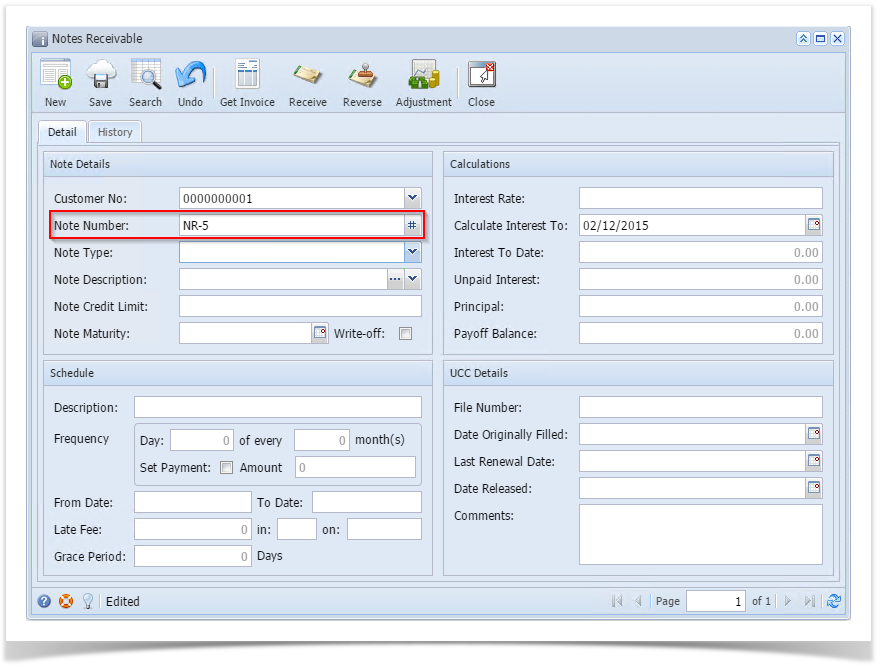
- Pattern of Note Number: Note Prefix + Last Note number(i.e. 1)+1
Example: Note Prefix: NR(non editable), Last Note number: 1 then New note number: NR-2 User can specify new number, but user cannot create a note which already exists in NR system.
Example: Note Number: NR-19 belongs to another customer. If the user try to create a note with the note number NR-19 for different/same customer then on click of save button, system will display “Note is already exist” message.
- Pattern of Note Number: Note Prefix + Last Note number(i.e. 1)+1
- Note Type: Select one of the notes Type. NR is having 3 different Note Type.
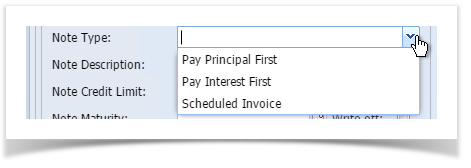
Pay Principal First - Principal amount will be paid first if selected.
- Pay Interest First – Interest amount will be paid first if selected.
- Schedule Invoice - If selected “Schedule” part will be enabled and user can schedule payments.
- Note Description: Select the Description of notes by clicking combo box button. User can define his own Note Types by clicking on the
 button, then Note Description creation window will be opened.
- Enter value in Description field or double click on the note description record from the combo list.
- Enter value in Description field or double click on the note description record from the combo list.
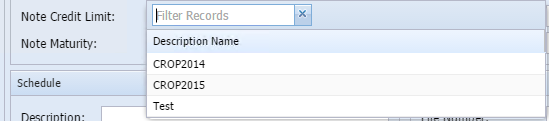
- Note Credit Limit: Enter credit limit for the note. Note Credit Limit field is mandatory.
- Note Maturity: Enter/Select Note Maturity for the note. The date cannot be less than the current date.
- Write-off: If the User checks the Write-off check box then that particular note cannot be calculated the Interest and for that particular note user can perform adjustments only.If the note is non Write-off note i.e. Write-off check box is unchecked, then user can check the checkbox and make the note as Write-off note. Once the user make the note as Write-off note (checks the check box) then user cannot uncheck the check box.
- Calculations:
- Interest Rate: Enter Interest Rate for the note between 0 to 100. If out of this range, following.
- Interest Rate cannot be 0.00%.
- Interest Rate cannot be negative value.
- Interest Rate cannot exceed 100%
- Interest Rate: Enter Interest Rate for the note between 0 to 100. If out of this range, following.
- Schedule:
If Note Type is “Schedule Invoice” User has to enter details in Schedule Box.

- Description: User needs to enter Description for his scheduled payments.
- Frequency: User needs to set in frequency you want to make your payment for any amount. User can set Day, Month and Payment amount here.
- From Date: User needs to set start date for his payments.
- To Date: User needs to set End date for his payments.
- Late Fee: User needs to enter late fee amount and currency here. It will be charged to customer in case of late payment. Late fee can be set in $ or % on Principal/Interest/Balance.
- Grace Period: User needs to set Grace Period here.
- UCC details: User can enter UCC Details if required in following box.
User need to set start date for his payments.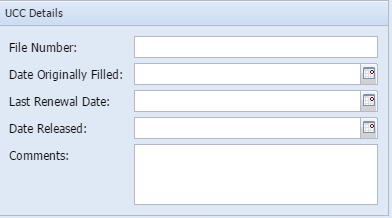
- Click on save button, Note will be created successfully if all required fields are contains value.
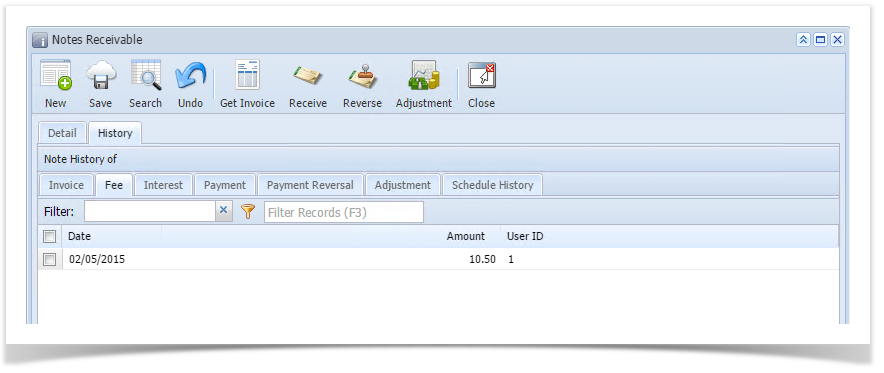
- Once note is saved successfully, that note creation date, note fee, user id (who created the note) information will be displayed in the Fee Tab of “Note History” Grid in Maintenance screen.
Overview
Content Tools