Here are the steps on how to create a Inbound shipments:
- Go to Logistics module> Inbound shipments. If there's any existing record, Search Inbound shipments screen will open. Otherwise, New Inbound shipments screen will open automatically.
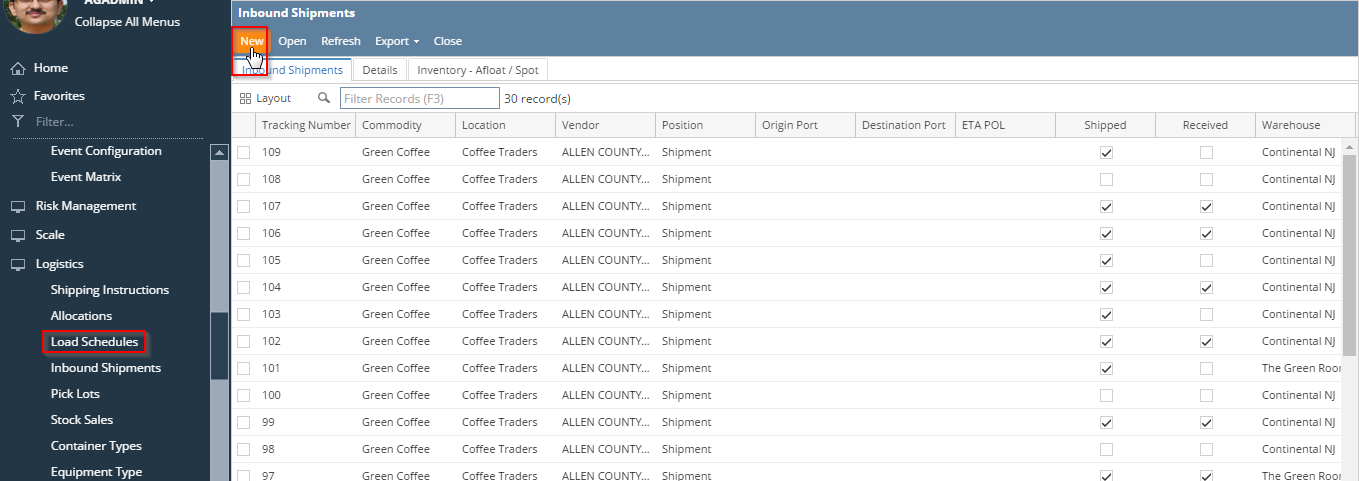
- Click on the New button of inbound shipment- search screen and a new fresh Inbound Shipment screen will open.
- User should select the vendor name, weight unit from the drop down. They can select to do a direct shipment by selecting the 'yes' from the drop down- Direct shipment.
- The customer name can also be selected from the 'Customer' drop down.
- As per the above mentioned criteria, it will fetch the PO contracts in the grid drop down.
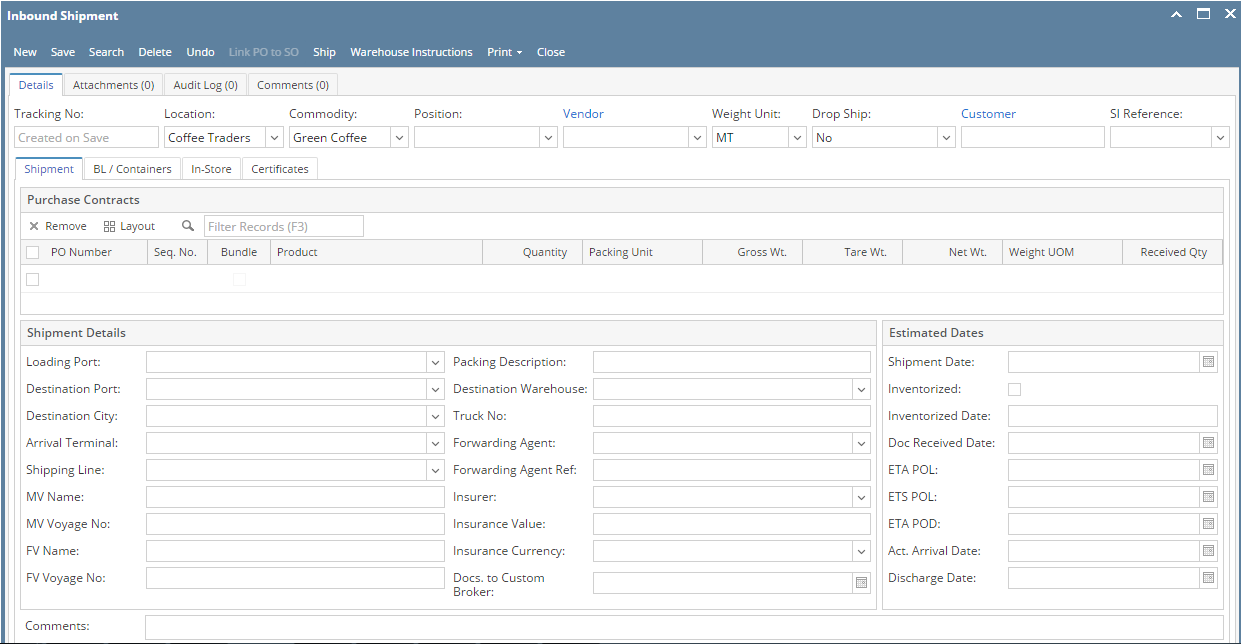
- User can select multiple PO contracts in the grid.
- Inbound Shipment Handles transportation for overseas business. For example, shipping wheat from Argentina to United States.
- Inbound Shipment Schedule for shipments is planned in Purchase contract creating one or more sequences.
- Contract is priced before the shipment
 10. On receiving the shipping advice and bill of lading from the shipper, it can be entered in this screen.
11. In shipment tab, user mainly enters the PO details and the shipment details.
12. User will enter the shipment details like the loading port and city, destination port and city, destination warehouse, arrival terminal, vessel details, insurance details in the shipment details section.
13. The estimated dates details like estimate time of arrival at port of loading, port of destination, discharge date etc.
14. Inventorized date will get automatically updated once the shipment is shipped. User can click on Ship button or it will get auto shipped once the lot is received in warehouse. 11. BL # / Container details can be captured in the 2nd tab of this screen.
 12. There can be many contracts and many containers in a shipment. Link BL to PO option helps to link contracts and containers.
Link PO to SO - If it is a direct shipment, user should link the PO to SO.
- Select the PO and SO and click on Link PO- SO button. Then the linked PO- SO quantity will show in the Linked section.
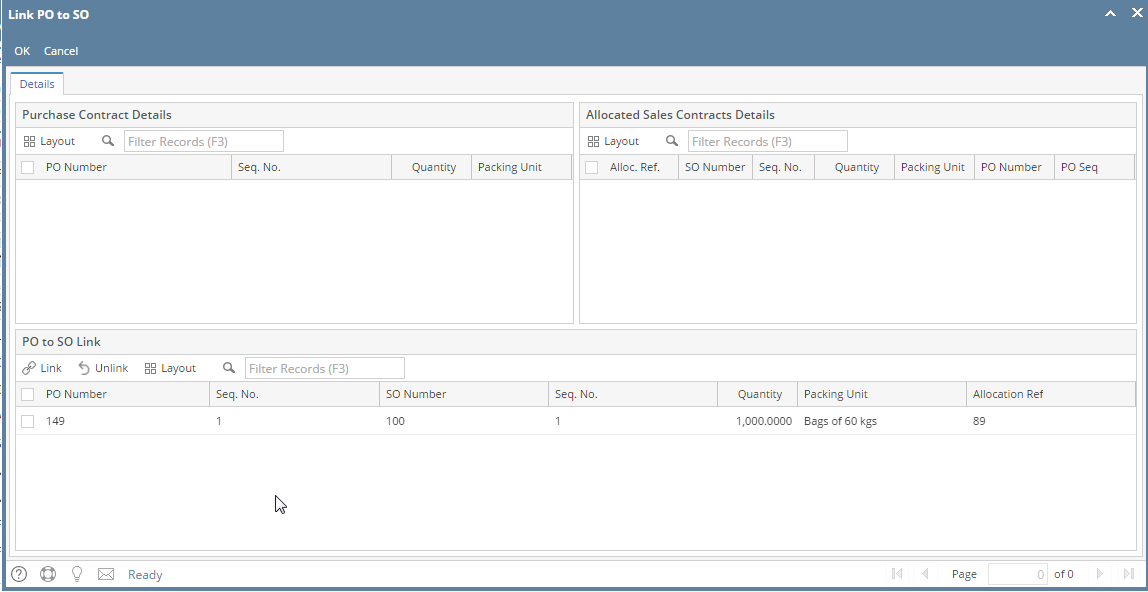
Why user needs to do this?
The logistics design allows to ship multiple contracts together and each contract could have its own BL and container. In order to track which container and BL belongs to which PO, this link is needed.
Instore tab
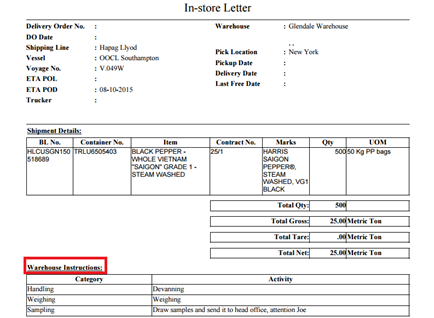
Use this tab to instruct the warehouse to instore the goods. Add your special instructions, if any, in freight, sample or other comments section and the same will be populated on the instore letter print.
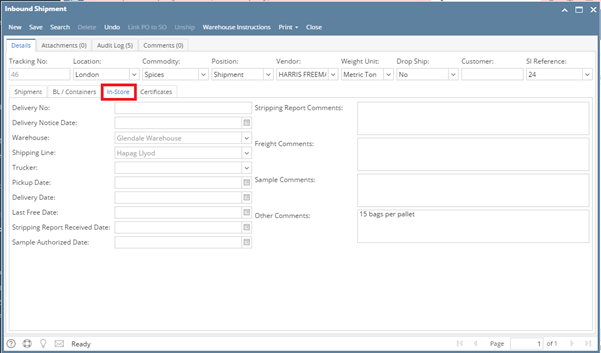
The warehouse name is automatically populated from the first tab.
Warehouse Instructions
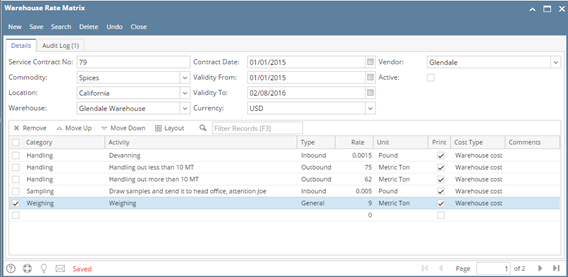
If user has a service contract with the warehouse, he can enter the services agreed in the service contract in warehouse rate matrix configuration in logistics module. Later we can use this matrix and select the services we want the warehouse to perform using “Warehouse Instructions” button

On clicking on warehouse instruction button, the warehouse instruction form opens up. User needs to select the service contract number and select the pre agreed services under the service contract.
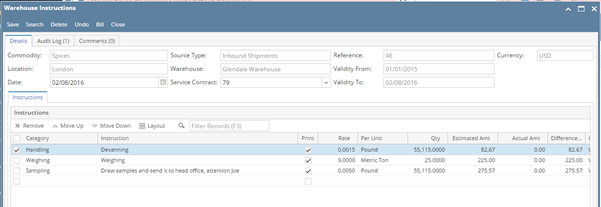
Next, user can enter the quantity and the estimated amount is auto calculated.
In the screenshot, there are 2 services which the user wants the warehouse to perform on its behalf. The print check box is checked. When the instore letter is printed, these instructions will be printed.
After entering all the data click on save and Ship button.
Creation of Purchase in transit inventory
Clicking on ship button creates Purchase in transit inventory

Overview
Content Tools