Here are the steps on how to create a Purchase Order:
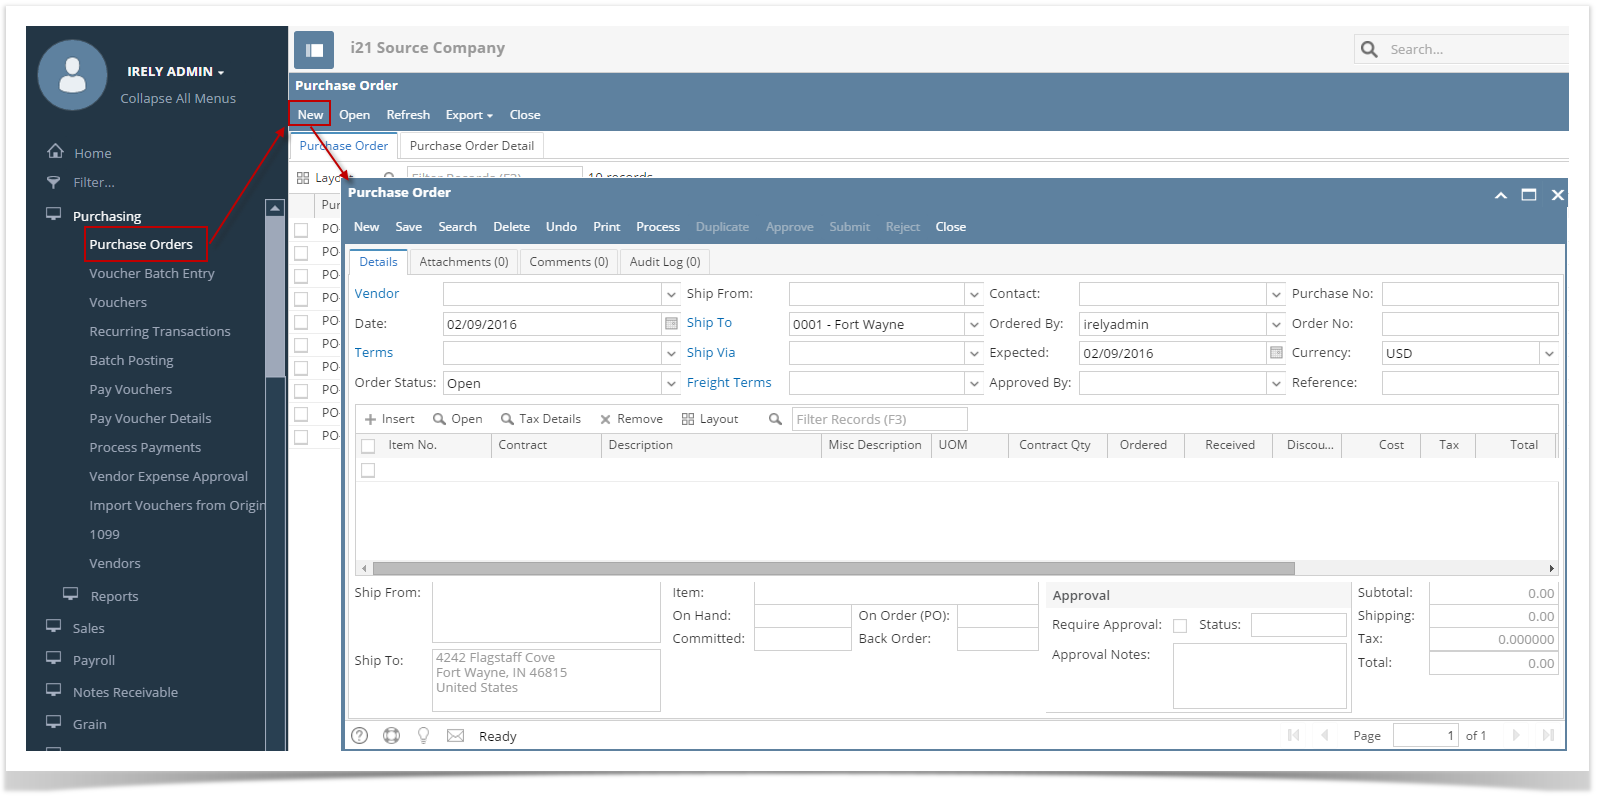
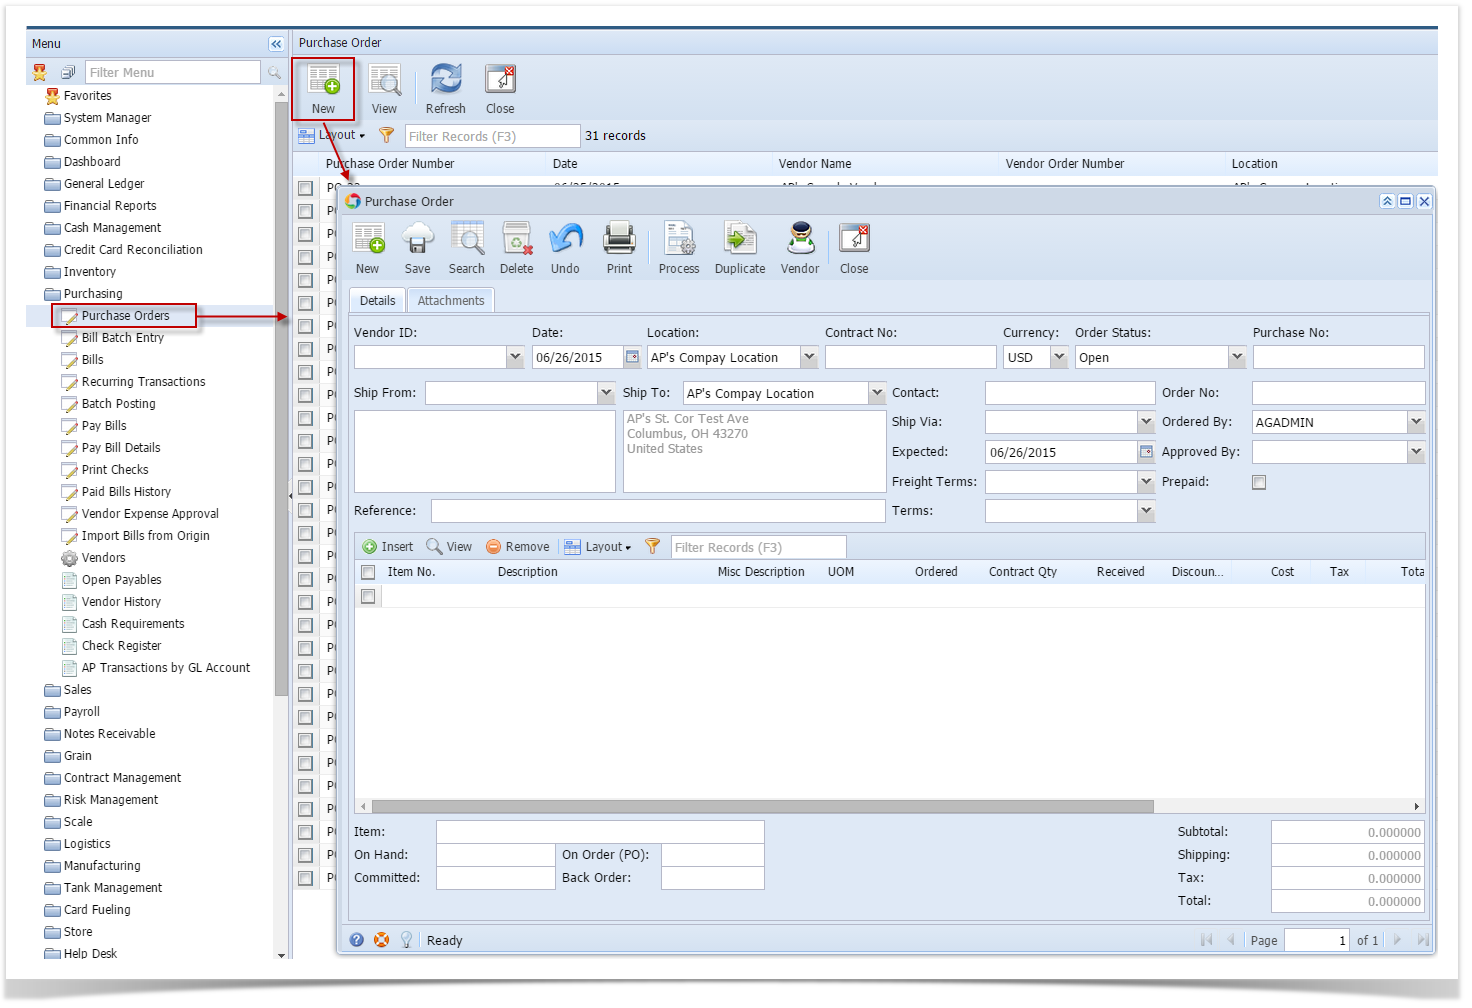
- From the Main Menu, expand Purchasing and click Purchase Orders. Search Purchase Order will be displayed.
- Click New toolbar button to open blank Purchase Order screen.
- Fill in fields.
- Click on Vendor to open combo box and then select vendor.
- After selecting Vendor: Ship From, Contact, Ship Via and Terms fields will be automatically populated by the details entered in Vendor screen.
- Date will default to today’s date. Change date if necessary by selecting from the mini calendar dropdown or by entering the date manually.
- Order Status will show Open and will remain open as long as Purchase Order is not yet processed.
- Ship To - will default to the address entered in the Common Info > Company Location. This will be your location where items are to be shipped.
- Ordered By - will default to the user that is currently logged in.
- Expected - will default to today's date. This is the date you expect to receive the items.
- Click the Freight Terms dropdown button and select freight terms from the list.
- Currency - will default to the currency set in Company Preference > Settings screen

Add details on grid.
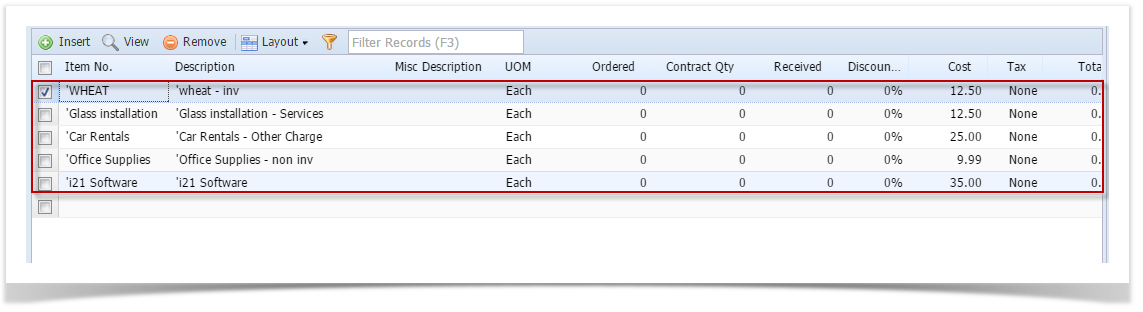
- Click Insert button or directly click Item No. field. Click dropdown button and select item from the list.
- Description, UOM, and Cost column will be automatically populated with the details of the selected item.

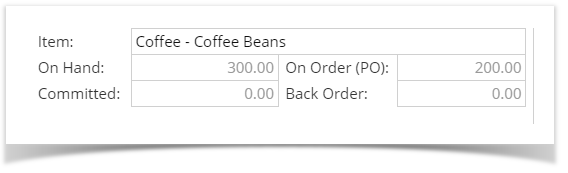
- Stock information of the selected item will also be displayed.
- Item - will display the Item Number and the Description of the selected item in the grid.
- In Stock - displays the total quantity in stock. This field changes every time an item is sold or purchased.
- Committed - displays the total quantity of the selected inventory item that has been ordered but not yet invoiced/shipped. This field changes every time an order is created and when an order is invoiced.
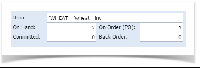
- On Order (PO) - displays the total quantity on order. This field changed every time a purchase order for the selected inventory item is created.
- Back Order - displays the total quantity on back order. This field changes every time an invoice for the selected inventory item is posted where there are not enough stock to complete the order (Shipped qty is less than Ordered qty).
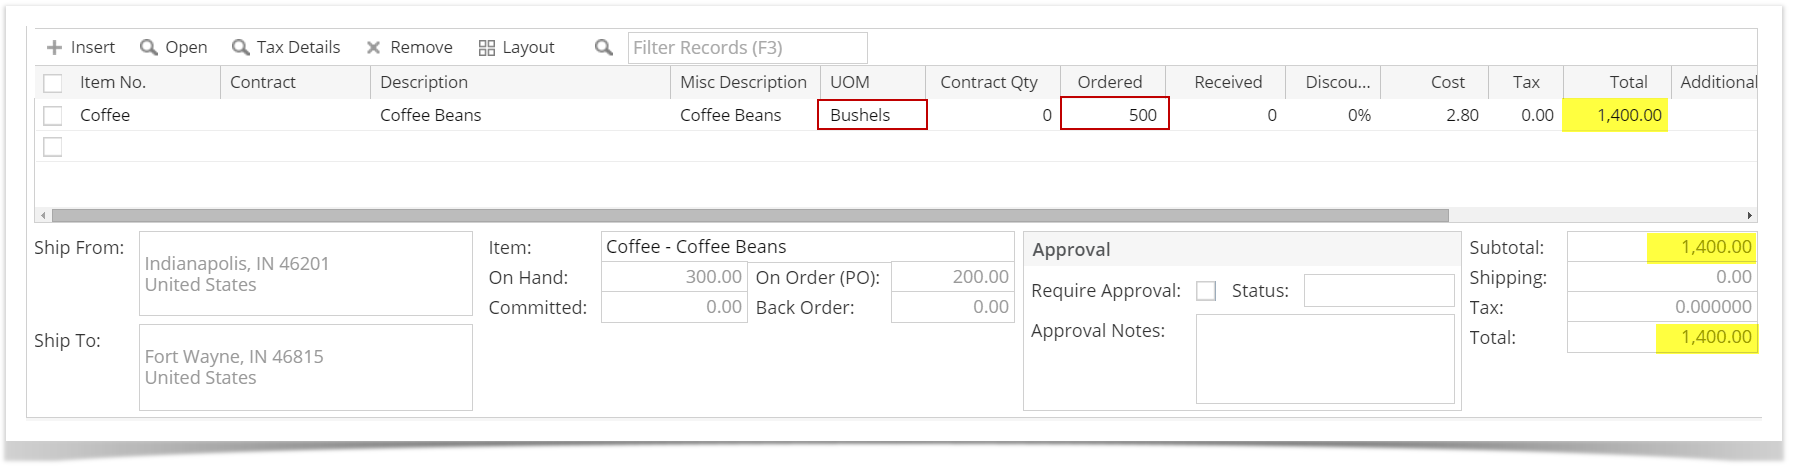
- Select UOM.
- Enter Ordered quantity. Total amount will be computed based on the item's Cost.
- Amount fields will also be filled up with the computed amounts from the grid.
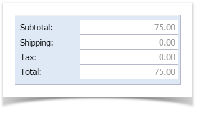
- Subtotal - displays the total of all the line items entered in the grid.
- Shipping - displays the shipping cost of the transaction.
- Tax - display the calculated tax for the Tax Code fields.
- Total - displays the total of the Subtotal, Freight, and Tax fields. This is the amount entered to the Accounts Payable account in the General Ledger after posting the transaction.
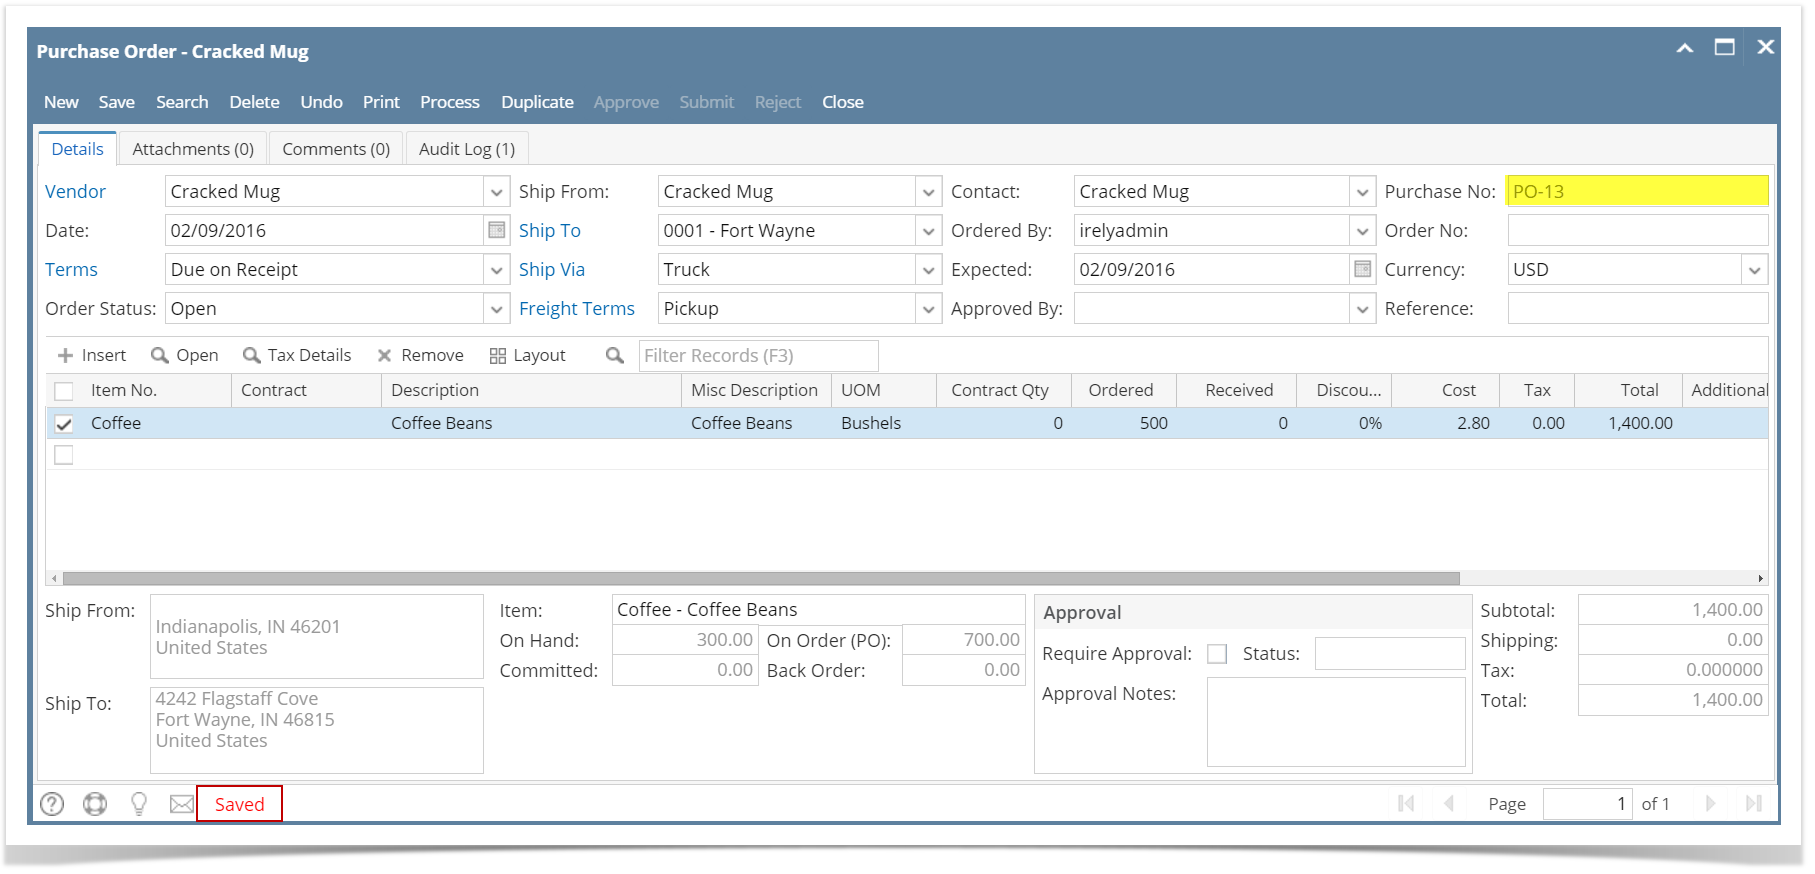
Save record by clicking Save toolbar button. A system-generated ID will be displayed in the Purchase No field.
You can skip saving the record if the transaction is to be processed right away. This will be catered when Purchase Order is being
processed to Inventory Receipt. (See )
Here are the steps on how to create a Purchase Order:
- From the Main Menu, click Purchasing > Purchase Orders. If there is an existing record, docked Search Purchase Order screen will open. Otherwise, blank Purchase Order screen will open automatically.
- If Search Purchase Order screen opens, click New toolbar button to open blank Purchase Order screen.
- Fill in fields.
- Click on Vendor ID. combo box button and select vendor.
- After selecting Vendor: Ship From, Contact, Ship Via and Terms fields will be automatically populated by the details entered in Vendor screen.
- Date will default to today’s date. Change date if necessary by selecting from the mini calendar dropdown or by entering the date manually.
- Location filed will show the default location of the user. Click dropdown button and select new location if necessary.
- Currency - will default to the currency set in Company Preference > Settings screen
- Order Status will show Open and will remain open as long as Purchase Order is not yet processed.
- Ship To - will default to the address entered in the Common Info > Company Location. This will be your location where items are to be shipped.
- Ordered By - will default to the user that is currently logged in.
- Expected - will default to today's date. This is the date you expect to receive the items.
- Click the Freight Terms dropdown button and select freight terms from the list.
Add details on grid.
- Click Insert button or directly click Item No. field. Click dropdown button and select item from the list.
- Description, UOM, Cost and Storage Location (if there's a setup) column will be automatically populated with the details of the selected item.
- Stock information of the selected item will also be displayed.
- Item - will display the Item Number and the Description of the selected item in the grid.
- In Stock - displays the total quantity in stock. This field changes every time an item is sold or purchased.
- Committed - displays the total quantity of the selected inventory item that has been ordered but not yet invoiced/shipped. This field changes every time an order is created and when an order is invoiced.
- On Order (PO) - displays the total quantity on order. This field changed every time a purchase order for the selected inventory item is created.
- Back Order - displays the total quantity on back order. This field changes every time an invoice for the selected inventory item is posted where there are not enough stock to complete the order (Shipped qty is less than Ordered qty).
- Enter Ordered quantity. Total amount will be computed based on the item's Cost.
- Amount fields will also be filled up with the computed amounts from the grid.
- Subtotal - displays the total of all the line items entered in the grid.
- Shipping - displays the shipping cost of the transaction.
- Tax - display the calculated tax for the Tax Code fields.
- Total - displays the total of the Subtotal, Freight, and Tax fields. This is the amount entered to the Accounts Payable account in the General Ledger after posting the transaction.
Save record by clicking Save toolbar button. A system-generated ID will be displayed in the Purchase No field.
You can skip saving the record if the transaction is to be processed right away. This will be catered when Purchase Order is being
processed to Inventory Receipt. (See )
Here are the steps on how to create a Purchase Order:
- From the Main Menu, click Accounts Payable Activities and click Purchase Order. If there is an existing record, Search Purchase Order screen will open. Otherwise, Purchase Order screen will open automatically.
- If Search Purchase Order screen opens, click New toolbar button to open blank Purchase Order screen.
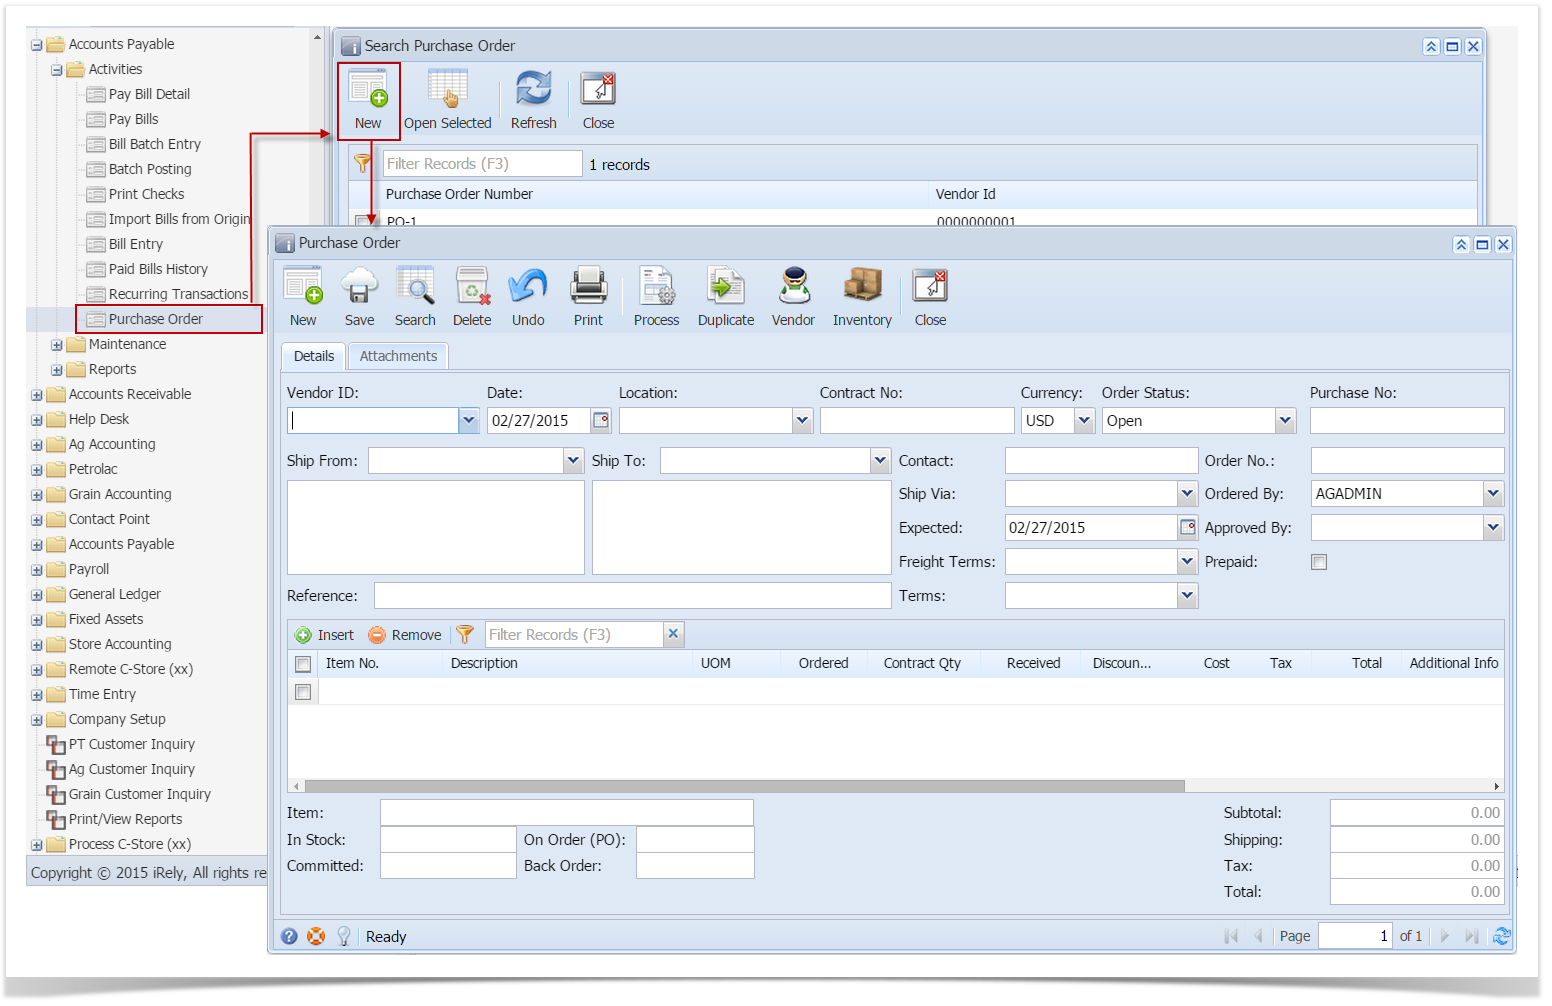
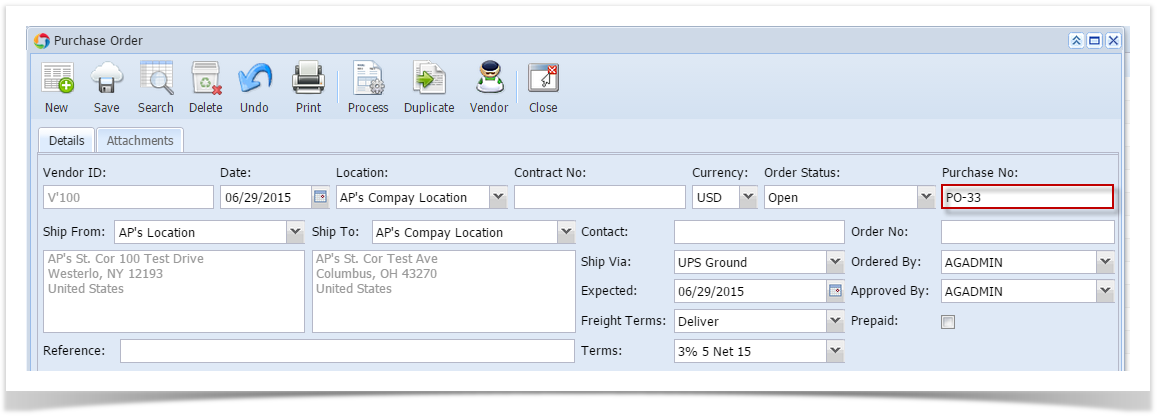
- Fill in fields.
- Click on Vendor ID. combo box button and select vendor.
- After selecting Vendor: Ship From, Contact, Ship Via and Terms fields will be automatically populated by the details entered in Vendor screen.
- Date will default to today’s date. Change date if necessary by selecting from the mini calendar dropdown or by entering the date manually.
- Location filed will show the default location of the user. Click dropdown button and select new location if necessary.
- Currency - will default to the currency set in Company Preference > Settings screen
- Order Status will show Open and will remain open as long as Purchase Order is not yet processed.
- Ship To - will default to the address entered in the Common Info > Company Location. This will be your location where items are to be shipped.
- Ordered By - will default to the user that is currently logged in.
- Expected - will default to today's date. This is the date you expect to receive the items.
- Click the Freight Terms dropdown button and select freight terms from the list.
Add details on grid.
- Click Insert button or directly click Item No. field. Click dropdown button and select item from the list.
- Description, UOM, Cost and Storage Location column will be automatically populated with the details of the selected item.
- Stock information of the selected item will also be displayed.
- Item - will display the Item Number and the Description of the selected item in the grid.
- In Stock - displays the total quantity in stock. This field changes every time an item is sold or purchased.
- Committed - displays the total quantity of the selected inventory item that has been ordered but not yet invoiced/shipped. This field changes every time an order is created and when an order is invoiced.
- On Order (PO) - displays the total quantity on order. This field changed every time a purchase order for the selected inventory item is created.
- Back Order - displays the total quantity on back order. This field changes every time an invoice for the selected inventory item is posted where there are not enough stock to complete the order (Shipped qty is less than Ordered qty).
- Enter Ordered quantity. Total amount will be computed based on the item's Cost.
- Amount fields will also be filled up with the computed amounts from the grid.
- Subtotal - displays the total of all the line items entered in the grid.
- Shipping - displays the shipping cost of the transaction.
- Tax - display the calculated tax for the Tax Code fields.
- Total - displays the total of the Subtotal, Freight, and Tax fields. This is the amount entered to the Accounts Payable account in the General Ledger after posting the transaction.
Save record by clicking Save toolbar button. A system-generated ID will be displayed in the Purchase No field.
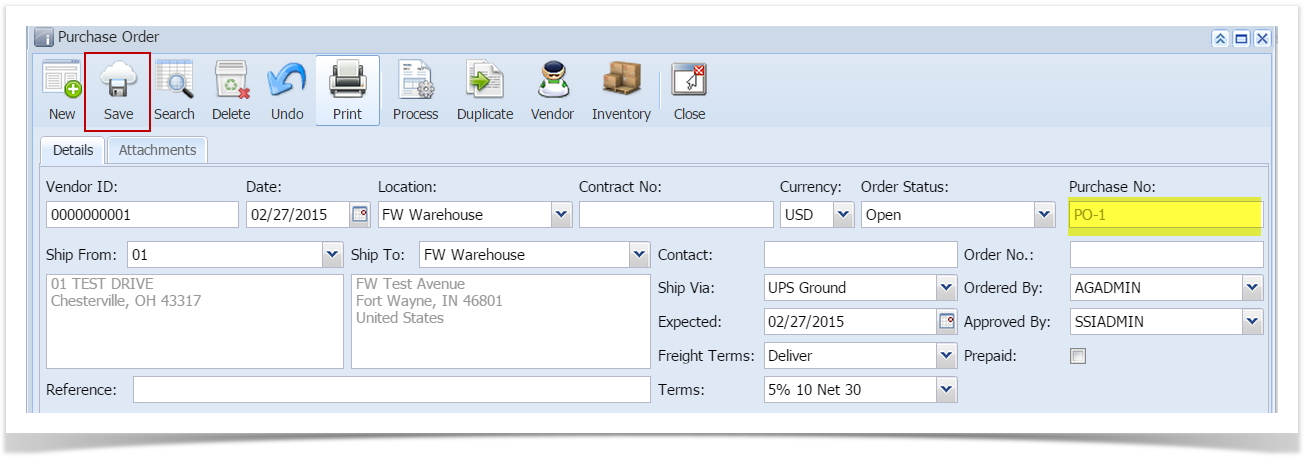
You can skip saving the record if the transaction is to be processed right away. This will be catered when Purchase Order is being
processed to Inventory Receipt. (See )
Overview
Content Tools