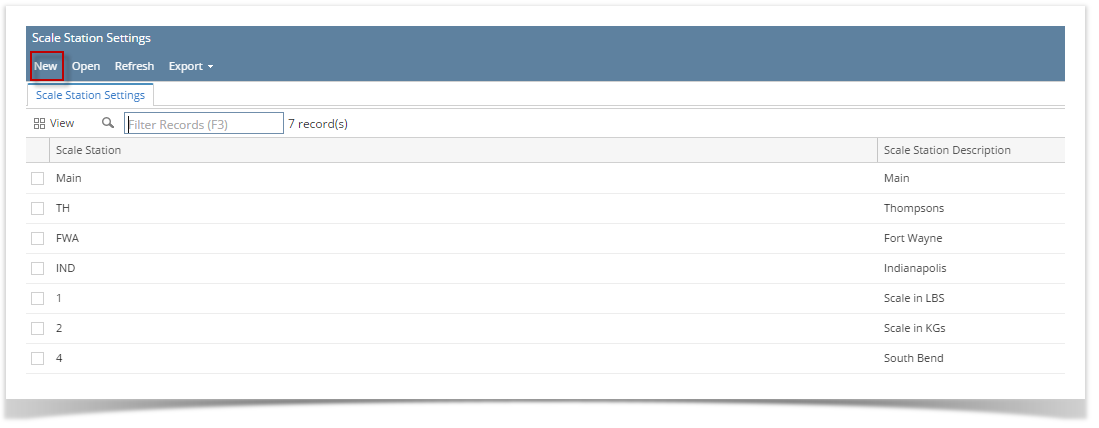
- From the Ticket Management menu, click on Scale Station Settings.
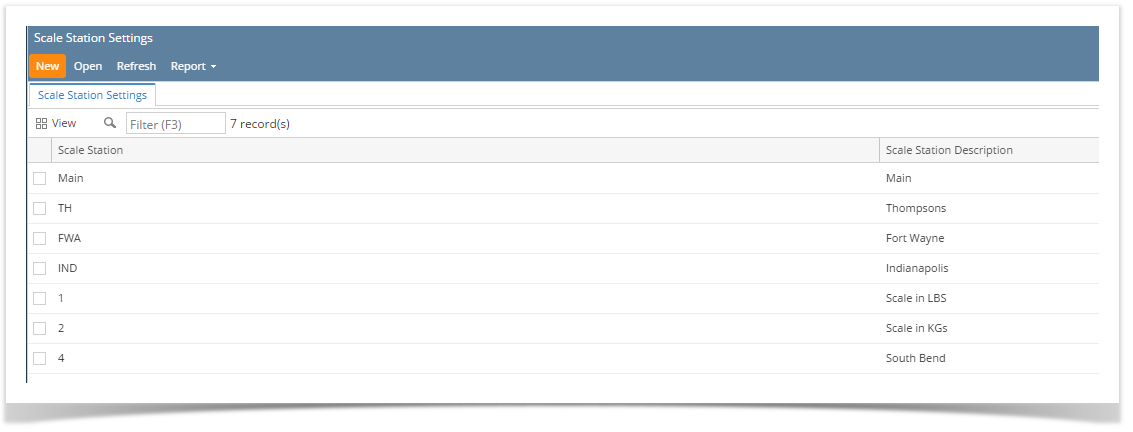
- If this is the first record you are to create, it will open directly the Ticket Pool screen where you can add Scale Station Setting. Otherwise. it will open Scale Station Settings Search screen where existing Scale Station Setting records are displayed. Click the New toolbar button to open new Scale Station Setting screen.
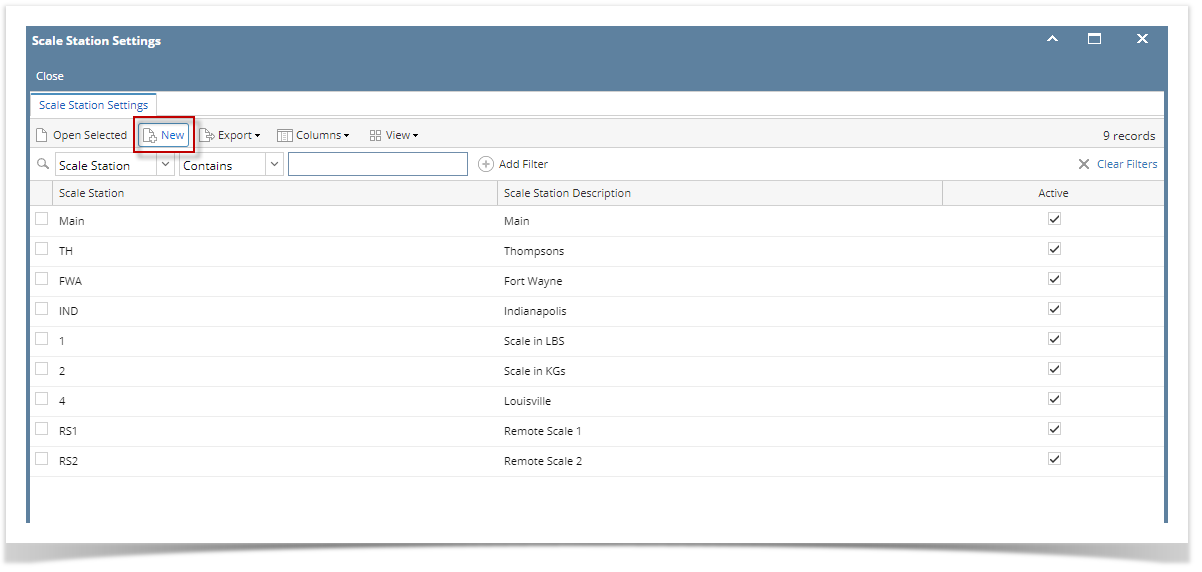
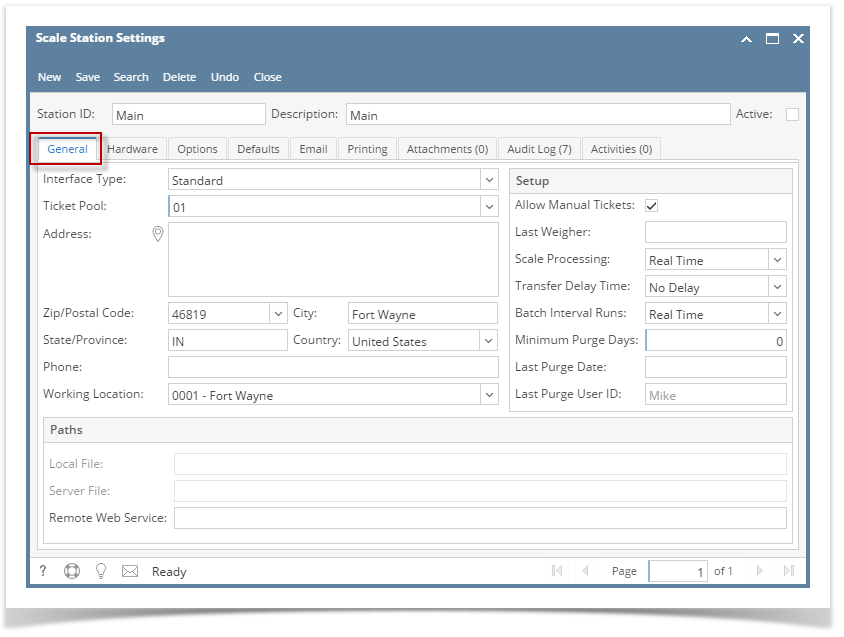
- Setup the Scale Station Setting.
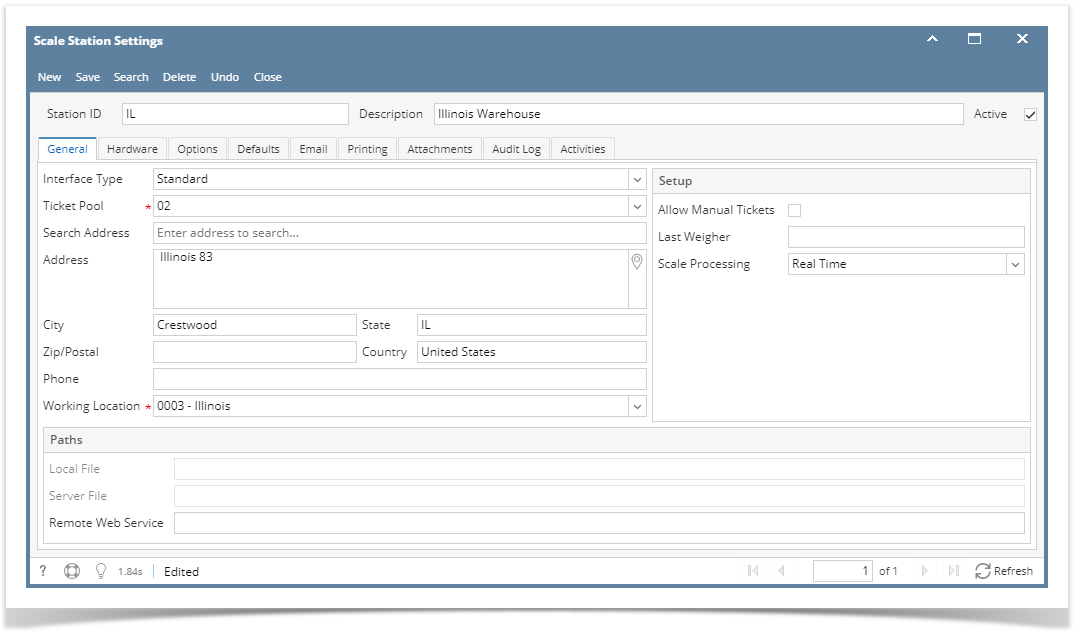
- Enter the Station ID. This is a unique and required field.
- Enter the Description of Scale Station Setting.
- Active - by default, it is set to Active. Active means the Scale Station Setting can be used/ selected before creating new Scale Ticket.
I. Under General tab, setup general information of the Scale Station.- Select the default Ticket Pool.
- Enter the Scale Station Address
- Select the default Working Location. This will be the default Location when this Scale Station is selected before creating Scale Ticket. This is a required field.
- Allow Manual Tickets. If this is unchecked, the Scale Ticket Number will be coming from the System Manager > Starting Numbers. If this is checked, the user is allowed to enter the Scale Ticket Number, else, the system automatically generated temporary Scale Ticket Number.
- Scale Processing - this will be used in Scale Remote process.
- Real Time - automatically synchronize the data from one remote location/station to main server and vice versa.
- Remote - the data will synchronize if the internet connection is ON.
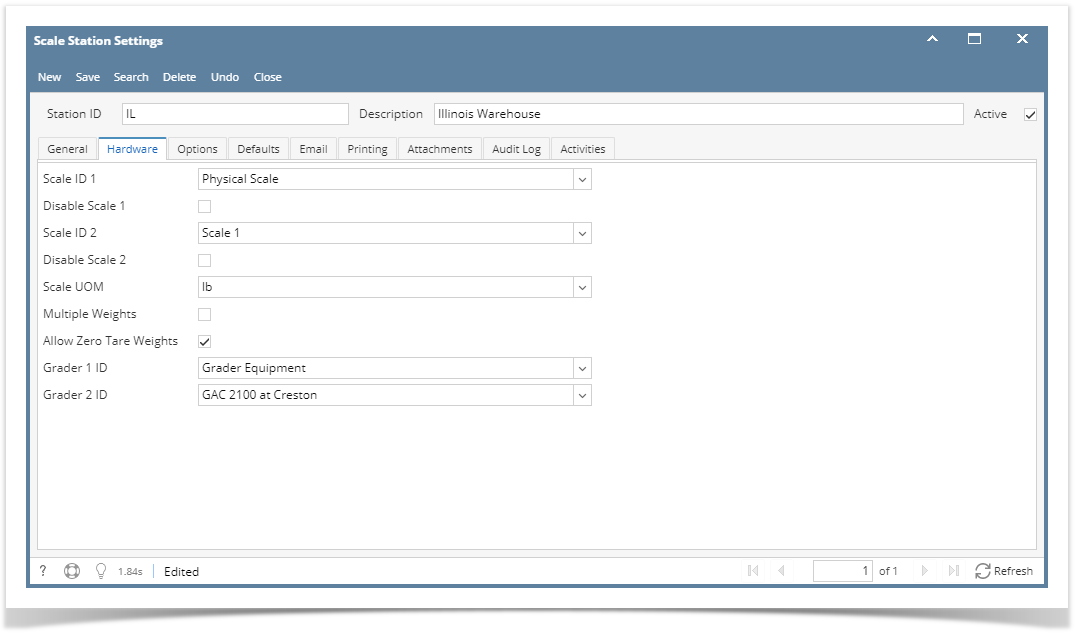
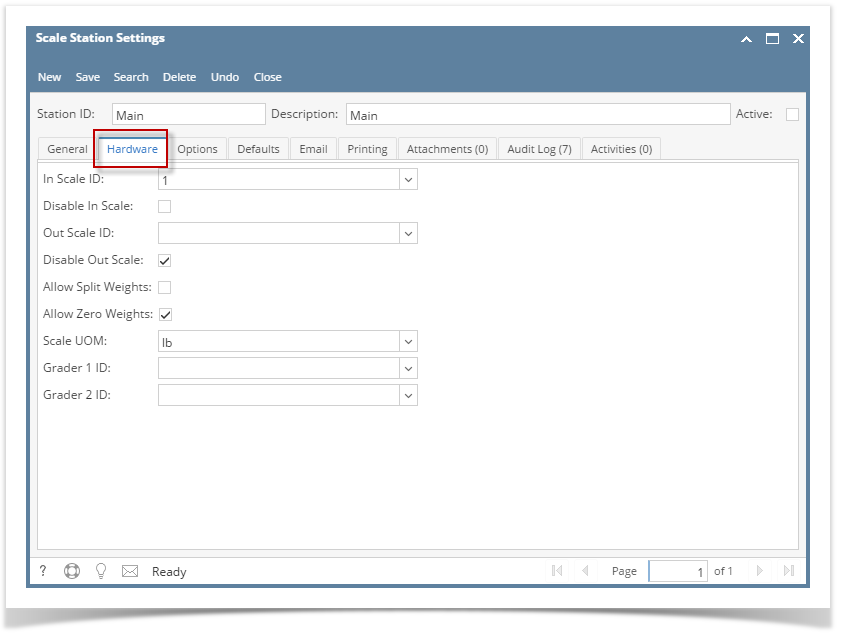
- Select the Scale Id. This should be coming from the Physical Scale setup. This is a required field.
- Select UOM. This will be the default Scale UOM. This is a required field.
- Multiple Weights - if this is checked, multiple Weight (Gross and Tare) fields are available in Scale Ticket screen
- Allow Zero Tare Weights - if this is checked, the user is allowed to distribute Scale Ticket without entering Tare Weight.
- Select the Grade ID. This should be coming from the Grading Scale setup.
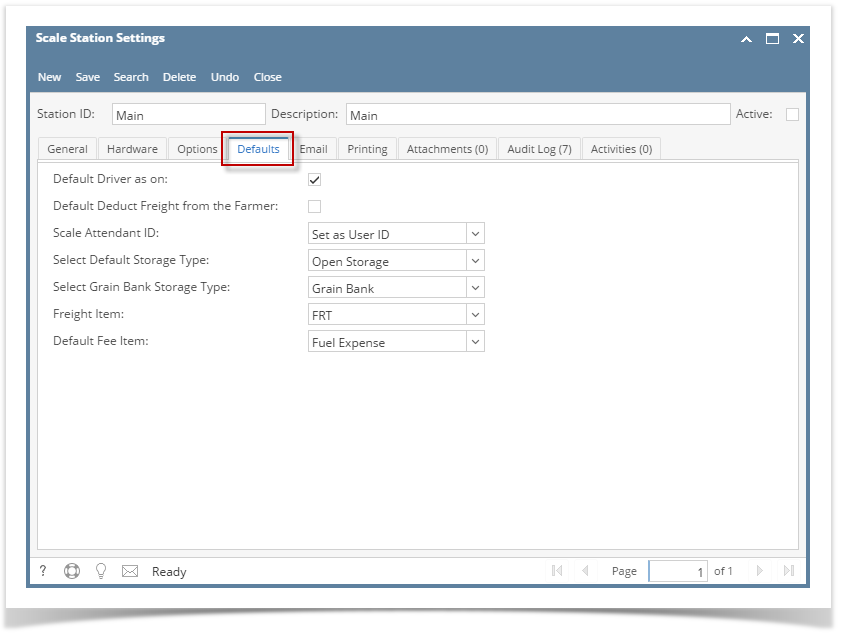
IV. Under Defaults tab, this is where you can setup the default Storage Types, Freight and Fee Item in Scale Ticket.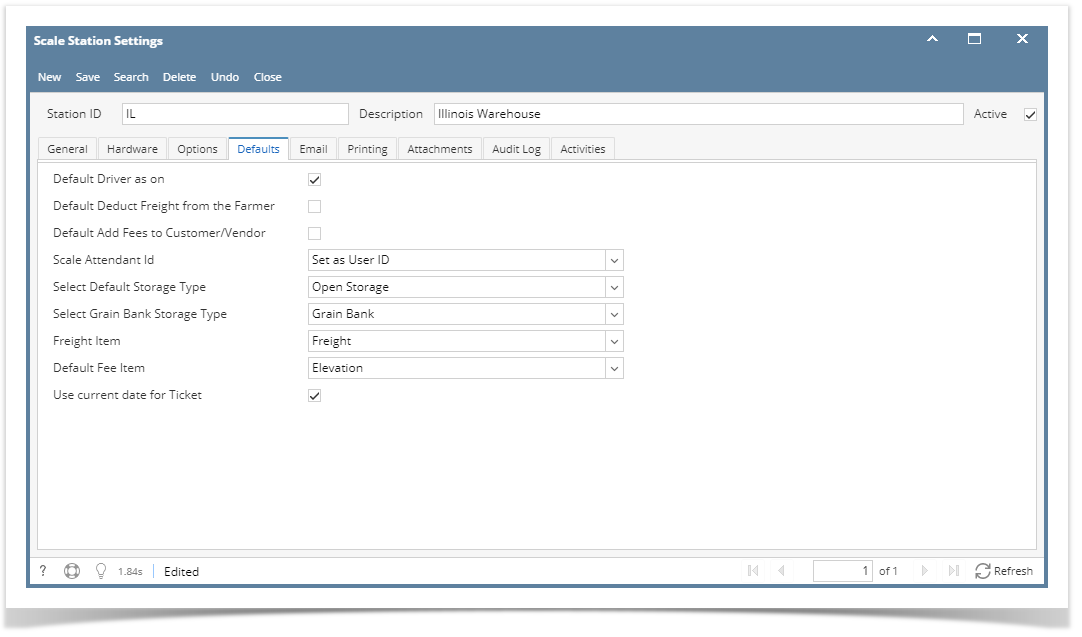
- Select Default Storage Type - this is the default Storage Type
- Select Grain Bank Default Storage Type - this is the default Grain Bank Storage Type
- Freight Item - default Freight item apply in Scale Ticket for non-contract / non-load scale ticket
- Default Fee Item - default Fee Item apply in Scale Ticket
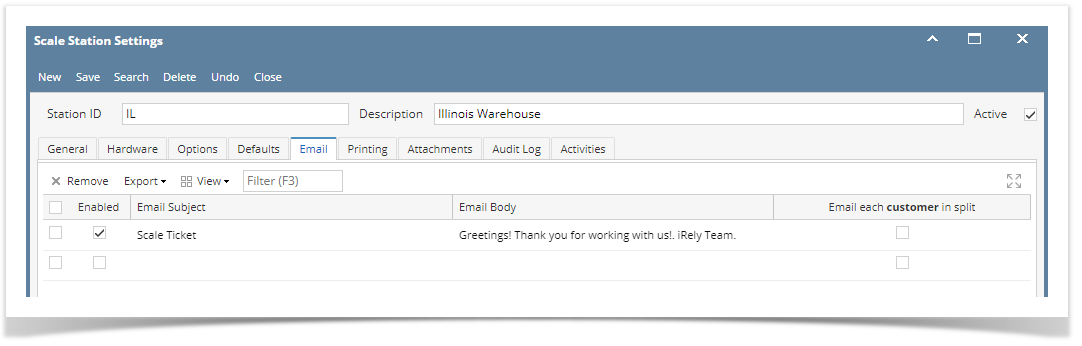
- Mark check the Enabled checkbox. When this is checked, this email content will be sent to selected Vendor/Customer after successful ticket distribution.
- Enter the Email Subject. This will be the email header.
- Enter the Email Body. This will be the contents of the email.
- Enabling the Email each customer split checkbox will be applied to the split distribution.
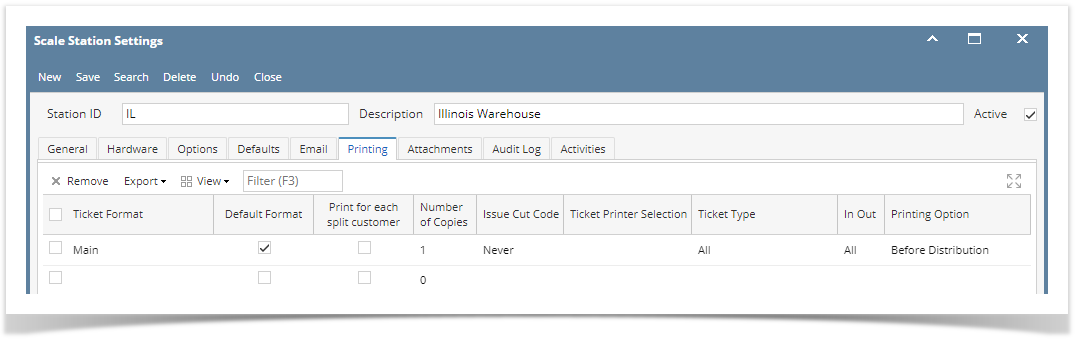
- Select the Ticket Format from the lists.
- Check the Default Format checkbox. If checked, this Ticket Format will be used when printing Scale Ticket.
- Select Ticket Type from the lists where this Ticket format will be applied.
- Select the Printing Option from the lists when the Scale Ticket should be printed.
- Click on Save.
- From the Ticket Management menu, click on Scale Station Settings.
- If this is the first record you are to create, it will open directly the Ticket Pool screen where you can add Scale Station Setting. Otherwise. it will open Scale Station Settings Search screen where existing Scale Station Setting records are displayed. Click the New toolbar button to open new Scale Station Setting screen.
- Setup the Scale Station Setting.

- Enter the Station ID. This is a unique and required field.
- Enter the Description of Scale Station Setting.
- Set the Scale Station Settings to 'Active' so that it can be selected in the Station Selection screen upon creating Scale Ticket.
- Under General tab, setup general information of the Scale Station.
- Select the default Ticket Pool.
- Enter the Scale Station Address
- Select the default Working Location. This will be the default Location when this Scale Station is selected before creating Scale Ticket. This is a required field.
- Allow Manual Tickets. If this is unchecked, the Scale Ticket Number will be coming from the Sytem Manager > Starting Numbers. If this is checked, the user is allowed to enter the Scale Ticket Number.
- Under Hardware tab, this is where you can setup the Physical Scale and Grading Equipment to be used in Scale Ticket.
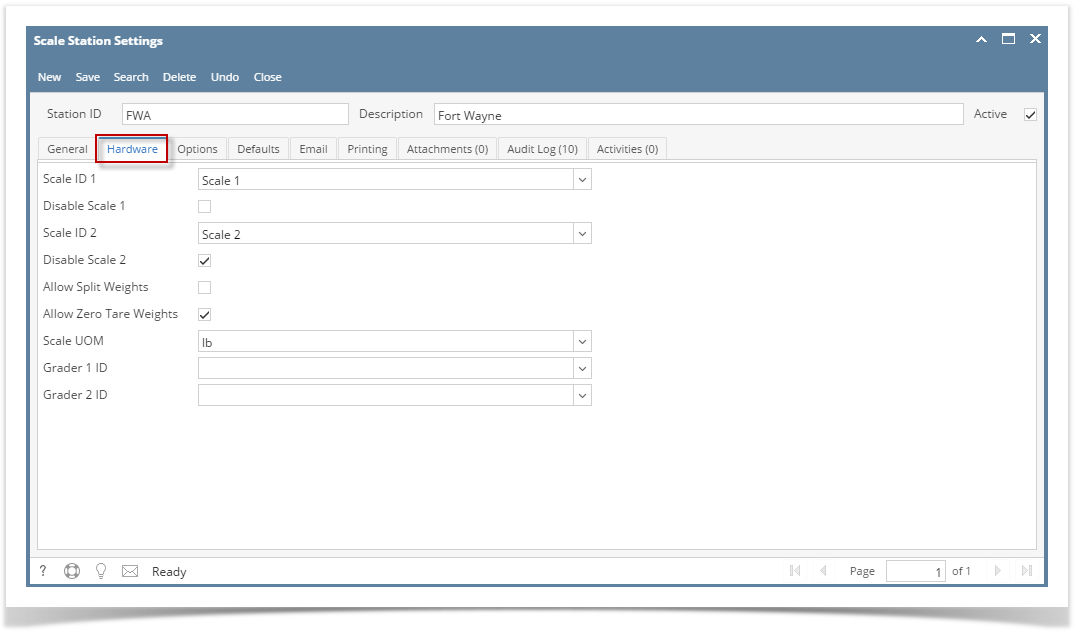
- Select the Scale Id. This should be coming from the Physical Scale setup. This is a required field.
- Select UOM. This will be the default Scale UOM. This is a required field.
- Select the Grade ID. This should be coming from the Grading Scale setup.
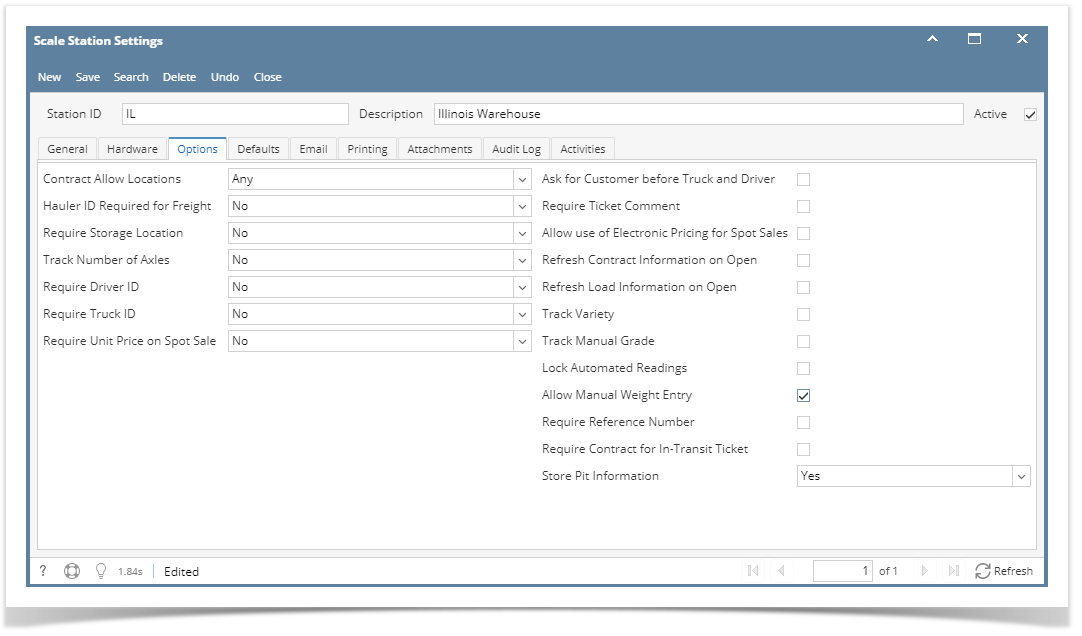
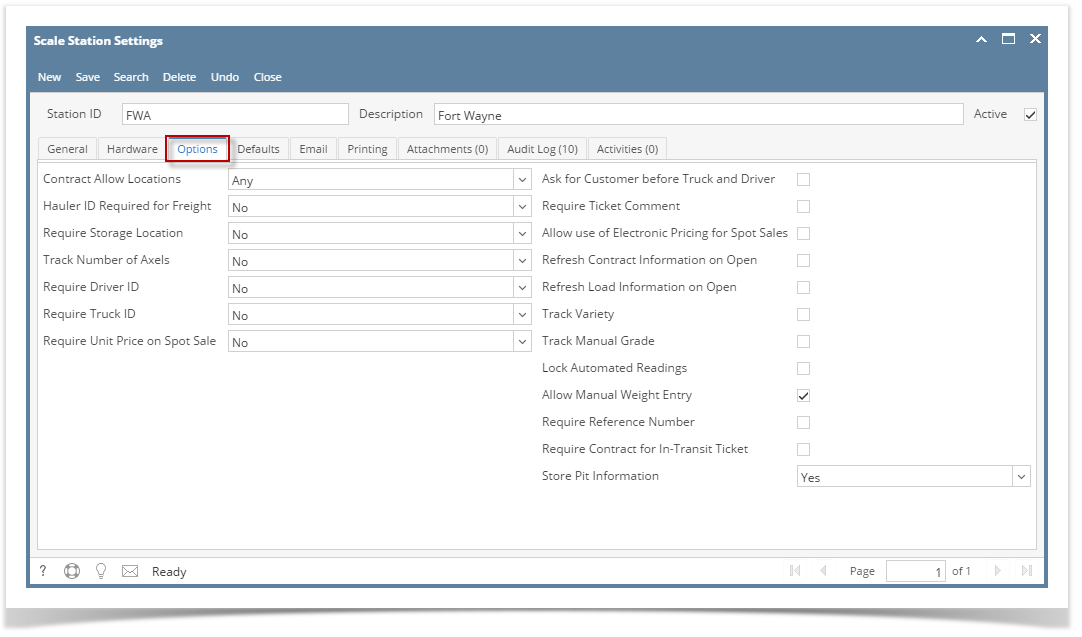
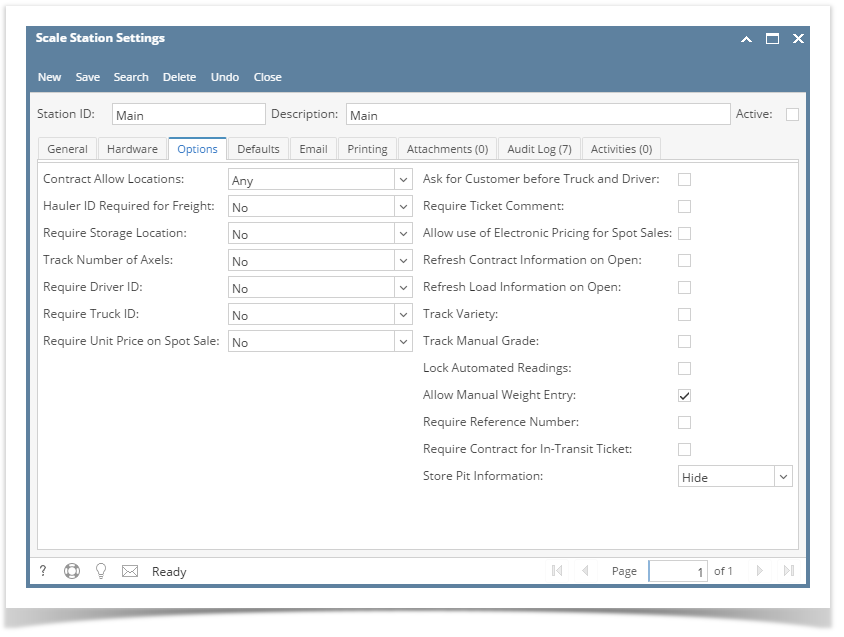
- Under Options tab, this is where you can setup the required fields needed in Scale Ticket screen.
- Under Defaults tab, this is where you can setup the default Storage Types, Freight and Fee Item in Scale Ticket.
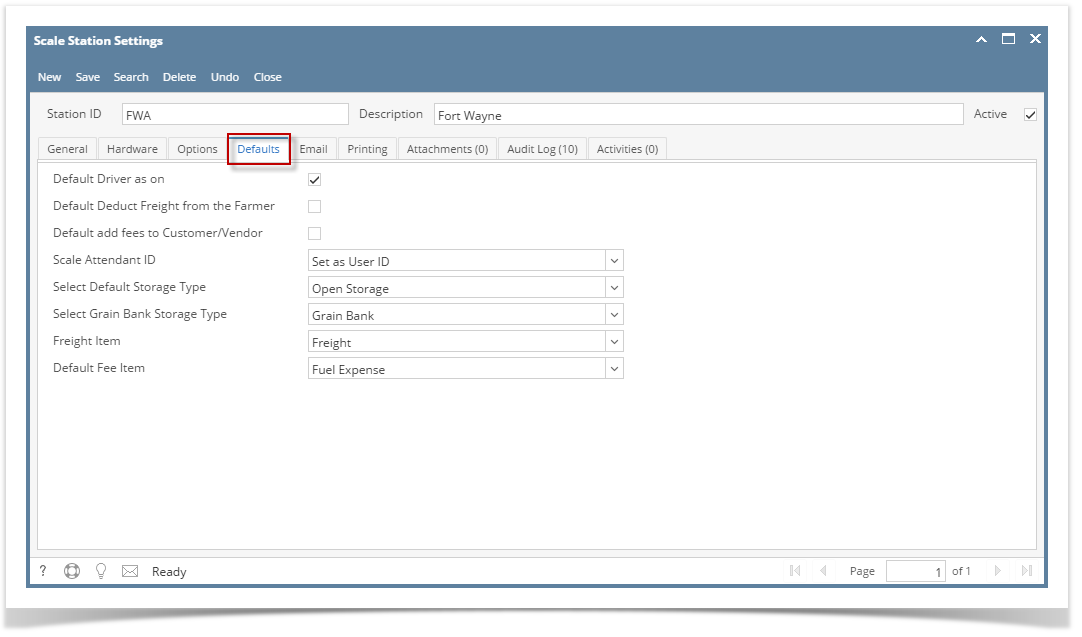
- Select Default Storage Type. This will be used when distributing non-Contract / non-Load Scale Ticket. The Distributed qty will be stored in the selected Default Storage Type.
- Select Grain Bank Default Storage Type
- Select Freight Item.
- Select Default Fee Item
- Under Email tab, this is where you can setup the auto-generated email to be sent to selected Vendor / Customer once the Scale Ticket is successfully distributed
- Mark check the Enabled checkbox. When this is checked, this email content will be sent to selected Vendor/Customer after succesful ticket distribution.
- Enter the Email Subject. This will be the email header.
- Enter the Email Body. This will be the contents of the email.
- Enabling the Email each customer split checkbox will be applied to the split distribution.
- Under Printing tab, this is where you can setup when printing Scale Ticket

- Select the Ticket Format from the lists.
- Check the Default Format checkbox. If checked, this Ticket Format will be used when printing Scale Ticket.
- Select Ticket Type from the lists where this Ticket format will be applied.
- Select the Printing Option from the lists where the Scale Ticket will be printed.
- Click on Save.
- From the Ticket Management menu, click on Scale Station Settings.
- If this is the first record you are to create, it will open directly the Ticket Pool screen where you can add Scale Station Setting. Otherwise. it will open Scale Station Settings Search screen where existing Scale Station Setting records are displayed. Click the New toolbar button to open new Scale Station Setting screen.
- Setup the Scale Station Setting.
- Enter the Station ID. This is a unique and required field.
- Enter the Description of Scale Station Setting.
- Under General tab, setup general information of the Scale Station.
- Select the default Ticket Pool.
- Enter the Scale Station Address
- Select the default Working Location. This will be the default Location when this Scale Station is selected before creating Scale Ticket. This is a required field.
- Allow Manual Tickets. If this is unchecked, the Scale Ticket Number will be coming from the Sytem Manager > Starting Numbers. If this is checked, the user is allowed to enter the Scale Ticket Number.
- Under Hardware tab, this is where you can setup the Physical Scale and Grading Equipment to be used in Scale Ticket.
- Select the Scale Id. This should be coming from the Physical Scale setup. This is a required field.
- Select UOM. This will be the default Scale UOM. This is a required field.
- Select the Grade ID. This should be coming from the Grading Scale setup.
- Under Options tab, this is where you can setup where the fields from Scale Ticket are required or not.
- Under Defaults tab, this is where you can setup the default Storage Types, Freight and Fee Item in Scale Ticket.
- Select Default Storage Type. This will be used when distributing non-Contract / non-Load Scale Ticket. The Distributed qty will be stored in the selected Default Storage Type.
- Select Grain Bank Default Storage Type
- Select Freight Item.
- Select Default Fee Item
- Under Email tab, this is where you can setup the auto-generated email to be sent to selected Vendor / Customer once the Scale Ticket is successfully distributed
- Mark check the Enabled checkbox. When this is checked, this email content will be sent to selected Vendor/Customer after succesfull ticket distribution.
- Enter the Email Subject. This will be the email header.
- Enter the Email Body. This will be the contents of the email.
- Enabling the Email each customer split checkbox will be applied to the split distribution.
- Under Printing tab, this is where you can setup when printing Scale Ticket
- Select the Ticket Format from the lists.
- Check the Default Format checkbox. If checked, this Ticket Format will be used when printing Scale Ticket.
- Select Ticket Type from the lists where this Ticket format will be applied.
- Select the Printing Option from the lists where the Scale Ticket will be printed.
- Click on Save.
Overview
Content Tools