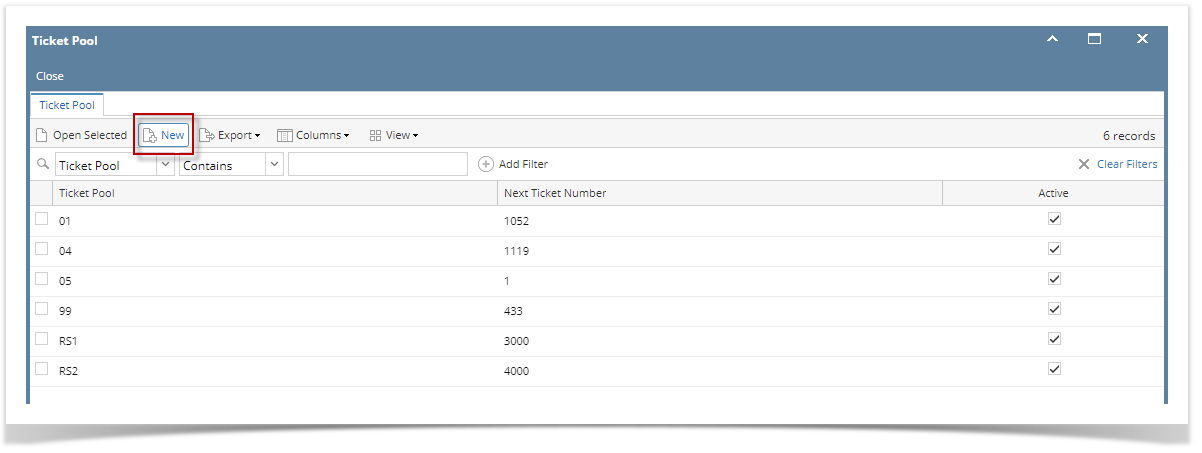
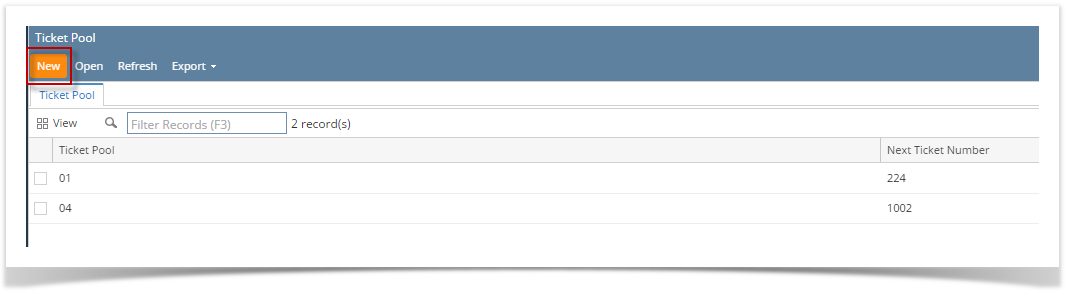
- From the Ticket Management menu, click on Ticket Pool.
- If this is the first record you are to create, it will open directly the Ticket Pool screen where you can add Ticket Pool. Otherwise. it will open Ticket Pool Search screen where existing Ticket Pool records are displayed. Click the New toolbar button to open new Ticket Pool screen.
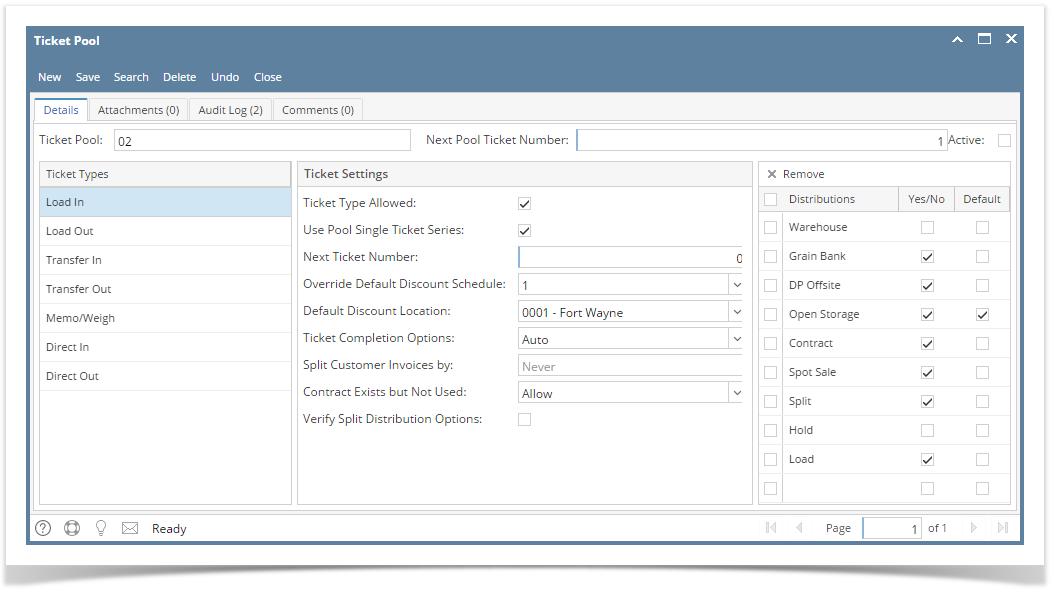
- Setup the Ticket Pool.
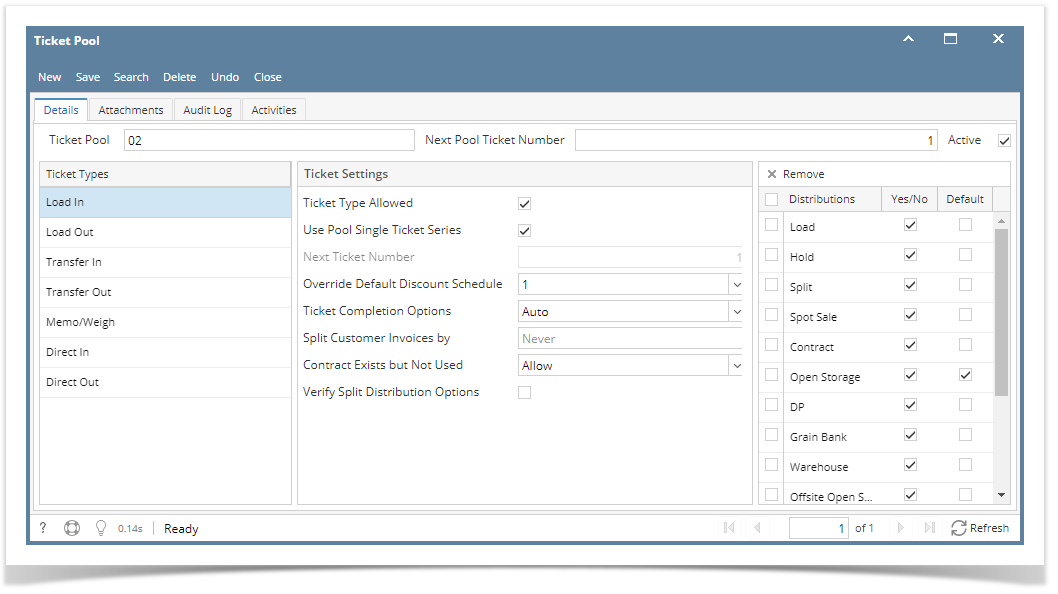
- Enter Ticket Pool id.This is a unique and required field.
- Next Pool Ticket Number - By default it is 1. Value cannot be less than 1, this will be the Scale Ticket Number once the scale ticket is saved.
- Active - controls if the Ticket Pool is active or inactive. Ticket Pool can be apply on Scale Station Setting if it is Active, else, it cannot.
Note: Disabling the Ticket Pool when it is already used in active Scale Station Setting is not allowed. - Configure Ticket Settings and Distributions on each Ticket Types.
- In Ticket Settings Panel,
- Ticket Type Allowed - controls if the Ticket Type will be available in Type field of Scale Ticket. The Ticket Type becomes available in Type field of Scale Ticket if the checkbox is enabled.
- Use Pool Single Ticket Series - enabling the checkbox will disable the Next Pool Ticket Number field and the Next Ticket Number field will be unlocked. Next Ticket Number will be the Scale Ticket Number once the scale ticket is saved.
- Override Default Discount Schedule - if there is selected Discount schedule, this will be used/applied after selecting an item in Scale Ticket screen.
- Ticket Completion Options - identifies how the Scale Ticket should be distributed.
- Auto - Scale Ticket will automatically distributed when click the Distribute button
- Manual - Scale Ticket will be manually distributed. Clicking the Distribute button will display the Manually Distribute Tickets screen.
- In Distributions Panel, add the Distribution types for each Ticket Types.
- Yes/No - enabling the checkbox tells that the Distribution types will be available in the Distribution selections in Scale Ticket screen
- Default - enabling the checbox indicates this will be the default Distribution type display in Scale Ticket screen
- Click on Save button. The Ticket Pool record will be saved.
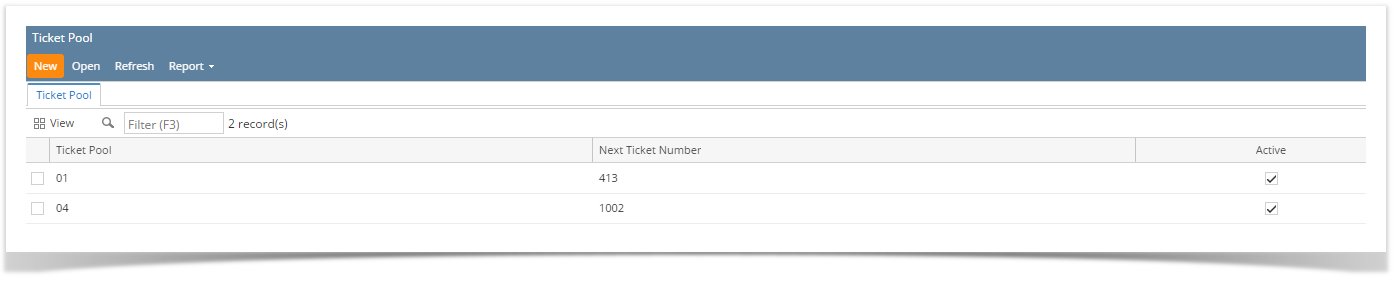
- From the Ticket Management menu, click on Ticket Pool.
- If this is the first record you are to create, it will open directly the Ticket Pool screen where you can add Ticket Pool. Otherwise. it will open Ticket Pool Search screen where existing Ticket Pool records are displayed. Click the New toolbar button to open new Ticket Pool screen.
- Setup the Ticket Pool.
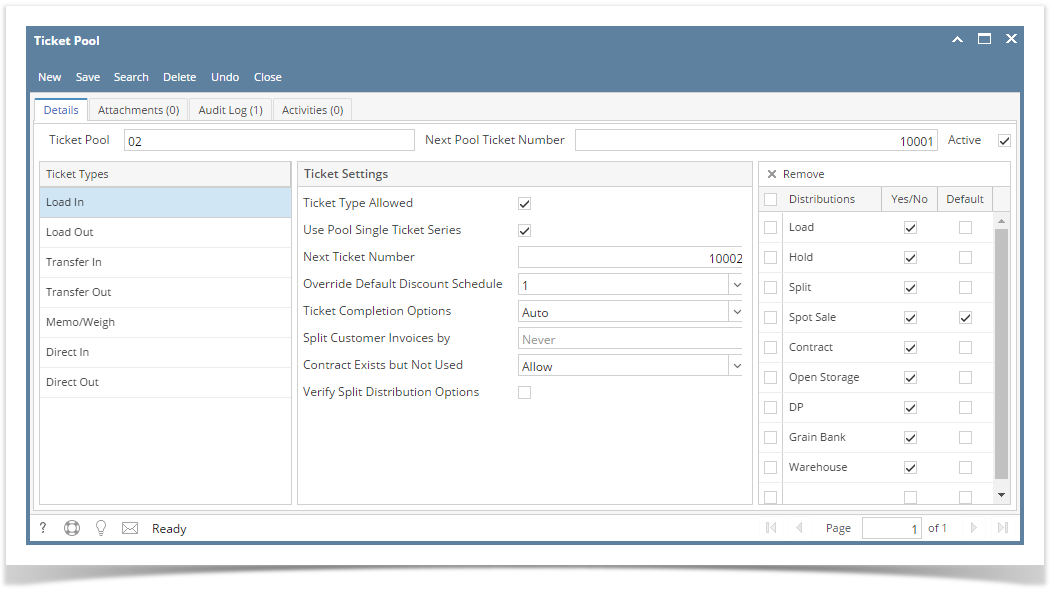
- Enter Ticket Pool id. It is a unique and required field.
- Next Pool Ticket Number is not mandatory. This will be the Scale Ticket Number once the record is saved.
- Configure Ticket Settings and Distributions on each Ticket Types.
- In Ticket Settings Panel,
- Enable or disable the Ticket Type Allowed
- Enable or disable the Use Pool Single Ticket Series
- Select Override Default Discount Schedule.
- Select Ticket Completion Options.
- In Distributions Panel, add the Distribution types.
- Enable the Yes/No checkbox so the storage types will be available in Scale Ticket Distribution field when the Ticket Type is selected.
- Enable the Default checkbox so it should be the default Distribution Type displayed in Scale Ticket.
- Click on Save button. The Ticket Pool record will be saved.
- From the Ticket Management menu, click on Ticket Pool.
- If this is the first record you are to create, it will open directly the Ticket Pool screen where you can add Ticket Pool. Otherwise. it will open Ticket Pool Search screen where existing Ticket Pool records are displayed. Click the New toolbar button to open new Ticket Pool screen.
- Setup the Ticket Pool.
- Enter Ticket Pool id. It is a unique and required field.
- Next Pool Ticket Number is not mandatory. This will be the Scale Ticket Number once the record is saved.
- Configure Ticket Settings and Distributions on each Ticket Types.
- Under Ticket Settings, select Override Default Discount Schedule.
- Select Default Discount Location.
- Select Ticket Completion Options.
- In Distributions Panel, add the Distribution types.
- Enable the Yes/No checkbox so the storage types will be available in Scale Ticket Distribution field when the Ticket Type is selected.
- Enable the Default checkbox so it should be the default Distribution Type displayed in Scale Ticket.
- Click on Save button. The Ticket Pool record will be saved.
Overview
Content Tools