Here are the steps on how to print a Trial Balance Report:
- Open Report Parameters screen of Trial Balance report.(See How To Print General Ledger Reports)
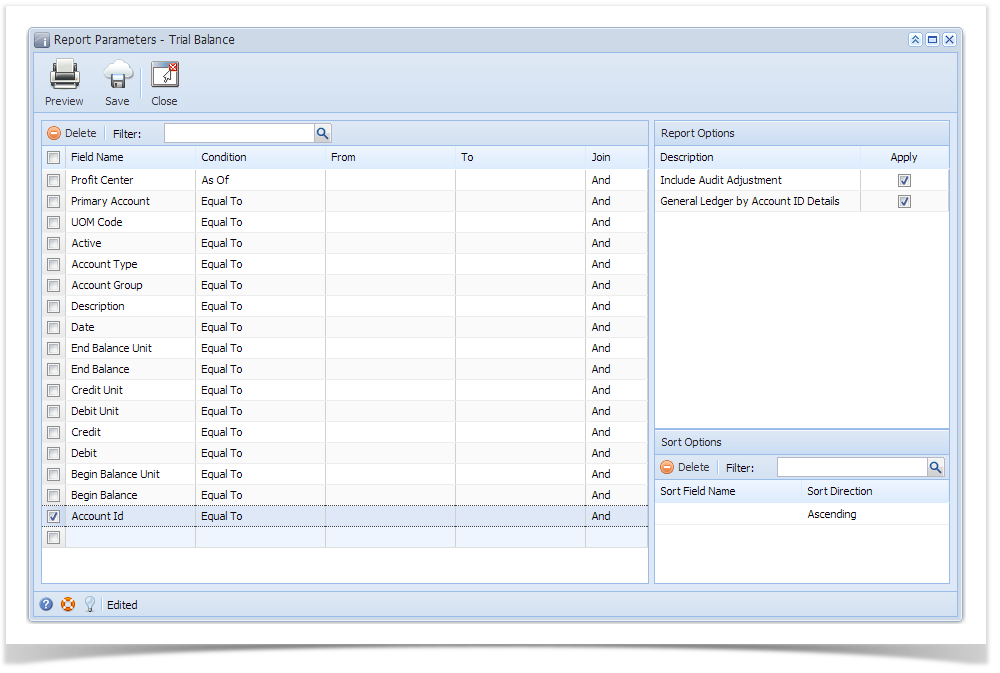
- Fill out Selection Criteria section. User can select from the combo box list, or manually type on the field of the Field Name column. If field is left blank, all records will be included in the report.
- Profit Center - This refer to the segment with Segment type. This may vary depending on the segment name you entered when you create your Account Structure. Use this to filter the transactions based on the selected segment code.
- Primary Account - This refer to the segment with Primary type. Use this to filter the transactions based on the selected primary account.
- UOM Code - This refers to the unit of measure code assigned to the accounts used in the transaction. Use this to filter the transactions based on the UOM Code selected on the field.
- Active - This refer to the status of the account if it is active or inactive. Use this to filter Active or Inactive accounts.
- Account Type - This refer to the type assigned on the accounts when it is created. Use this to filter the transactions based on the account type selected on the field.
- Account Group - This refer to the type assigned to the accounts when it is created. Use this to filter the transactions based on the type selected on the field.
- Description - This refer to the description assigned to the accounts when it is created. Use this to filter the accounts based on the description selected on the field.
- Date - This refer to the date when the transaction is posted. Use this to filter transactions based on the date selected on the field.
- End Balance Unit - This refers to the units Ending Balance per account id. Use this to filter the transactions based on the units Beginning Balance set in the field.
- End Balance - This refers to the Ending Balance per account id. Use this to filter the transactions based on the Ending Balance set in the field.
- Credit Unit - This refers to the units entered on Credit side. Use this to filter the transactions based on the Credit Units selected on the field.
- Debit Unit - This refers to the units entered on Debit side. Use this to filter the transactions based on the Debit Units selected on the field.
- Credit - This refers to the amounts entered on Credit side. Use this to filter the transactions based on the Credit amounts selected on the field.
- Debit - This refers to the amounts entered on Debit side. Use this to filter the transactions based on the Debit amounts selected on the field.
- Begin Balance Unit - This refers to the units Beginning Balance per account id. Use this to filter the transactions based on the units Beginning Balance set in the field.
- Begin Balance - This refers to the Beginning Balance per account id. Use this to filter the transactions based on the Beginning Balance set in the field.
- Account Id - This refer to the account ids used in the transaction. Use this to filter transactions based on the accounts selected on the field.
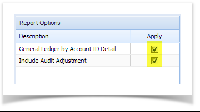
- To allow drilling down General Ledger By Account ID Detail report, check General Ledger by Account ID Detail > Apply check box.
- To include Audit Adjustment in the report, check Include Audit Adjustment > Apply check box.
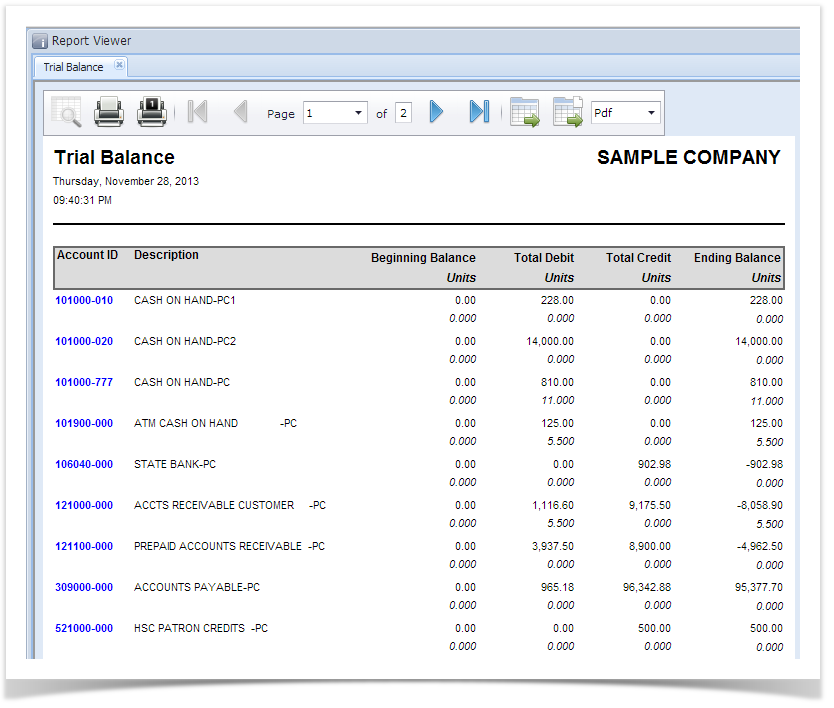
- Preview the report by clicking the Preview toolbar button. The report looks like this:
Overview
Content Tools