- From Inventory module > click on Items menu.
The Search screen for Items will be shown. Click New toolbar button.
- This will open a new Item screen.
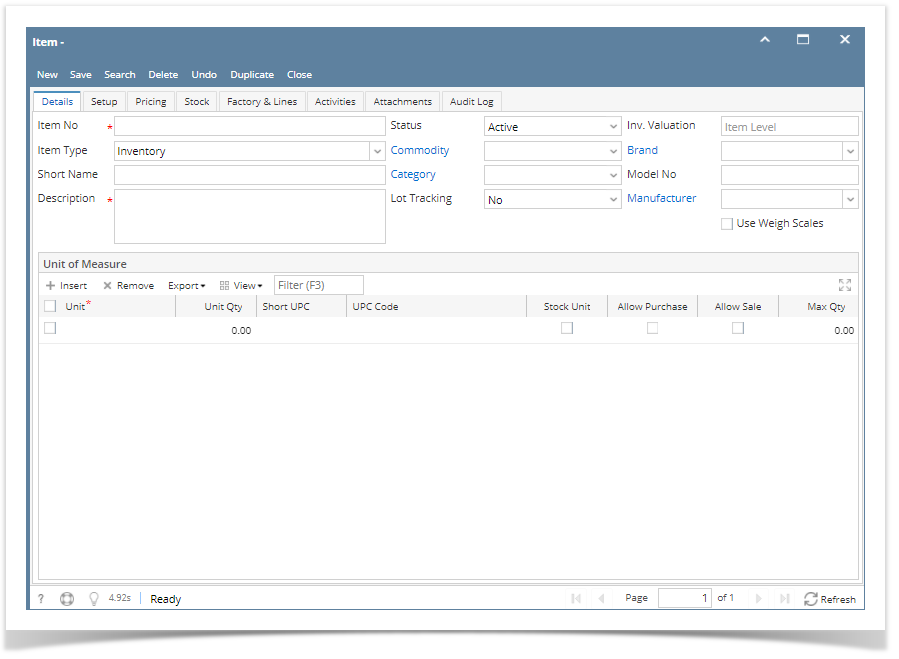
- In the Details tab, fill in or select the ff.
- Enter Item No and Description.
In the Type field select Finished Good.
- In the Lot Tracking field select whether the item is Lot Tracked or not.
- Select Yes-Serial Number if the item is lot tracked and will use the predefined lot number from the Starting Numbers screen.
- Select Yes-Manual if the item is lot tracked and will manually enter the lot number.
- Select No if he item is not lot tracked.
Select Category.
Category is used to group together items that are of the same kind. Doing so will be easier to assign Tax and GL Accounts to items since you will not have to assign/add it on each and every item. Instead, Tax will be assigned and GL Accounts will be added to the Category, then once Category is selected for the item, Tax and GL Accounts will be applied. Though you can still define Tax Class and GL Accounts at item level.
Ex. GL Accounts for selected required accounts can be modified at Item Level.
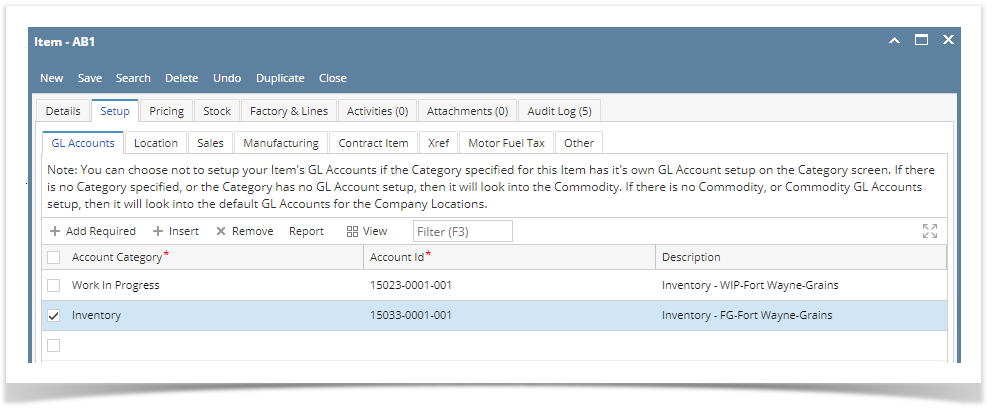
Note that for Finished Good item type, it is required that you have Work in Progress GL account setup. You can setup that at Category Level or Item Level like shown in the screenshot above.
Select Commodity.
- Fill in other information as needed.
- Setup Unit of Measure. See How to Setup Item UOM.
- Setup Item Locations. See How to Setup Item Location.
- Setup GL Accounts. See How to Setup GL Accounts for the items.
- Setup Tax for the item if it is taxable. See How to Setup Tax for an item.
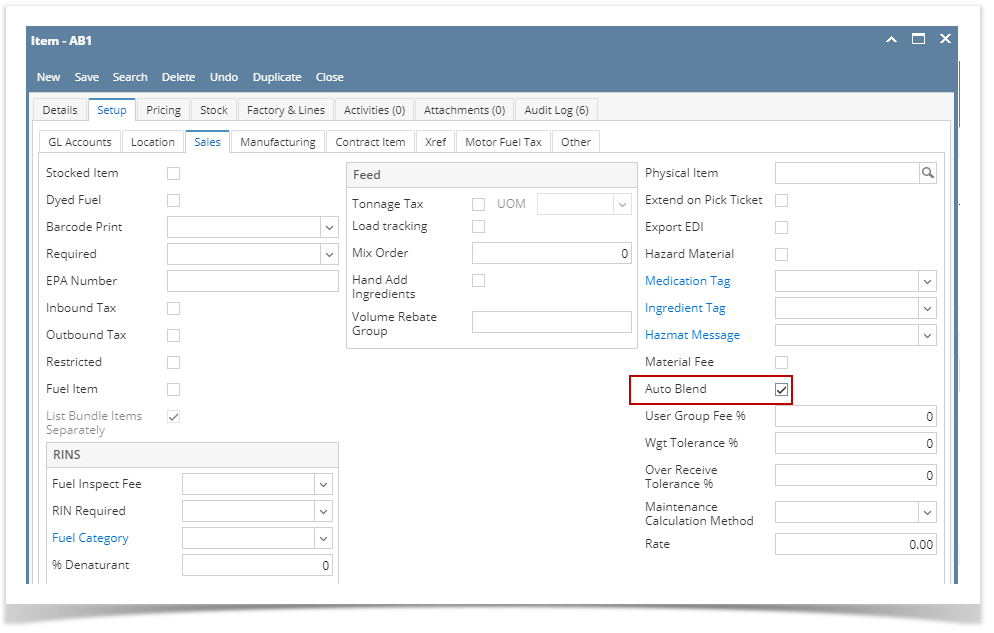
- In the Setup tab > Sales tab > mark Auto-Blend checkbox as checked if this item will be selected in Invioce and is intended to be auto-blended when stock is not enough to complete the sales.
- In the Setup tab > Manufacturing tab > fill in or select the ff.
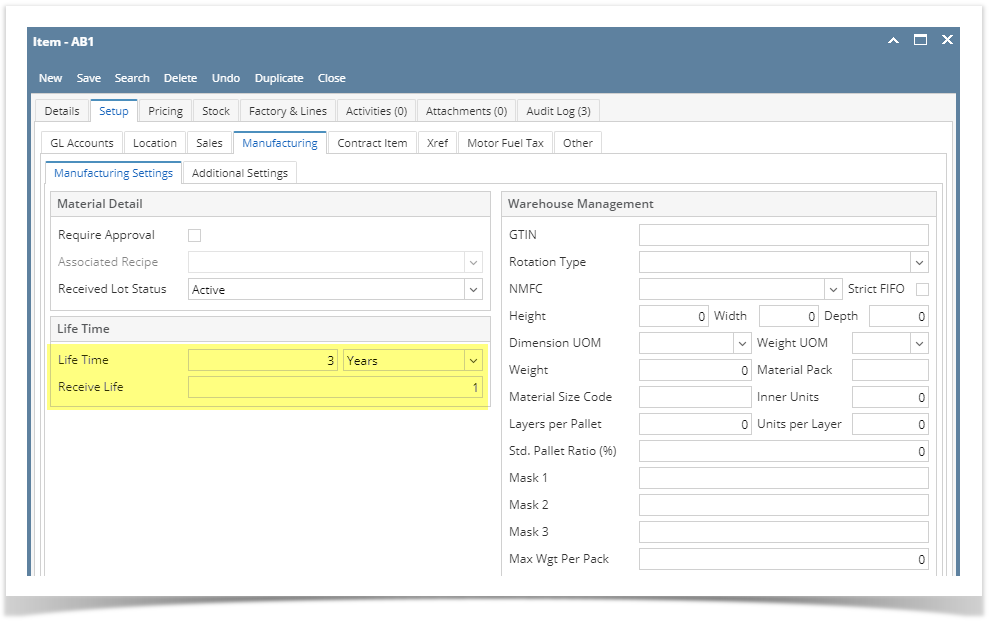
- Required fields are"
- Life Time
- Receive Life
- Fill in or select other information as needed.
- Required fields are"
- In the Factory & Lines tab > select the ff.
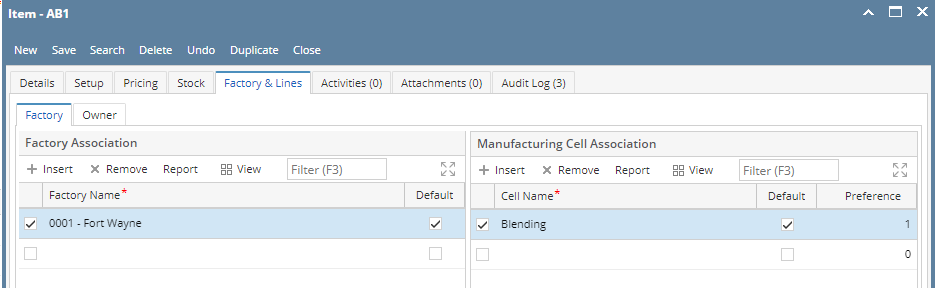
- In the Factory tab > Factory Association grid, select the Factory Name. This factory name is the item location that determines an item is allowed for transaction in a particular location.
- In the Factory tab >Manufacturing Cell Association grid, select the Manufacturing Cell that can process the specific item. This is only required for Semi-finished and Finished Goods items.
- Setup Pricing. See How to Setup Item Pricing.
- Setup Pricing Level as needed. See How to Setup Pricing Level
- Setup Special Pricing as needed. See How to Setup Promotional Pricing.
- Save the record. You can click the Save toolbar button to save it. In case you miss to click this button and you click the Close toolbar button or the x button at the top right corner of the screen, i21 will prompt you if you would like to save it before closing the screen.
Overview
Content Tools