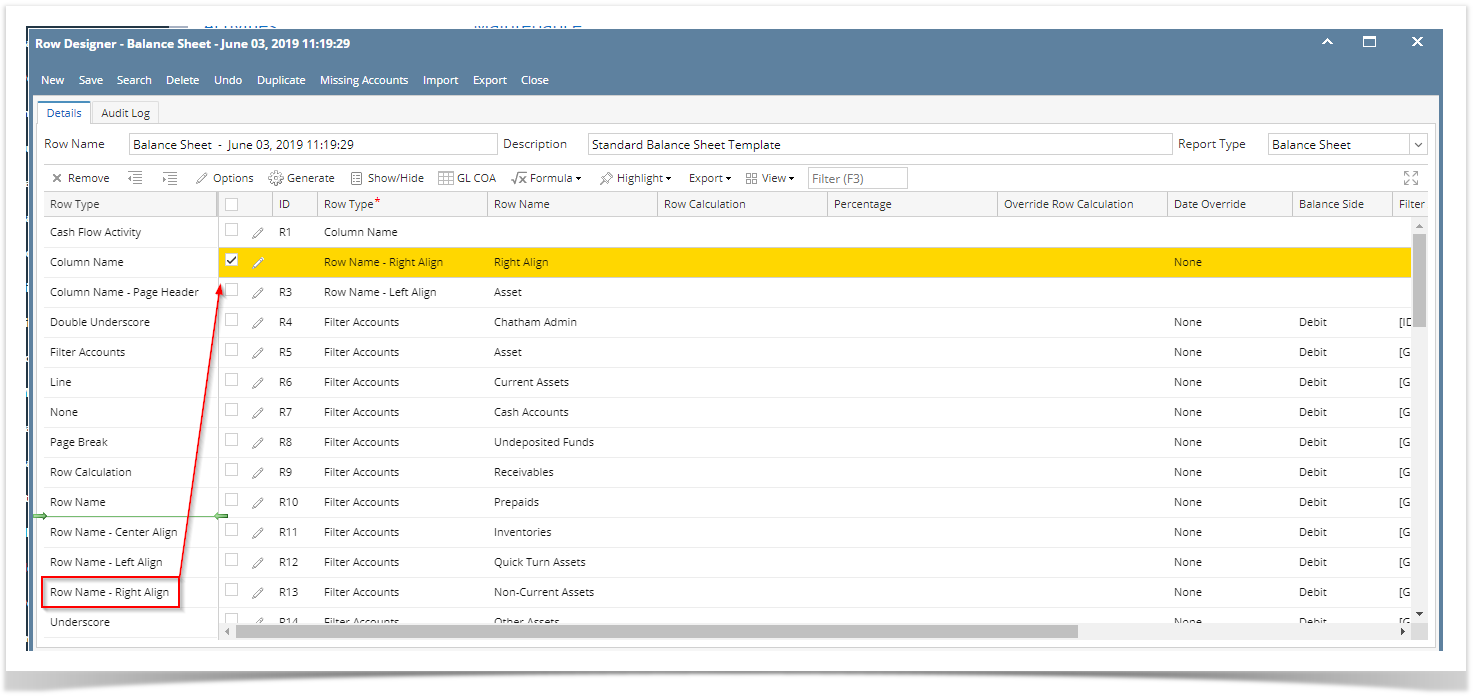
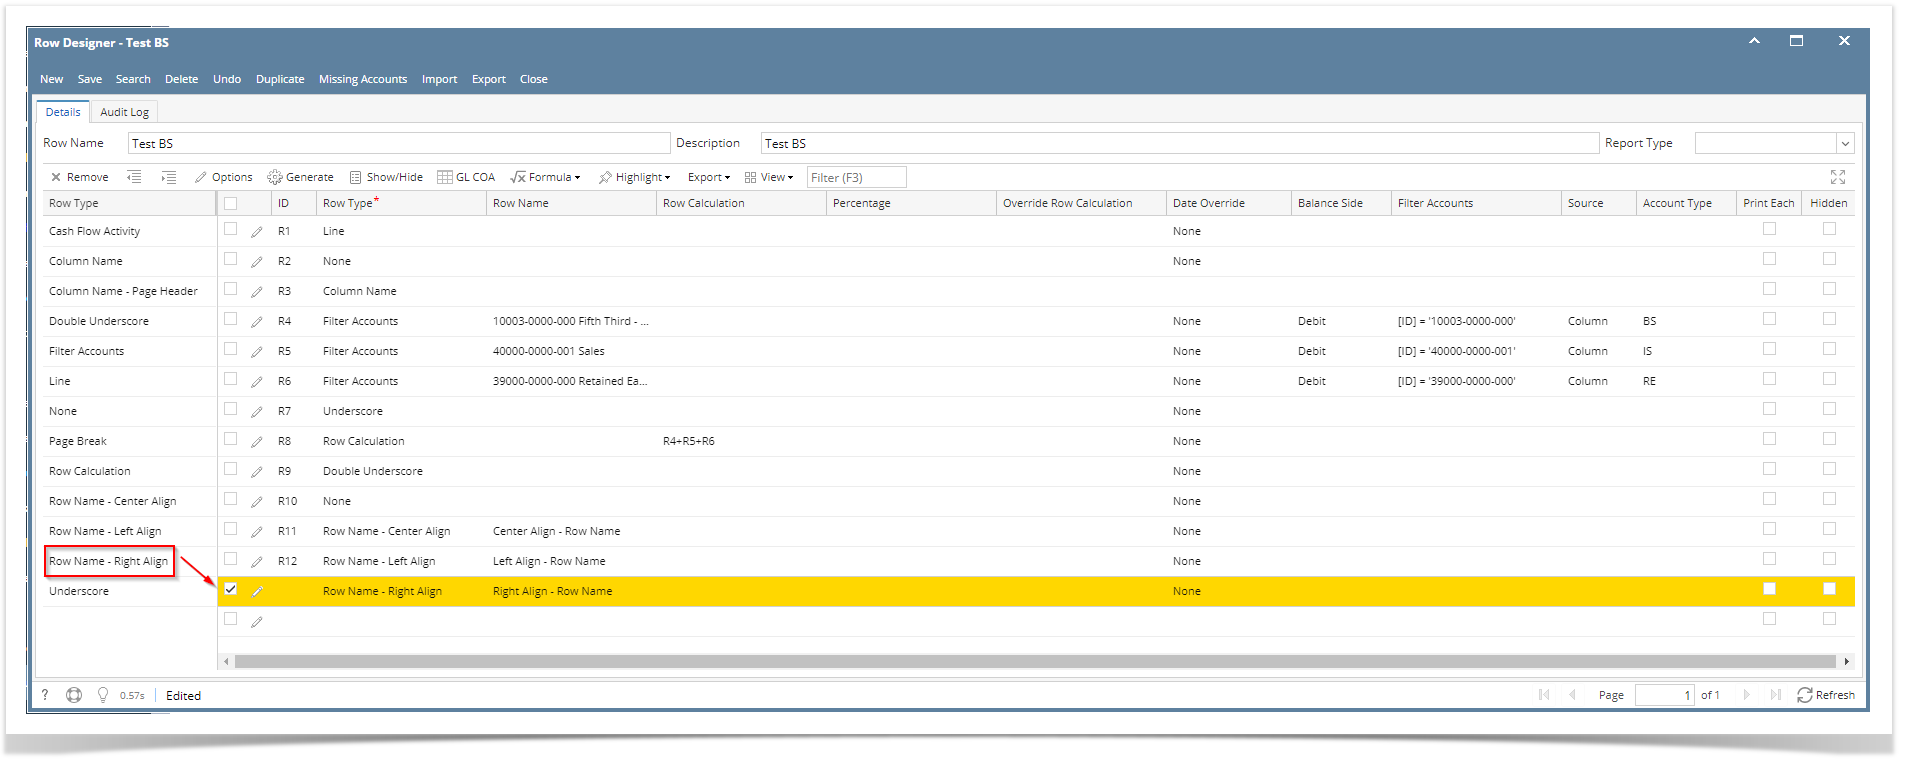
The Row Name - Right Align row will ignore any column configuration you have. It will take the entire report page as its basis and the value entered in the Row Name field will be shown at the right-most part of your report.
Follow these steps to add a Row Name - Right Align row.
- From the Row Type section select Row Name - Right Align and drag it to the grid area, in the position you want that row be added.
- Enter a value in the Row Name field.
- All other fields are not anymore necessary so you can leave those out.
This is how Row Name - Right Align row will look like when you follow the above steps.
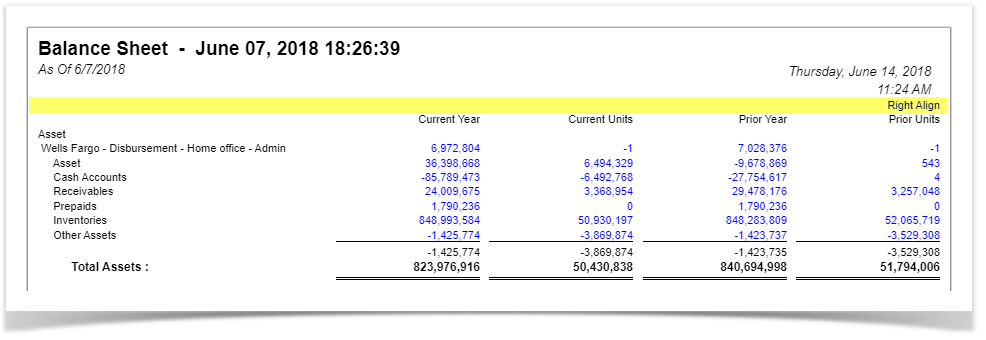
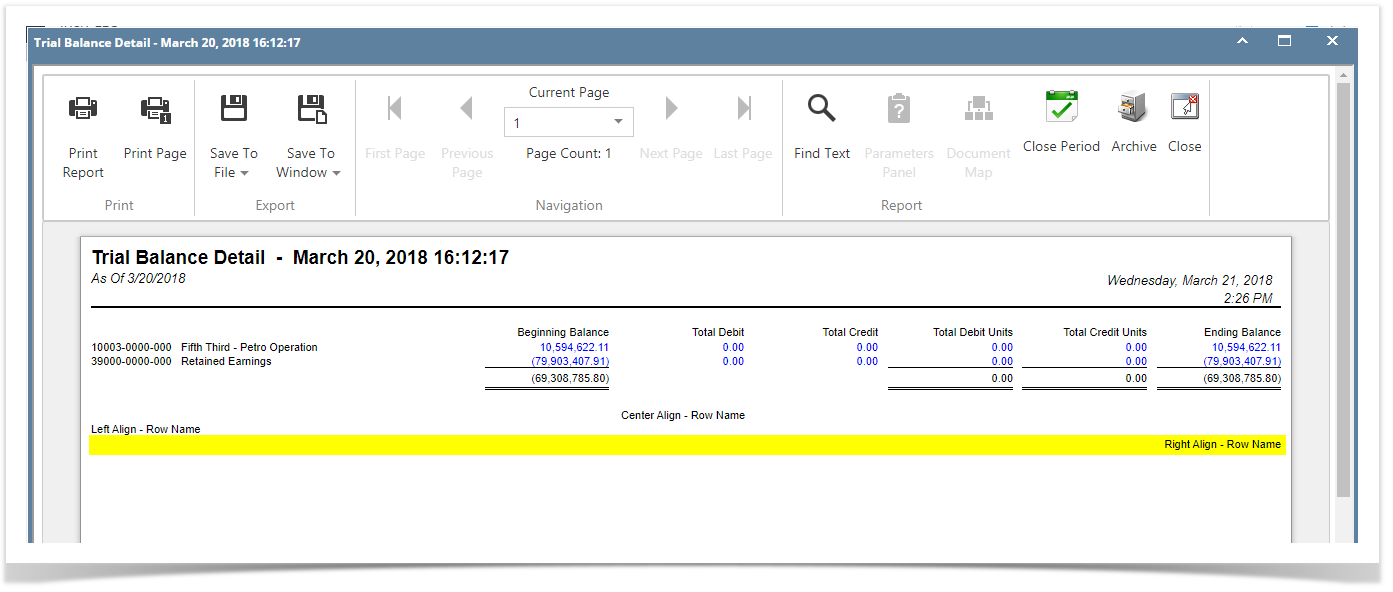
This is how it will be shown when you print your financial report.
You can enhance this row by setting its Font Properties and Row Height. See How to Configure Row Font Properties and Row Height topic to guide you on how to do this.
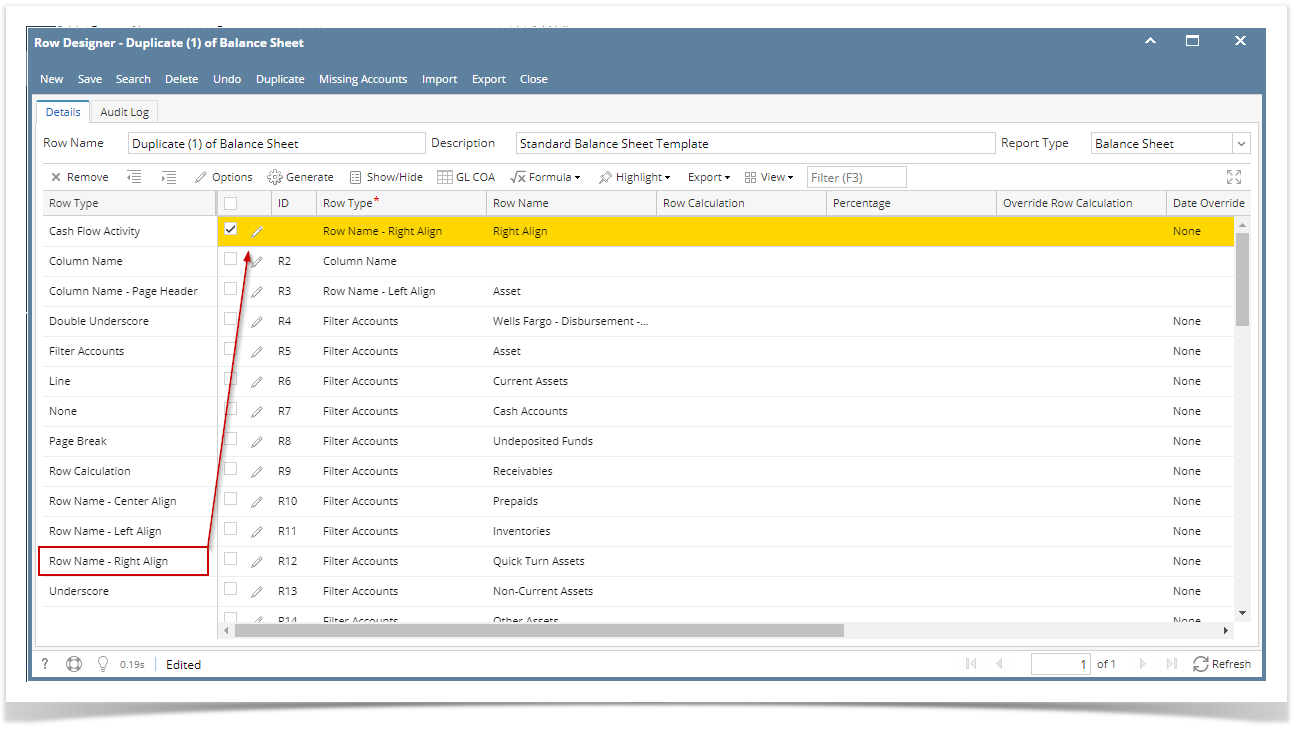
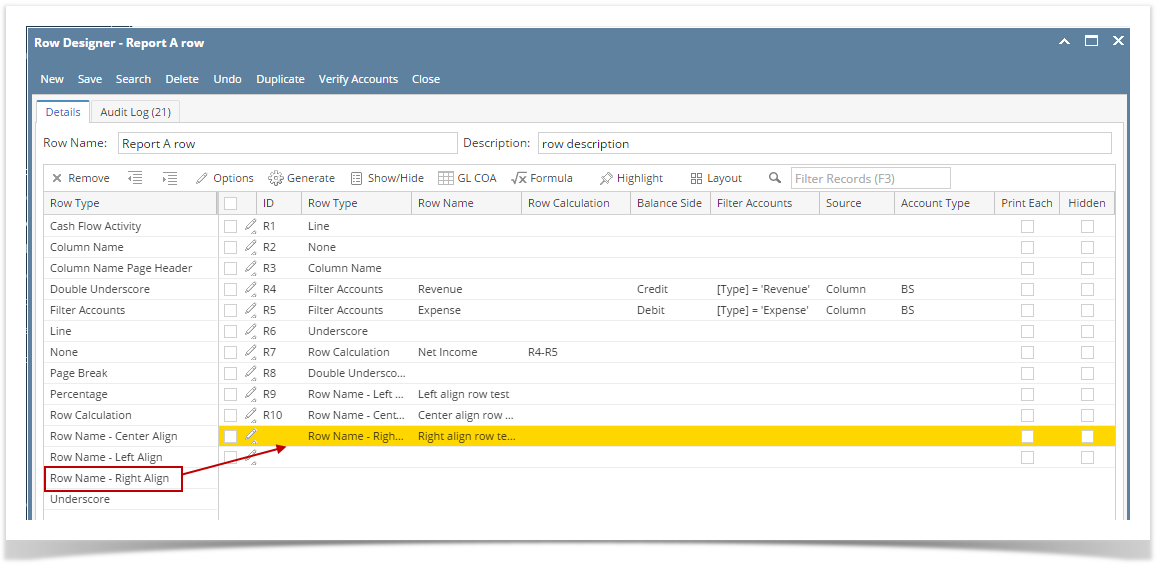
The Row Name - Right Align row will ignore any column configuration you have. It will take the entire report page as its basis and the value entered in the Row Name field will be shown at the right-most part of your report.
Follow these steps to add a Row Name - Right Align row.
- From the Row Type section select Row Name - Right Align and drag it to the grid area, in the position you want that row be added.
- Enter a value in the Row Name field.
- All other fields are not anymore necessary so you can leave those out.
This is how Row Name - Right Align row will look like when you follow the above steps.
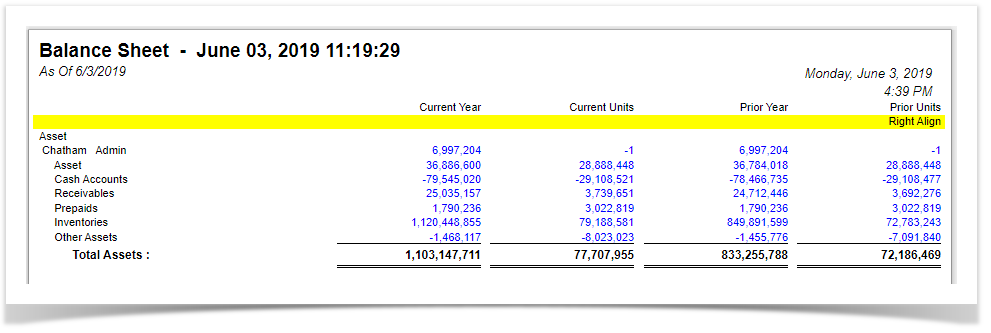
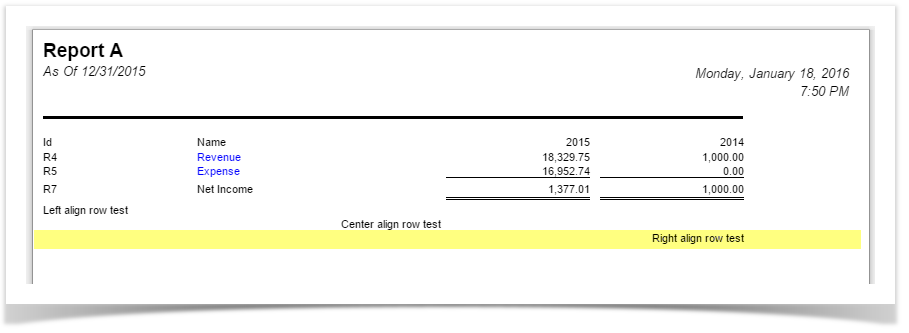
This is how it will be shown when you print your financial report.
You can enhance this row by setting its Font Properties and Row Height. See How to Configure Row Font Properties and Row Height topic to guide you on how to do this.
The Row Name - Right Align row will ignore any column configuration you have. It will take the entire report page as its basis and the value entered in the Row Name field will be shown at the right-most part of your report.
Follow these steps to add a Row Name - Right Align row.
- From the Row Type section select Row Name - Right Align and drag it to the grid area, in the position you want that row be added.
- Enter a value in the Row Name field.
- All other fields are not anymore necessary so you can leave those out.
This is how Row Name - Right Align row will look like when you follow the above steps.
This is how it will be shown when you print your financial report.
You can enhance this row by setting its Font Properties and Row Height. See How to Configure Row Font Properties and Row Height topic to guide you on how to do this.
The Right Title row will ignore any column configuration you have. It will take the entire report page as its basis and the value entered in the Description field will be shown at the right-most part of your report.
Follow these steps to add a Right Title row.
- A new row will be available in the grid section.
- Enter a value in the Description field.
- In the Row Type field, select Right Title.
- All other fields are not anymore necessary so you can leave those out.
This is how Right Title row will look like when you follow the above steps.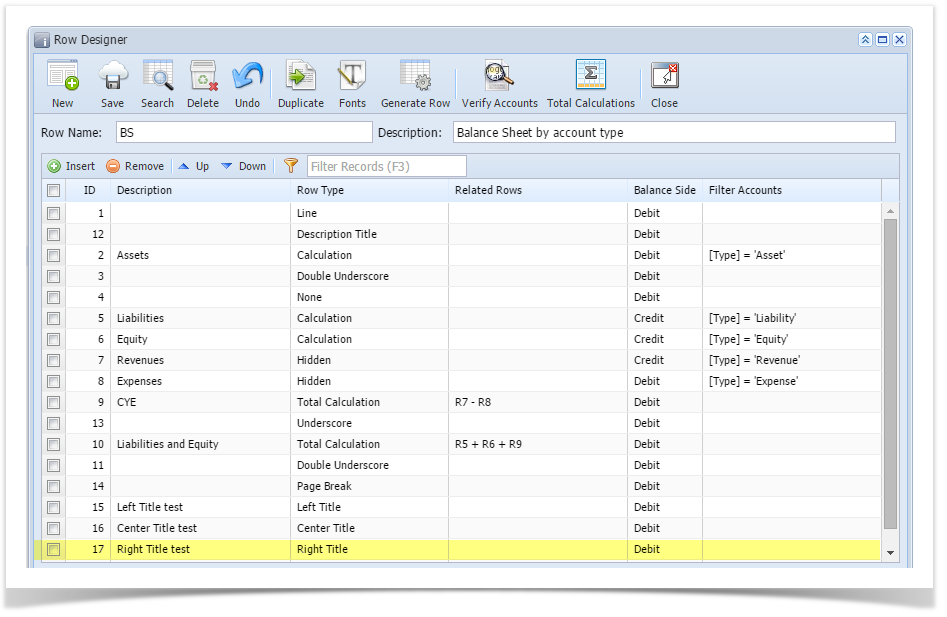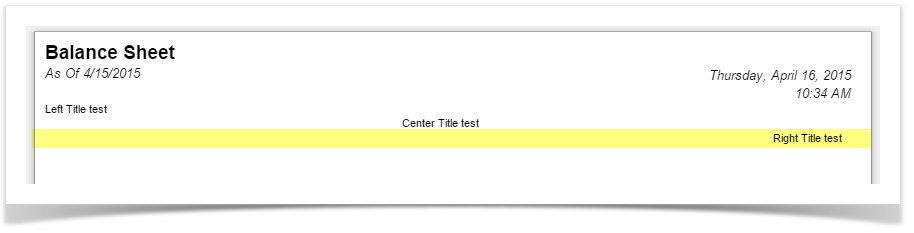
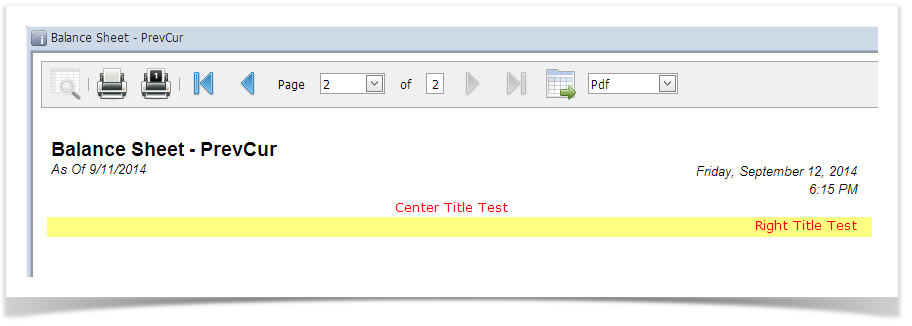
This is how it will be shown when you print your financial report.
You can enhance this row by setting its Font Properties and Row Height. See How to Configure Row Font Properties and Row Height topic to guide you on how to do this.
Overview
Content Tools