- Open a new Salesperson screen. There are four ways to do this. Note that the New button will open the Create New Entity screen. You can either fill out this screen, or simply close it and proceed with the succeeding steps.
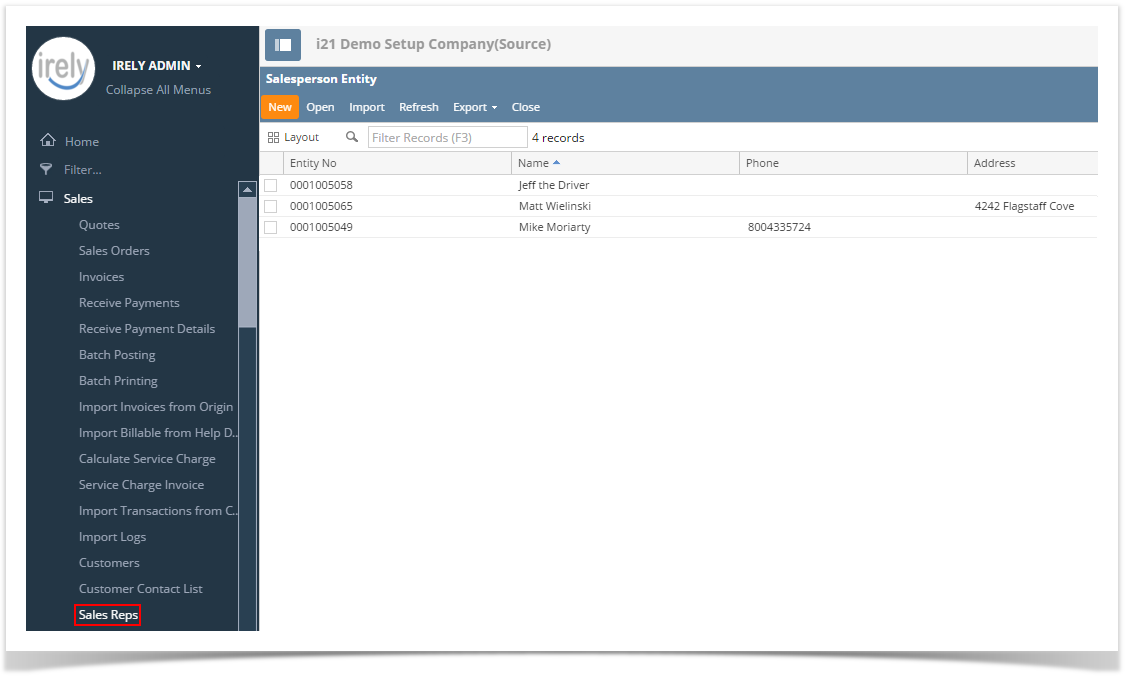
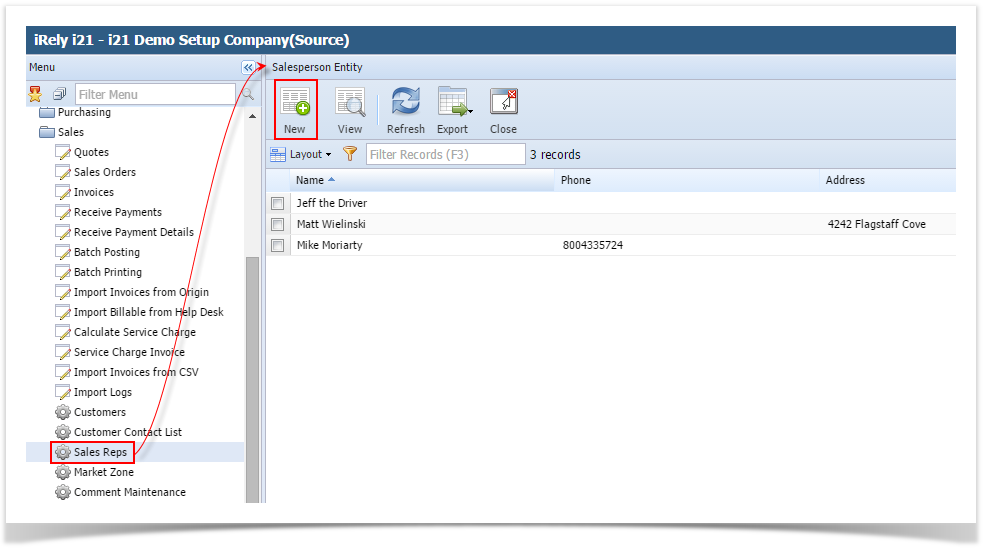
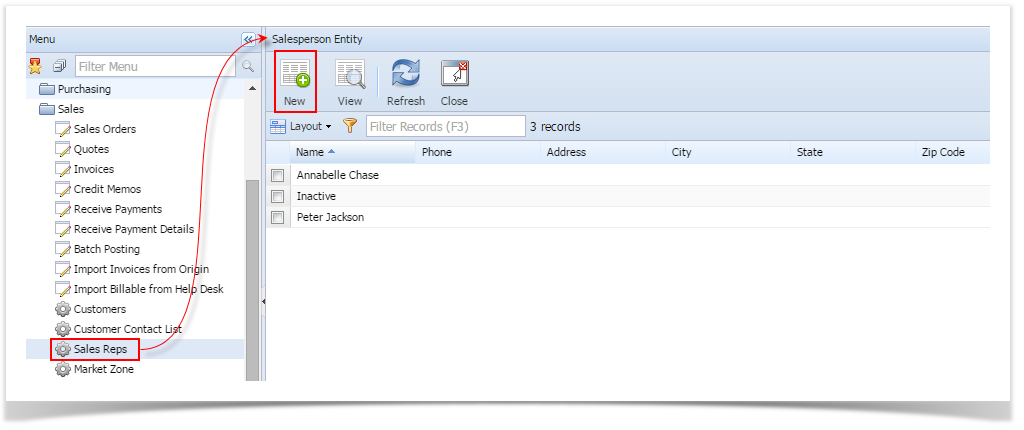
- Via Menu: On Sales folder, click the Sales Reps menu. When the Salesperson Entity search grid is displayed, click the New button.
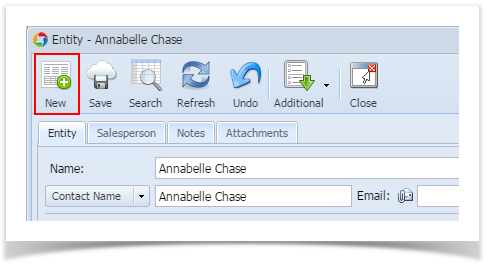
- Via Entity screen | New button: On Entity (Salesperson) screen, click the New button.
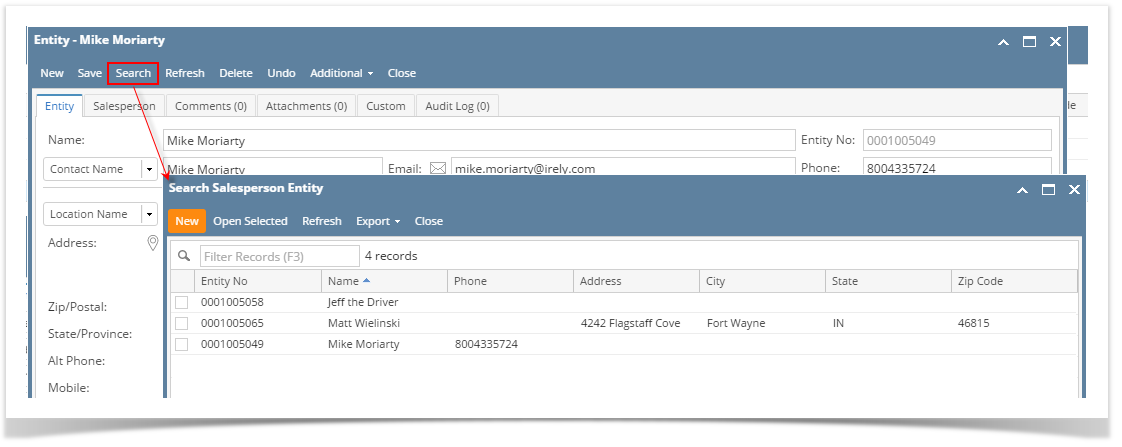
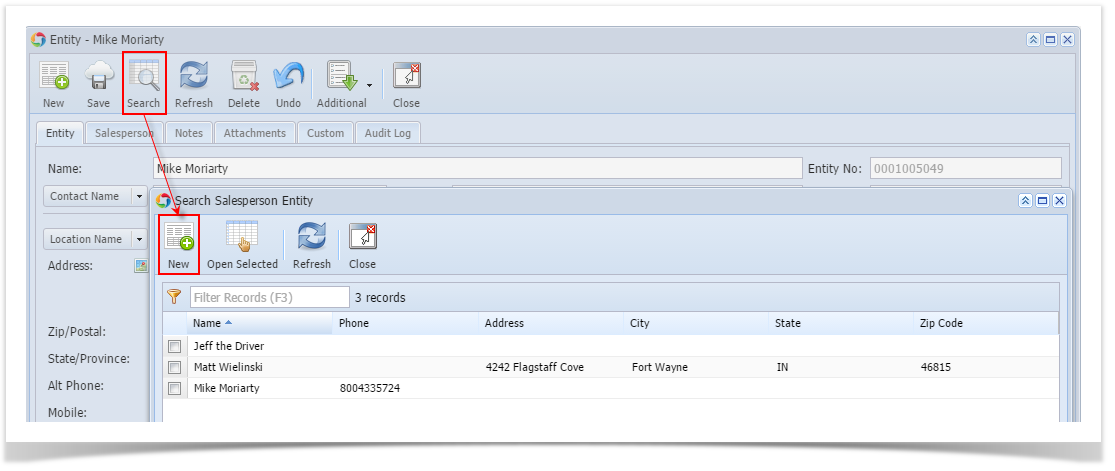
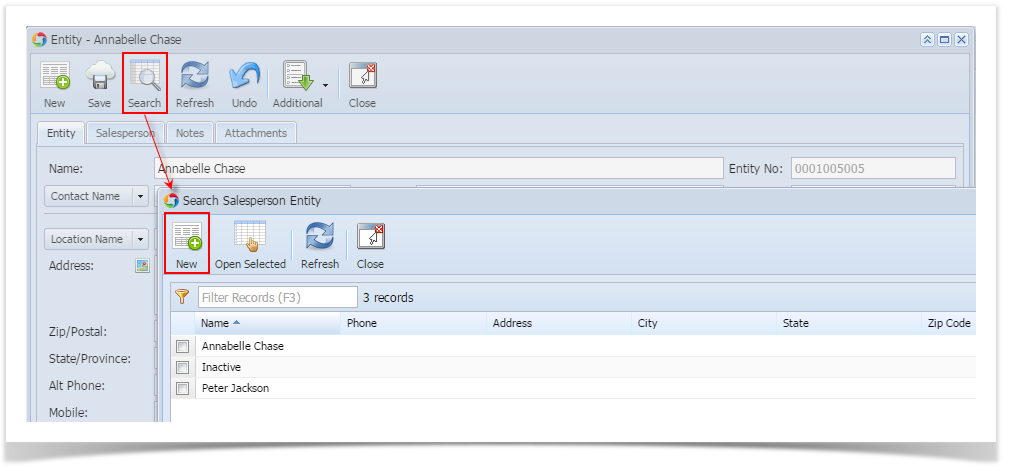
Via Entity screen | Search button: On Entity (Salesperson) screen, click the Search button. When the Search Salesperson Entity screen is displayed, click the New button.
Via Entity tab | Customer tab: On Entity (Customer) screen, navigate to Customer tab | Detail tab. Click the Salesperson hyperlink. If the field is blank, the link will open a new Salesperson screen, else it will open the record of the salesperson assigned to the customer.
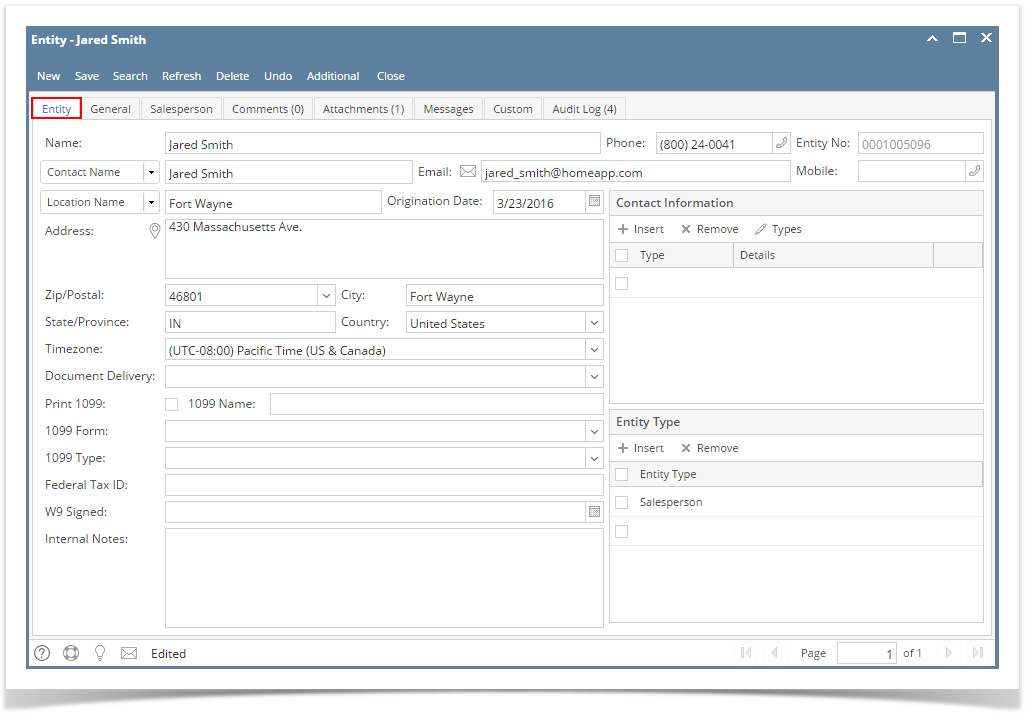
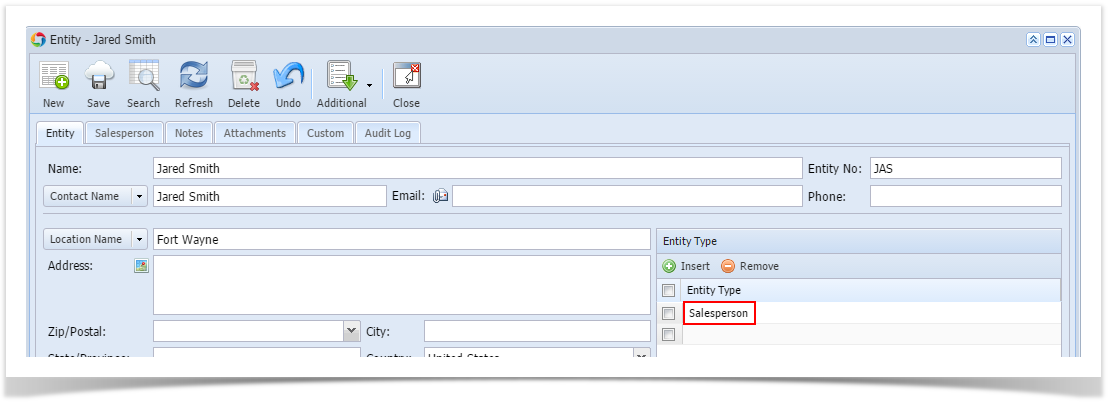
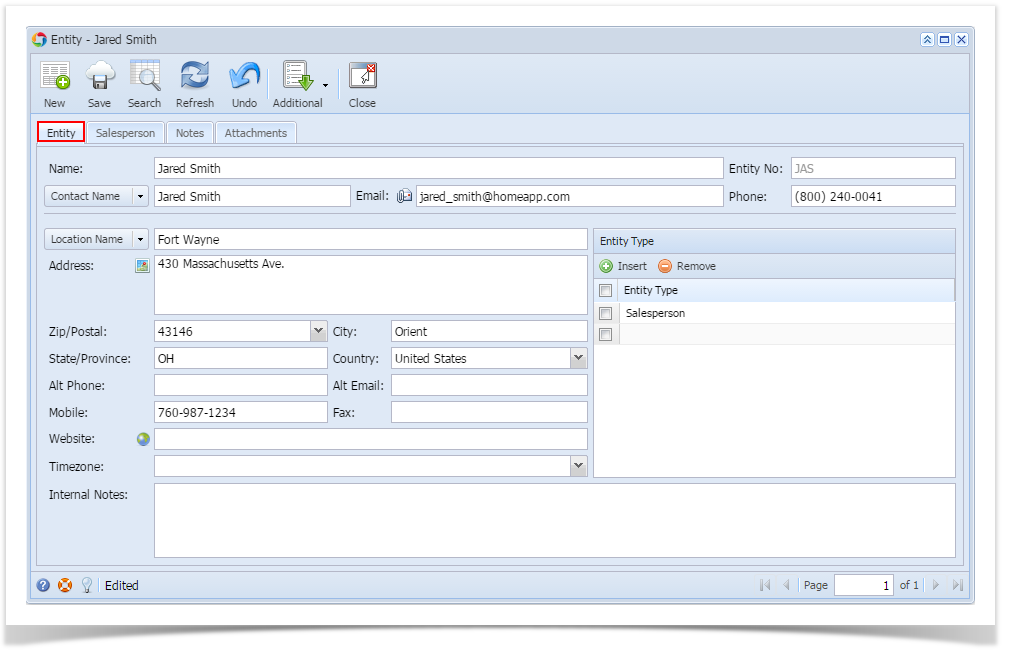
Fill out the Entity tab fields.
Enter the Name, Contact Name, Location Name, and Timezone. These are the required details in saving the record.
- You can either enter the Entity No or let the system generate it for you upon saving the record.
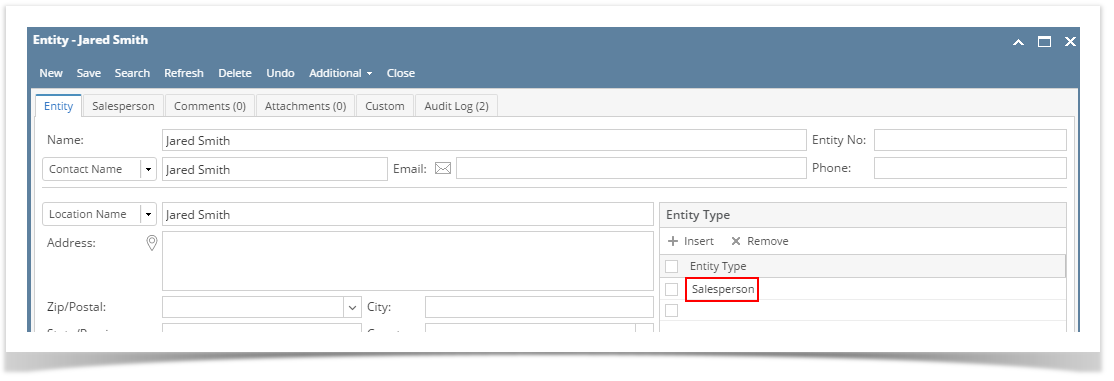
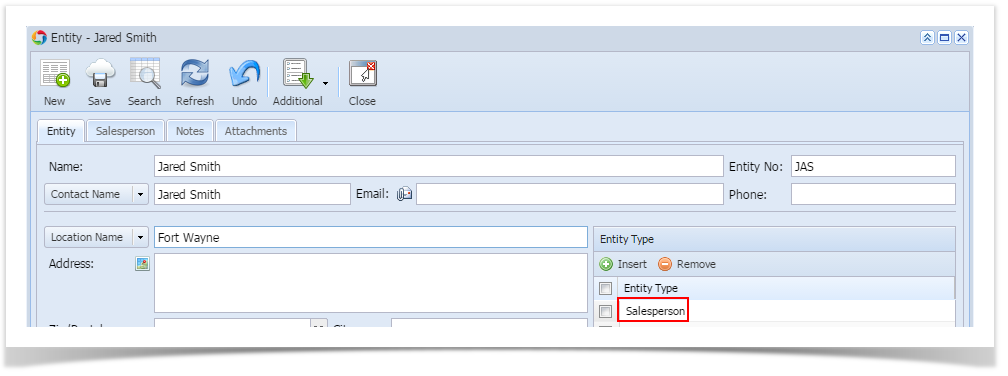
- Make sure that the Entity Type is set to Salesperson.
- Fill out other details on Entity tab. You can be as detailed as you see necessary. Below is a sample record.
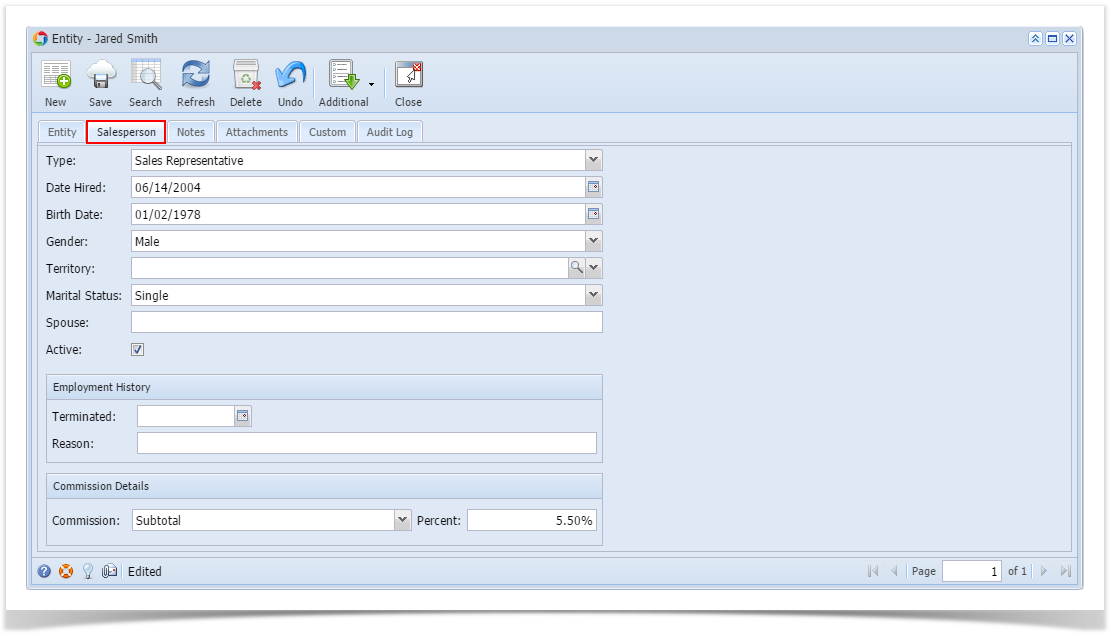
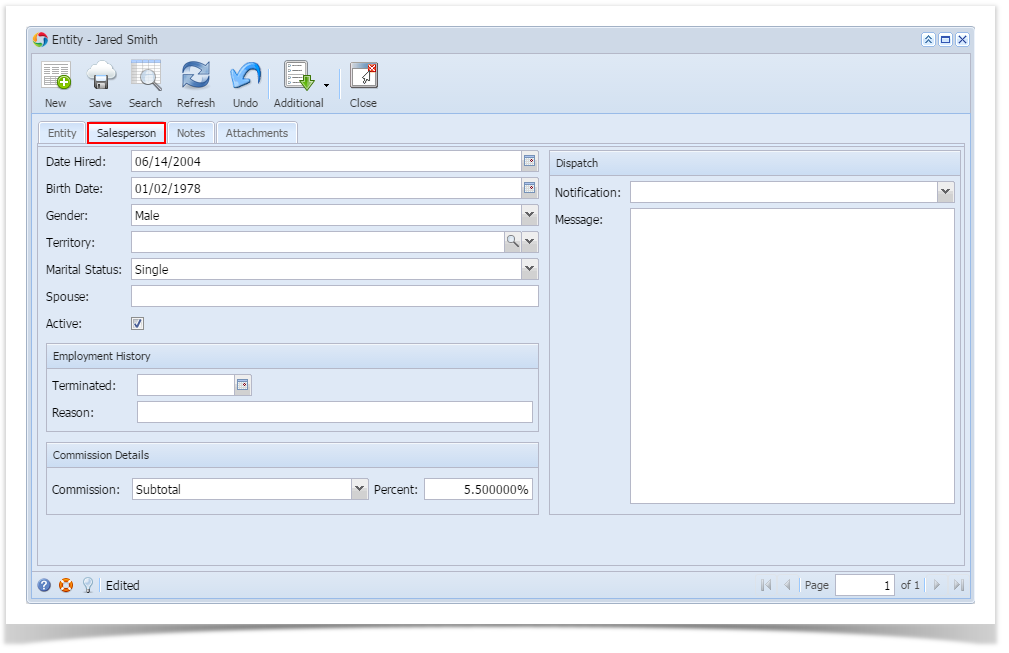
Navigate to Salesperson tab and fill out the fields.
Set Type to Driver. The Dispatch panel will be displayed on the right side of the screen.
Enter other necessary details. Refer to Salesperson | Field Description to help you in filling out the fields.
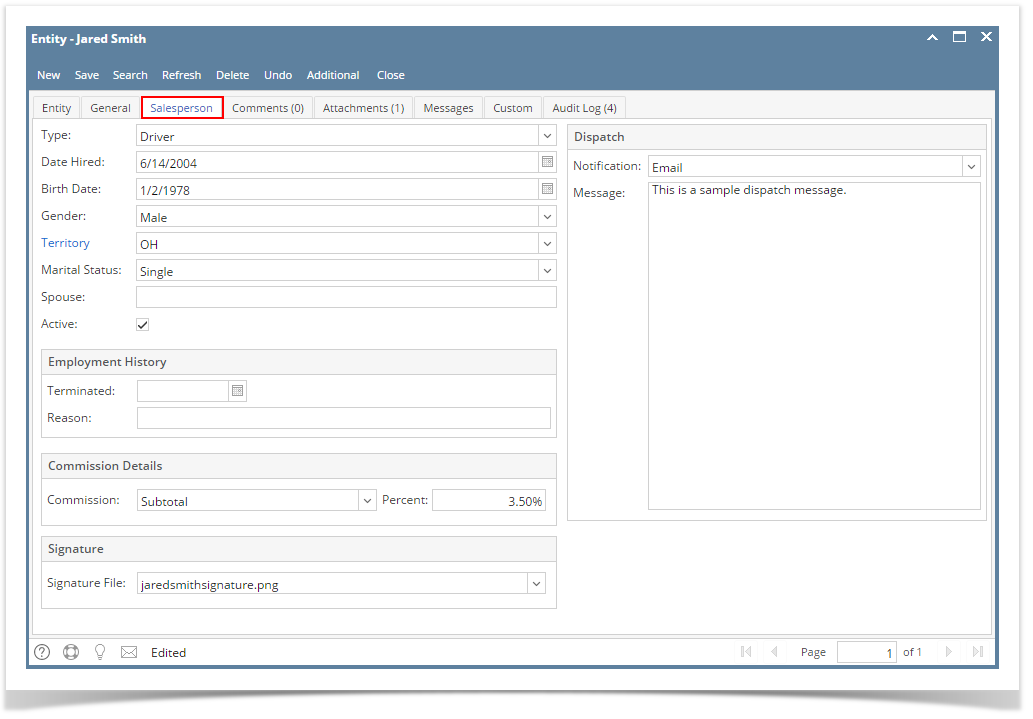
Save the record once done.
- Open a new Salesperson screen. There are four ways to do this. Note that the New button will open the Create New Entity screen. You can either fill out this screen, or simply close it and proceed with the succeeding steps.
- Via Menu: On Sales folder, click the Sales Reps menu. When the Salesperson Entity search grid is displayed, click the New button.
- Via Entity screen | New button: On Entity (Salesperson) screen, click the New button.
Via Entity screen | Search button: On Entity (Salesperson) screen, click the Search button. When the Search Salesperson Entity screen is displayed, click the New button.
Via Entity tab | Customer tab: On Entity (Customer) screen, navigate to Customer tab | Detail tab. Click the Salesperson hyperlink. If the field is blank, the link will open a new Salesperson screen, else it will open the record of the salesperson assigned to the customer.
Fill out the Entity tab fields.
Enter the Name, Contact Name, Location Name, and Timezone. These are the required details in saving the record.
- You can either enter the Entity No or let the system generate it for you upon saving the record.
- Make sure that the Entity Type is set to Salesperson.
- Fill out other details on Entity tab. You can be as detailed as you see necessary. Below is a sample record.
Navigate to Salesperson tab and fill out the fields. Refer to Salesperson | Field Description to help you in filling out the fields.
If you are to create a Driver record, set Type to Driver. The Dispatch panel will then get displayed.
Save the record once done.
- Open a new Salesperson screen. There are three ways to do this. Note that the New button will open the Create New Entity screen. You can either fill out this screen, or simply close it and proceed with the succeeding steps.
- On Sales folder, click the Sales Reps menu. When the Salesperson Entity search grid is displayed, click the New button.
- On Entity (Salesperson) screen, click the New button.

On Entity (Salesperson) screen, click the Search button. When the Search Salesperson Entity screen is displayed, click the New button.
- On Sales folder, click the Sales Reps menu. When the Salesperson Entity search grid is displayed, click the New button.
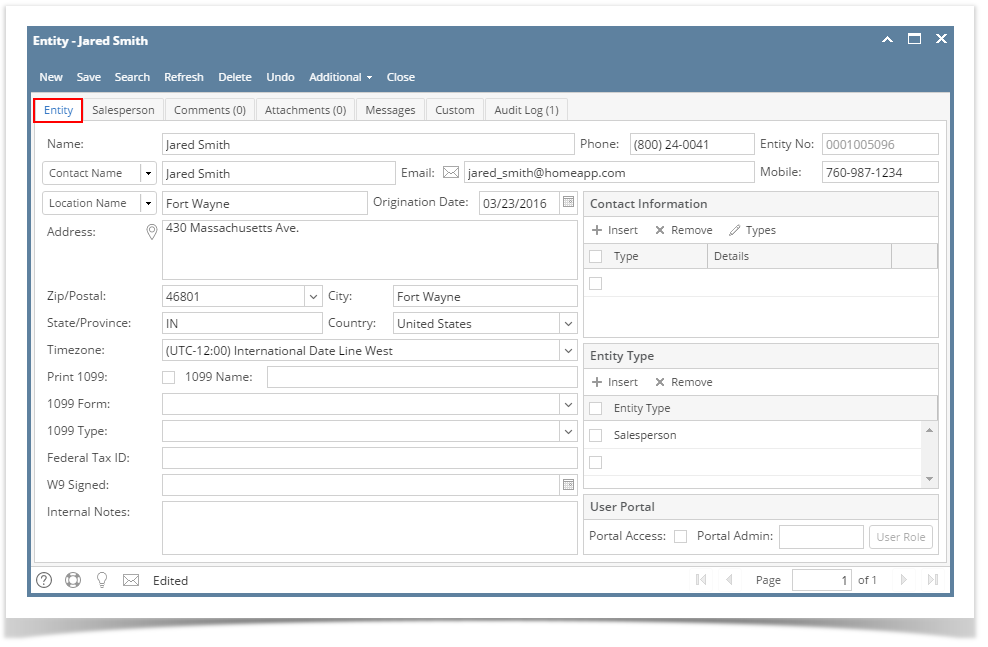
Fill out the Entity tab fields.
Enter the Name, Contact Name, and Location Name. These are the required details in saving the record.
- You can either enter the Entity No or let the system generate it for you upon saving the record.
- Make sure that the Entity Type is set to Salesperson.
- Fill out other details on Entity tab. You can be as detailed as you see necessary. Below is a sample record.

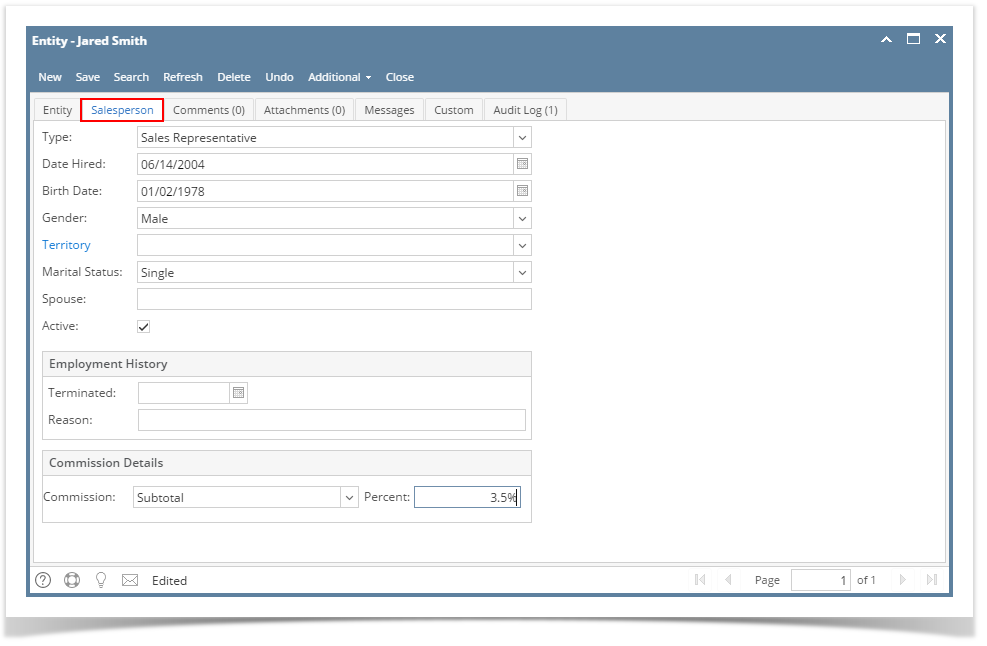
Navigate to Salesperson tab and fill out the fields. Refer to Salesperson | Field Description to help you in filling out the fields.
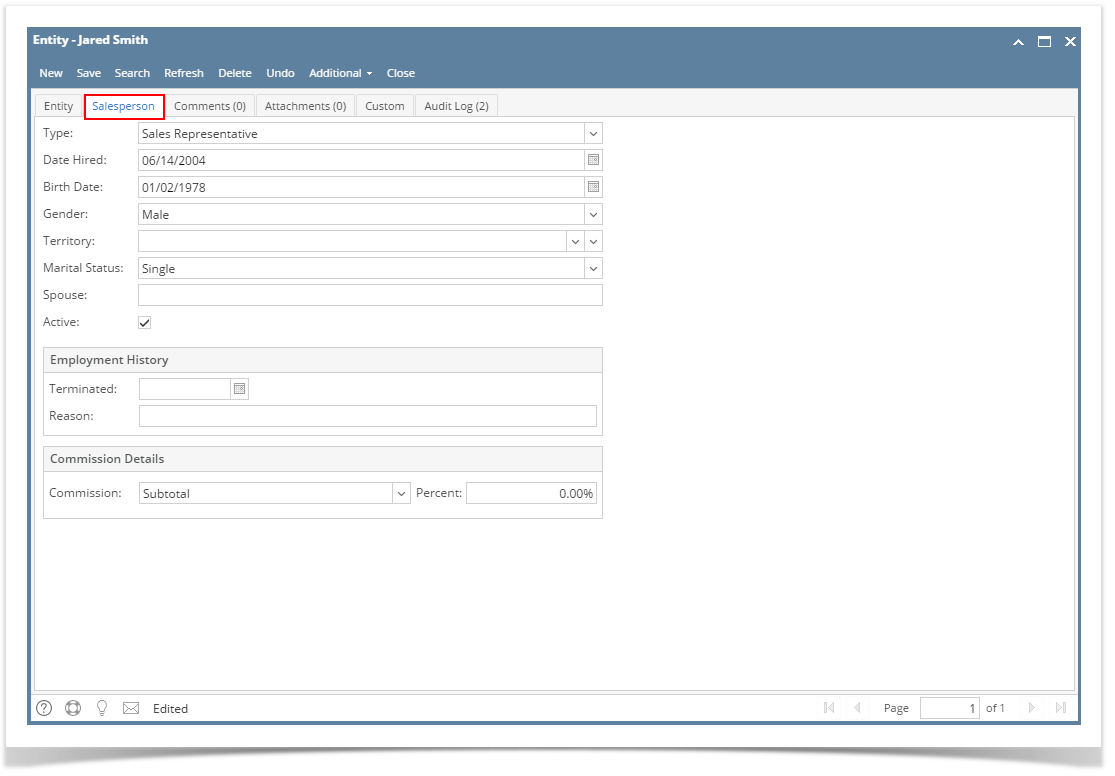
If you are to create a Driver record, set Type to Driver. The Dispatch panel will then get displayed.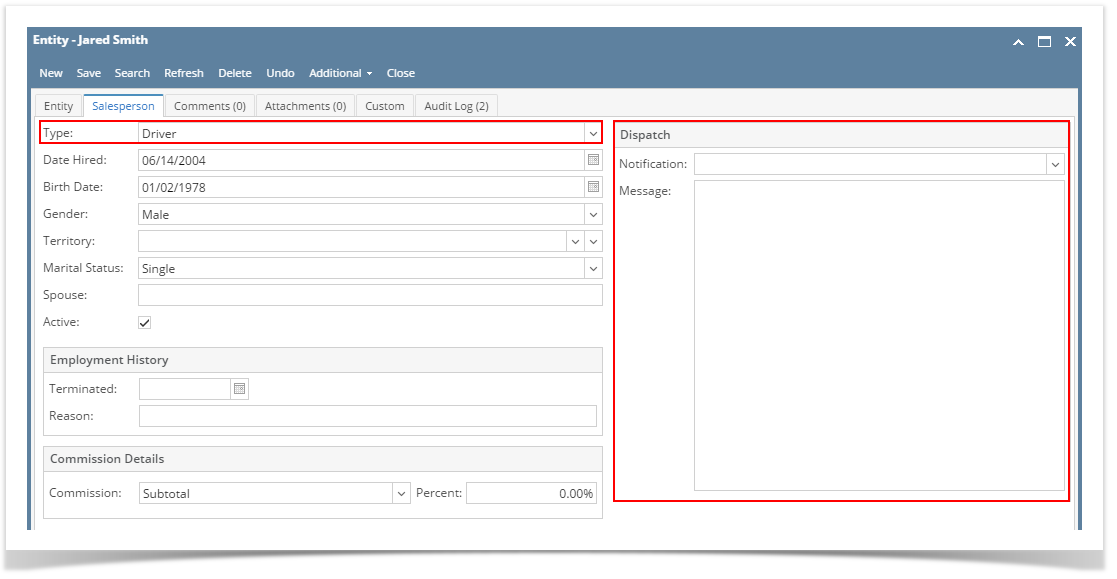
Save the record once done.
- Open a new Salesperson screen. There are three ways to do this.
- On Sales folder, click the Sales Reps menu. When the Salesperson Entity search grid is displayed, click the New toolbar button.
- On Entity (Salesperson) screen, click the New toolbar button.

On Entity (Salesperson) screen, click the Search toolbar button. When the Search Salesperson Entity screen is displayed, click the New toolbar button.
Note that the New button will open the Create New Entity screen. You can either fill out this screen or simply close it, and proceed with the following steps.
- On Sales folder, click the Sales Reps menu. When the Salesperson Entity search grid is displayed, click the New toolbar button.
Fill out the Entity tab fields.
Enter the Name, Contact Name, and Location Name. These are the required details in saving the record.
- You can either enter the Entity No or let the system generate it for you upon saving the record.
- Make sure that the Entity Type is set to Salesperson.
- Fill out other details on Entity tab. You can be as detailed as you see necessary. Below is a sample record.

Navigate to Salesperson tab and fill out the fields. Refer to Salesperson | Field Description to help you in filling out the fields.
If you are to create a Driver record, set Type to Driver. The Dispatch panel will then get displayed.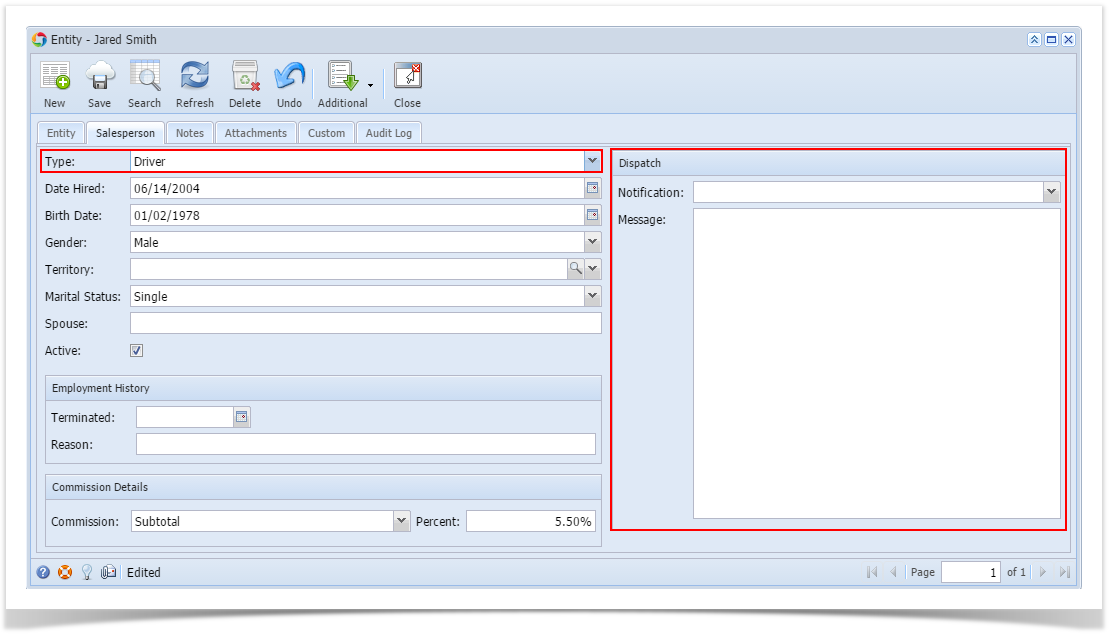
Save the record once done.
- Open a new Salesperson screen. There are three ways to do this.
- On Sales folder, click the Sales Reps menu. When the Salesperson Entity search grid is displayed, click the New toolbar button.
- On Entity (Salesperson) screen, click the New toolbar button.
On Entity (Salesperson) screen, click the Search toolbar button. When the Search Salesperson Entity screen is displayed, click the New toolbar button.
- On Sales folder, click the Sales Reps menu. When the Salesperson Entity search grid is displayed, click the New toolbar button.
Fill out the Entity tab fields.
Enter the Name, Contact Name, and Location Name. These are the required details in saving the record.
- You can either enter the Entity No or let the system generate it for you upon saving the record.
- Make sure that the Entity Type is set to Salesperson.
- Fill out other details on Entity tab. You can be as detailed as you see necessary. Below is a sample record.
Navigate to Salesperson tab and fill out the fields. Refer to Salesperson for the description of each field.
Save the record once done.
- Open a new Salesperson screen. There are four ways to do this.
- On Accounts Receivable > Maintenance, double click the Salesperson menu. When the Search Salesperson screen is displayed, click the New toolbar button.

- On Salesperson screen, click the New toolbar button.

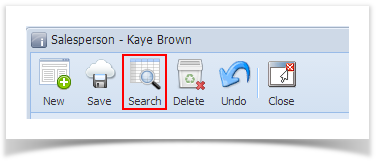
- On Salesperson screen, click the Search toolbar button. When the Search Salesperson screen is displayed, click the New toolbar button.
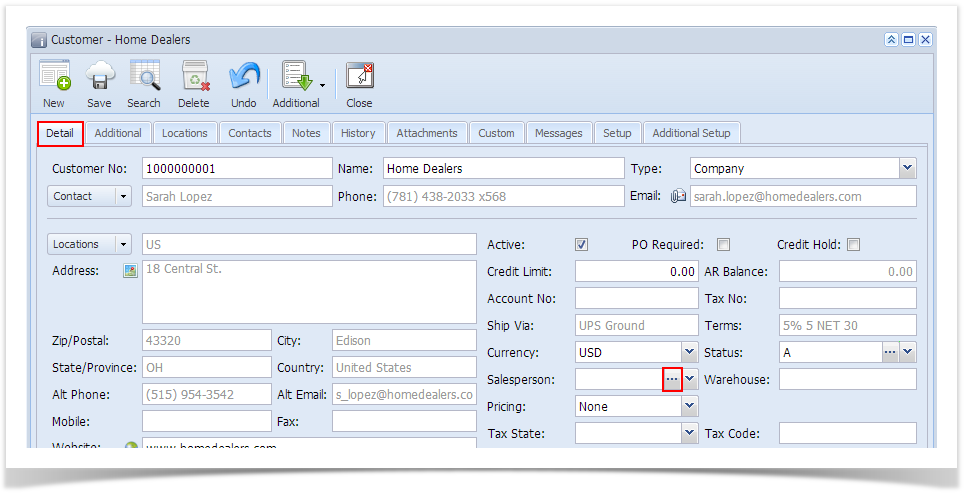
- On Customer screen > Detail tab, leave the Salesperson field blank and then click the Salesperson ellipsis button.
- On Accounts Receivable > Maintenance, double click the Salesperson menu. When the Search Salesperson screen is displayed, click the New toolbar button.
Enter the Salesperson ID.
Enter other necessary details. You can be as detailed as you like. Refer to Salesperson for the description of each field.
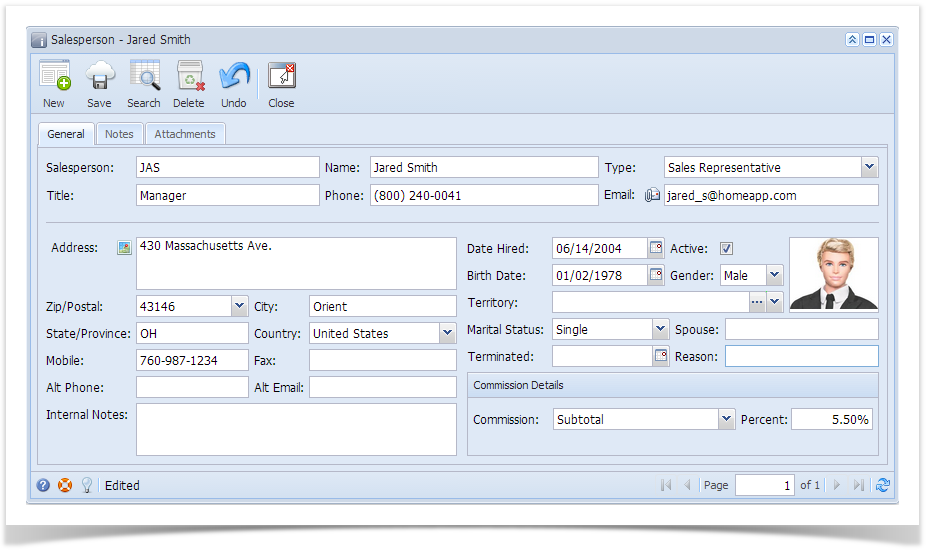
The Dispatch tab will only be displayed when Type is set to Driver.
- Save the record once done.
Overview
Content Tools