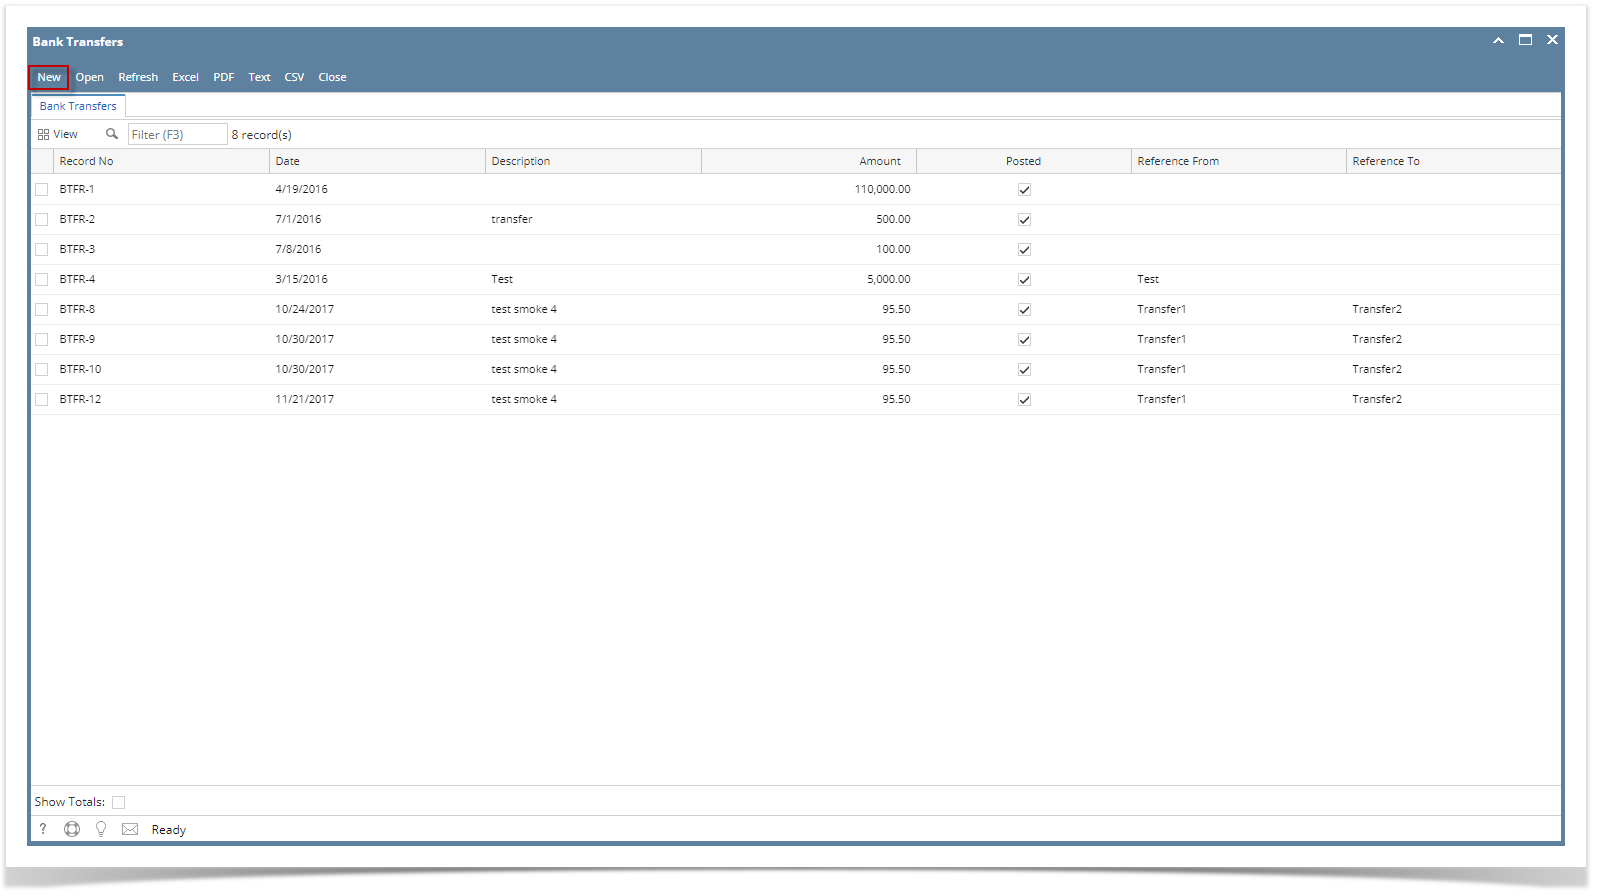
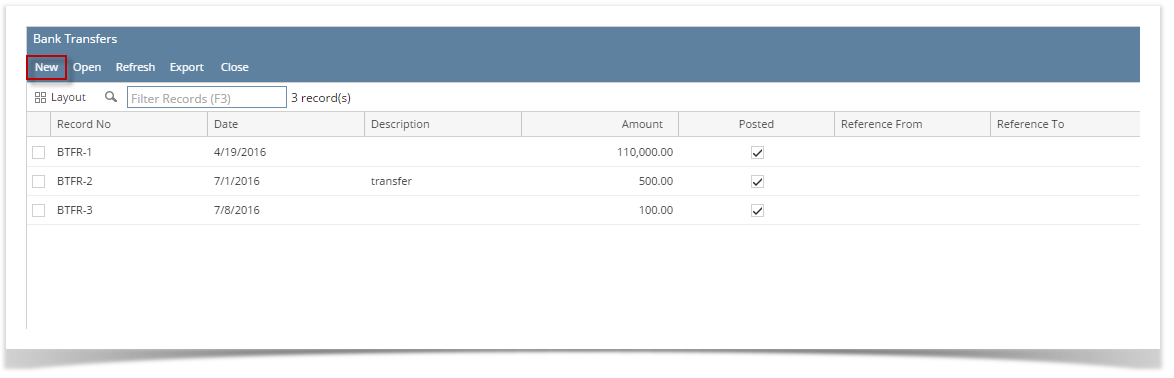
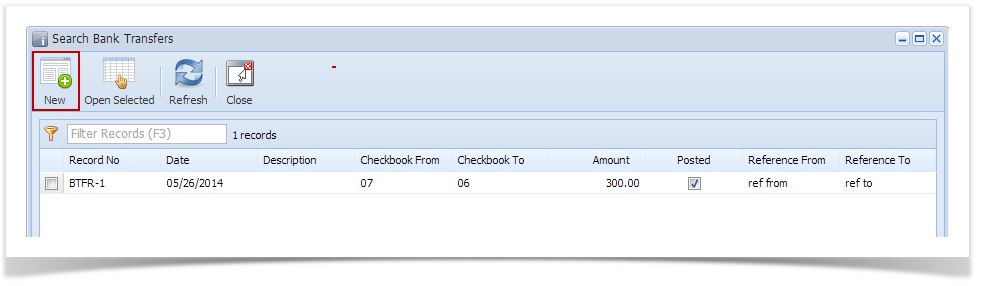
- From Cash Management module click Bank Transfers.
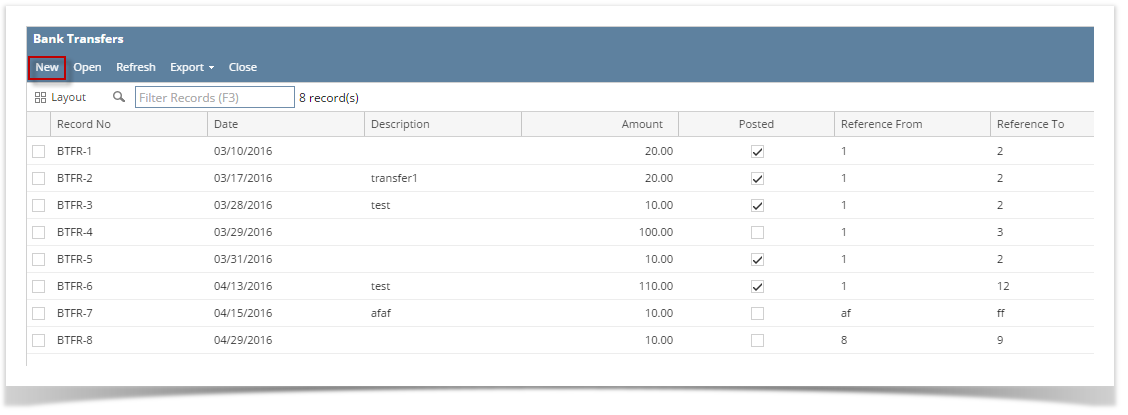
- If this is the first record you are to create, it will open directly on new Bank Transaction screen where you can then add the transaction. Otherwise, it will open the Search Bank Transfers screen where existing bank transfers are displayed. Click the New toolbar button to open the new Bank Transfer screen.
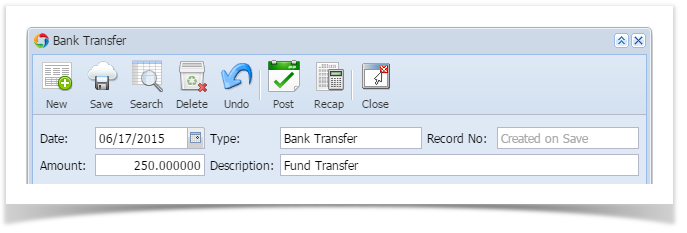
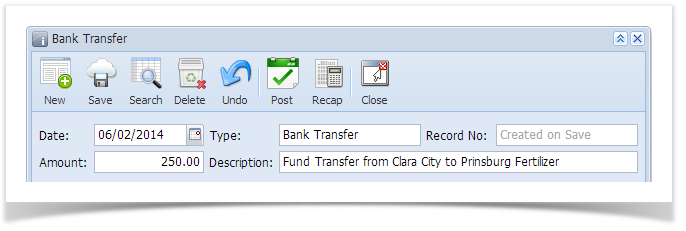
Fill in Bank Transfer header information.
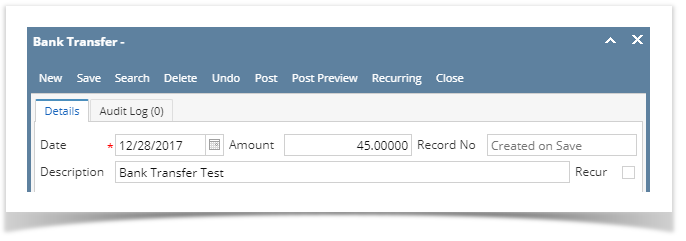
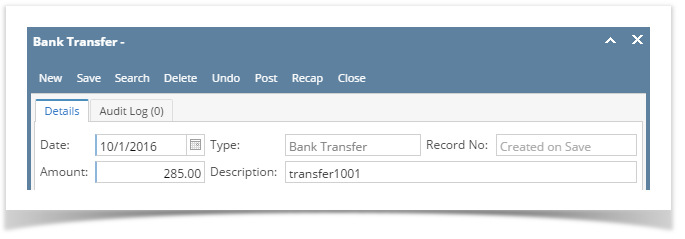
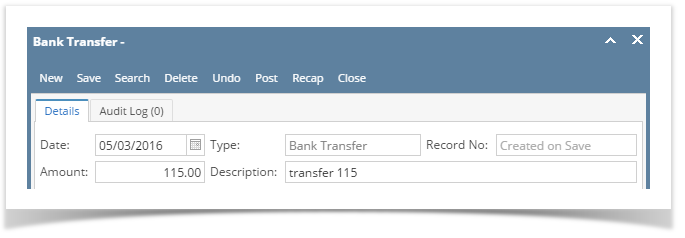
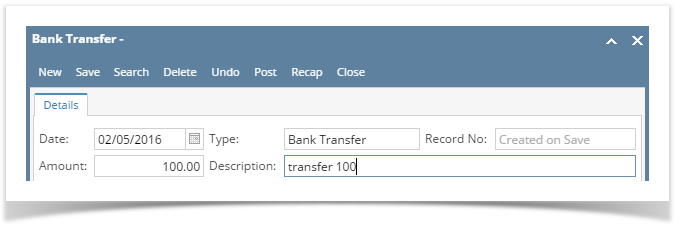
- The Date field by default will show today's date. Change this date as you feel necessary.
- The Type field will show Bank Transfer since this is a Bank Transfer transaction.
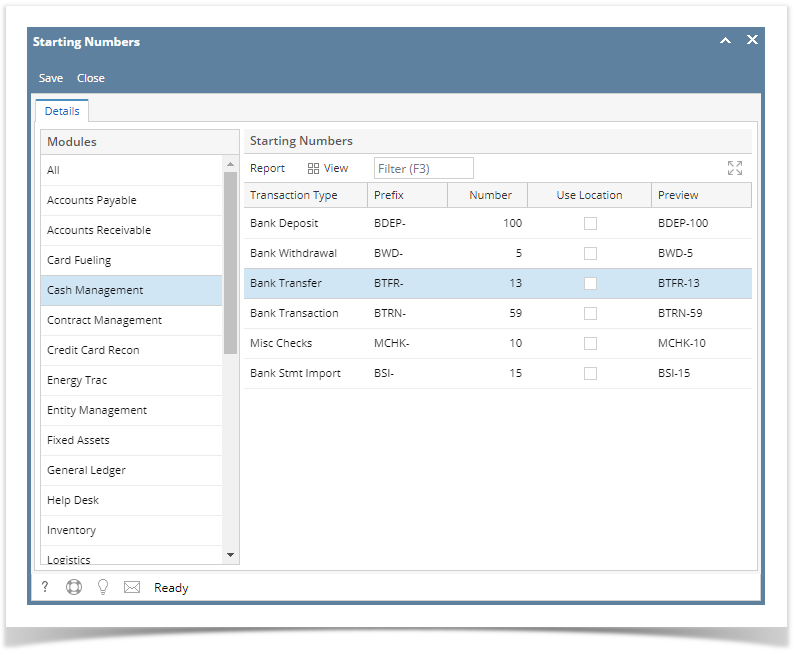
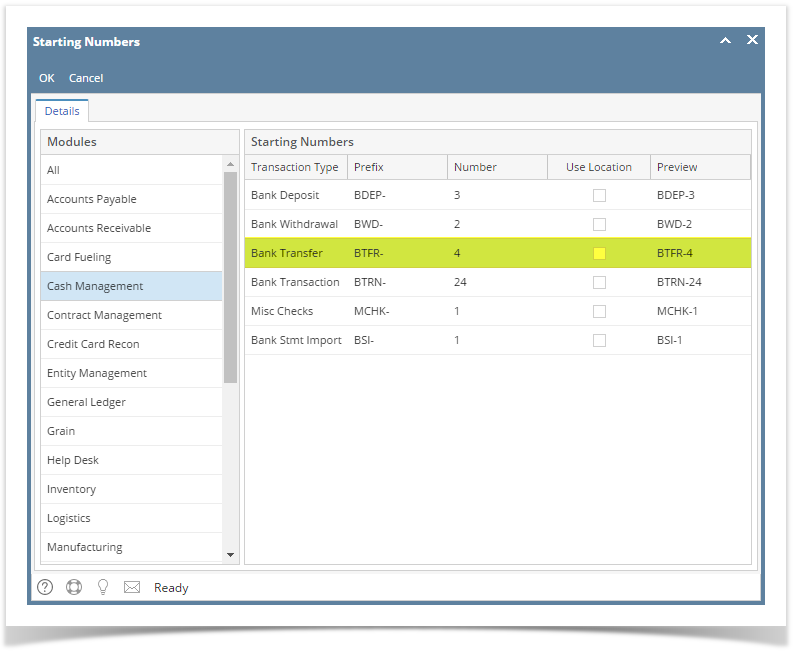
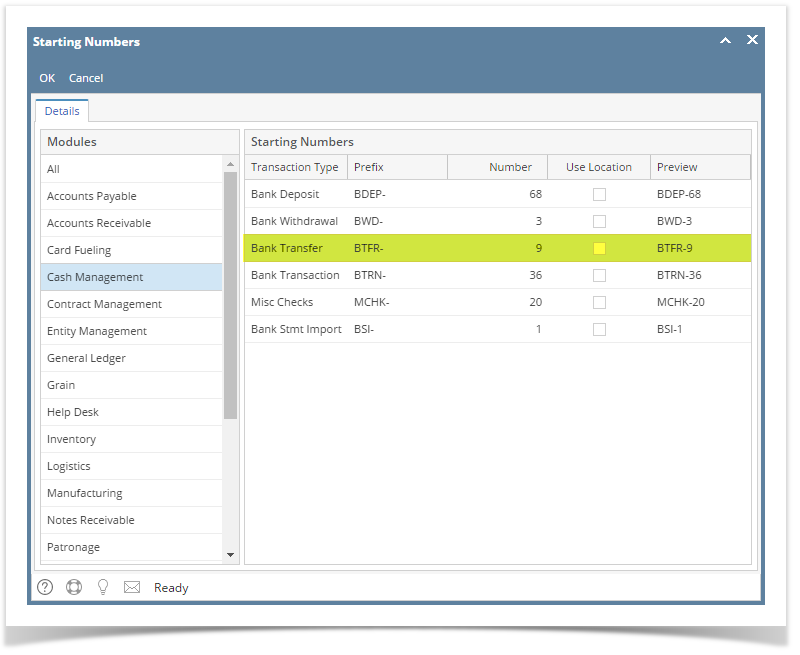
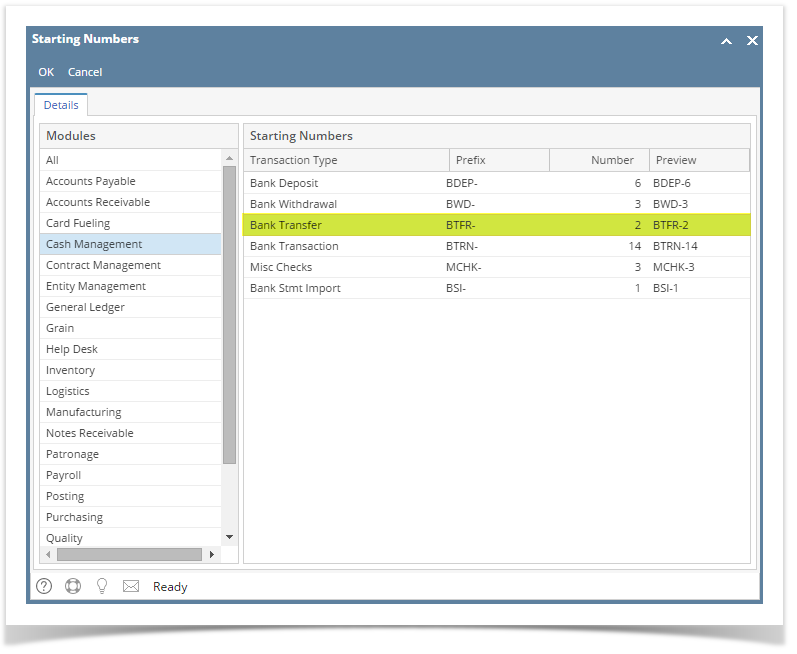
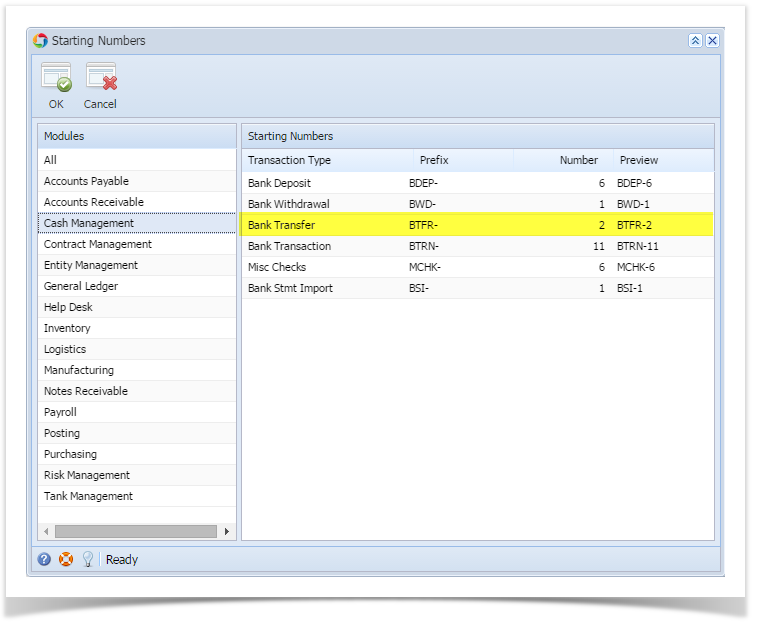
- The Record No field will only be filled with the bank transfer number as soon as the Bank Transfer is saved. This will be based in the Starting Numbers setup from the Starting Numbers screen > Bank Transfer. That screen can be opened from System Manager > Starting Numbers.
This number will also be used to track the transaction later on. - Enter the amount of fund to transfer in the Amount field.
- Enter a description for the Bank Transfer in the Description field.
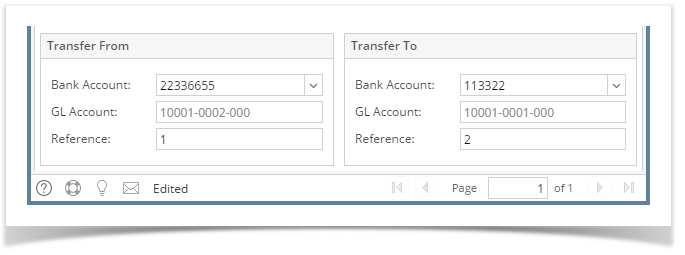
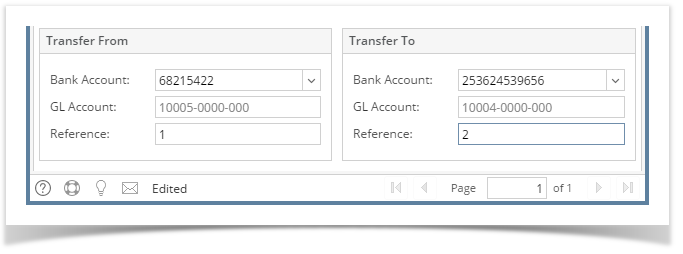
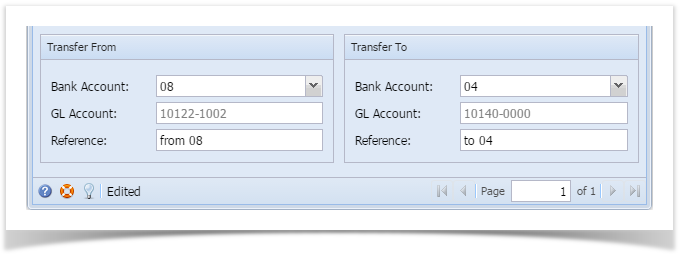
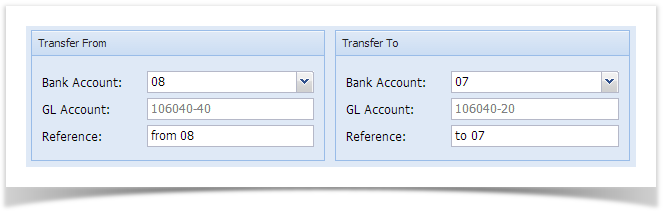
- In the detail area, enter Transfer From and Transfer To information.
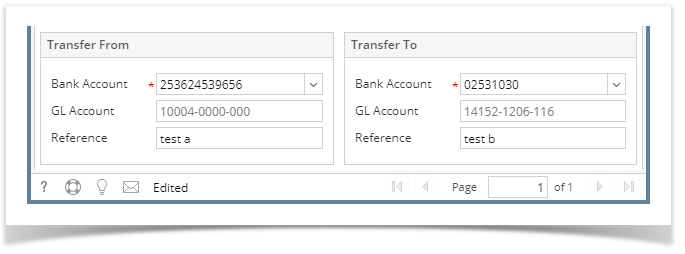
- Transfer From panel
- In the Bank Account field, select the Bank Account where the fund will be coming from.
- The GL Account field will show the GL Account assigned for the selected Bank Account.
- Enter a reference for the transfer from in the Reference field.
- Transfer To panel
- In the Bank Account field, select the Bank Account where the fund will be transferred to.
- The GL Account field will show the GL Account assigned for the selected Bank Account.
- Enter a reference for the transfer to in the Reference field.
Make sure that the bank account you want to use for the bank transfer - Transfer From and Transfer To had been added in the Bank Accounts screen. If not, see How to Add new Bank Account to guide you on how to add it.
- Transfer From panel
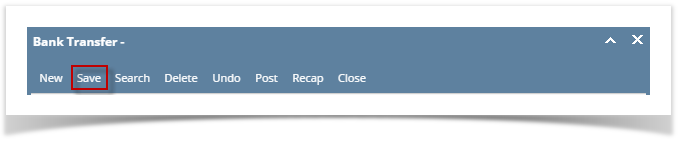
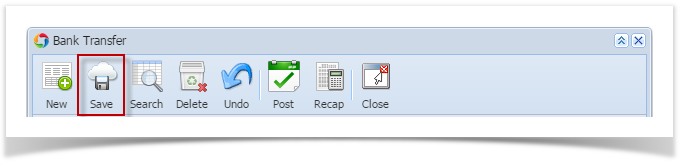
Click Save toolbar button to save the bank transfer.

The Record No field will then show the bank transfer number assigned for this transaction.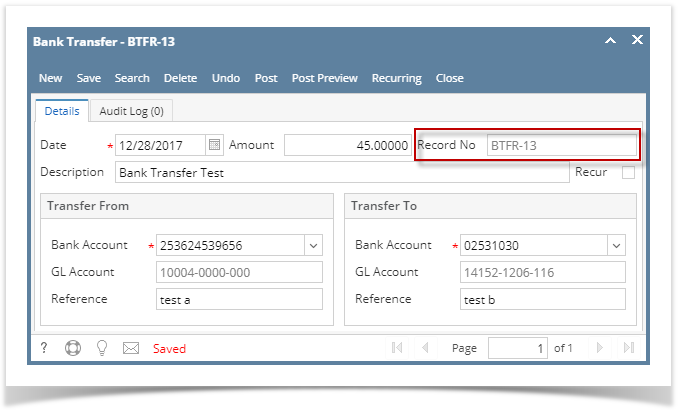
If the transaction is to be posted right away, you may skip saving it. Instead, click Post toolbar button and it will save and post the transaction. See How to Post Bank Transfer
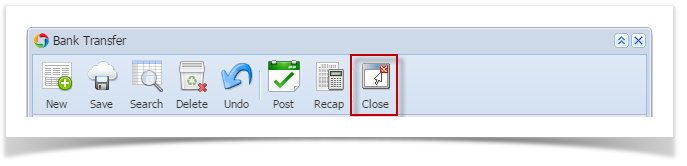
Click Close toolbar button to close the screen.

- From Cash Management module click Bank Transfers.
- If this is the first record you are to create, it will open directly on new Bank Transaction screen where you can then add the transaction. Otherwise, it will open the Search Bank Transfers screen where existing bank transfers are displayed. Click the New toolbar button to open the new Bank Transfer screen.
Fill in Bank Transfer header information.
- The Date field by default will show today's date. Change this date as you feel necessary.
- The Type field will show Bank Transfer since this is a Bank Transfer transaction.
- The Record No field will only be filled with the bank transfer number as soon as the Bank Transfer is saved. This will be based in the Starting Numbers setup from the Starting Numbers screen > Bank Transfer. That screen can be opened from System Manager > Starting Numbers.
This number will also be used to track the transaction later on. - Enter the amount of fund to transfer in the Amount field.
- Enter a description for the Bank Transfer in the Description field.
- In the detail area, enter Transfer From and Transfer To information.

- Transfer From panel
- In the Bank Account field, select the Bank Account where the fund will be coming from.
- The GL Account field will show the GL Account assigned for the selected Bank Account.
- Enter a reference for the transfer from in the Reference field.
- Transfer To panel
- In the Bank Account field, select the Bank Account where the fund will be transferred to.
- The GL Account field will show the GL Account assigned for the selected Bank Account.
- Enter a reference for the transfer to in the Reference field.
Make sure that the bank account you want to use for the bank transfer - Transfer From and Transfer To had been added in the Bank Accounts screen. If not, see How to Add new Bank Account to guide you on how to add it.
- Transfer From panel
Click Save toolbar button to save the bank transfer.
The Record No field will then show the bank transfer number assigned for this transaction.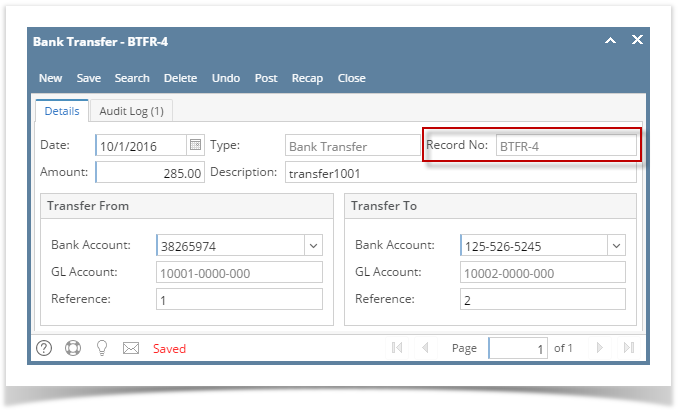
If the transaction is to be posted right away, you may skip saving it. Instead, click Post toolbar button and it will save and post the transaction. See How to Post Bank Transfer
Click Close toolbar button to close the screen.

- From Cash Management module click Bank Transfers.
- If this is the first record you are to create, it will open directly on new Bank Transaction screen where you can then add the transaction. Otherwise, it will open the Search Bank Transfers screen where existing bank transfers are displayed. Click the New toolbar button to open the new Bank Transfer screen.
Fill in Bank Transfer header information.
- The Date field by default will show today's date. Change this date as you feel necessary.
- The Type field will show Bank Transfer since this is a Bank Transfer transaction.
- The Record No field will only be filled with the bank transfer number as soon as the Bank Transfer is saved. This will be based in the Starting Numbers setup from the Starting Numbers screen > Bank Transfer. That screen can be opened from System Manager > Starting Numbers.
This number will also be used to track the transaction later on. - Enter the amount of fund to transfer in the Amount field.
- Enter a description for the Bank Transfer in the Description field.
- In the detail area, enter Transfer From and Transfer To information.
- Transfer From panel
- In the Bank Account field, select the Bank Account where the fund will be coming from.
- The GL Account field will show the GL Account assigned for the selected Bank Account.
- Enter a reference for the transfer from in the Reference field.
- Transfer To panel
- In the Bank Account field, select the Bank Account where the fund will be transferred to.
- The GL Account field will show the GL Account assigned for the selected Bank Account.
- Enter a reference for the transfer to in the Reference field.
Make sure that the bank account you want to use for the bank transfer - Transfer From and Transfer To had been added in the Bank Accounts screen. If not, see How to Add new Bank Account to guide you on how to add it.
- Transfer From panel
Click Save toolbar button to save the bank transfer.
The Record No field will then show the bank transfer number assigned for this transaction.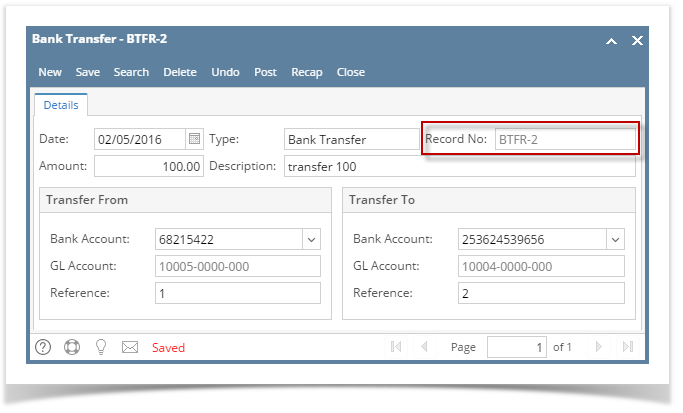
If the transaction is to be posted right away, you may skip saving it. Instead, click Post toolbar button and it will save and post the transaction. See How to Post Bank Transfer
Click Close toolbar button to close the screen.

- From Cash Management module click Bank Transfers.
- If this is the first record you are to create, it will open directly on new Bank Transaction screen where you can then add the transaction. Otherwise, it will open the Search Bank Transfers screen where existing bank transfers are displayed. Click the New toolbar button to open the new Bank Transfer screen.

Fill in Bank Transfer header information.
- The Date field by default will show today's date. Change this date as you feel necessary.
- The Type field will show Bank Transfer since this is a Bank Transfer transaction.
- The Record No field will only be filled with the bank transfer number as soon as the Bank Transfer is saved. This will be based in the Starting Numbers setup from the Starting Numbers screen > Bank Transfer. That screen can be opened from System Manager > Starting Numbers.
This number will also be used to track the transaction later on. - Enter the amount of fund to transfer in the Amount field.
- Enter a description for the Bank Transfer in the Description field.
- In the detail area, enter Transfer From and Transfer To information.
- Transfer From panel
- In the Bank Account field, select the Bank Account where the fund will be coming from.
- The GL Account field will show the GL Account assigned for the selected Bank Account.
- Enter a reference for the transfer from in the Reference field.
- Transfer To panel
- In the Bank Account field, select the Bank Account where the fund will be transferred to.
- The GL Account field will show the GL Account assigned for the selected Bank Account.
- Enter a reference for the transfer to in the Reference field.
Make sure that the bank account you want to use for the bank transfer - Transfer From and Transfer To had been added in the Bank Accounts screen. If not, see How to Add new Bank Account to guide you on how to add it.
- Transfer From panel
Click Save toolbar button to save the bank transfer.

The Record No field will then show the bank transfer number assigned for this transaction.If the transaction is to be posted right away, you may skip saving it. Instead, click Post toolbar button and it will save and post the transaction. See How to Post Bank Transfer.
Click Close toolbar button to close the screen.

- From Cash Management module click Bank Transfers.
- If this is the first record you are to create, it will open directly on new Bank Transaction screen where you can then add the transaction. Otherwise, it will open the Search Bank Transfers screen where existing bank transfers are displayed. Click the New toolbar button to open the new Bank Transfer screen.

Fill in Bank Transfer header information.
- The Date field by default will show today's date. Change this date as you feel necessary.
- The Type field will show Bank Transfer since this is a Bank Transfer transaction.
- The Record No field will only be filled with the bank transfer number as soon as the Bank Transfer is saved. This will be based in the Starting Numbers setup from the Starting Numbers screen > Bank Transfer. That screen can be opened from System Manager > Starting Numbers.
This number will also be used to track the transaction later on. - Enter the amount of fund to transfer in the Amount field.
- Enter a description for the Bank Transfer in the Description field.
- In the detail area, enter Transfer From and Transfer To information.
- Transfer From panel
- In the Bank Account field, select the Bank Account where the fund will be coming from.
- The GL Account field will show the GL Account assigned for the selected Bank Account.
- Enter a reference for the transfer from in the Reference field.
- Transfer To panel
- In the Bank Account field, select the Bank Account where the fund will be transferred to.
- The GL Account field will show the GL Account assigned for the selected Bank Account.
- Enter a reference for the transfer to in the Reference field.
Make sure that the bank account you want to use for the bank transfer - Transfer From and Transfer To had been added in the Bank Accounts screen. If not, see How to Add new Bank Account to guide you on how to add it.
- Transfer From panel
Click Save toolbar button to save the bank transfer.
The Record No field will then show the bank transfer number assigned for this transaction.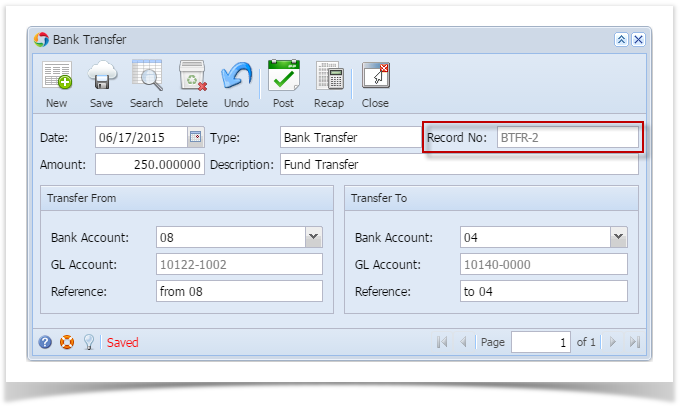
If the transaction is to be posted right away, you may skip saving it. Instead, click Post toolbar button and it will save and post the transaction. See How to Post Bank Transfer.
Click Close toolbar button to close the screen.
- From Cash Management module > Activities folder > double-click Bank Transfers.
- If this is the first record you are to create, it will open directly on new Bank Transaction screen where you can then add the transaction. Otherwise, it will open the Search Bank Transfers screen where existing bank transfers are displayed. Click the New toolbar button to open the new Bank Transfer screen.
Fill in Bank Transfer header information.
- The Date field by default will show today's date. Change this date as you feel necessary.
- The Type field will show Bank Transfer since this is a Bank Transfer transaction.
- The Record No field will only be filled with the bank transfer number as soon as the Bank Transfer is saved. This will be based in the Starting Numbers setup from the Starting Numbers screen > Bank Transfer. That screen can be opened from Admin folder > Starting Numbers.

This number will also be used to track the transaction later on. - Enter the amount of fund to transfer in the Amount field.
- Enter a description for the Bank Transfer in the Description field.
- In the detail area, enter Transfer From and Transfer To information.
- Transfer From panel
- In the Bank Account field, select the Bank Account where the fund will be coming from.
- The GL Account field will show the GL Account assigned for the selected Bank Account.
- Enter a reference for the transfer from in the Reference field.
- Transfer To panel
- In the Bank Account field, select the Bank Account where the fund will be transferred to.
- The GL Account field will show the GL Account assigned for the selected Bank Account.
- Enter a reference for the transfer to in the Reference field.
Make sure that the bank account you want to use for the bank transfer - Transfer From and Transfer To had been added in the Bank Accounts screen. If not, see How to Add new Bank Account to guide you on how to add it.
- Transfer From panel
Click Save toolbar button to save the bank transfer.

The Record No field will then show the bank transfer number assigned for this transaction.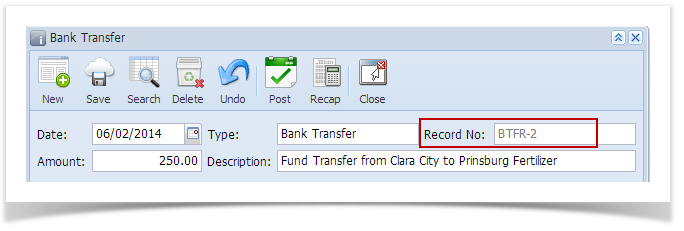
If the transaction is to be posted right away, you may skip saving it. Instead, click Post toolbar button and it will save and post the transaction. See How to Post Bank Transfer.
Click Close toolbar button to close the screen.

Overview
Content Tools