1. Log in as Admin user
  2. On user’s menu panel, go to System Manager folder then click Custom Tab Designer
  3. From Search Custom Field screen, click New toolbar button to open a new Custom Tab Designer screen 

  4. Select values on the header fields (Screen NameTab NameLayoutDescription

    Field Name
    Description
    Screen NameA combo box that will list all the screens in i21.
    ModuleA read-only field displaying the module the selected Screen belongs to.
    Tab NameThe name of the Tab where the custom fields will be displayed.
    LayoutA combo box displaying 3 layout options (1 Column, 2 Columns or 3 Columns). This will determine the number of columns the Tab will display.
    DescriptionA detailed description of the custom fields.


    (info)  Module field is automatically filled with the module parent of the selected Screen Name.

  5. Select/enter details on the grid (Control Name, Type, Action, Flex, and Location)


    (info) Control Type is automatically filled when a Field Type is selected. A Text type can be a Text Box, Text Area, or a Combo box.

    Control NameThe name of the custom field that will be displayed as the label.
    TypeA combo box displaying a list of Field Types to choose from. This list should include the following:
    • Text Box
    • Text Area
    • Combo box
    • Grid
    • Integer
    • Decimal
    • Date
    • Checkbox
    Action

    Shows Create/Edit button for combo box and grid types

    FlexDefines how much space the control will take up
    LocationA combo box displaying the Layout options. For example, if they user selected 2 Columns layout then the Location combo should list (Column 1 and Column 2). 
    This will determine which column the selected field will be displayed on the tab. 
  6. Click Save toolbar button once done

Users can preview how the fields will look by going to the Preview tab

  1. Log in as Admin user
  2. On user’s menu panel, go to System Manager folder then click Custom Fields
  3. From Search Custom Field screen, click New toolbar button to open a new Custom Fields screen 

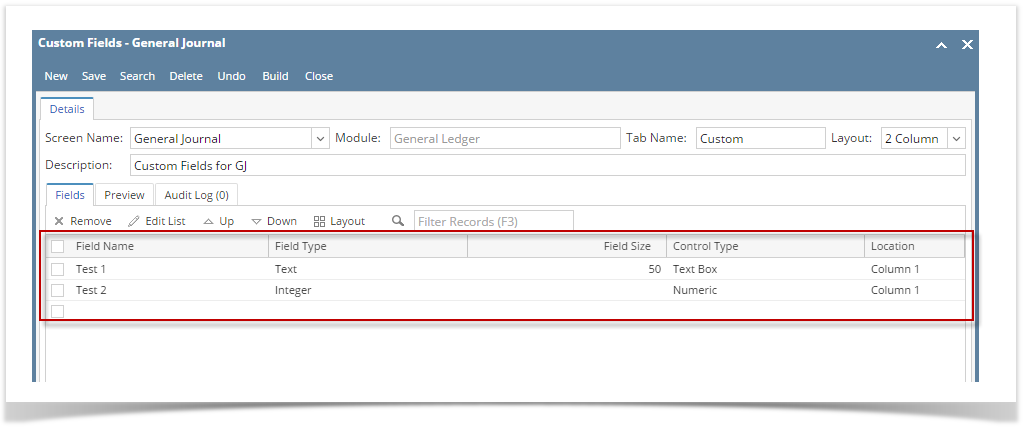
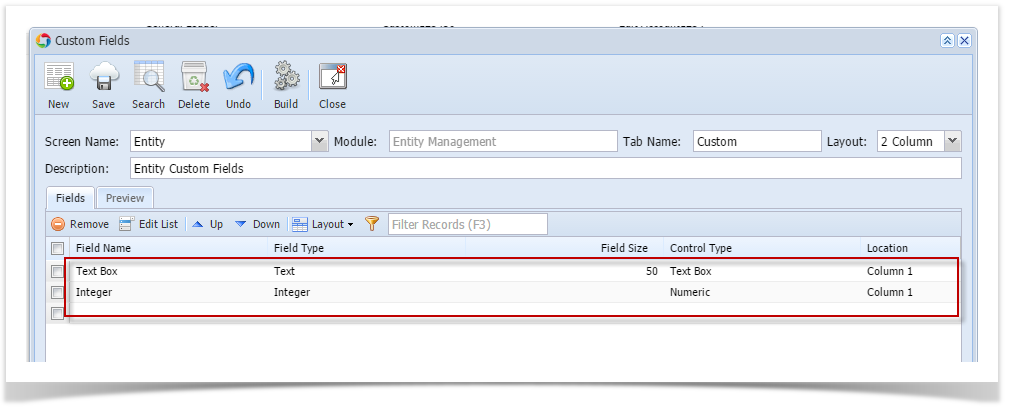
  4. Select values on the header fields (Screen NameTab NameLayoutDescription

    (info)  Module field is automatically filled with the module parent of the selected Screen Name.

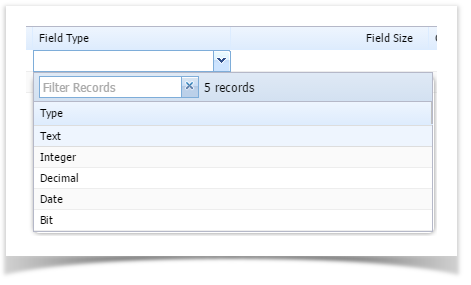
  5. Select/enter details on the grid (Field NameField TypeField SizeControl Type, and Location)

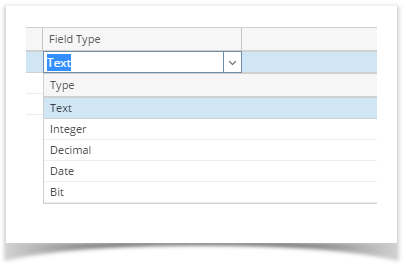
    Field Types can be any of the following:

    (info) Control Type is automatically filled when a Field Type is selected. A Text type can be a Text Box, Text Area, or a Combo box.
  6. Click Save toolbar button once done

Users can preview how the fields will look by going to the Preview tab


  1. Log in as Admin user
  2. On user’s menu panel, go to System Manager folder then click Custom Fields
  3. From Search Custom Field screen, click New toolbar button to open a new Custom Fields screen 

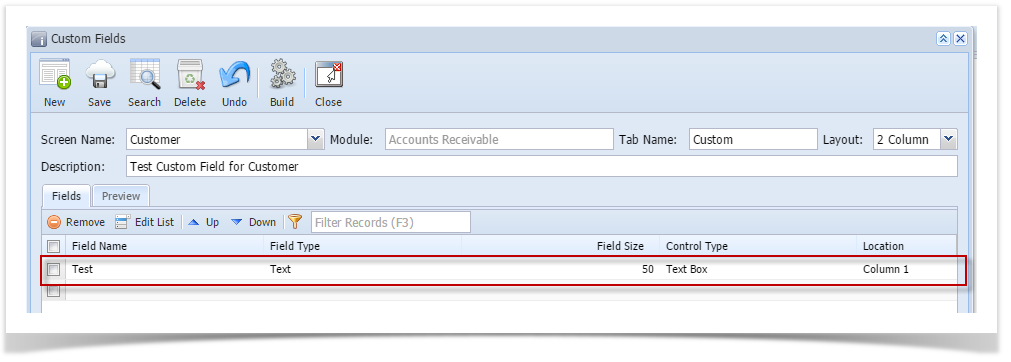
  4. Select values on the header fields (Screen NameTab NameLayoutDescription

    (info)  Module field is automatically filled with the module of the selected Screen Name.

  5. Select/enter details on the grid (Field NameField TypeField SizeControl Type, and Location)

    Field Types can be any of the following:

    (info) Control Type is automatically filled when a Field Type is selected. A Text type can be a Text Box, Text Area, or a Combo box.
  6. Click Save toolbar button once done
  1. Log in as Admin user
  2. Expand Admin folder then double click Custom fields.
    1. If there are existing records, Search Custom Field screen will open
    2. If there is no existing record, the new Custom Fields screen will open
  3. From Search Custom Field screen, click New toolbar button to open a new Custom Fields screen 

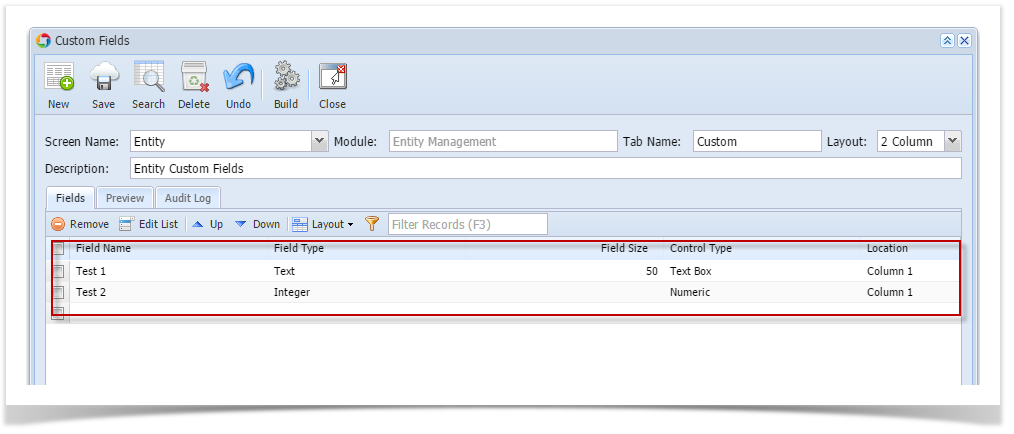
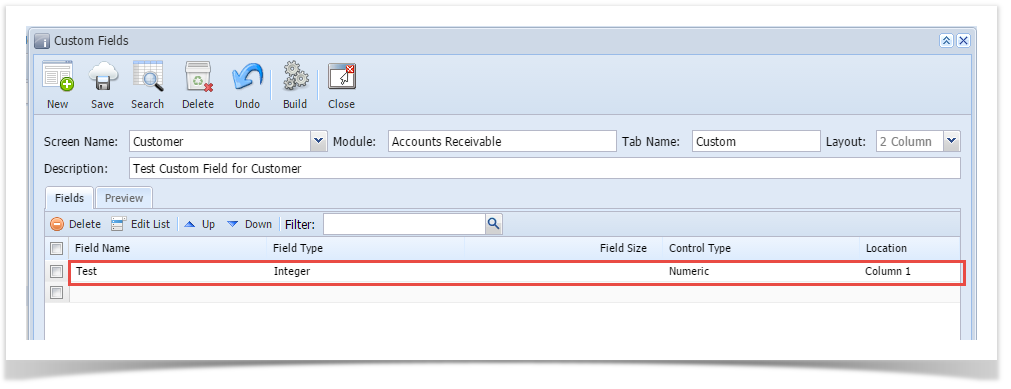
  4. Select values on the header fields (Screen NameTab NameLayoutDescription

    (info)  Module field is automatically filled with the module of the selected Screen Name.

  5. Select/enter details on the grid (Field NameField TypeField SizeControl Type, and Location)

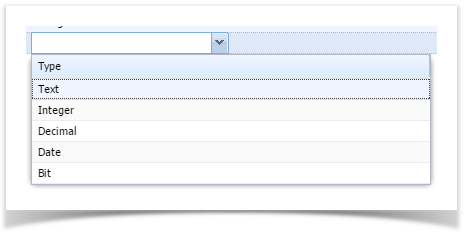
    Field Types can be any of the following:

    (info) Control Type is automatically filled when a Field Type is selected. A Text type can be a Text Box, Text Area, or a Combo box.
  6. Click Save toolbar button once done


  • No labels