This will guide you on how to setup your bank statement in the Bank File Formats screen and import the Bank Statement based on that setup to mark transactions cleared by the bank.
- From Cash Management module > click on Bank File Formats menu.
- If this is the first record you are to create, it will open directly on new Bank File Formats screen where you can then add the bank file format record. Otherwise, it will open the Search Bank File Formats screen where existing bank file formats are displayed. Click the New toolbar button to open the new Bank File Formats screen.
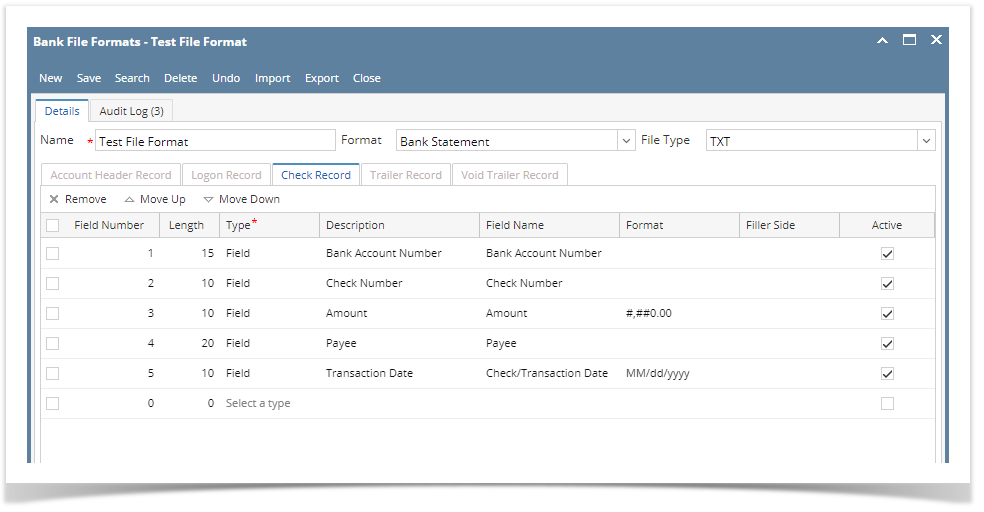
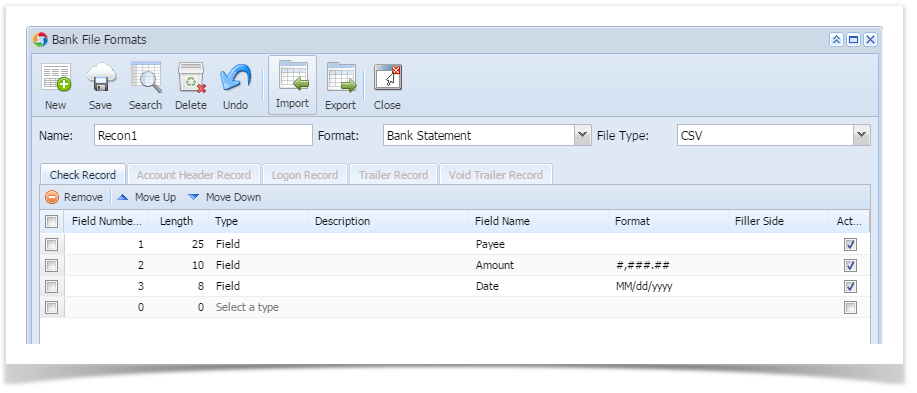
- In the new Bank File Formats screen,
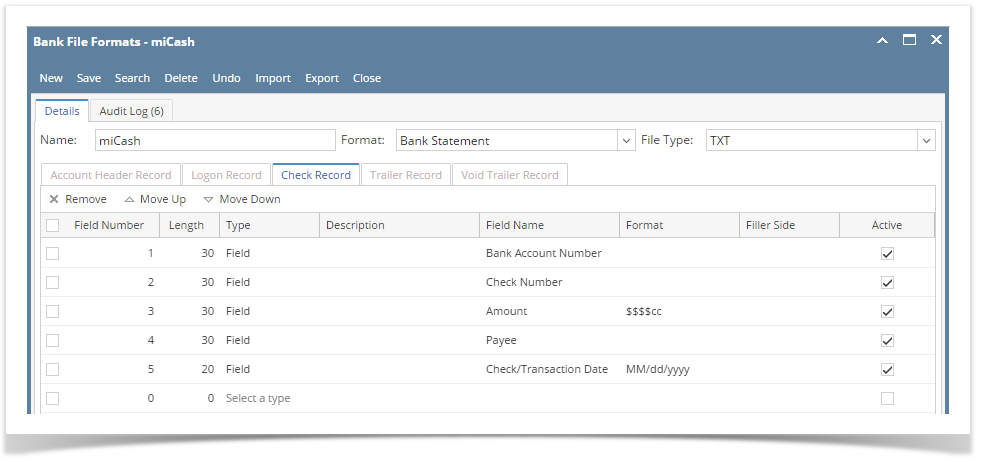
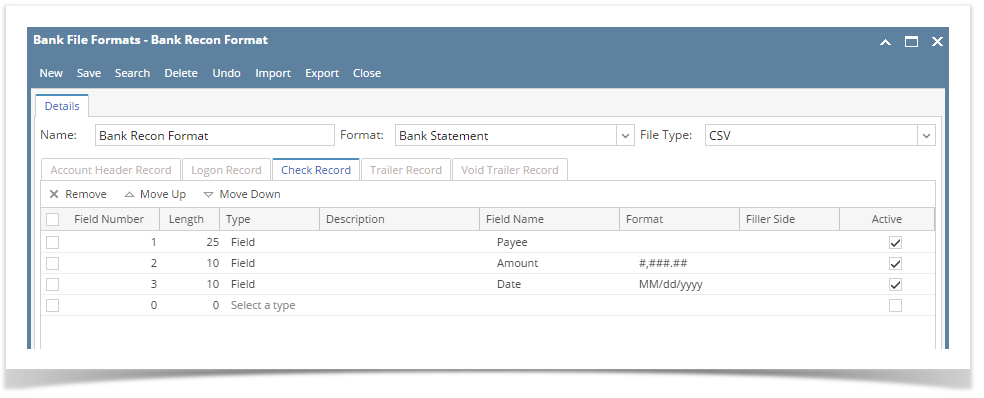
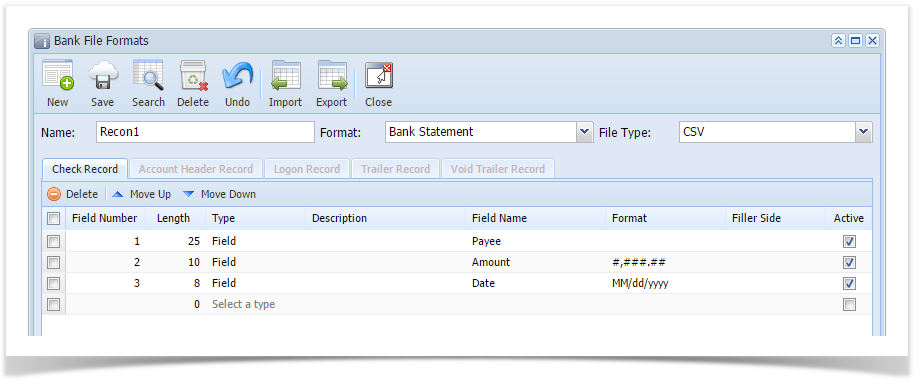
- Type in the Name you would like to call that Bank File Formats record in the Name field.
- In the Format combo box field select Bank Statement.
- In the File Type combo box field select CSV.
- In the grid area > Check Record tab, specify your bank statement setup. This is a sample of how your setup would be.
- Click Save toolbar button to save the bank file format record.
- Click Close toolbar button to close the screen.
- Open the bank account you will want to make a bank reconciliation.
- From Cash Management module > click on Bank Accounts menu.
- When Search Bank Accounts screen opens, select the bank account you will want to make a bank reconciliation and click Open Selected toolbar button.
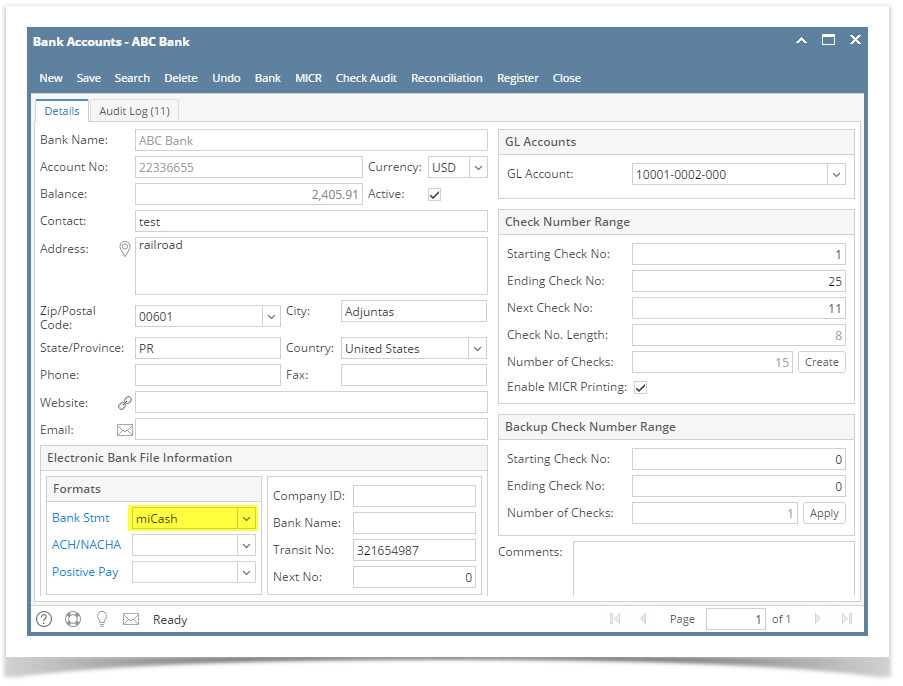
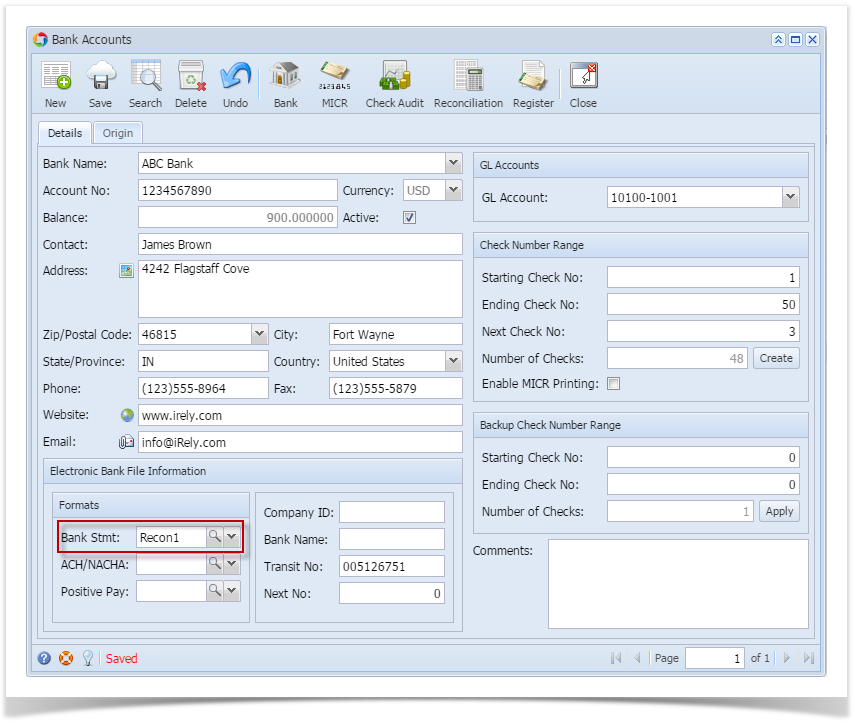
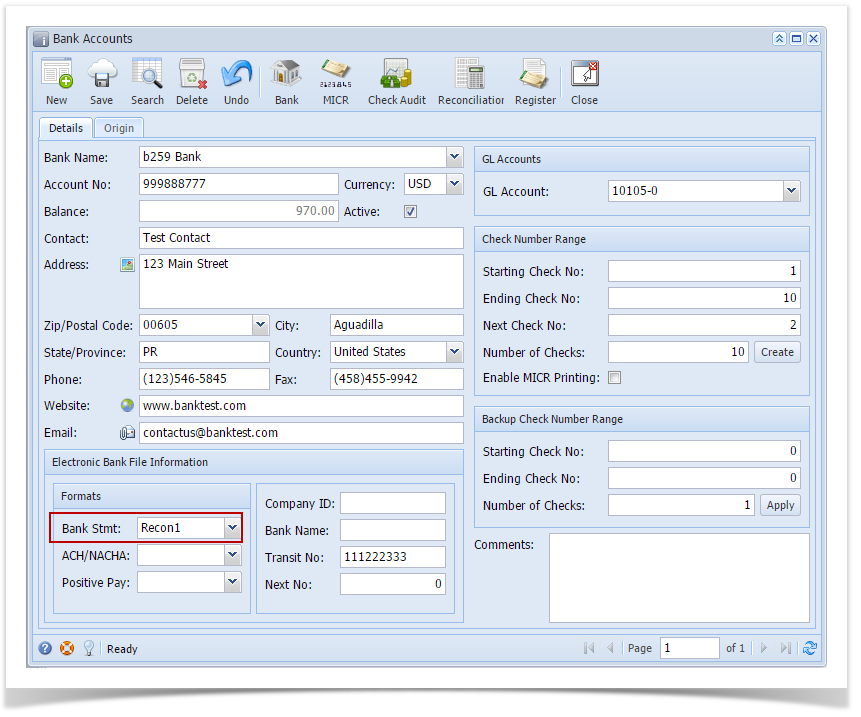
- Bank Accounts screen opens displaying the selected record. In the Electronic Bank File Information panel > select the bank statement setup from the Bank File Formats screen. The one created on Step 3.
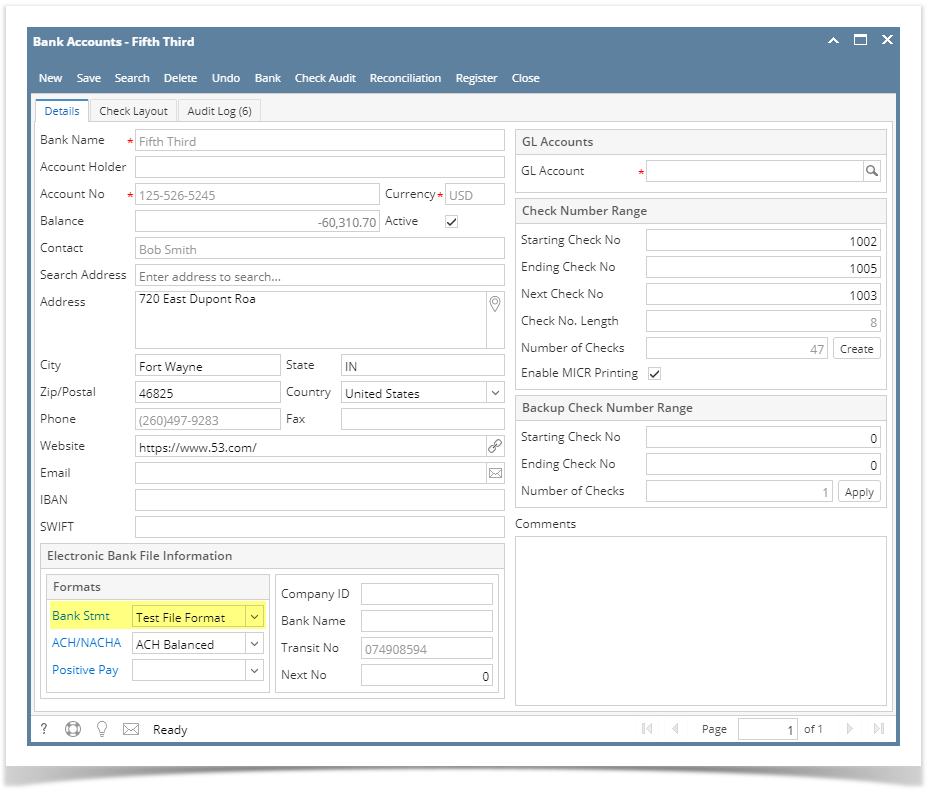
- Click Save toolbar button to save the changes made.
- Click Close toolbar button to close the screen.
- Open the Bank Reconciliation screen.
- From Cash Management module > Activities folder > double-click on Bank Reconciliation menu.
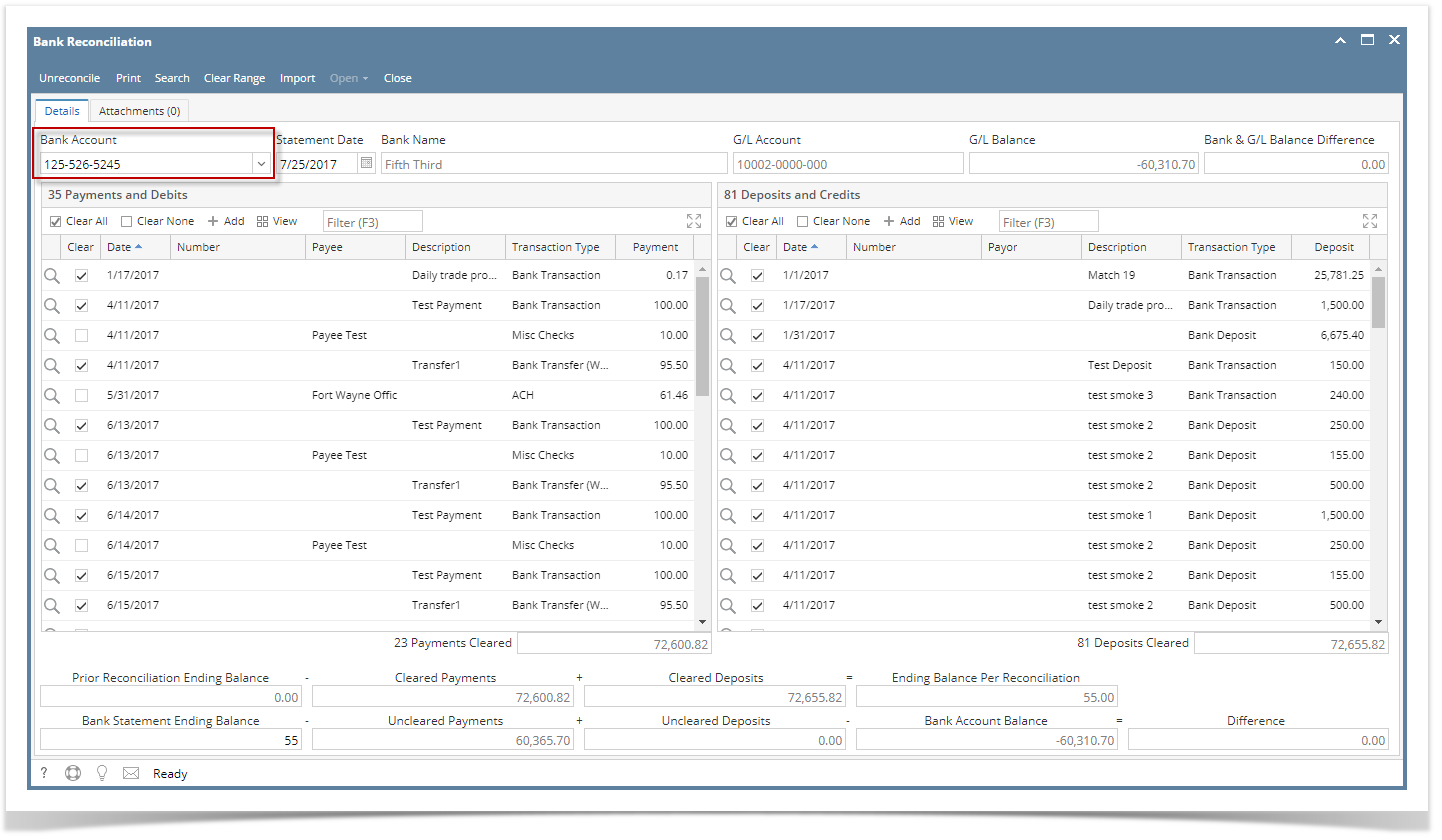
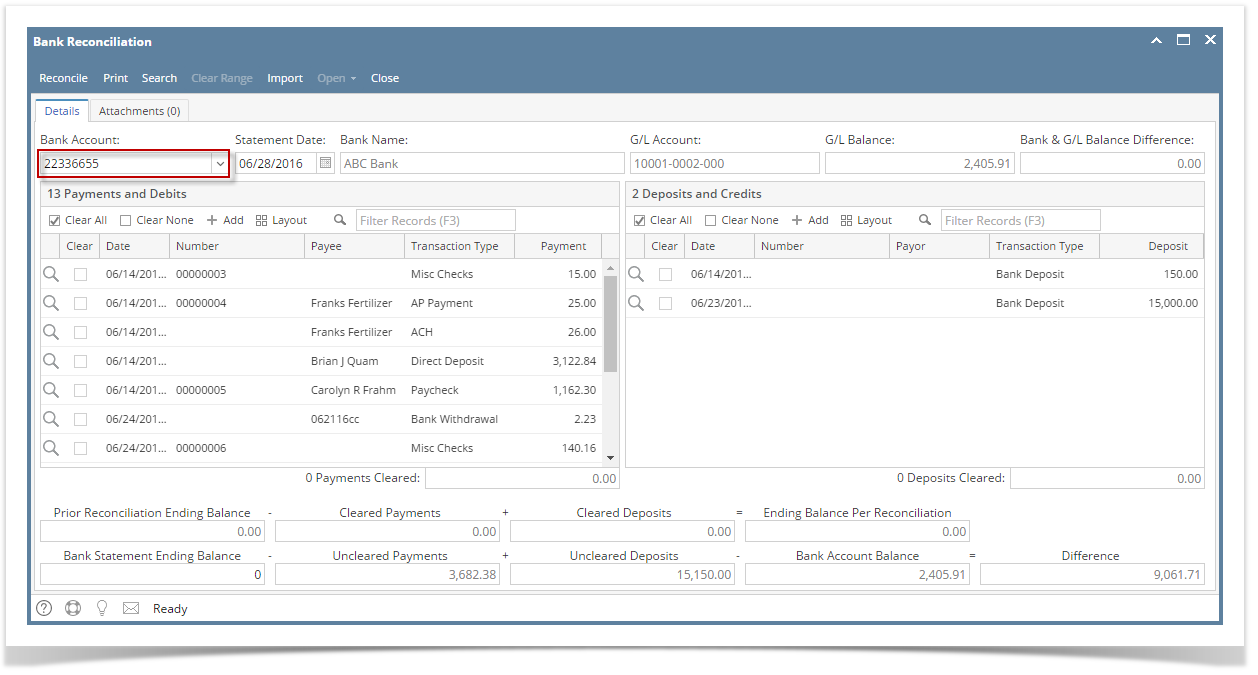
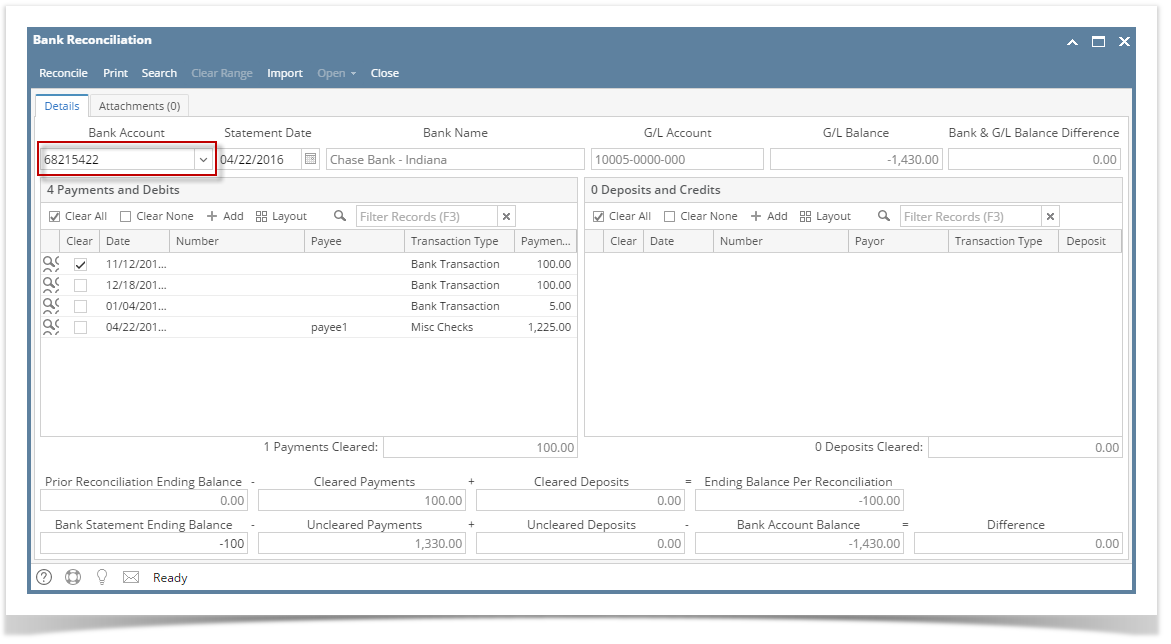
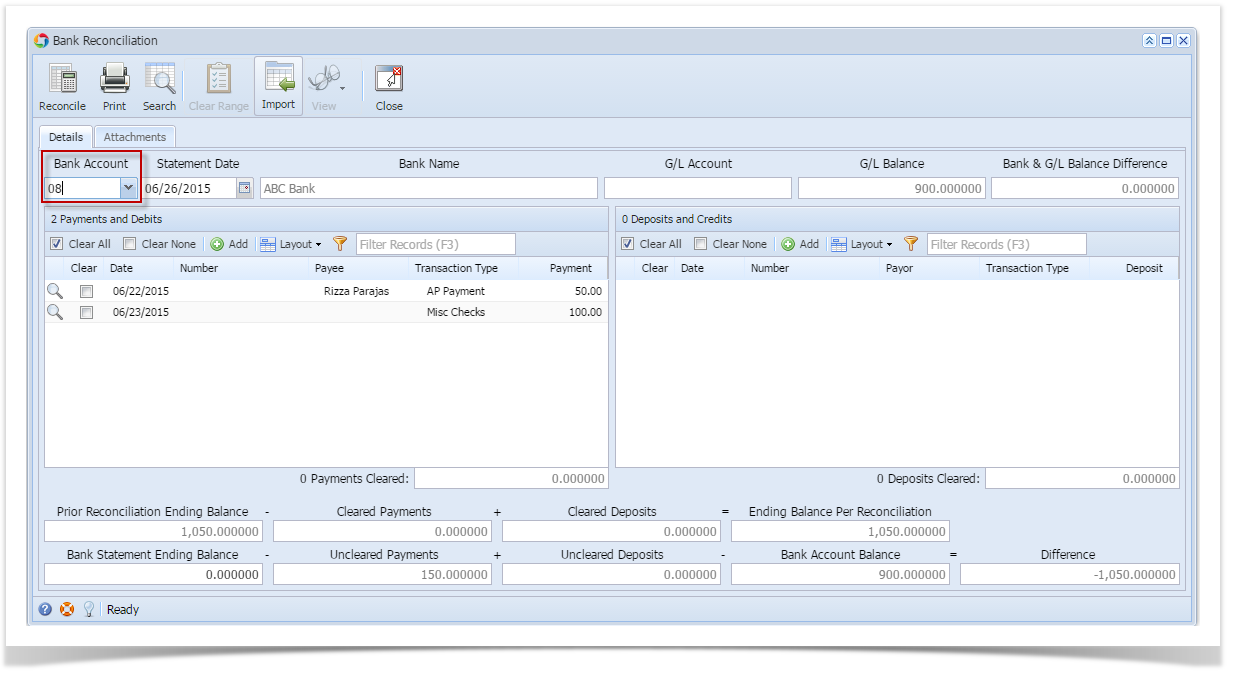
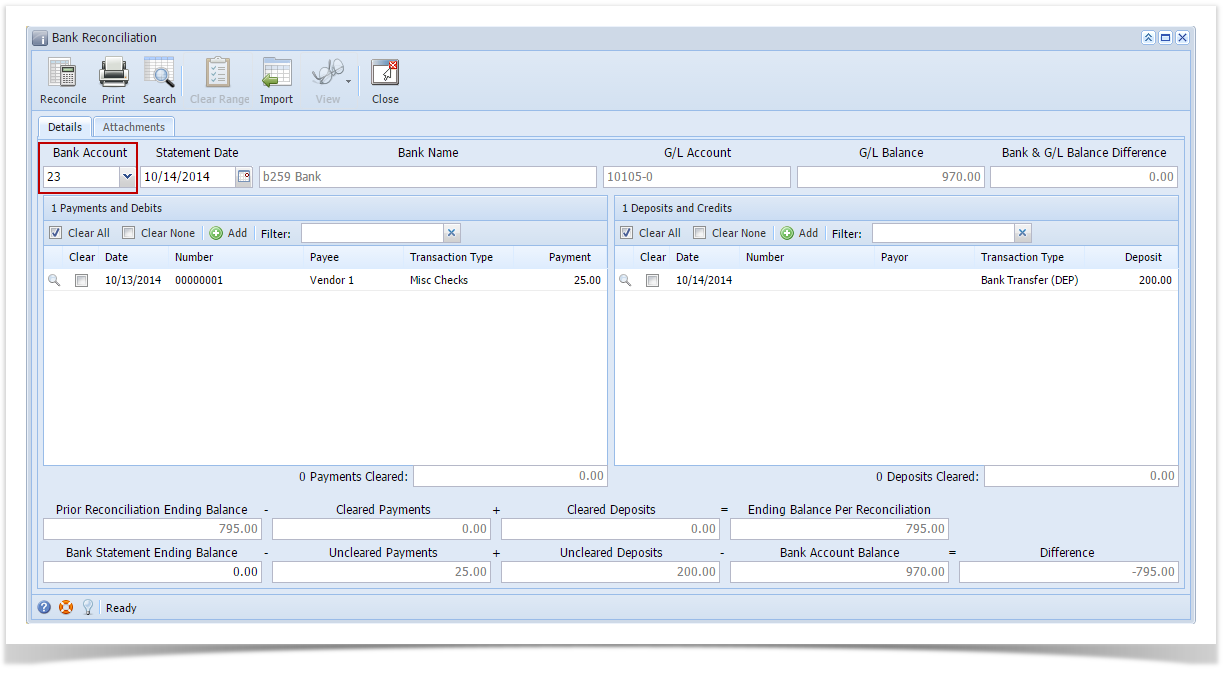
- Bank Reconciliation screen opens.
- In the Bank Account field select the bank account you will want to make a bank reconciliation.
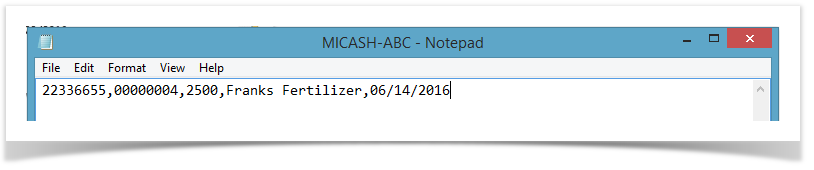
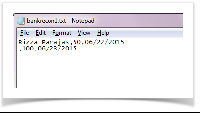
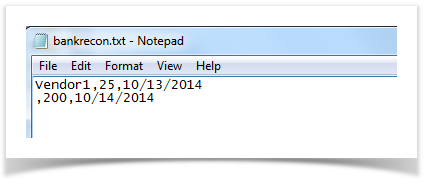
- Say this is the bank reconciliation file to import.
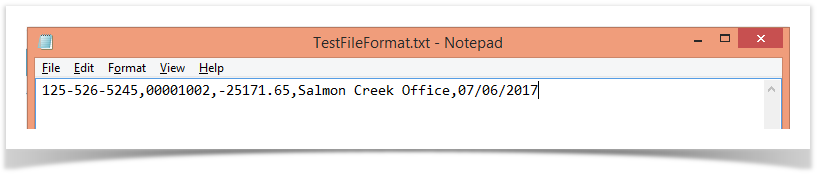
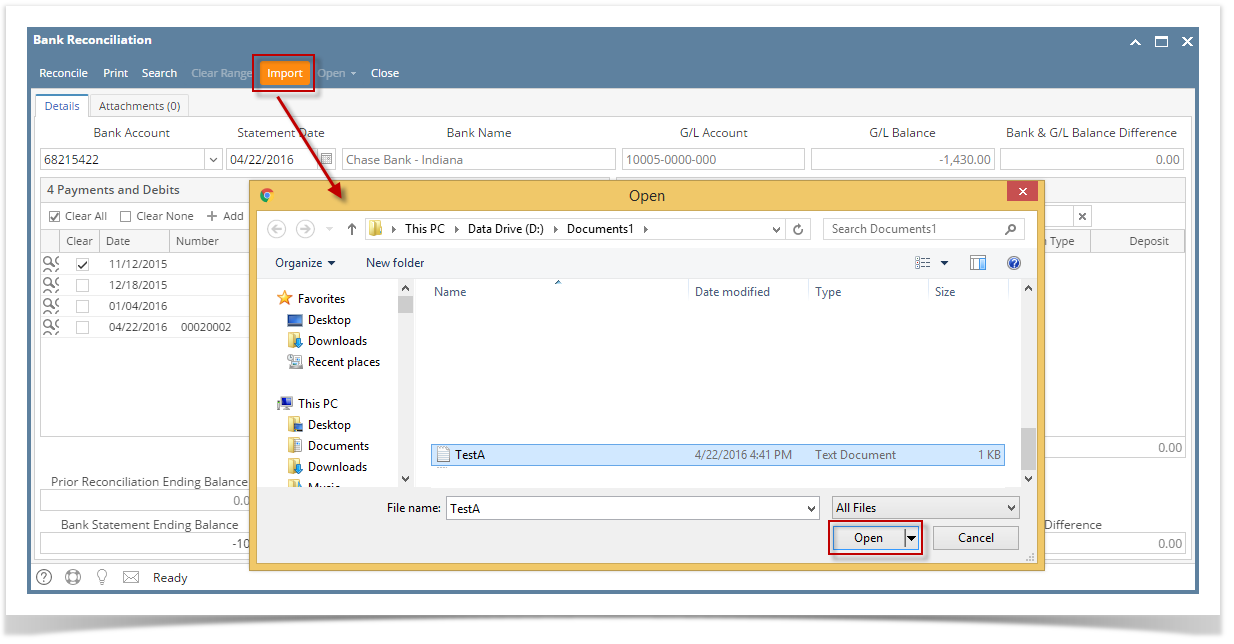
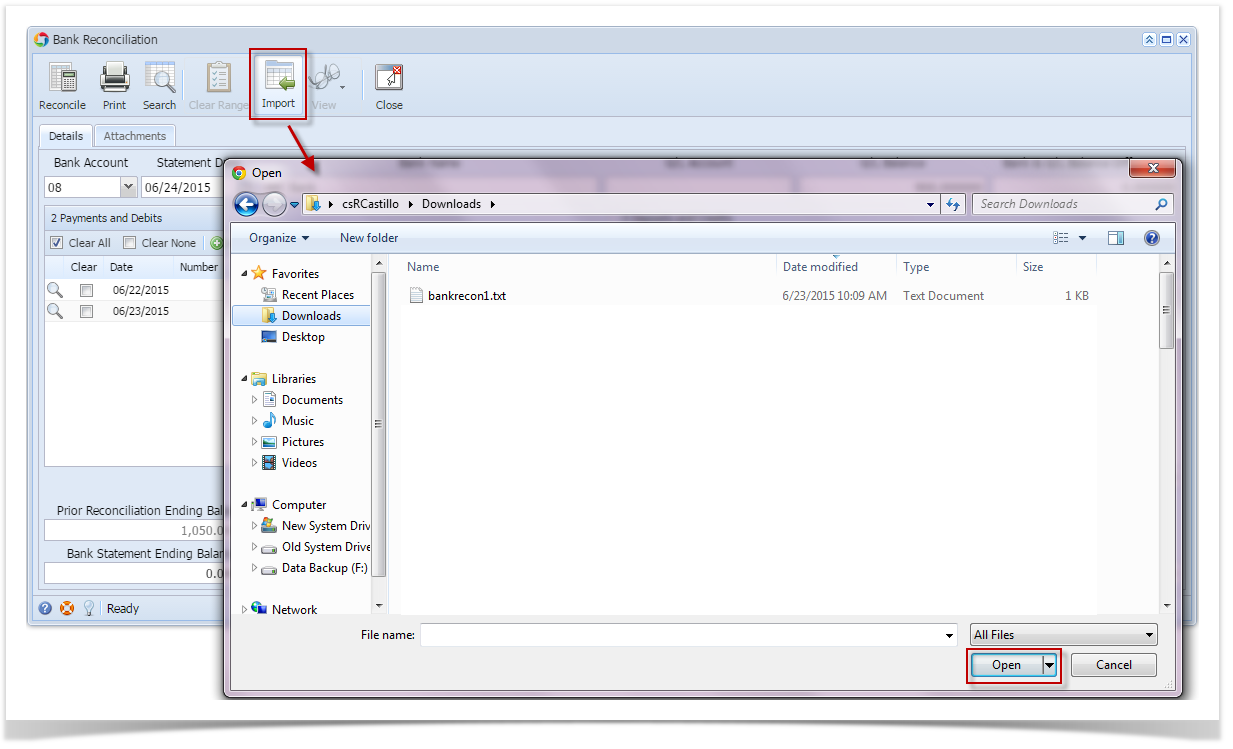
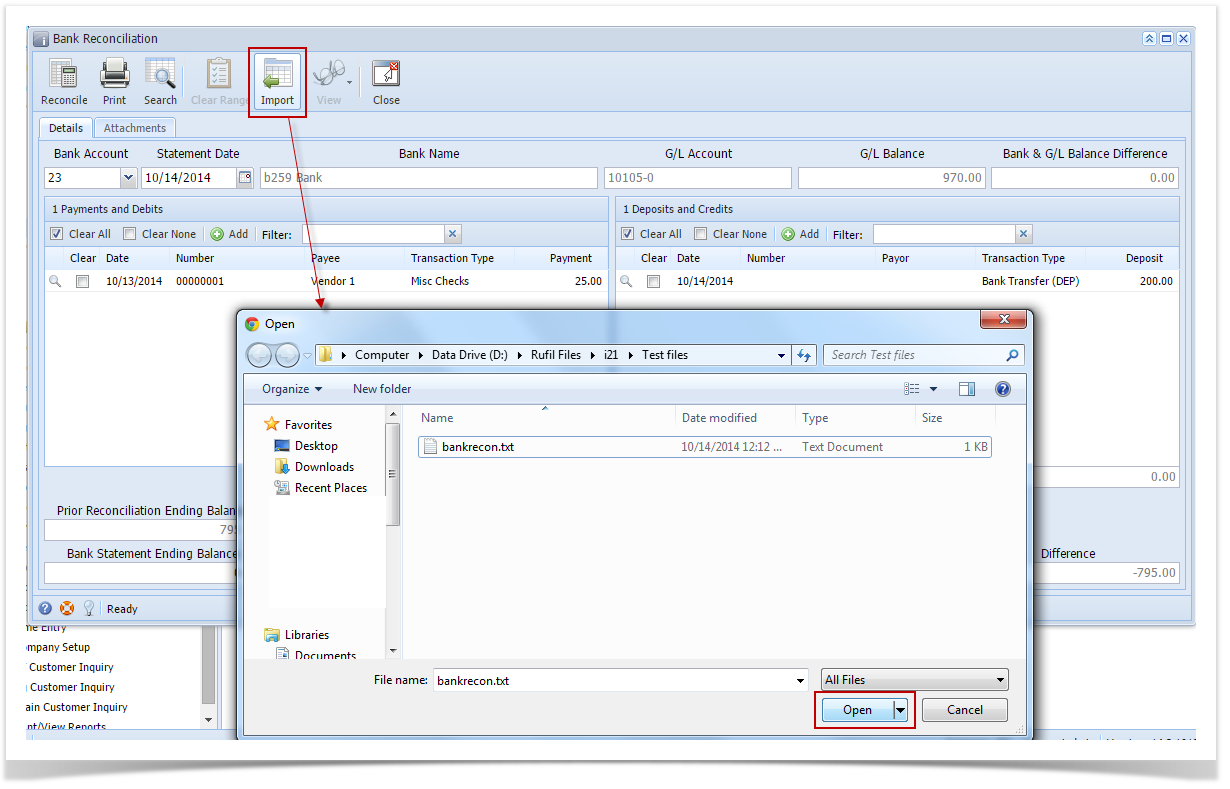
- Click Import toolbar button and select the file mentioned on Step 5.d. Then click Open button on the lookup screen.
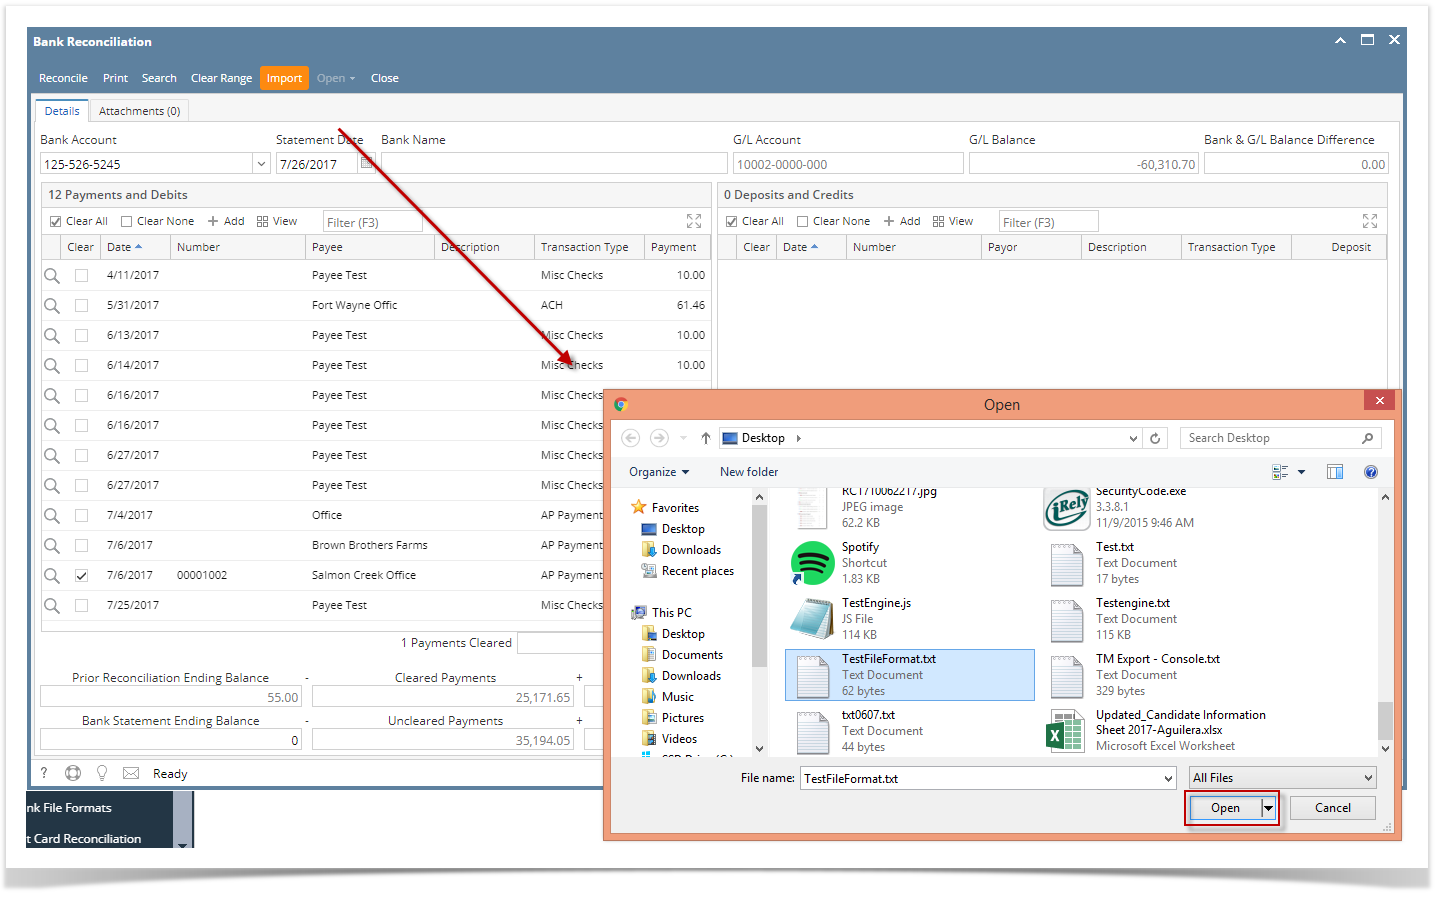
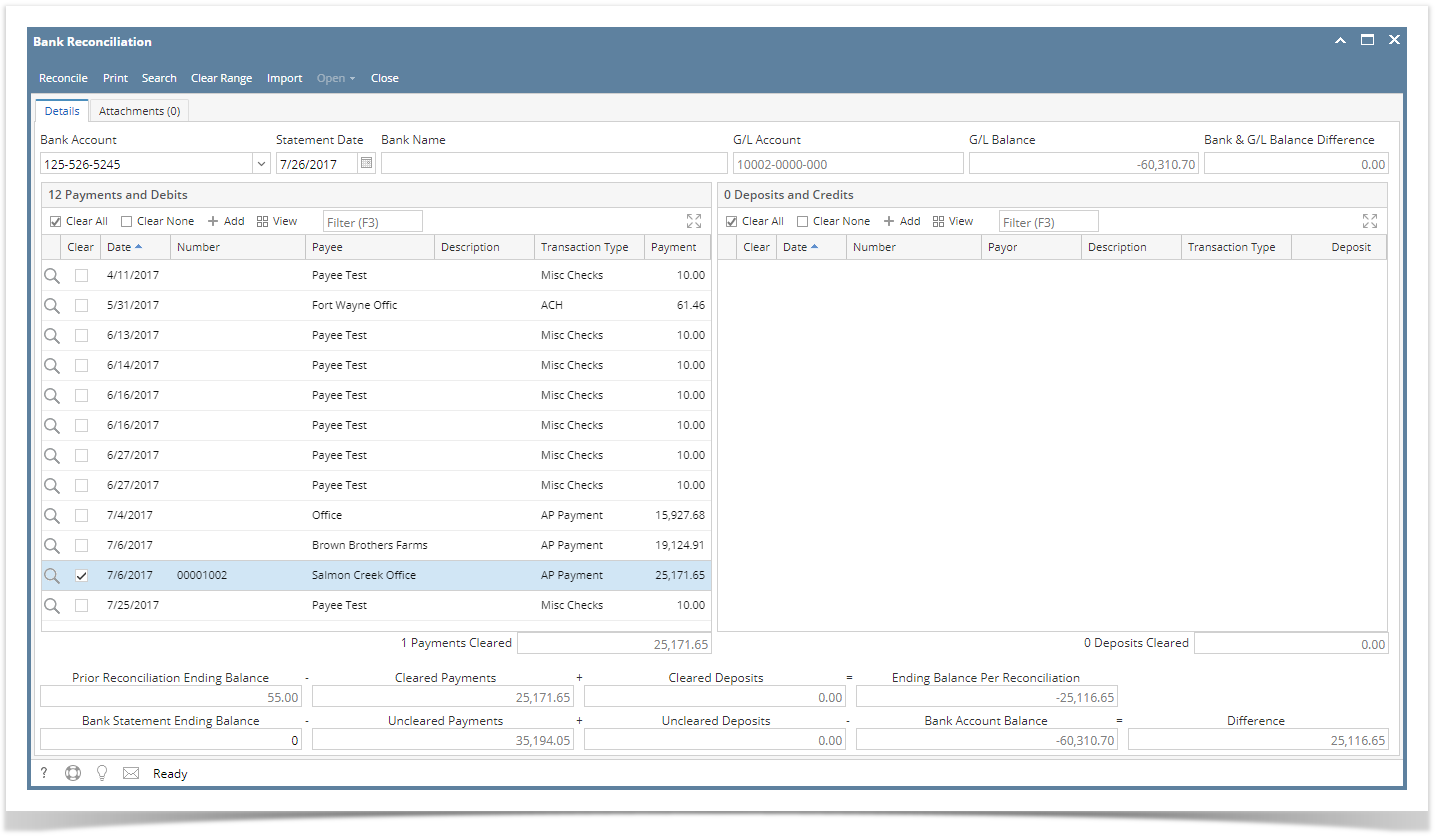
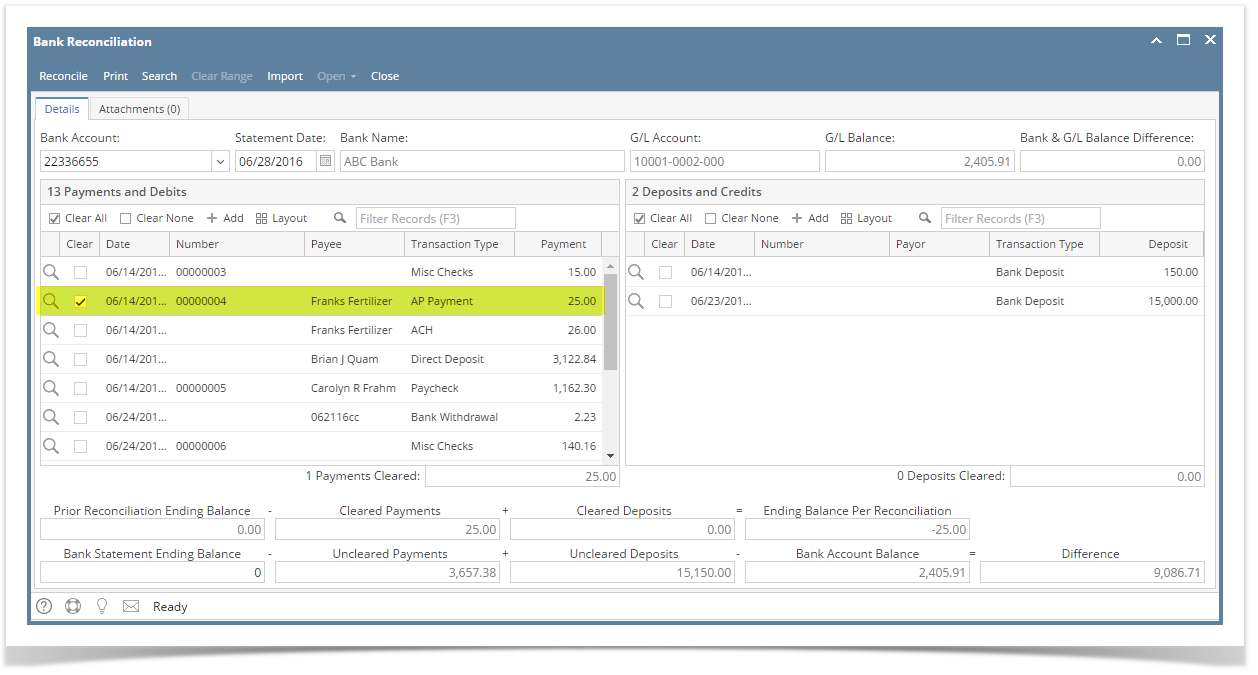
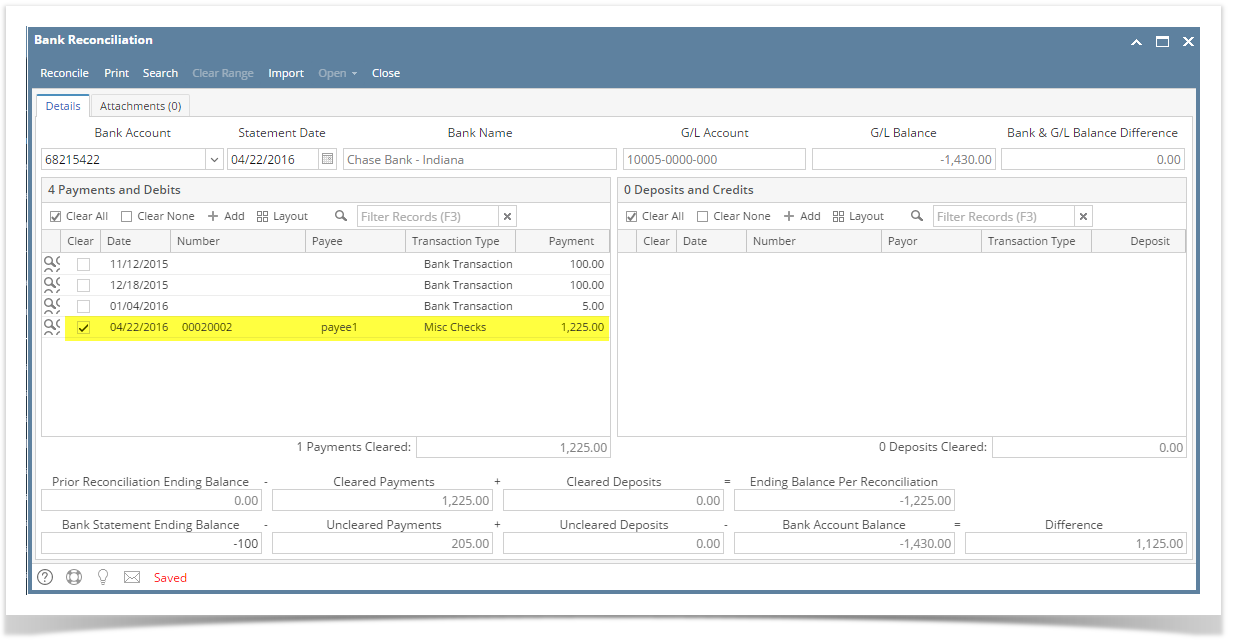
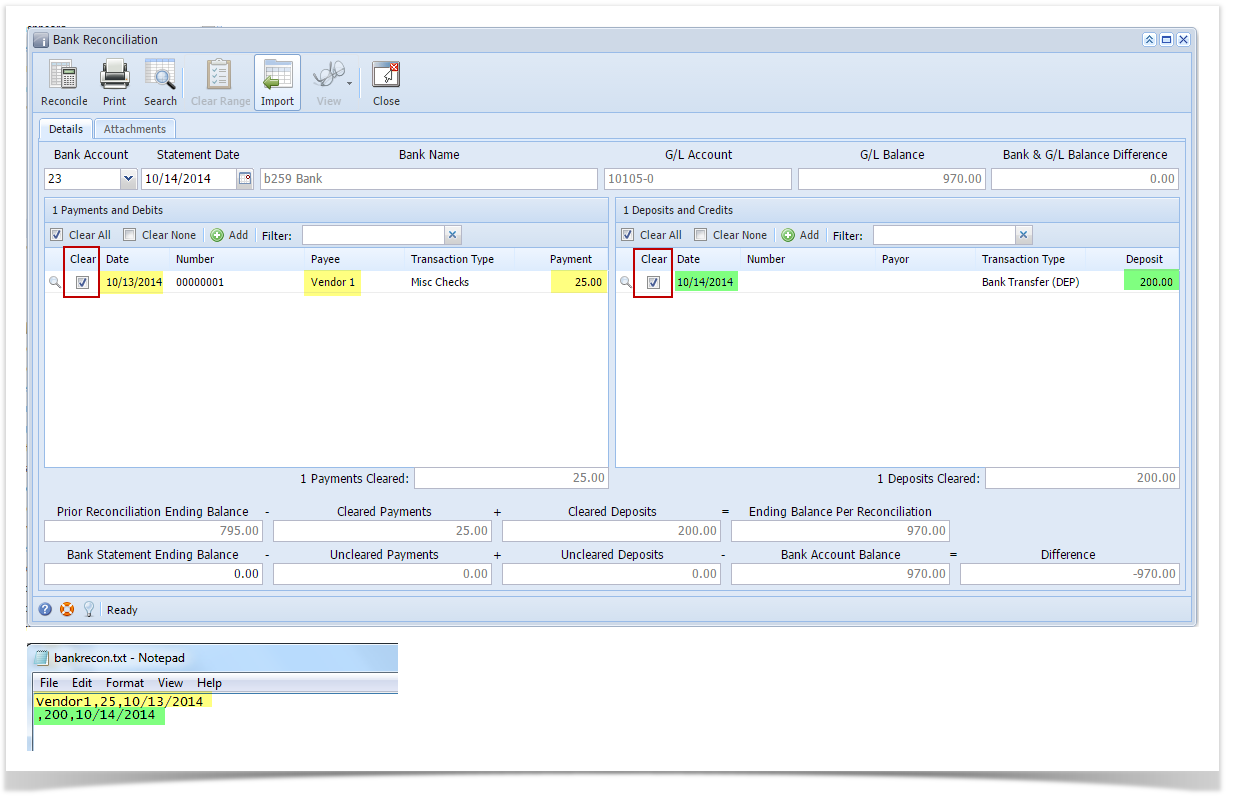
- A progress bar will be shown to show the progress of selecting transactions to clear base on the imported file. Once it is done, all transactions that matched the Bank Statement file imported will show the Clear checkbox as checked.
This will guide you on how to setup your bank statement in the Bank File Formats screen and import the Bank Statement based on that setup to mark transactions cleared by the bank.
- From Cash Management module > click on Bank File Formats menu.
- If this is the first record you are to create, it will open directly on new Bank File Formats screen where you can then add the bank file format record. Otherwise, it will open the Search Bank File Formats screen where existing bank file formats are displayed. Click the New toolbar button to open the new Bank File Formats screen.
- In the new Bank File Formats screen,
- Type in the Name you would like to call that Bank File Formats record in the Name field.
- In the Format combo box field select Bank Statement.
- In the File Type combo box field select CSV.
- In the grid area > Check Record tab, specify your bank statement setup. This is a sample of how your setup would be.
- Click Save toolbar button to save the bank file format record.
- Click Close toolbar button to close the screen.
- Open the bank account you will want to make a bank reconciliation.
- From Cash Management module > click on Bank Accounts menu.
- When Search Bank Accounts screen opens, select the bank account you will want to make a bank reconciliation and click Open Selected toolbar button.
- Bank Accounts screen opens displaying the selected record. In the Electronic Bank File Information panel > select the bank statement setup from the Bank File Formats screen. The one created on Step 3.
- Click Save toolbar button to save the changes made.
- Click Close toolbar button to close the screen.
- Open the Bank Reconciliation screen.
- From Cash Management module > Activities folder > double-click on Bank Reconciliation menu.
- Bank Reconciliation screen opens.
- In the Bank Account field select the bank account you will want to make a bank reconciliation.
- Say this is the bank reconciliation file to import.
- Click Import toolbar button and select the file mentioned on Step 5.d. Then click Open button on the lookup screen.

- A progress bar will be shown to show the progress of selecting transactions to clear base on the imported file. Once it is done, all transactions that matched the Bank Statement file imported will show the Clear checkbox as checked.
- From Cash Management module > click on Bank File Formats menu.
- If this is the first record you are to create, it will open directly on new Bank File Formats screen where you can then add the bank file format record. Otherwise, it will open the Search Bank File Formats screen where existing bank file formats are displayed. Click the New toolbar button to open the new Bank File Formats screen.
- In the new Bank File Formats screen,
- Type in the Name you would like to call that Bank File Formats record in the Name field.
- In the Format combo box field select Bank Statement.
- In the File Type combo box field select CSV.
- In the grid area > Check Record tab, specify your bank statement setup. This is a sample of how your setup would be.
- Click Save toolbar button to save the bank file format record.
- Click Close toolbar button to close the screen.
- Open the bank account you will want to make a bank reconciliation.
- From Cash Management module > click on Bank Accounts menu.
- When Search Bank Accounts screen opens, select the bank account you will want to make a bank reconciliation and click Open Selected toolbar button.
- Bank Accounts screen opens displaying the selected record. In the Electronic Bank File Information panel > select the bank statement setup from the Bank File Formats screen. The one created on Step 3.
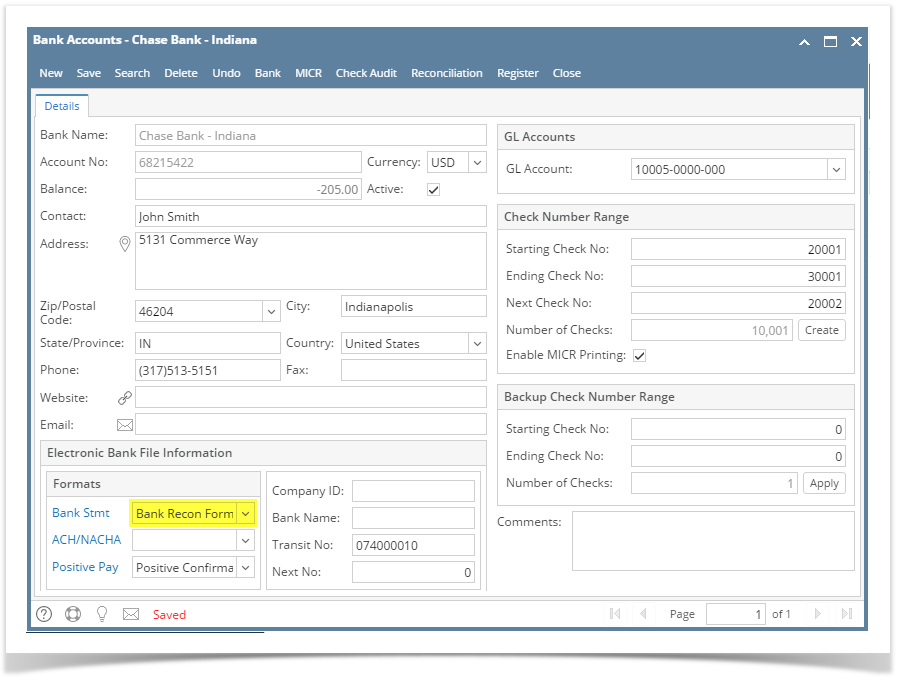
- Click Save toolbar button to save the changes made.
- Click Close toolbar button to close the screen.
- Open the Bank Reconciliation screen.
- From Cash Management module > Activities folder > double-click on Bank Reconciliation menu.
- Bank Reconciliation screen opens.
- In the Bank Account field select the bank account you will want to make a bank reconciliation.
- Say this is the bank reconciliation file to import.

- Click Import toolbar button and select the file mentioned on Step 5.d. Then click Open button on the lookup screen.
- A progress bar will be shown to show the progress of selecting transactions to clear base on the imported file. Once it is done, all transactions that matched the Bank Statement file imported will show the Clear checkbox as checked.
- From Cash Management module > click on Bank File Formats menu.
- If this is the first record you are to create, it will open directly on new Bank File Formats screen where you can then add the bank file format record. Otherwise, it will open the Search Bank File Formats screen where existing bank file formats are displayed. Click the New toolbar button to open the new Bank File Formats screen.
- In the new Bank File Formats screen,
- Type in the Name you would like to call that Bank File Formats record in the Name field.
- In the Format combo box field select Bank Statement.
- In the File Type combo box field select CSV.
- In the grid area > Check Record tab, specify your bank statement setup. This is a sample of how your setup would be.
- Click Save toolbar button to save the bank file format record.
- Click Close toolbar button to close the screen.
- Open the bank account you will want to make a bank reconciliation.
- From Cash Management module > click on Bank Accounts menu.
- When Search Bank Accounts screen opens, select the bank account you will want to make a bank reconciliation and click Open Selected toolbar button.
- Bank Accounts screen opens displaying the selected record. In the Electronic Bank File Information panel > select the bank statement setup from the Bank File Formats screen. The one created on Step 3.
- Click Save toolbar button to save the changes made.
- Click Close toolbar button to close the screen.
- Open the Bank Reconciliation screen.
- From Cash Management module > Activities folder > double-click on Bank Reconciliation menu.
- Bank Reconciliation screen opens.
- In the Bank Account field select the bank account you will want to make a bank reconciliation.
- Say this is the bank reconciliation file to import.
- Click Import toolbar button and select the file mentioned on Step 5.d. Then click Open button on the lookup screen.
A progress bar will be shown to show the progress of selecting transactions to clear base on the imported file. Once it is done, all transactions that matched the Bank Statement file imported will show the Clear checkbox as checked.
This will guide you on how to setup your bank statement in the Bank File Formats screen and import the Bank Statement based on that setup to mark transactions cleared by the bank.
- From Cash Management module > Maintenance folder > double-click on Bank File Formats menu.
- If this is the first record you are to create, it will open directly on new Bank File Formats screen where you can then add the bank file format record. Otherwise, it will open the Search Bank File Formats screen where existing bank file formats are displayed. Click the New toolbar button to open the new Bank File Formats screen.
- In the new Bank File Formats screen,
- Type in the Name you would like to call that Bank File Formats record in the Name field.
- In the Format combo box field select Bank Statement.
- In the File Type combo box field select CSV.
- In the grid area > Check Record tab, specify your bank statement setup. This is a sample of how your setup would be.
- Click Save toolbar button to save the bank file format record.
- Click Close toolbar button to close the screen.
- Open the bank account you will want to make a bank reconciliation.
- From Cash Management module > Maintenance folder > double-click on Bank Accounts menu.
- When Search Bank Accounts screen opens, select the bank account you will want to make a bank reconciliation and click Open Selected toolbar button.
- Bank Accounts screen opens displaying the selected record. In the Electronic Bank File Information panel > select the bank statement setup from the Bank File Formats screen. The one created on Step 3.
- Click Save toolbar button to save the changes made.
- Click Close toolbar button to close the screen.
- Open the Bank Reconciliation screen.
- From Cash Management module > Activities folder > double-click on Bank Reconciliation menu.
- Bank Reconciliation screen opens.
- In the Bank Account field select the bank account you will want to make a bank reconciliation.
- Say this is the bank reconciliation file to import.
- Click Import toolbar button and select the file mentioned on Step 5.d. Then click Open button on the lookup screen.
- A progress bar will be shown to show the progress of selecting transactions to clear base on the imported file. Once it is done, all transactions that matched the Bank Statement file imported will show the Clear checkbox as checked.
Overview
Content Tools