- Click Process Paychecks from Payroll module.
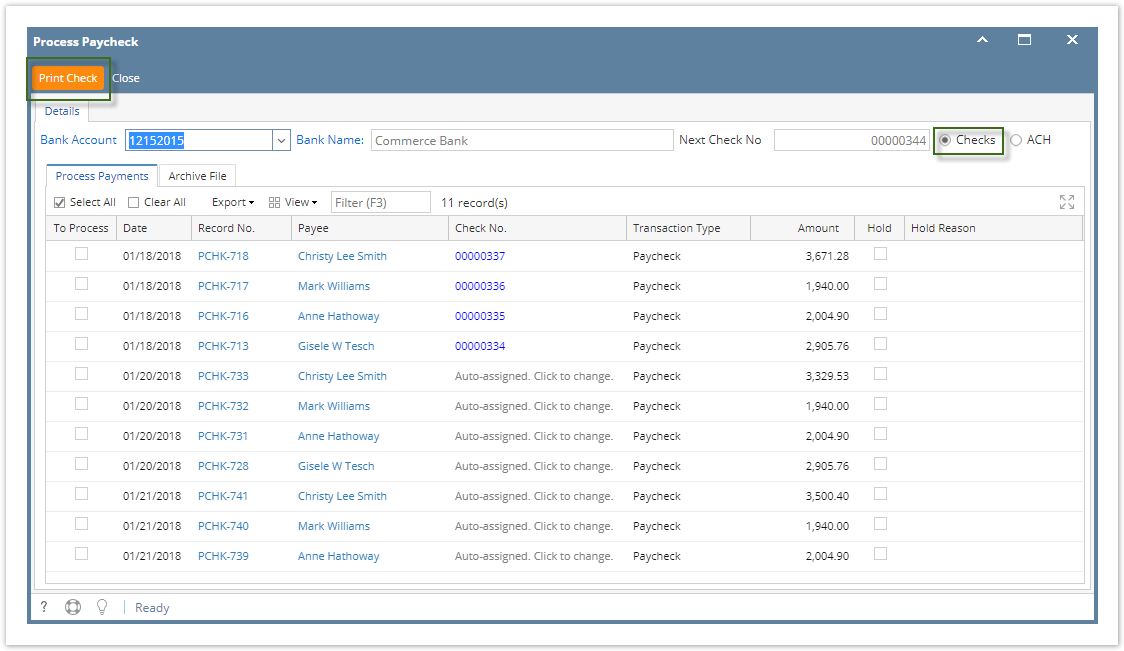
Select Bank Account from the dropdown.
Banks with posted paychecks only will be displayed in the dropdown.
- Checks radio button is selected
Paychecks under the set criteria will automatically populate the grid.
Displayed records should be checked by default.
Click Select All grid icon to check all records for printing.
Click Clear All grid icon to deselect all checked records.
To search for specific criteria, Advance filters can be used.
- Click Preview Check button.
- Report Preview screen will be displayed.
- Click the Print icon
 .
. - Proceed to print the paycheck/s.
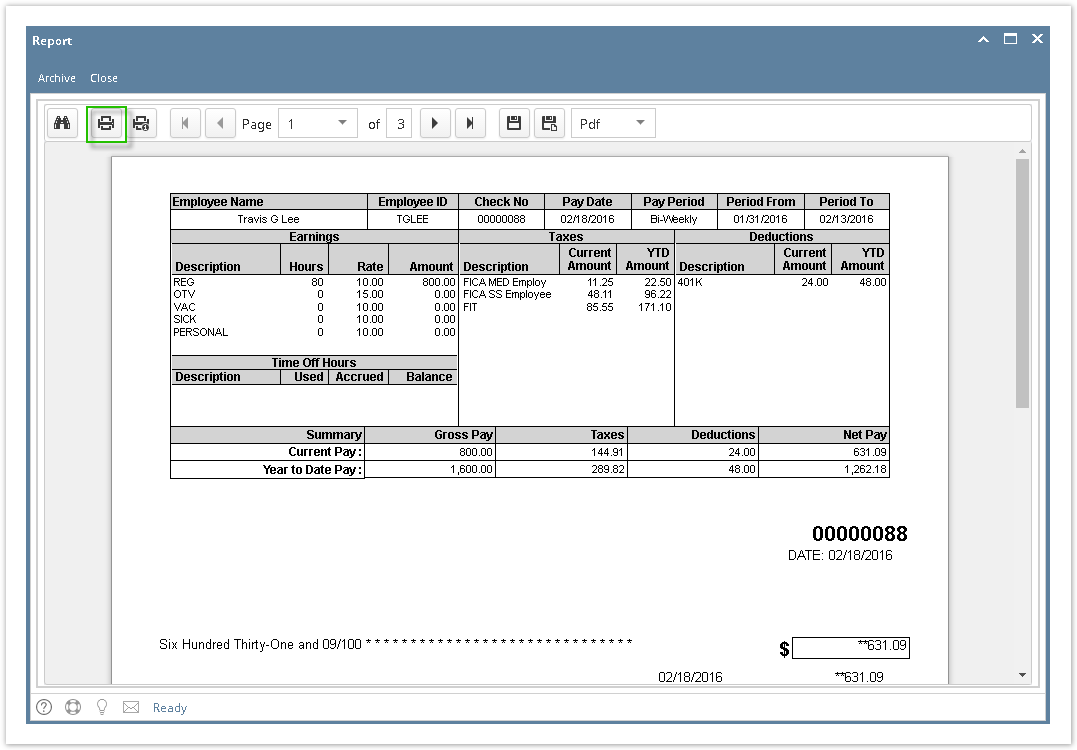
- Paycheck/s are automatically committed and displayed in Archive tab
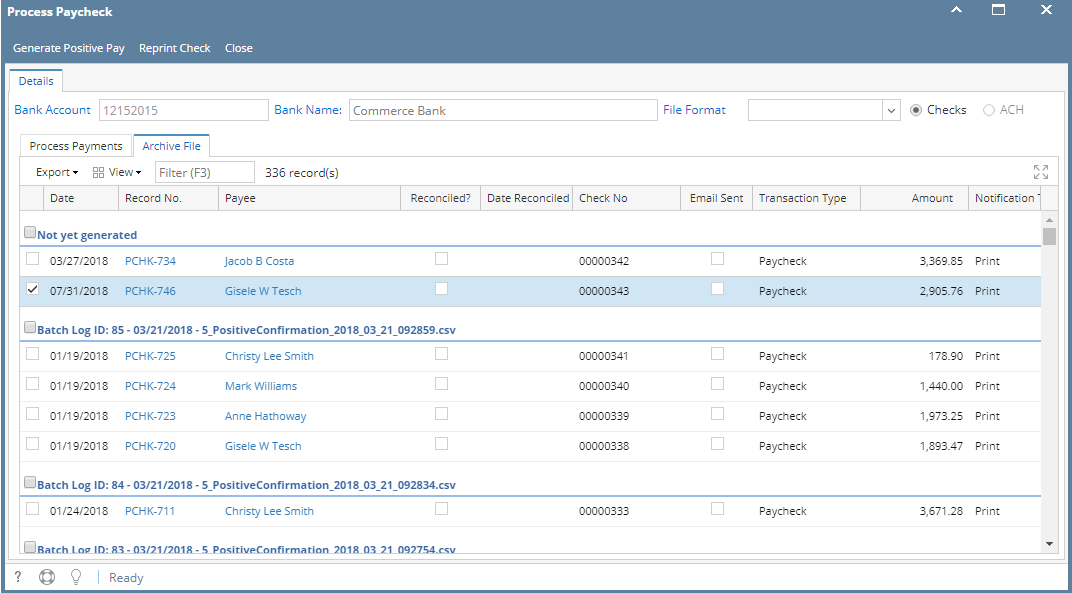
In Archive tab, actions available for the paycheck:
- Generate Positive Pay:
- Select paychecks under Not yet generated group
- Click Generate Positive Pay button
- Positive pay file is generated for the selected paychecks
- Reprint Check:
- Select paychecks to reprint
- Click Reprint Check button
- Report screen is displayed
- Generate Positive Pay:
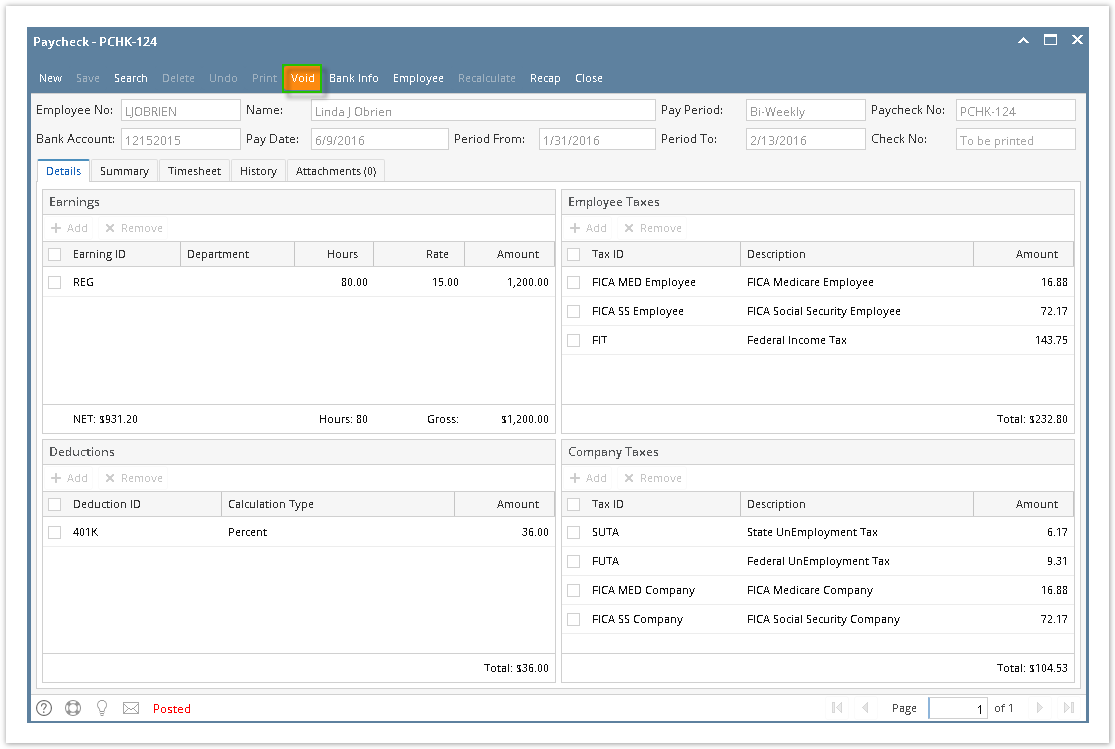
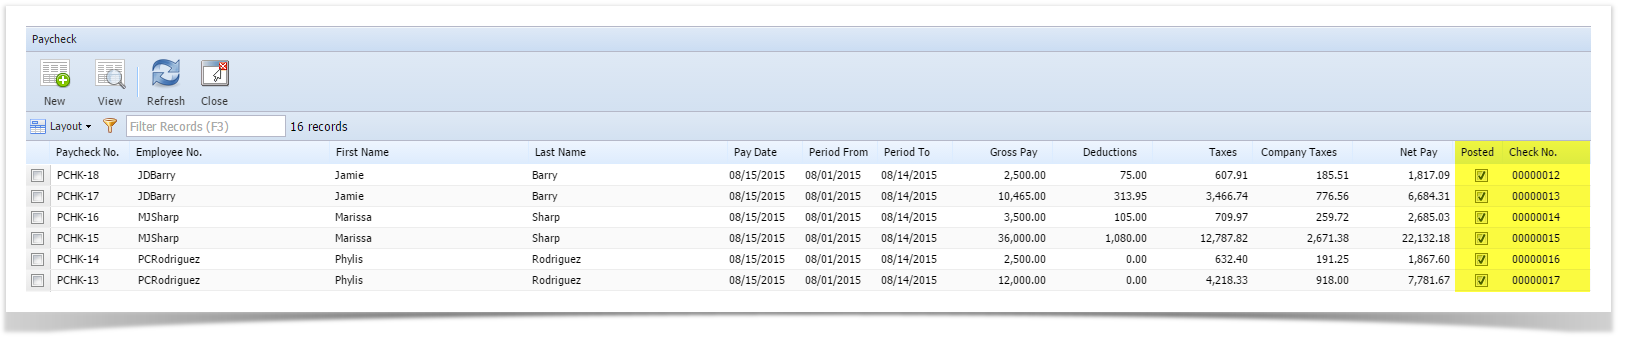
Committed normal paychecks will reflect their check numbers in the column.
Void toolbar button will replace the Post/Unpost toolbar buttons and other buttons will be disabled.
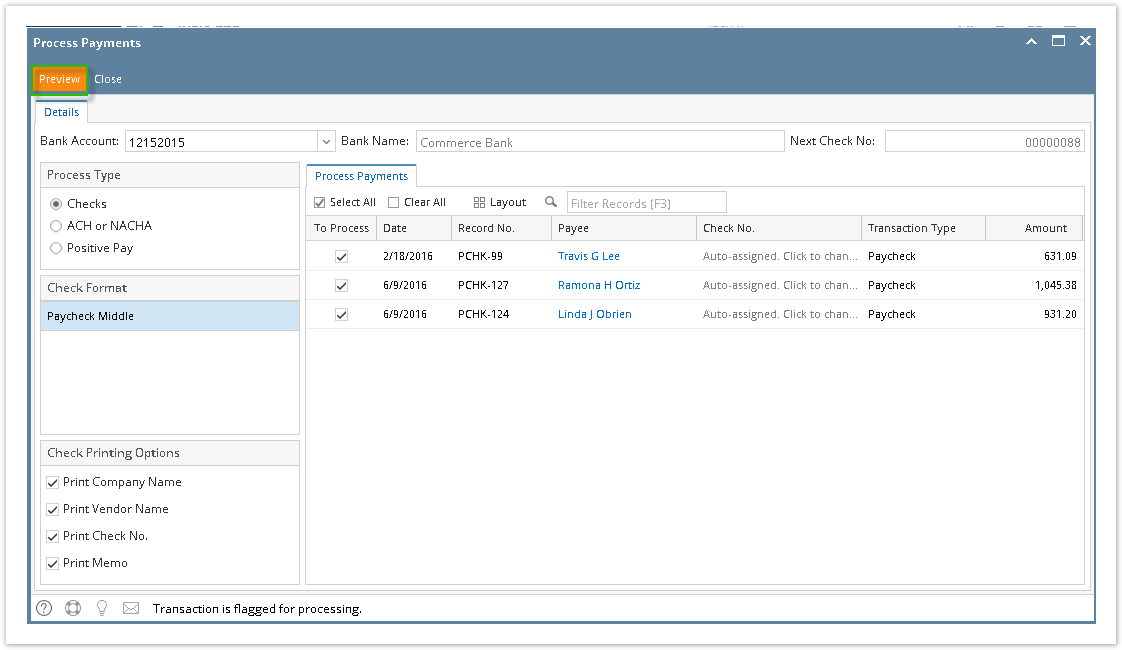
- Click Process Paychecks from Payroll module.
Select Bank Account from the dropdown.
Banks with posted paychecks only will be displayed in the dropdown.
- Select Checks from the Process Type panel.
Paychecks under the set criteria will automatically populate the grid.
Displayed records should be checked by default.
Click Select All grid icon to check all records for printing.
Click Clear All grid icon to deselect all checked records.
To search for specific criteria, Advance filters can be used.
- Click Preview button.
- Report Preview screen will be displayed.
- Click the Print icon
 .
. - Proceed to print the paycheck/s.
- Return to Print Check Verification screen.
Click Commit toolbar button.
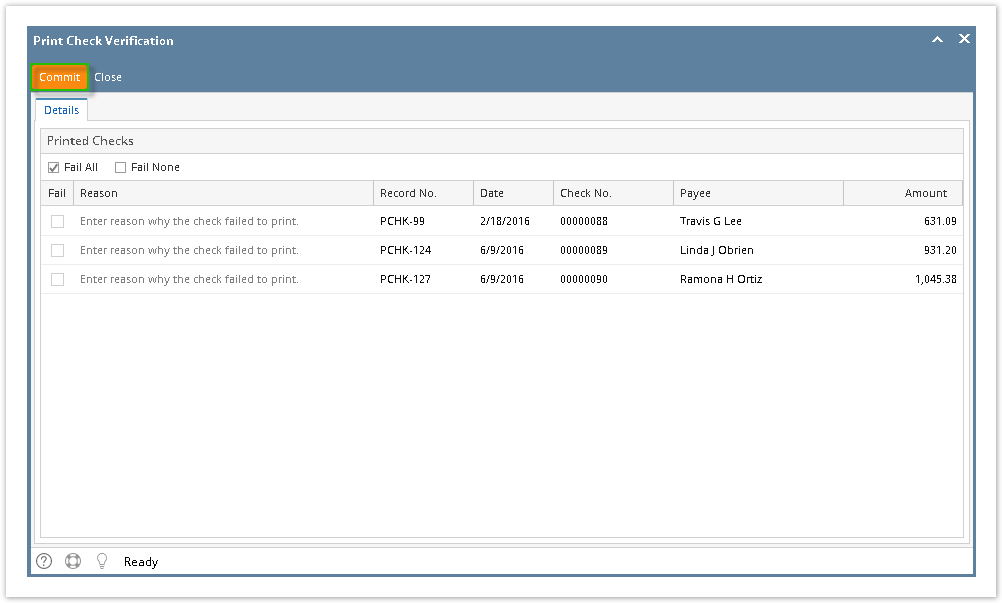
If the check failed to print, the reason must be entered in the Reason column and checked before hitting Commit toolbar button.
- A confirmation message will be displayed.
Click Yes button.

Committed normal paychecks will reflect their check numbers in the column.
Void toolbar button will replace the Post/Unpost toolbar buttons and other buttons will be disabled.
Print Checks feature is very helpful to print multiple paychecks and the system will automatically generates Check Nos.
- From Payroll module, single click the Print Checks menu.
- Select the Bank Account ID to display the posted Paychecks that are to be printed under the Print Checks tab.
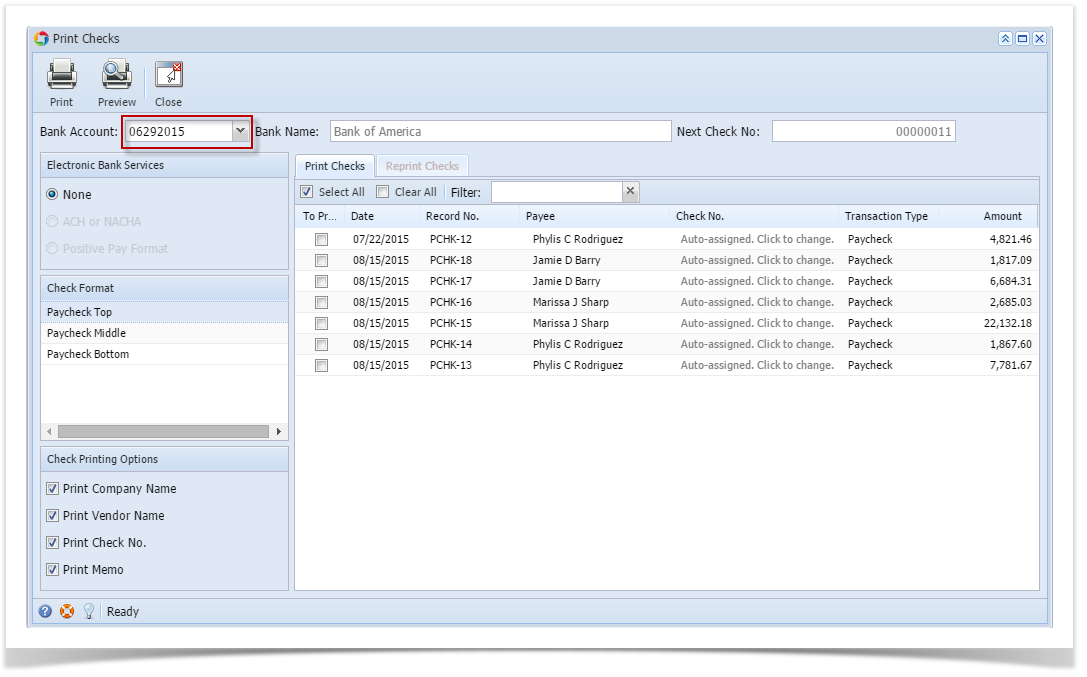
- Select the Paycheck transactions you would want to print with the generated Check Nos.
- Select the Check Format report.
- Click the Preview toolbar button to preview the paycheck reports.
- Once you've reviewed the paycheck reports, click the Print the report button to print ALL the selected paychecks or click the Print the current page button.
After printing, Print Check Verification screen will be shown.
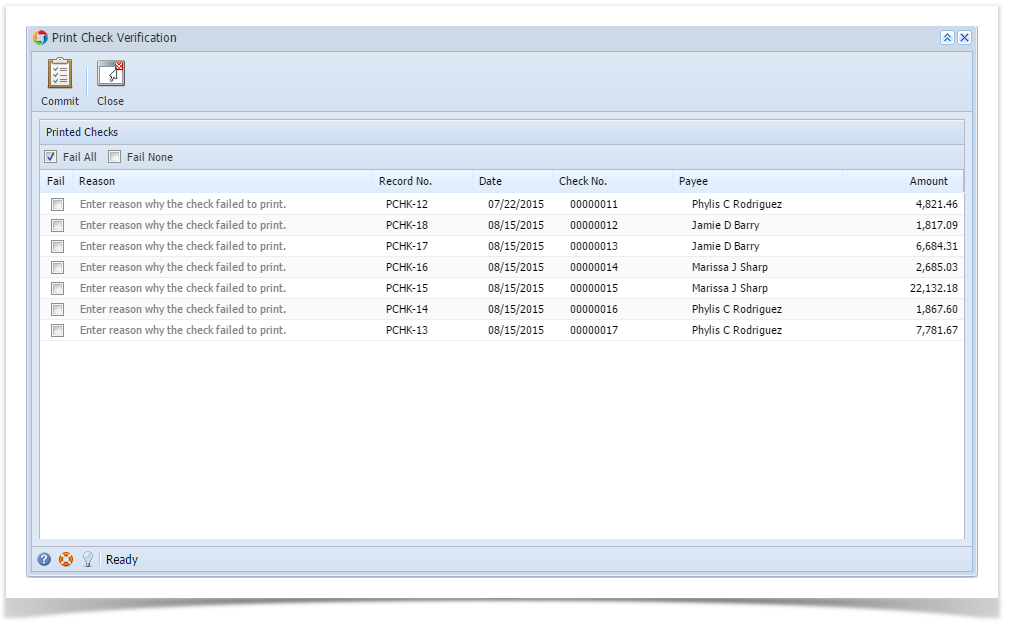
If any of the Printed paychecks on the list is not successful due to any problem when printing, enter the Reason and click the Fail checkbox.
Click the Commit toolbar button.
All the assigned Check Nos. on paychecks will be displayed on the Employee paycheck screen. For the Failed printed Checks, Check Nos. will be tagged as 'Wasted' in Bank Accounts module > Check Number Audit screen but still can re-use and re-print failed printed paychecks by manually entering the Check Nos. in Print Checks screen.
Open the printed Employee Paychecks from Paycheck Search screen, Paycheck should be marked as Posted and Printed.
Overview
Content Tools