You can opt not to setup GL Accounts at Item level, i.e. if GL Accounts are setup at Category or Company Location level. See Hierarchy of GL Account setup for Inventory.
Setting up GL Accounts at item setup is a good practice especially if each and every item you have has different GL Account setup. This account setup will be used when you post Inventory related transactions like Inventory Receipt, Inventory Shipment, Inventory Adjustment, Inventory Transfer and other related modules that use the item.
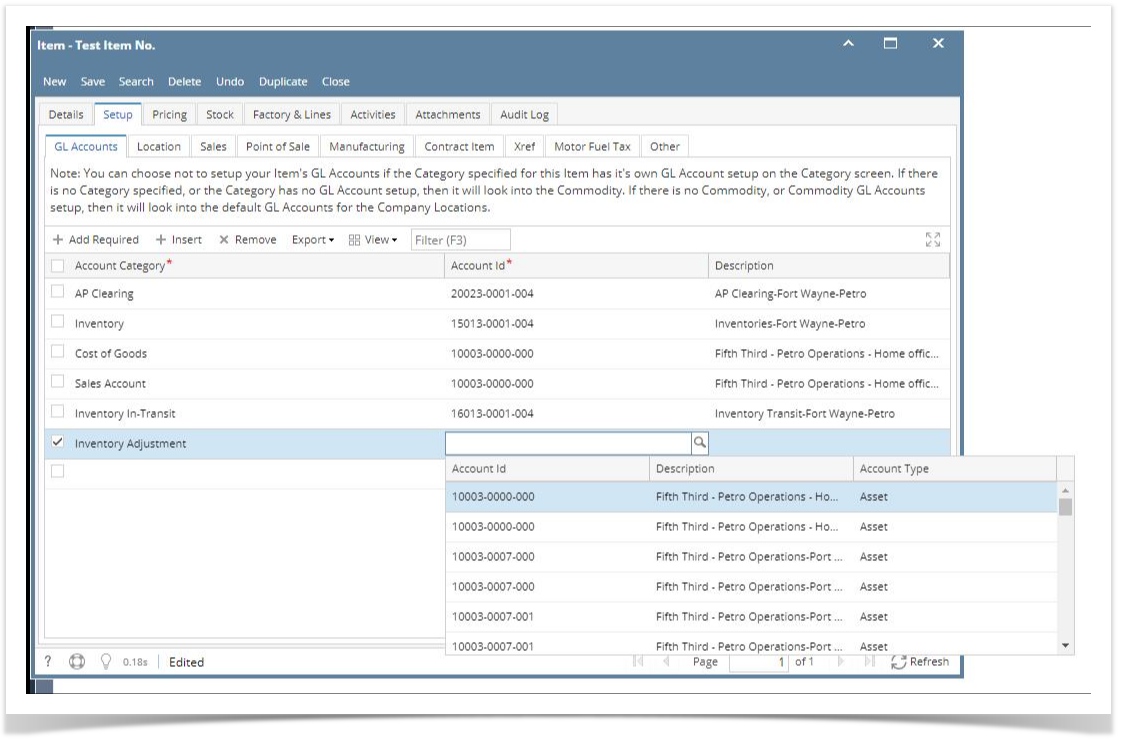
- Open Item screen > Setup tab > GL Accounts tab.
Click Add Required button. This will bring in all account categories needed for the item. GL Accounts required vary based on Item Type selected from Details tab. See Account Categories required for transactions.
- Select an Account ID for each and every Account Category.
- Save the record. You can click Save or use the shortcut key Ctrl+S. In case you miss to save it and you click the Close or the x button at the top right corner of the screen or use the shortcut key Alt+X or Esc , i21 will prompt you if you would like to save it before closing the screen.
Overview
Content Tools