Adding item location is a MUST. This is where you set the location where the item will be available. When making Purchasing, Sales, Inventory and other Inventory related transactions, you will have to select first the location. Then items available for that location will be available for selection.
There are 2 ways to add item location.
- Add Single item location. See How to Add Single Location to the item
- Add Multiple item Location. See How to Add Multiple Locations to the item.
Adding item location is a must. This is where you set the location where the item can be available. When making Purchasing, Sales and Inventory transactions, you will have to select first the location. Then items available for that location will be available for selection.
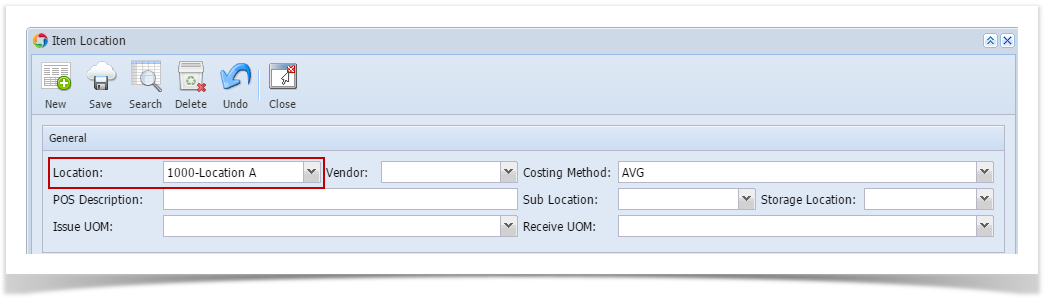
- Open Item screen > Setup tab > Location tab.
- Click Insert button to open a new Item Location screen.
- In the Item Location screen select a Location.
You can default Location fields to always show the default location of the user that is currently logged on. This is done on User Security screen > Settings tab > Default Location. This will save you an extra step having to select the Location in record/transaction you are to enter/create.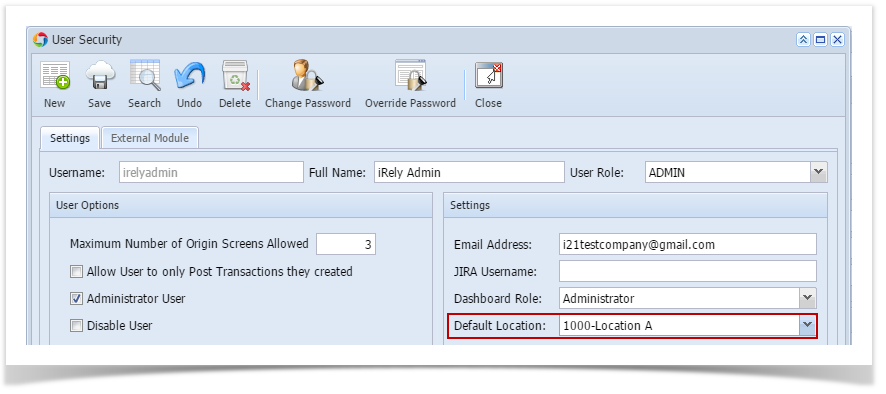
- In the Vendor field select a vendor if applicable.
- The Costing Method field is defaulted to AVG (Average). Other costing methods available is FIFO (First In First Out) and LIFO (Last In Last Out). Change this to whatever Costing method this item from this location be treated as per costing method.
- In the Issue UOM, select the default UOM when item from this location is used in Sales or Manufacturing screens.
- In the Receive UOM, select the default UOM when item from this location is used in Purchasing screens.
- In the Point of Sales section fill in with info as necessary. These fields are used in i21 Stores.
- In the Stock section, set the following:
- The Negative Inventory field is used to set whether or not you will allow item stock to go negative. Select:
- Yes, to allow stock to go negative.
- Yes with Auto Write-Off, to allow stock to go negative, however will be written off once you receive stocks.
- No, to not allow stock to go negative.
- Fill in other information as needed.
- The Negative Inventory field is used to set whether or not you will allow item stock to go negative. Select:
- In the Freight section fill in with info as necessary.
- Save the record. You can click the Save toolbar button to save it. In case you miss to click this button and you click the Close toolbar button or the x button at the top right corner of the screen, i21 will prompt you if you would like to save it before closing the screen.
Overview
Content Tools