It is very important to setup Item UOM as this will filter UOMs available for the item when selected in Sales and Purchasing transactions. Aside from that, this is where conversion is based.
There are 2 ways you can assign Item UOM/s to an item.
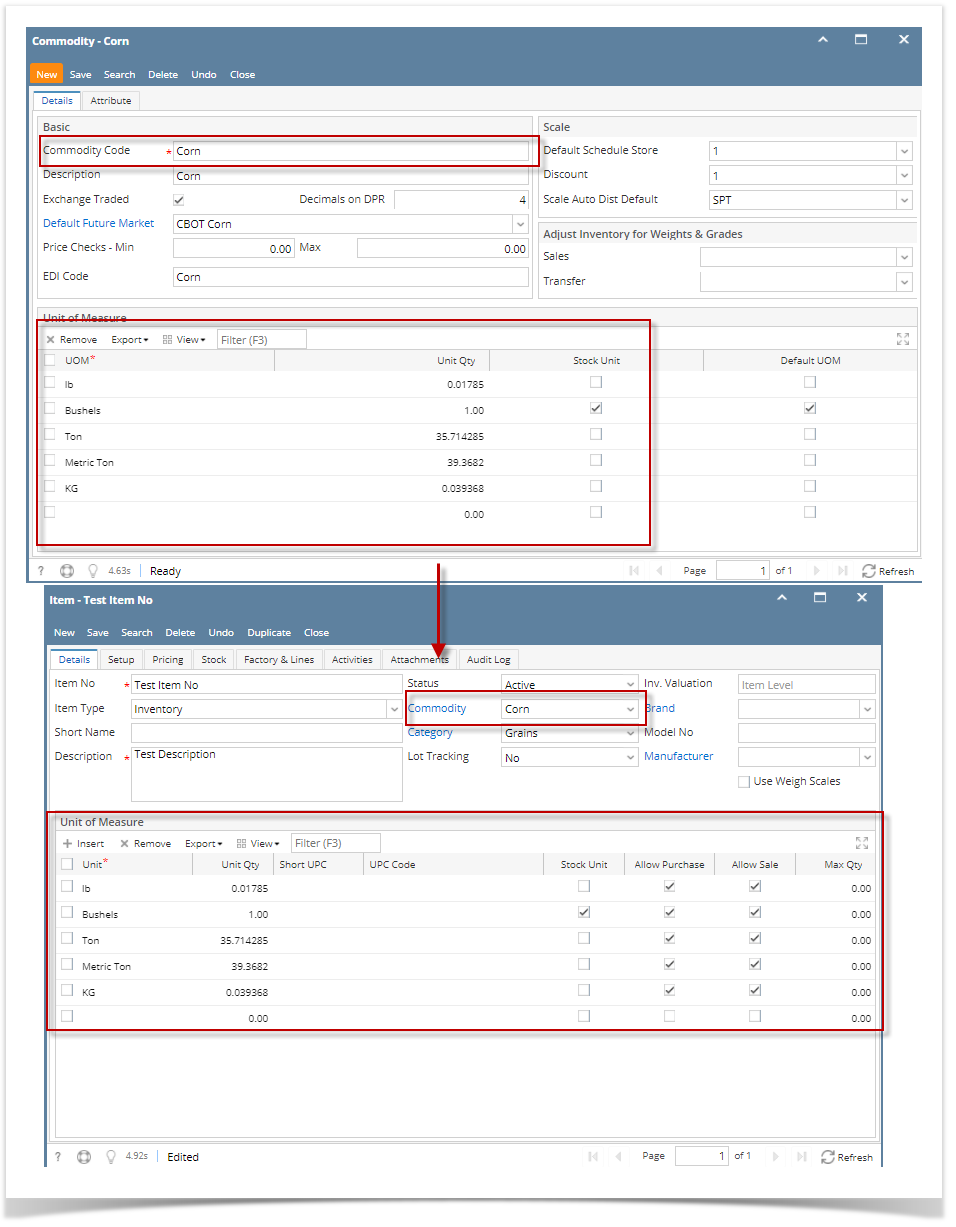
First is to setup UOM's in Commodity screen. Go to Item Screen>Details Tab and select the commodity with UOM setup, all UOM's from the commodity will be displayed on the Item UOM Grid.
Another way is configure it to the item itself. This one can be tedious since this will require you to select one by one the UOMs available for the item, one by one.
- Once you have added the UOM/s in the Item screen > Unit of Measure grid, you can do other configurations like below. Though you can have this already configured in the Category or the Commodity. In that way there would be less configurations to do in the Item screen > Unit of Measure grid.
- Check Allow Purchase checkbox if you want the Item UOM be shown in Purchasing screens.
- Check Allow Sale checkbox if you want the Item UOM be shown in Sales screens.
- Fill in other information as needed.
- Save the record.
It is very important to setup Item UOM as this will filter UOMs available for the item when selected in Sales and Purchasing transactions. Aside from that, this is where conversion is based. Follow the steps below to guide you on how to setup Item Unit of Measure.
- Open Item screen > Details tab > Unit of Measure grid.
- A new line will be available to allow you to add a new Unit of Measure for the item.
- Add first the stock UOM for the item and then check the Stock Unit checkbox. This checkbox determines the UOM as stock UOM.
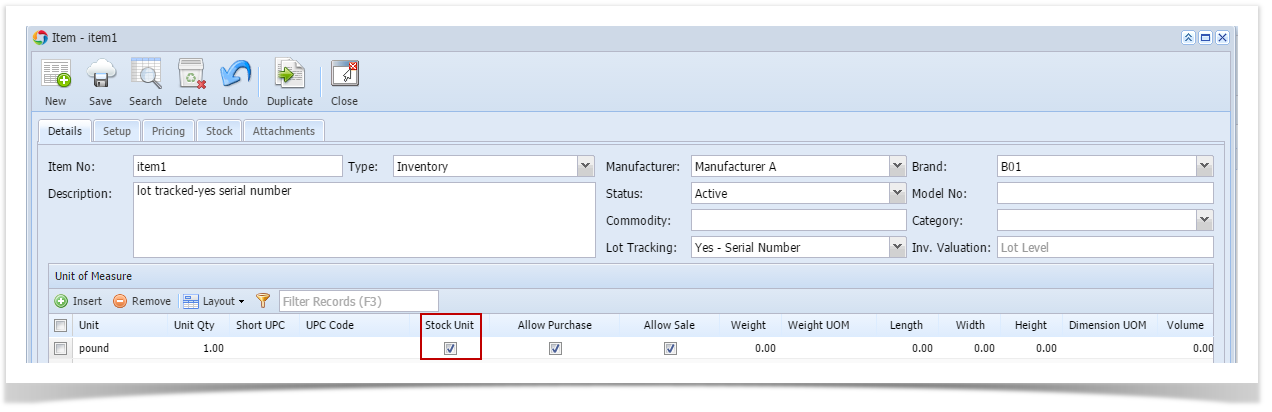
Notice that as you checked the Stock Unit checkbox, the Unit Qty field will automatically be updated with 1. - Add next Other UOMs. As you add other UOMs, the Unit Qty field will automatically be updated with converted value based on the setup configured in the Inventory UOM. That is why it is recommended that Inventory UOM is configured properly so that when used in Item/Category/Commodity Setup, it will automatically convert it for you. To guide you on how to add and configure Inventory UOM, see How to Add new Inventory UOM.
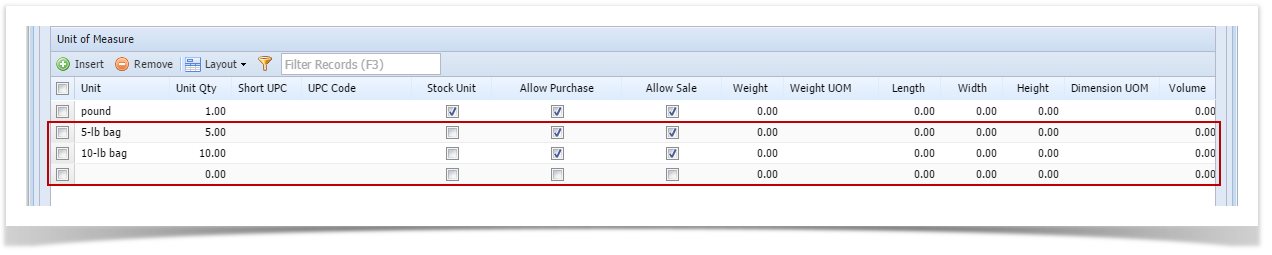
- Check Allow Purchase checkbox if you want the Item UOM be shown in Purchasing screens.
- Check Allow Sale checkbox if you want the Item UOM be shown in Sales screens.
- Fill in other information as needed.
- Save the record. You can click the Save toolbar button to save it. In case you miss to click this button and you click the Close toolbar button or the x button at the top right corner of the screen, i21 will prompt you if you would like to save it before closing the screen.
If you assign Category to an item and the category has UOM setup, as you select the Category in the Item screen > Details tab > Category field, the Category UOM setup will automatically be carried over to the Item UOM setup. This helps speed up data entry especially if all of your items of the same category have the same UOM setup. Can be modified also at any time you want it at the item level.
Overview
Content Tools