1. On the Menu Panel, click on Help Desk.
2. Click on Time Entry under Activities.
3. Agent default value is agent logged in. Period default is the period where today's date is. Required hours is the number of required hours the agent should be logged in within the period.
- To change agent, select from agent combo box.
- To change Period, select from Period combo box.
4. To add new Hours Worked, go to the next available row on the grid.
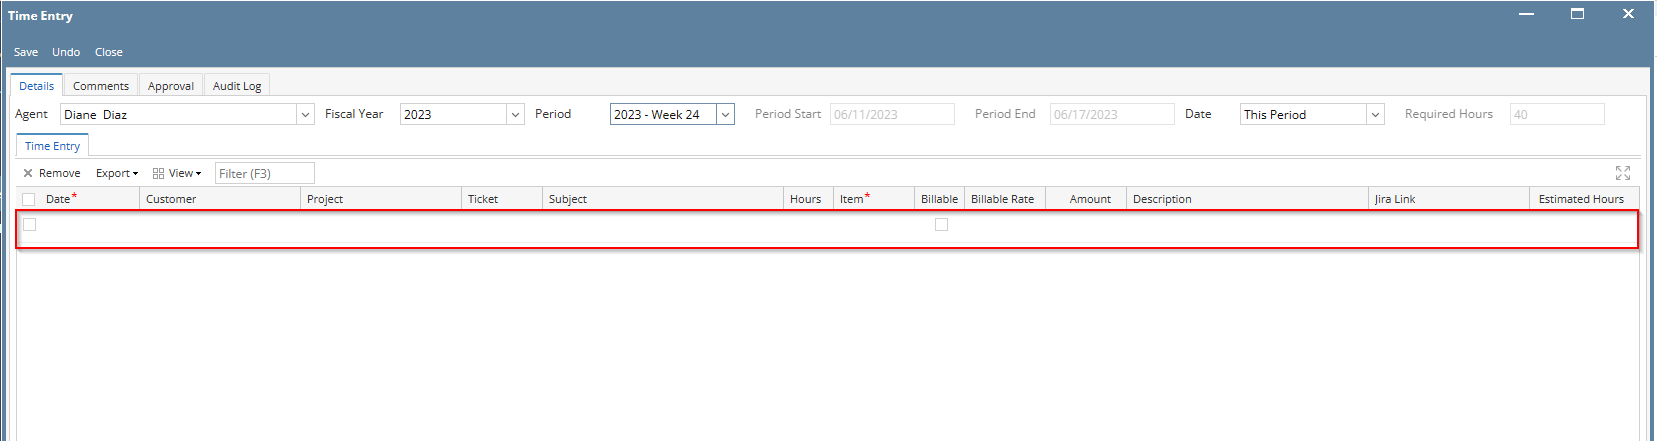
- Select Date
- Type in the Customer or select from the customer combo box. (Not a required field)
- Type in the Project or select from the project combo box. (Not a required field)
- Type in the Ticket or select from the ticket combo box. (Required field)
- Type in the Subject or select from the Subject combo box.
- Input Hours
- Select Item from item combo box
- Tick if billable or non-billable
- Double check Billable Rate
- The amount will be displayed. Formula: HoursxBillable rate
- Add Description and JIRA link if needed/available.
- Add Estimated Hours if available
- Click Save
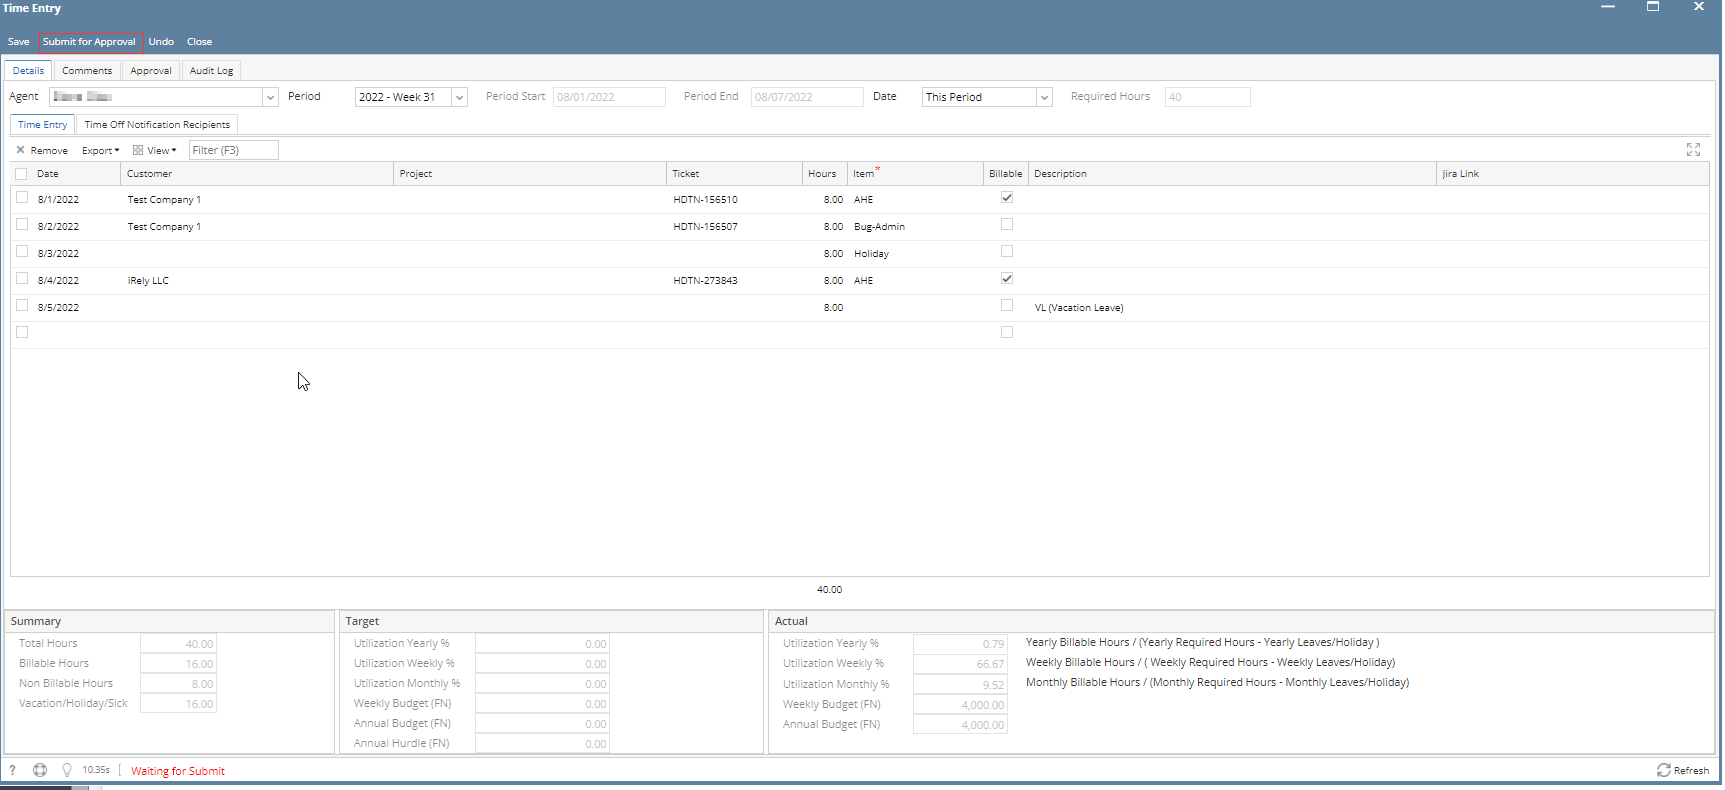
Once saved, the read only info pane on the bottom part of the screen will auto populate with the:
- Summary of the logged hours by the agent,
- Their Targets
- Their Actual utilization as of date based on logged hours
5. Agent can also edit existing hours worked (if not yet imported to invoice) by selecting the existing hours worked in the grid.
- Select Date
- Type in the customer or select from the ticket combo box. (Not a required field)
- Type in the customer or select from the ticket combo box. (Not a required field)
- Type in the ticket or select from the ticket combo box. (Required field)
- Input Hours
- Select item from item combo box
- Mark if billable or non-billable
- Add Description and JIRA link if needed/available.
- Click Save
6. In the event that the agent was on a vacation/sick/ personal leave, they should file a time off request in the Payroll Menu with the number of hours they were on leave. (This is to still be able to complete the required hours for the period)
7. If there is a holiday within the period, the agent should add a time entry for Holiday and select the Holiday item in the Item combo box.
8. Once the required hours have been completed for the period, the agent should click Submit for Approval so that the time entries will now be routed for approval and when approved, billable hours can be invoiced.
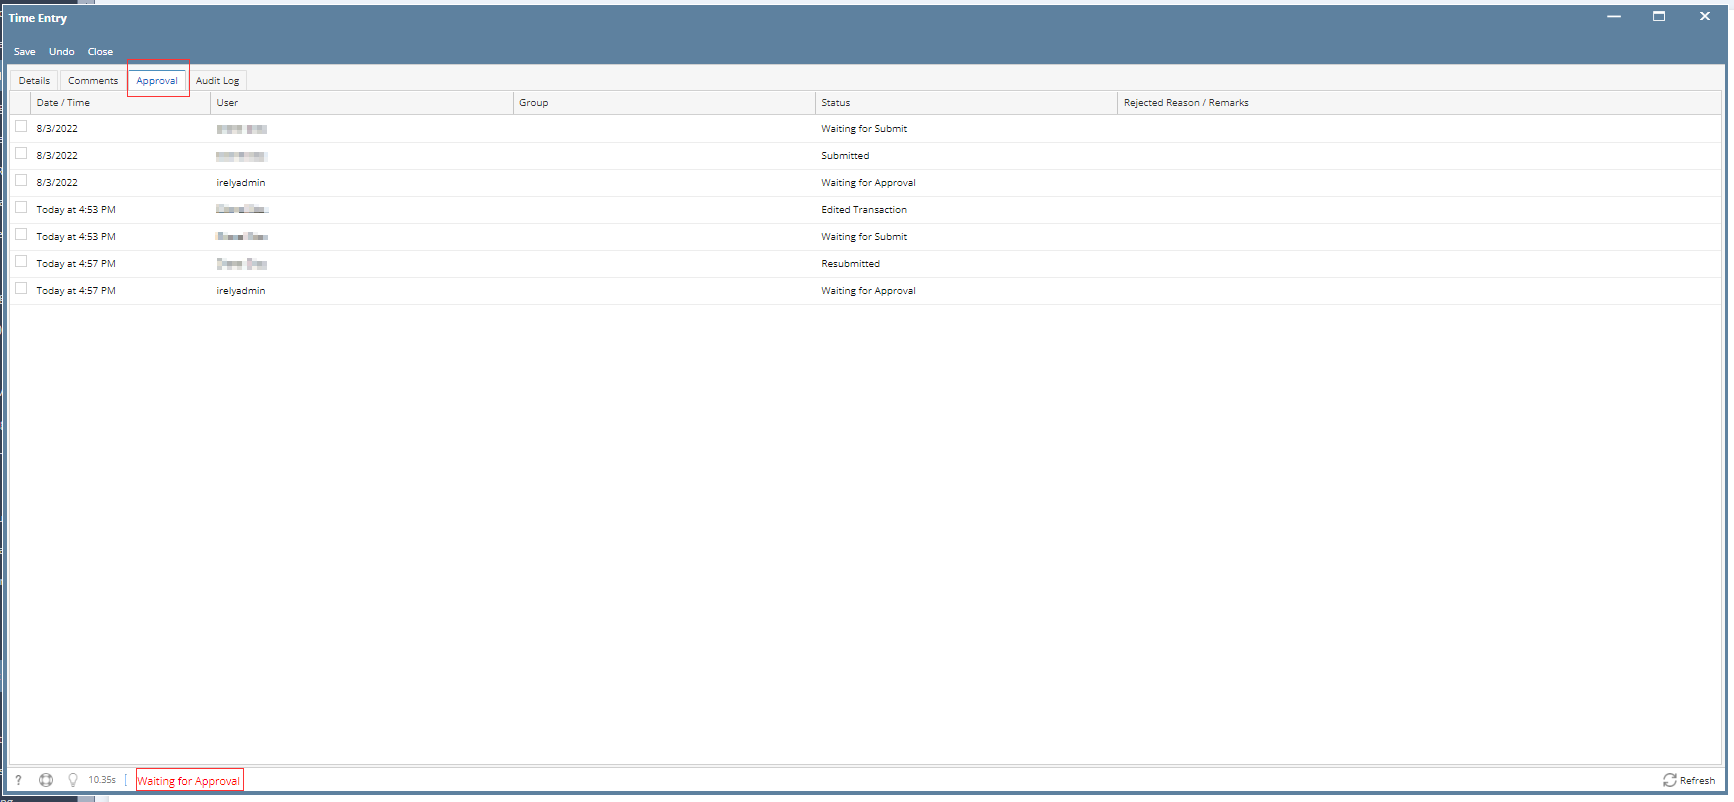
9. To be able to check the status of the time entry approval, the agent may check the bottom left part of the screen or click on the Approval Tab
To add estimated hours for an agent, see Adding Estimated Hours
To add Coworker goals for an agent, see Setting coworker goals
Overview
Content Tools