Page History
Note: Make sure to set up the Customer Contact, SMTP and the Export File Mapping before sending invoice copy via email.
- Generate customer invoice data. Click here to see how to generate invoice data.
Once invoice data is generated, it will be displayed on Invoices tab like below.
- To send specific customer invoices, select the desired customer then click Email button from the grid.
- To send all customer invoices, click From Card Fueling module, click Invoice menu. Invoice screen will be displayed.
- Fill up any of the fields to filter the invoice results according to your requirement.
Please see sample below.
- Click Email toolbar button then select Email Invoice on the drop down menu to generate invoices.
Report Viewer screen will be displayed and invoices that match the requirement will be displayed including the invoices generated in the past.
Note: Make sure to set up the Customer Contact, SMTP and the Export File Mapping before sending invoice copy via email.

- Once invoice copy is Once invoices were sent, a notification like below will appear on the computer screen.
An invoice copy both in CSV and/or PDF format will be sent to the customer via email.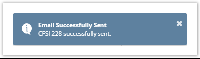
Close Report Viewer screen and navigate to Email Distribution tab. Email information will be displayed.
Invoice Date will have a default value equivalent to current date while Print Order will have a default value of Customer Code.
Update A/R Invoices and Print Discount Audit List check boxes is checked by default.

To include past invoice transaction in printing, click Include Previously Printed Transactions check box.
Overview
Content Tools