Page History
...
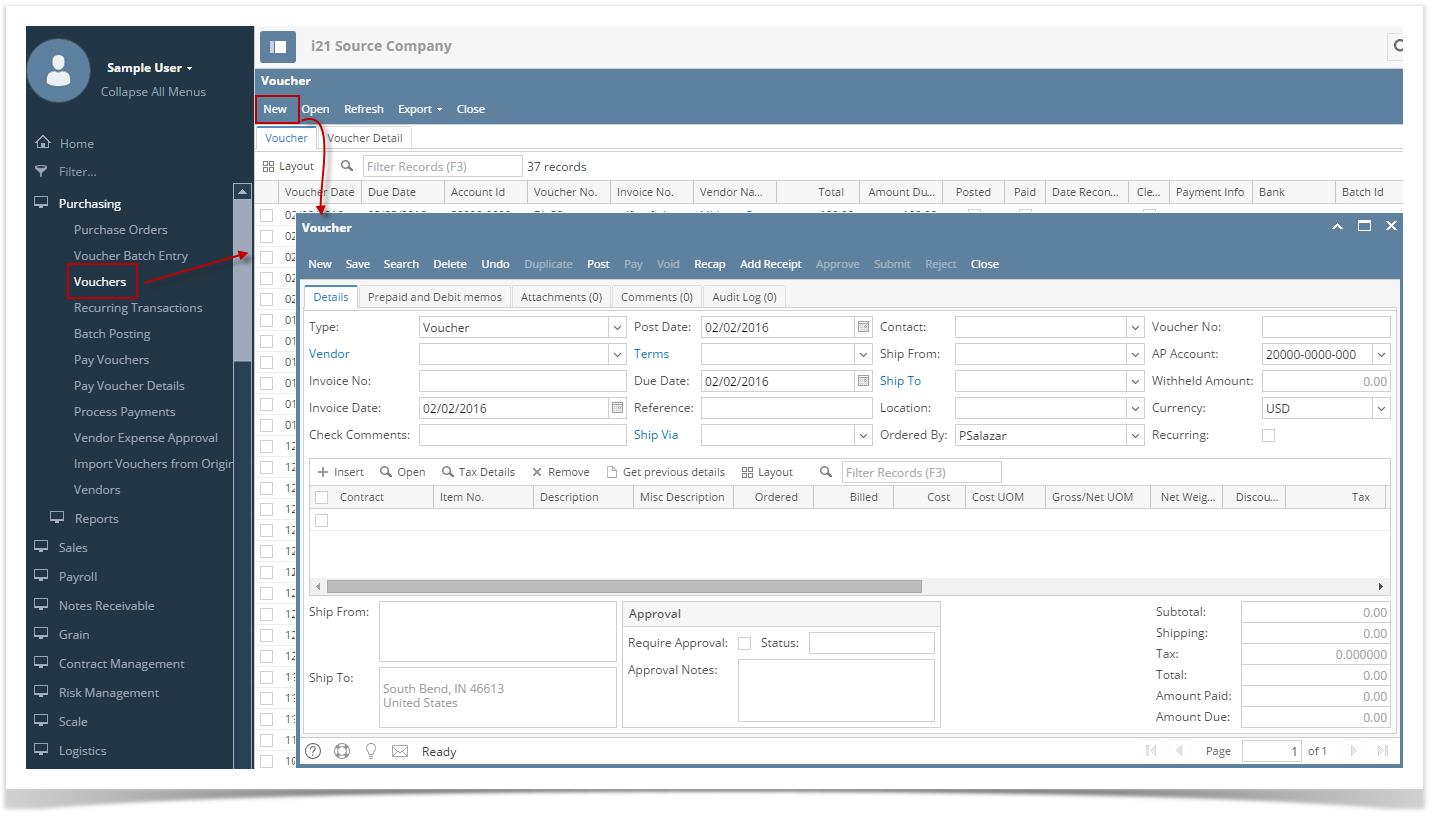
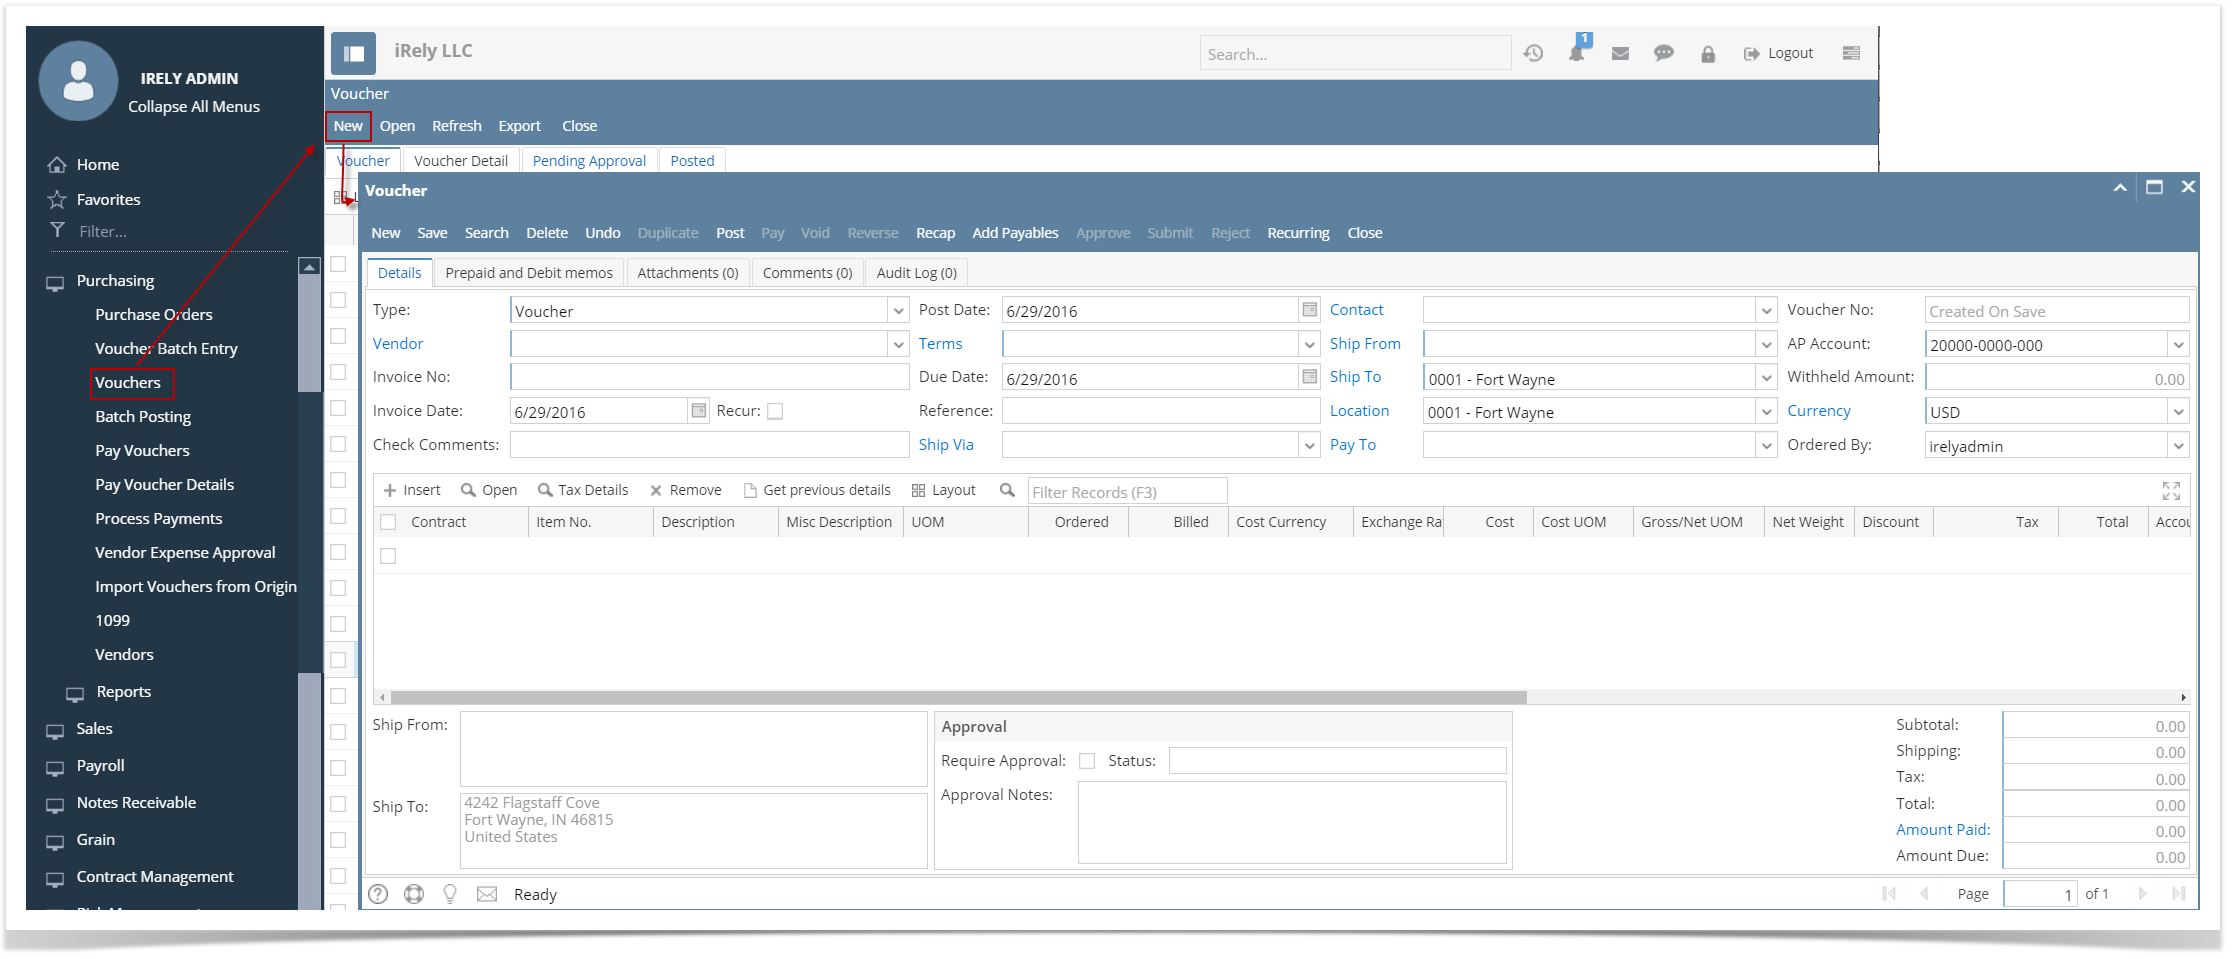
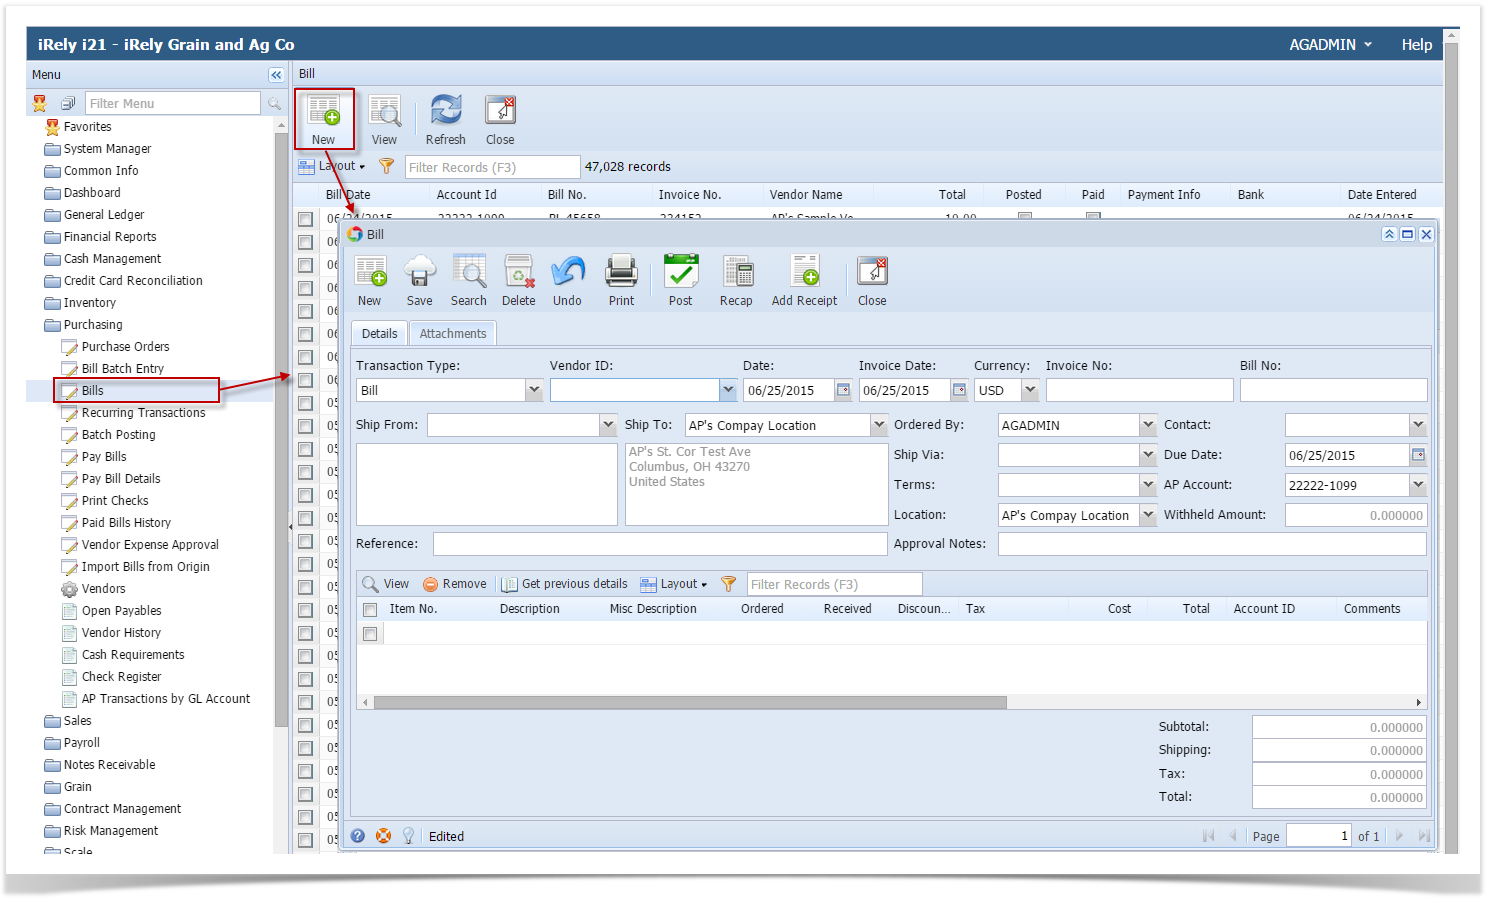
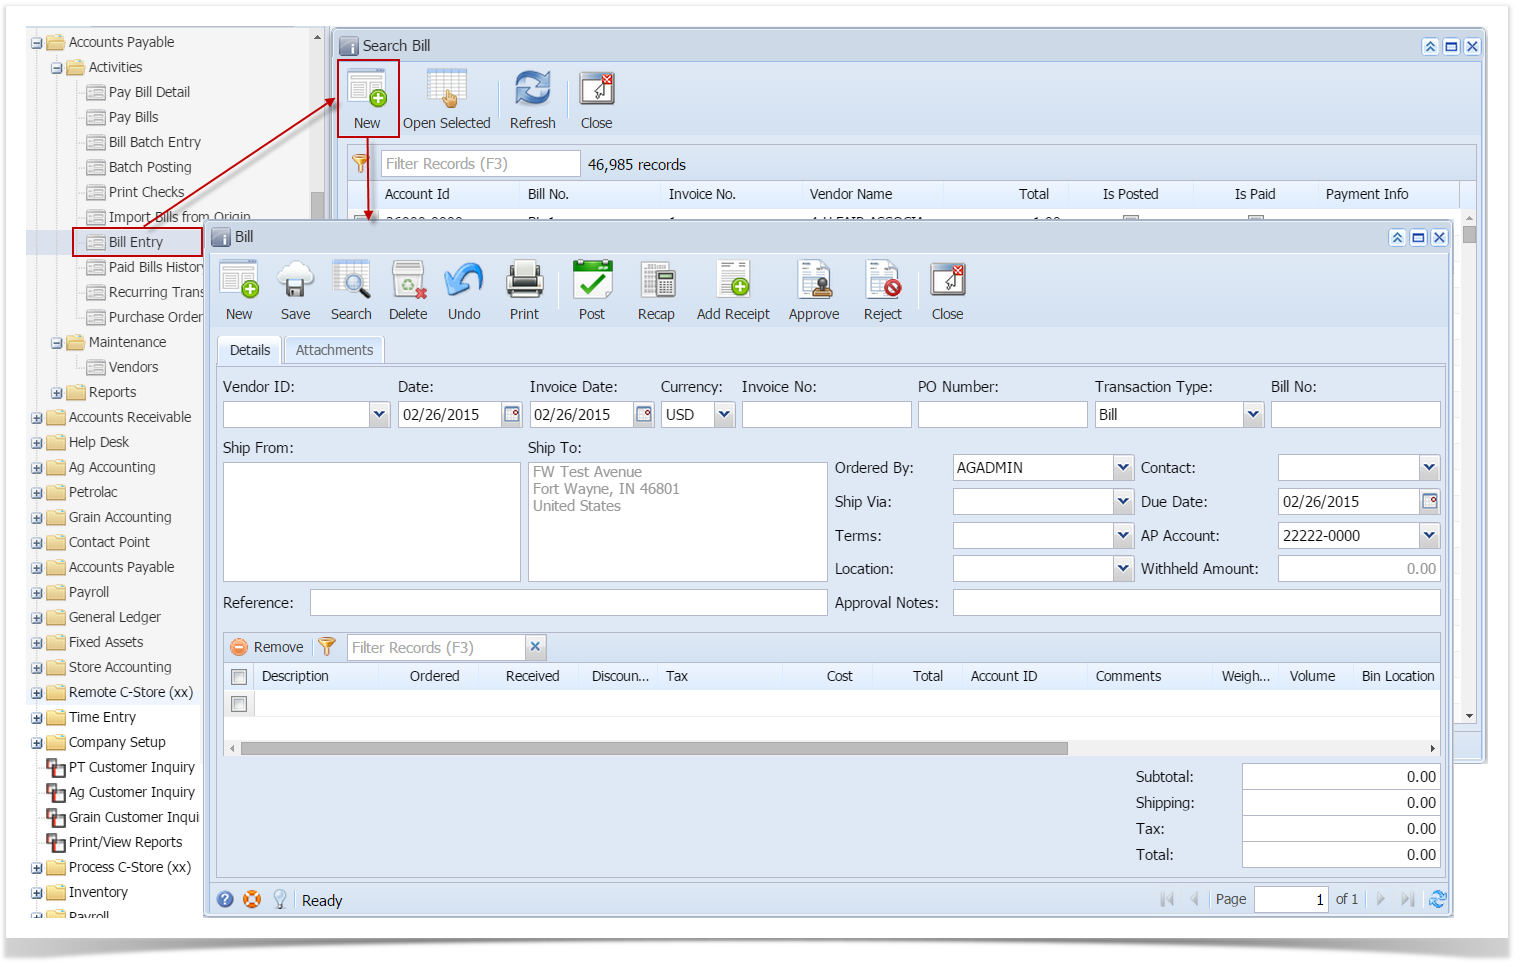
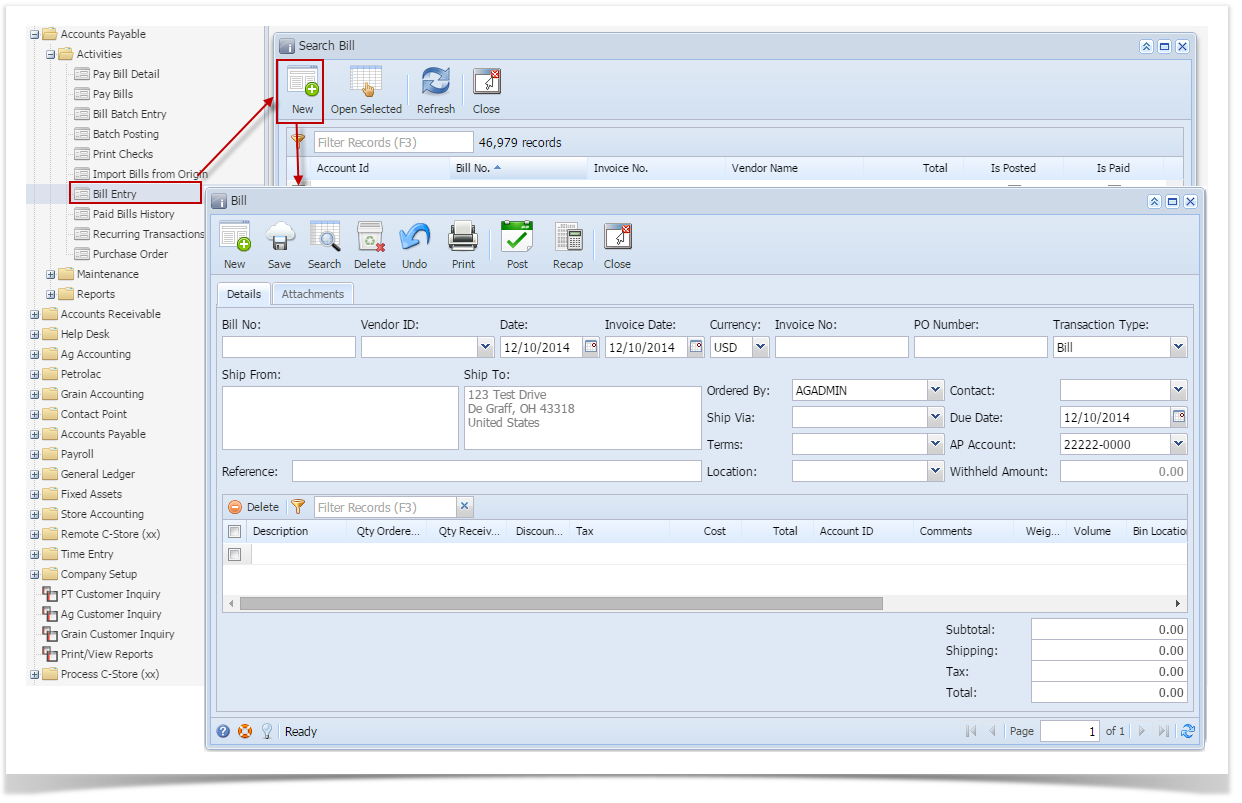
- From the Main Menu, expand Purchasing and then click Vouchers to open Search Vouchers.
- Click New toolbar button to open blank Voucher screen.
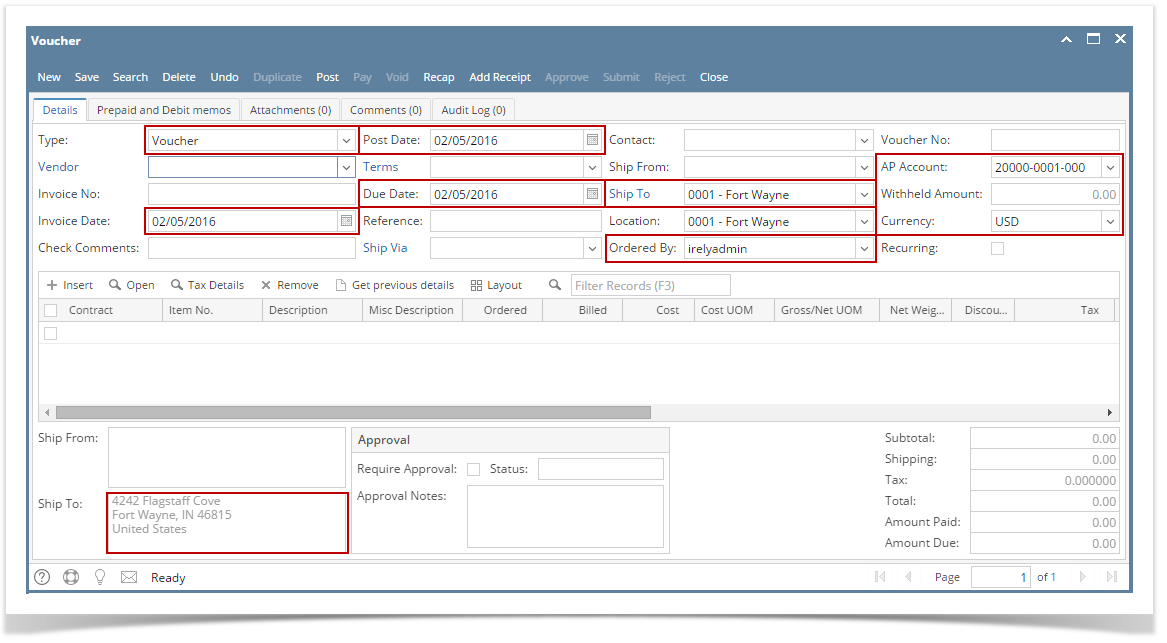
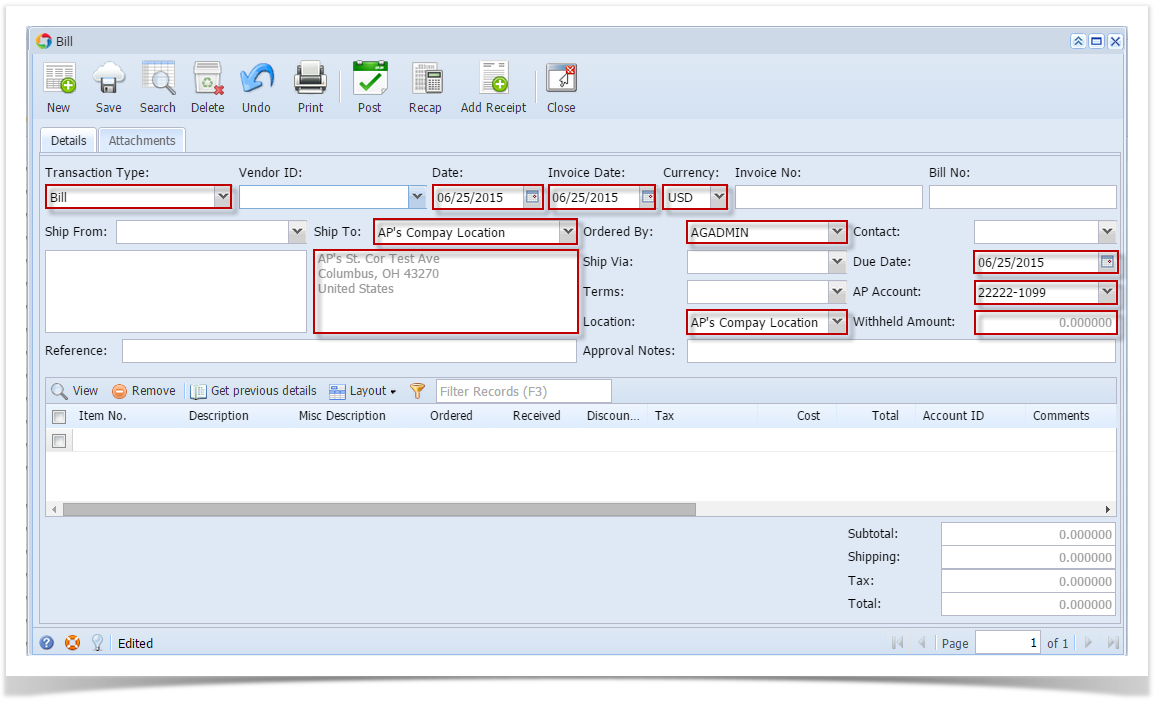
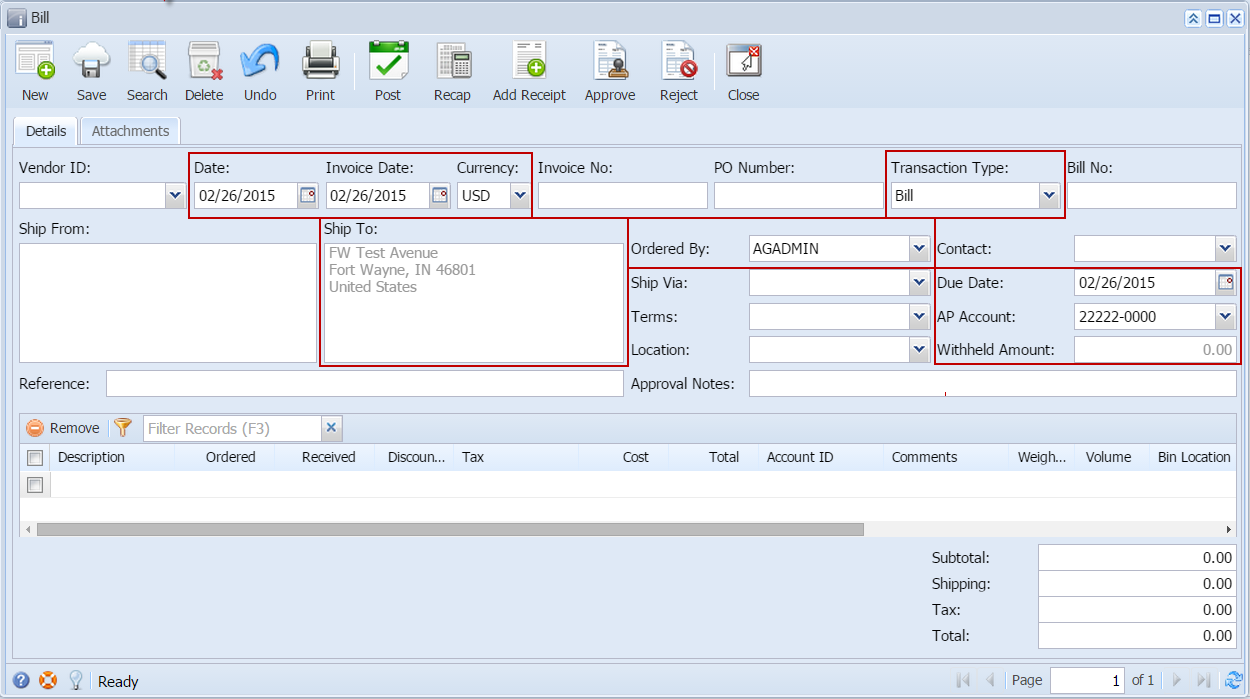
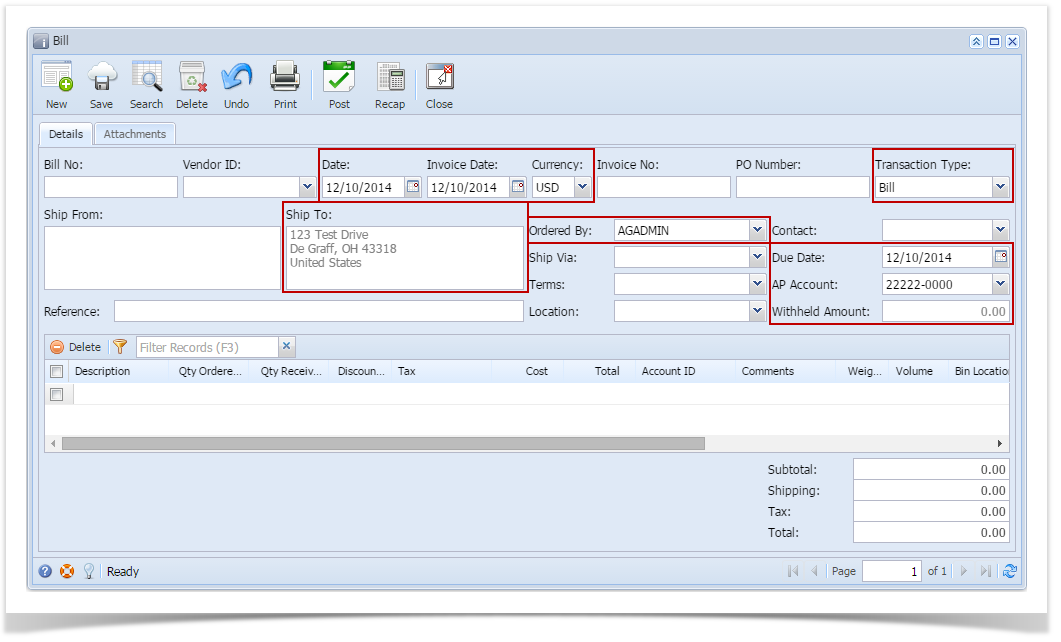
- The following fields were automatically populated:
- Transaction Type - will default to Voucher
- Invoice Date - will default to today's date
- Post Date - will default to today's date
- Due Date - will default to today's date
- Ship To - will show the default Location set for the user that is currently logged in. Address is displayed on the Ship To Address field below the grid.
- Ordered By - will default to the user that is currently logged in
- AP Account - will default to the AP Account set for the default Company Location.
- Currency - will default to the currency set in Company Preference > Settings screen
Withheld Amount - will default to 0.00
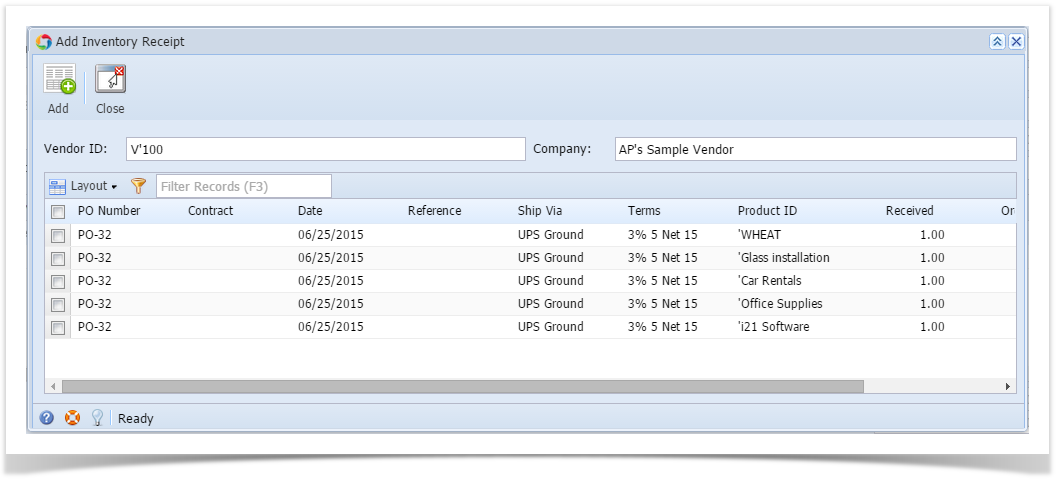
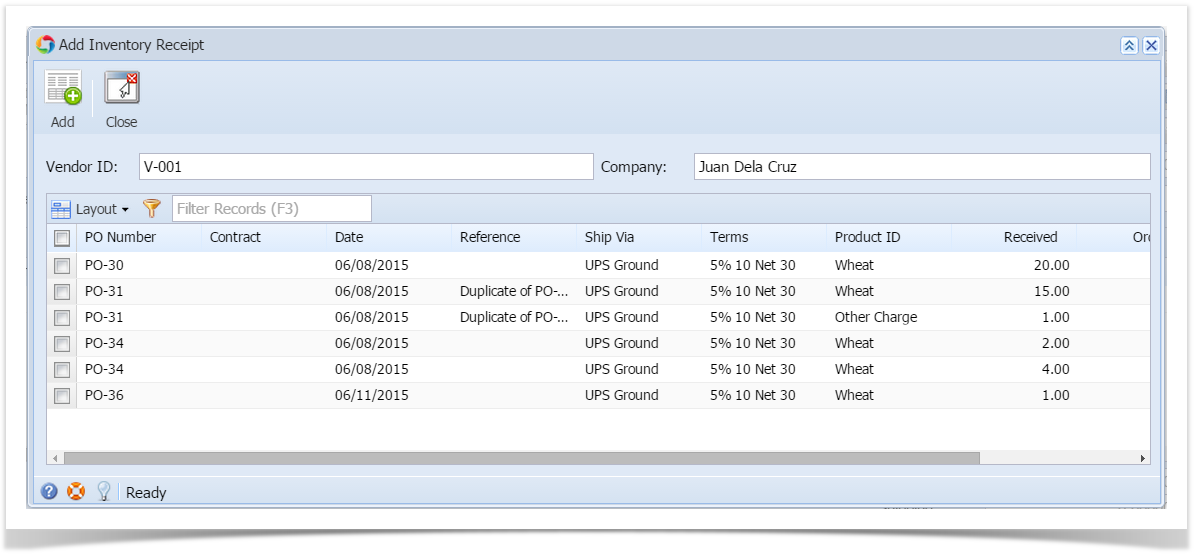
- Click Vendor combo box button and select existing Vendor from the combo box list. Name of the selected vendor will be displayed.
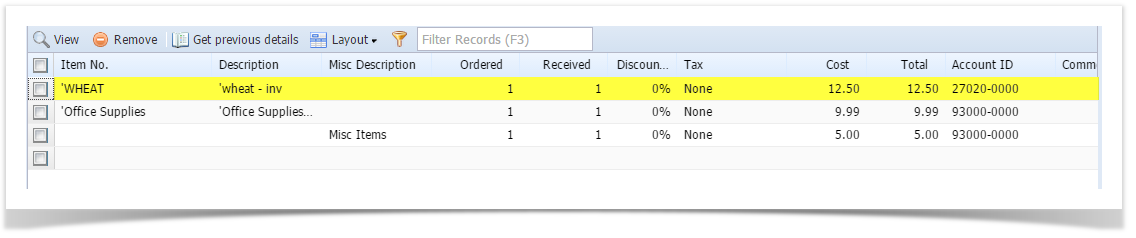
- If selected vendor has an existing Inventory Receipt, Add Inventory Receipt screen will open.
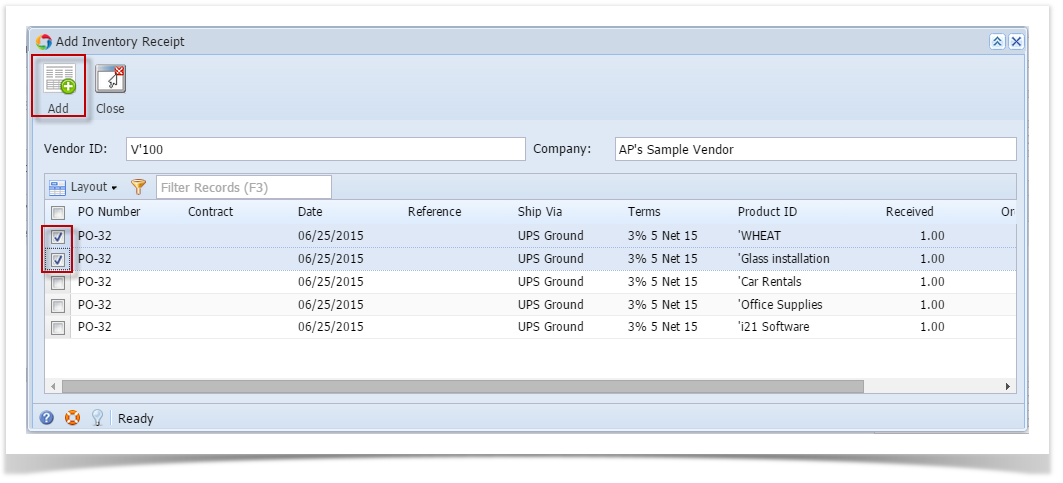
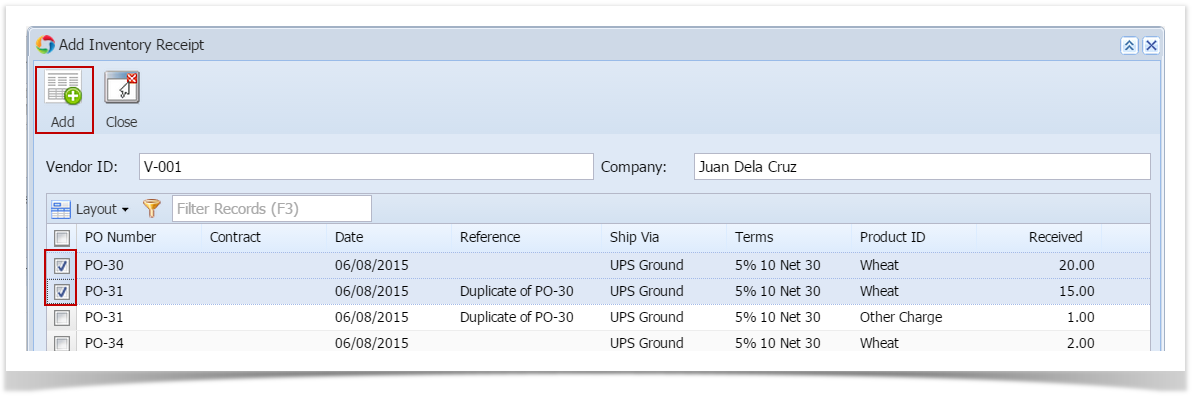
- Select the item/s you want to add on your bill and click Add button.
- Selected item/s will be displayed on the grid together with the other details set in the Inventory Item screen.
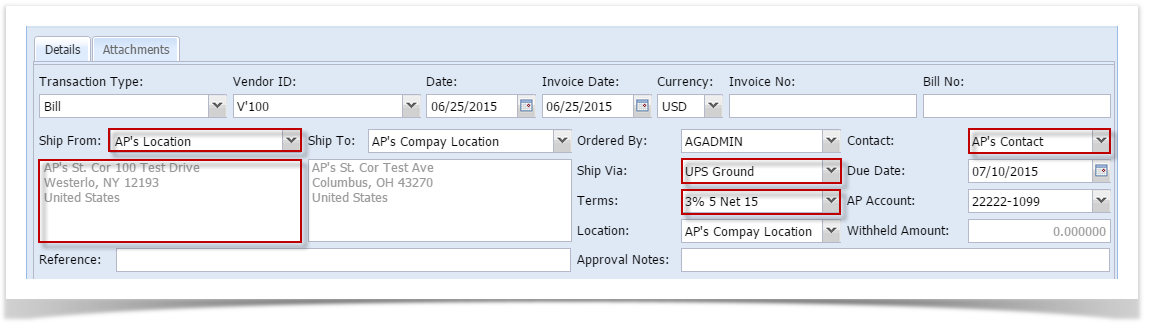
- After selecting Vendor: Terms, Contact, and Ship From, and Ship From Address fields will be automatically populated by the details entered in Vendor screen.
- Due Date field will update based on the terms assigned for the selected vendor and on the Invoice Date selected.
- Enter Invoice No.
Enter Reference if necessary.

Note For combo box fields, selecting different value is allowed if necessary.
Except for the items added via Add Inventory Receipt screen, you can still add details on the grid.
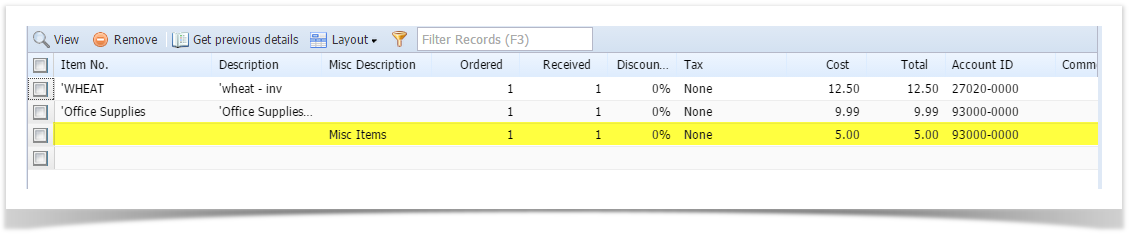
Expand title Adding misc items that is not existing in the Inventory Items table - Enter Misc Description.
- Enter quantity in Billed column. Any quantity entered in this field will also be displayed in Ordered column.
- Enter Discount if necessary.
- Enter amount in Cost column. This will update the Total column to Cost * Billed.
- Account ID column will be automatically populated by the GL Account set in Vendor screen.
- Enter comments, weight and volume if necessary.
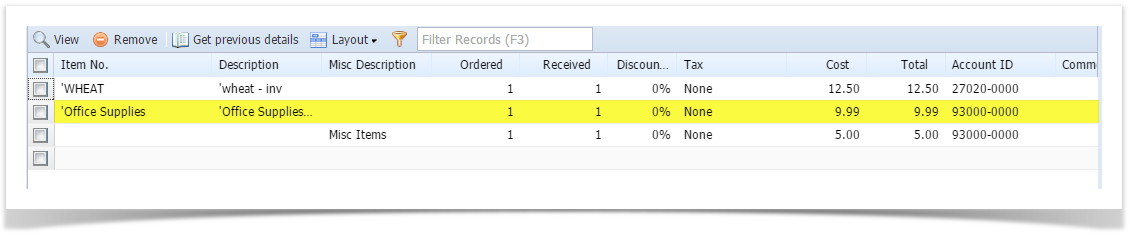
Expand title Adding misc items that is existing in the Inventory Items table - Click Item No combo box button.
- Inventory Items with Services, Non-Inventory, Other Charges and Software type will be displayed on the combo box list. Select the items you want to add.
- Selected item/s will be displayed on the grid.
- Ordered and Billed quantity will default to 1. Change if necessary.
- Cost will default to the cost entered in Inventory Item screen. Total column will display Cost * Billed.
- Account ID column will be automatically populated by the General account set in the Item screen.
- Enter comments, weight and volume if necessary.
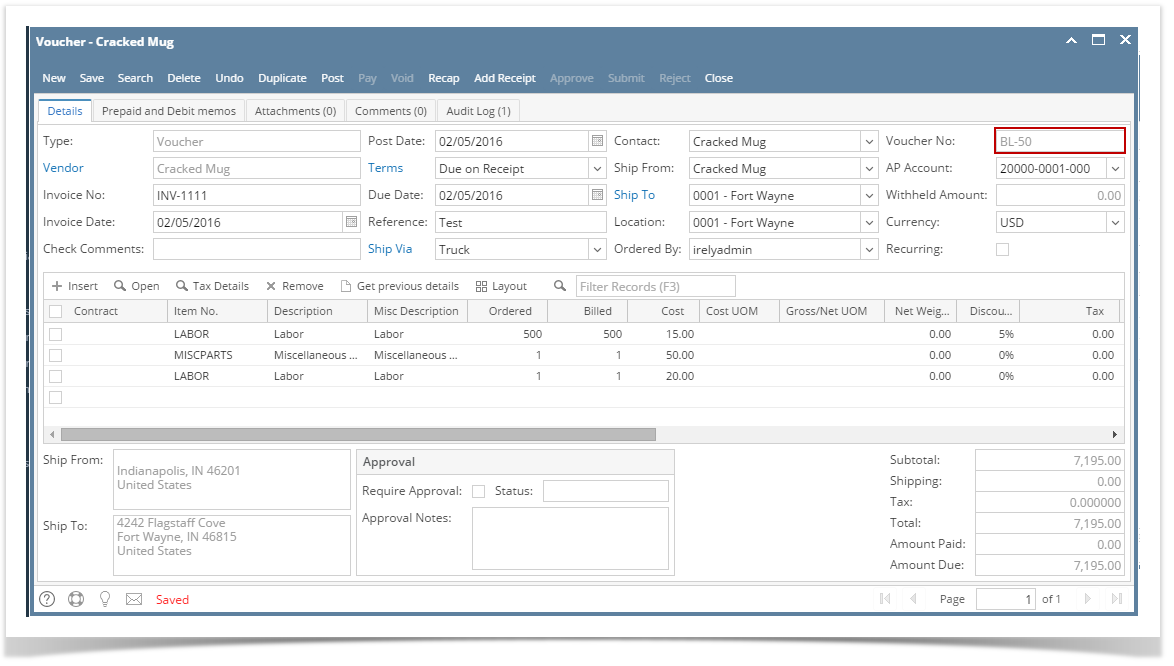
- At the bottom of the screen is the Subtotal field that displays the total before sales tax of all the line items entered in the grid.
- The Shipping field can be used to enter shipping costs for the transaction.
- The Tax field will display the calculated tax of all the details added on the grid.
- The Total field will display the added amount of the Subtotal, Freight and Tax fields. This is the amount that will be entered to the Accounts Payable account in the General Ledger when you post this transaction. You will also see this amount in the Payables form for this vendor.
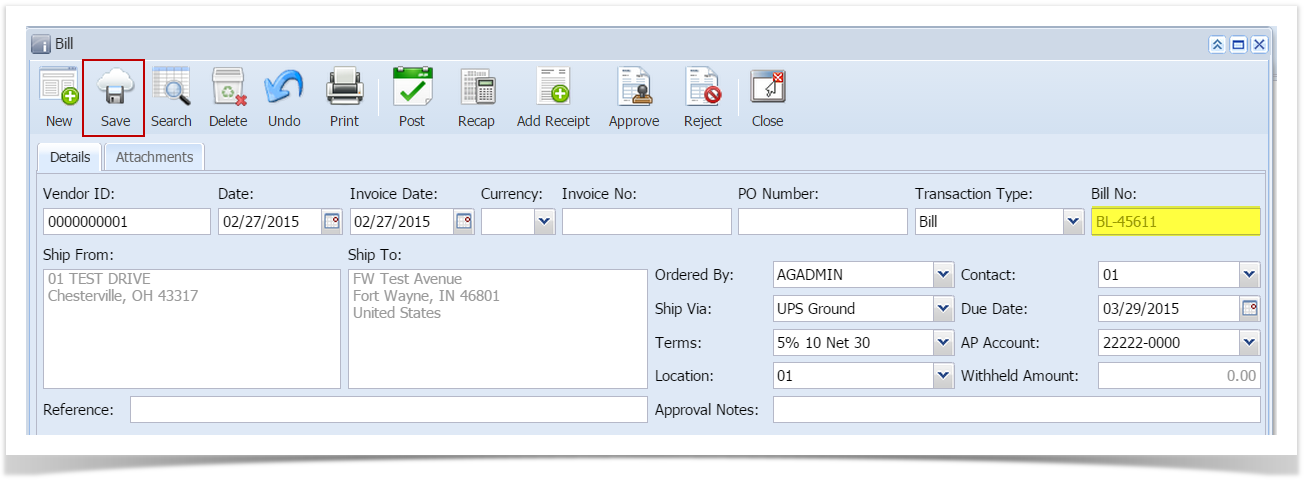
- Click Save button. Voucher No field will now be filled in with a unique, system-generated ID automatically.
| Note |
|---|
| Expand | ||||||||||||||
|---|---|---|---|---|---|---|---|---|---|---|---|---|---|---|
| ||||||||||||||
Here are the steps on how to create Vouchers:
|
| Expand | ||||||||||||||
|---|---|---|---|---|---|---|---|---|---|---|---|---|---|---|
| ||||||||||||||
Here are the steps on how to create Bill Entry:
|

| Expand | ||||
|---|---|---|---|---|
| ||||
Here are the steps on how to create Bill Entry:
|


| Expand | ||||
|---|---|---|---|---|
| ||||
Here are the steps on how to create Bill Entry:
|

Overview
Content Tools