Page History
- Click Process Paychecks from Payroll module.
Select Bank Account from the dropdown.
Info Banks with posted paychecks only will be displayed in the dropdown.
- Select ACH or NACHA from the Process Type panel.
Paychecks under the set criteria will automatically populate the grid.
Info Displayed records should be checked by default.
Click Select All grid icon to check all records for printing.
Click Clear All grid icon to deselect all checked records.
To search for specific criteria, Advance filters can be used.
Click Generate toolbar button.
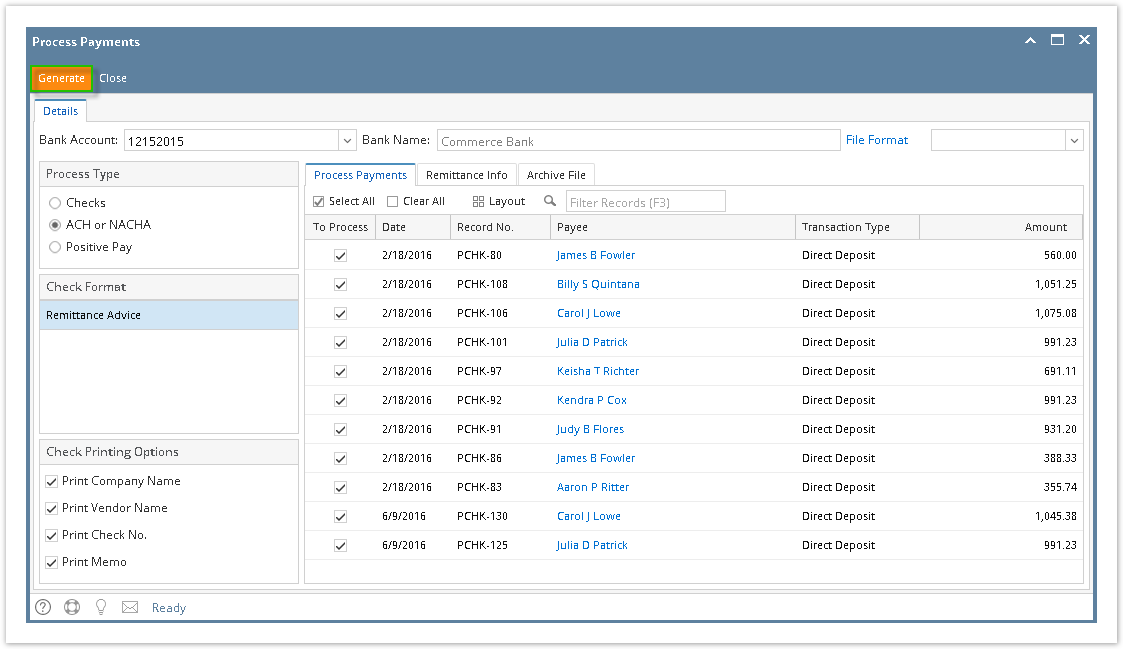
Info File Format will be required if the bank used by the paycheck has no default ACH file.
ACH file is downloaded
Click Remittance Info tab

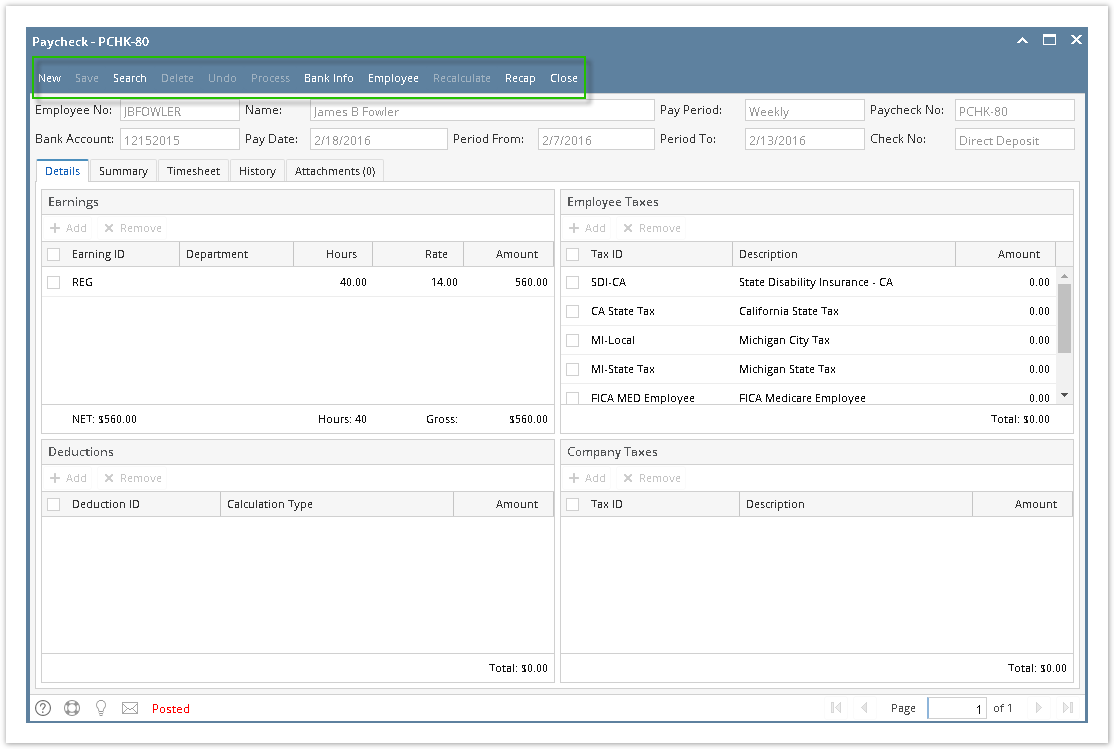
Info To preview or print paychecks of direct deposit, select paychecks and click Preview button to display paycheck and print
To regenerate ACH file for paychecks, select paychecks and click Regenerate button
Select paychecks and click Email Remittance button

Info Employee should have email distribution setup to be able to email remittance
To setup email distribution, open employee screen.
In Contacts tab, select employee and click Open.
In Email Remittance field, select PR Remittance
Save Changes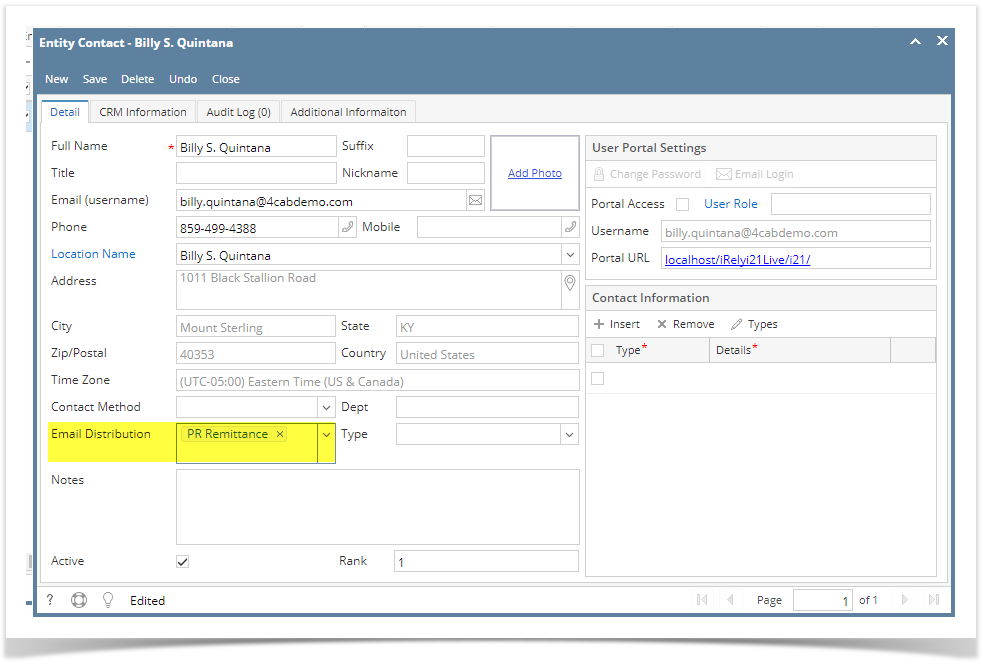
After remittance info is sent, click Archive File tab
Info In Archive File tab, paychecks can be re-preview, re-emailed, retrieve bank file (for committed paychecks), and regenerate bank file.
- Select paychecks and click Commit button
- A confirmation message will be displayed.
- Click Yes button.

Remittance Advice will be sent in employee's email.
Click the Print icon
 .
.- Proceed on printing the paycheck/s.
Other buttons will be disabled.
| Expand | ||||
|---|---|---|---|---|
| ||||
|
...
|
...
|
...
|
Overview
Content Tools