Page History
NR Automated EFT Transfers:
Automated EFT transfers will be reflected in NR system by scheduling the process using iProcess. iProcess will be installed along with Notes Receivable application.
For scheduling the process one time setup needs to be done in iProcess application.
- Double click on the iProcess icon on the desktop.

- iProcess application will be opened

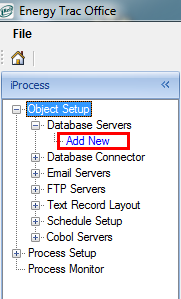
- In the Left side tree menu, expand "Object Setup" "Database Servers" "Add New". Double click on "Add New"
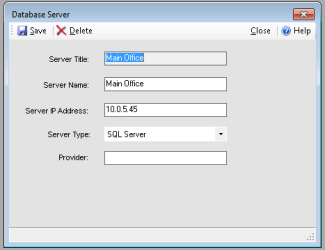
- Data Servers screen will open. Here we need to fill in the Database server details in which Notes Receivable database is present.
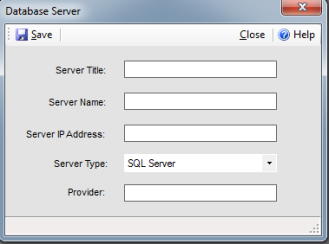
- Fill in the required details
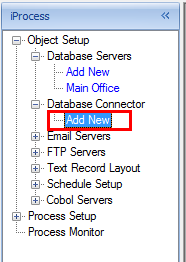
- To set the Database setup, navigate to "Database Connector" Add New. Double click on "Add New" menu.
- Database connector screen will be opened.
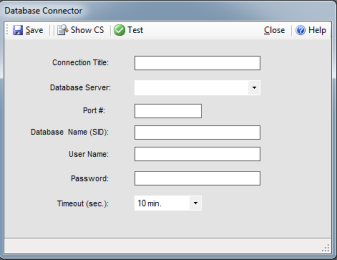
- Fill in the required Database details and click on "Save" button on the top left corner.
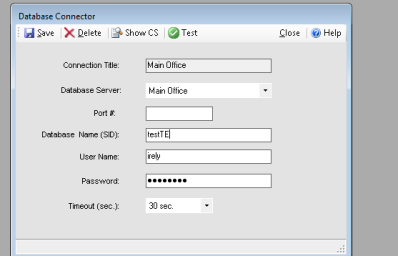
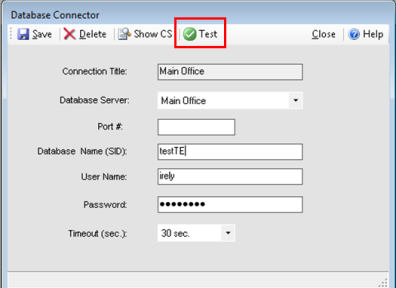
- Close the Database Connector form and open again. Now click on "Test" button on the top left section.
- On the "Database Connection" screen click on the "Execute" button on the top left corner.
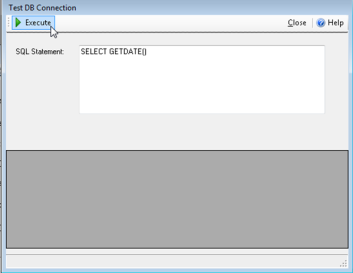
- On execution, date should be displayed in the grid below the SQL Statement.

- If there is any issue with the connection, date will not be displayed. Instead an error message with the cause of error will appear.
- To setup the Schedule, navigate to Schedule Setup Add New. Double click on the "Add New" button.
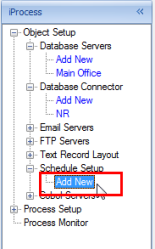
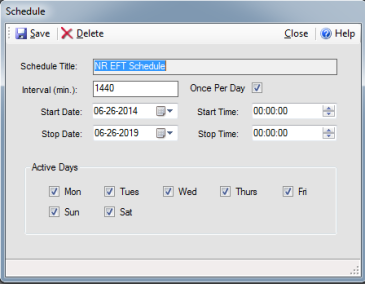
- Schedule form will open up.
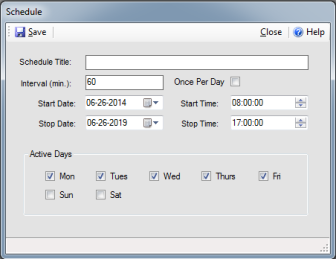
- Fill in the required information and click on the "Save" button. Schedule will be created which can be used in further steps.
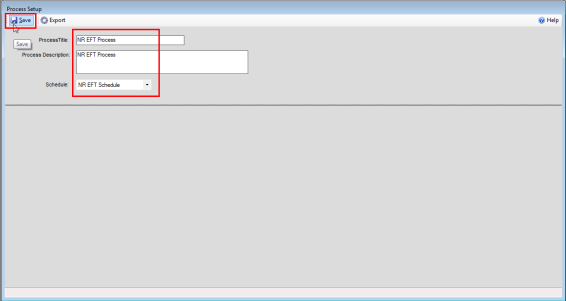
- To create a process which will execute the EFT Transfers process automatically, navigate to Process Setup Add New. Double click on "Add New".
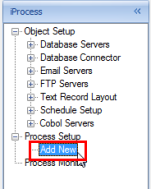
- Process setup page will open up.

- Fill in the Process title and description and select schedule created earlier. Click on Save button.
- Once the process is saved successfully, Process Workflow area will be displayed with the record save message.
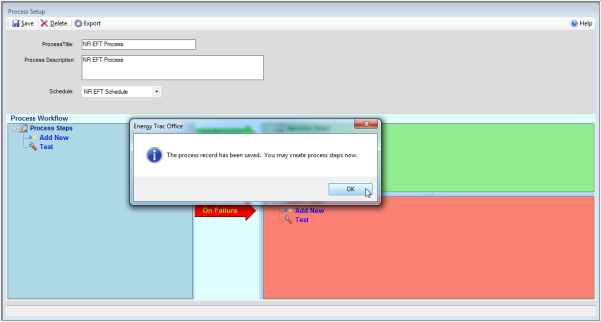
- In the Process Workflow area double click on the Add New link.
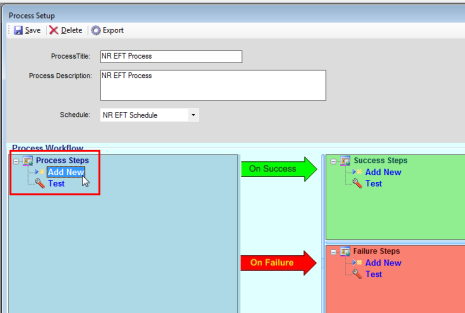
- Process Step Definition form will open.
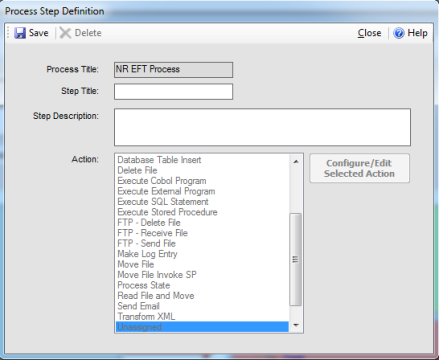
- Fill in the Step Title. Step Description will be filled automatically same as Step Title. You can change the description as per your requirement. Also Action list will be enabled.
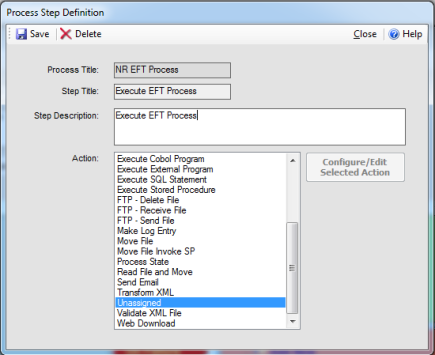
- From the list select "Execute External Program" record and click on "Configure/Edit Selected Action" button.
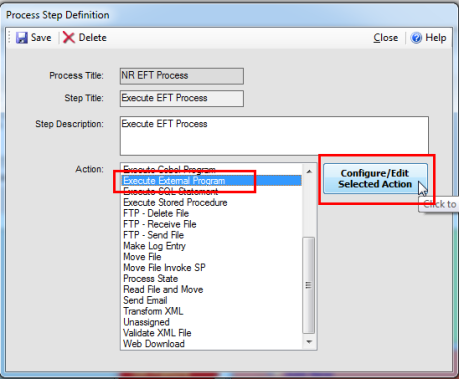
- Execute External Program form will open.
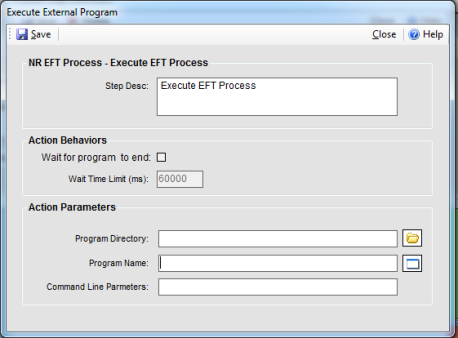
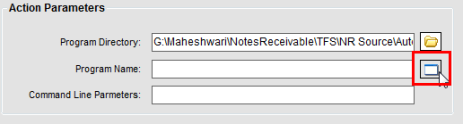
- Click on the Open Folder button besides Program Directory text area in Action Parameter section.
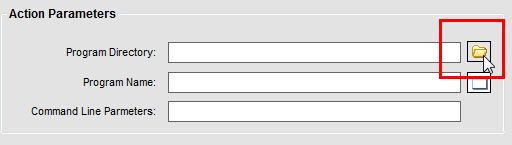
- Browse to the Notes Receivable – Server folder from "C:\Program Files (x86)\iRely" and click "OK" button

- Respective path will be loaded in Program Directory text area. Next click on the Program Name button highlighted in the below image.
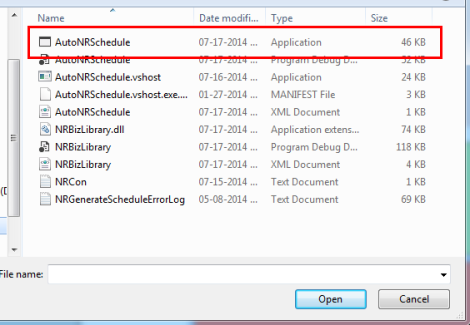
- "Select File" dialog will be opened for the program directory. Select the AutoNRSchedule application from the files as highlighted in below image.
- Click on "Save" button.
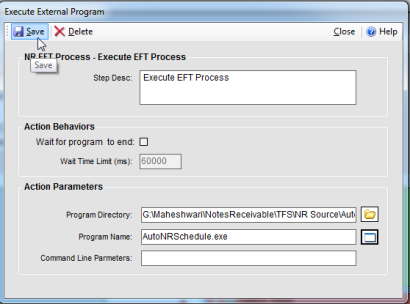
- We are now all set for the Automatic execution of Automatic Notes Receivable EFT process.
EFT Process
- EFT process will process all the notes which are of scheduled invoice type.
- This process will be executed daily in the midnight based on the schedule setup.
- For each note, expected payment date, Number of Days prior note be generated and other late fee details will be retrieved.
- If the current date is equal to the note generation date,
- Schedule invoice will be upd
ated as generated which will be reflected in the schedule history of the note.Anchor _GoBack _GoBack - GL notes receivable account will be credited by Principal portion of invoice
- Interest Income account will be credited by Interest portion of invoice.
- Scheduled Invoice GL Account will be debited by total of Principal and Interest portion.
- Schedule invoice will be upd
- If current date is equal to the expected payment date EFT payment transaction will be initiated,
- Payment transaction entry will be done automatically on the note for the amount of scheduled invoice.
- Cash account will be debited for the total of Principal and Interest.
- Scheduled Invoice GL account will be credited for the total of Principal and Interest.
- Scheduled Invoice will be updated as paid which will be reflected in the scheduled history of the note.
- If payment is pending and passed over grace period, late fee will be processed,
- Late fee will be calculated based on the late fee settings of the note.
- Scheduled Invoice Late fee account will be credited for late fee amount
- Scheduled Invoice GL account will be debited for late fee amount
- This will just apply late fees to the scheduled invoice. Payment of late fees should be done manually using Receive Payment screen.
Overview
Content Tools