Page History
...
| Module | Description | How To | |||||||
|---|---|---|---|---|---|---|---|---|---|
| System Manager |
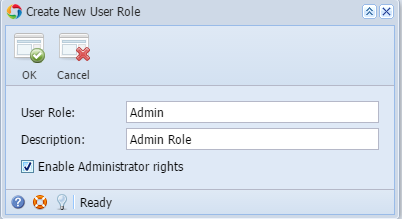
| Go to System Manager menu > User Roles | Click New button Enter Role details Tick the check box to create an Admin role Click OK toolbar button when done
| ||||||
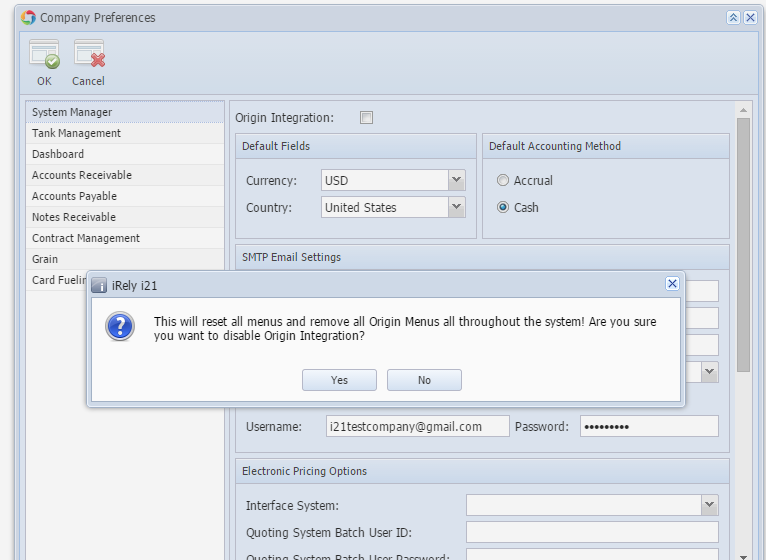
| 2. Create Non Origin User | Go to System Manager menu > Company Preferences Turn off Origin Conversion then click Ok toolbar button
| ||||||||
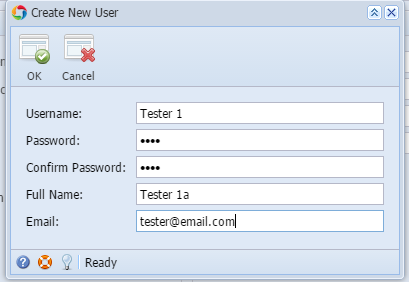
| Go to System Manager menu > User Security | |||||||||
Click New button Enter User details Click OK toolbar button when done Click Save on User Security screen
| |||||||||
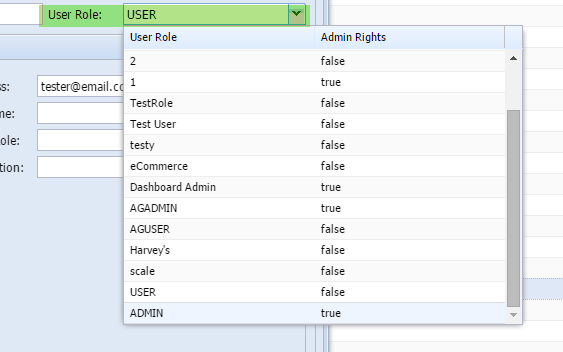
| 2a. Assign the created user role to new user | While record create from step 2 is still open, click the User Role dropdown Select the role from the list
Record will be automatically saved | ||||||||
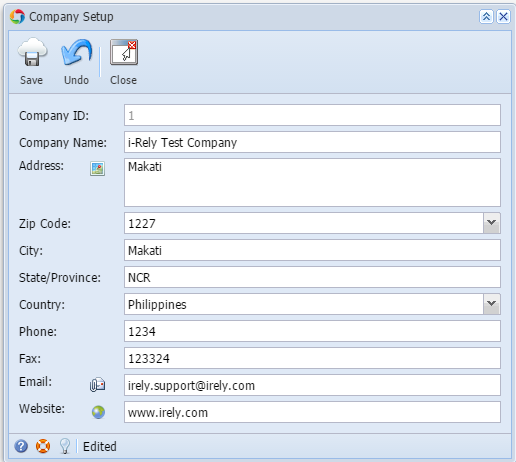
| 3. Change the Company Setup | Go to System Manager menu > Company Setup | To be able to change company name, make sure origin integration is disabled on Company Preferences Enter Necessary details Click Save toolbar button
| |||||||
Reload i21 for changes to take effect
| |||||||||
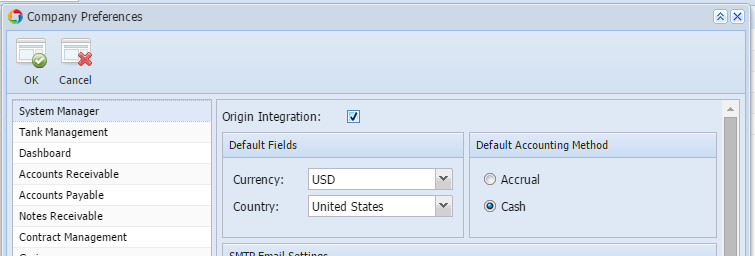
| 4. Enable Origin Integration | Go to System Manager menu > Company Preferences | Tick the Origin Integration checkbox Click Ok toolbar button
| |||||||
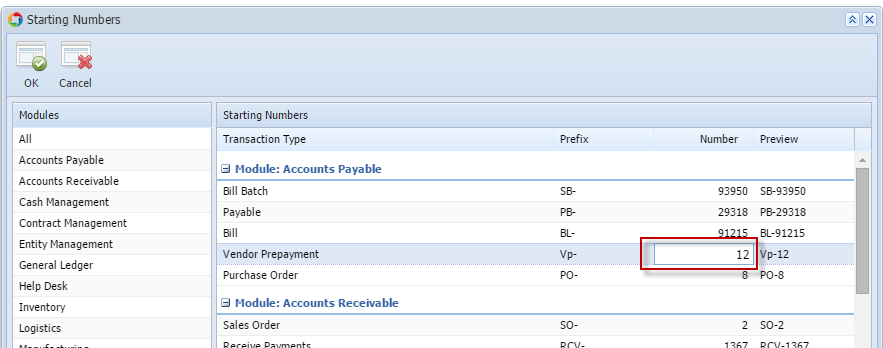
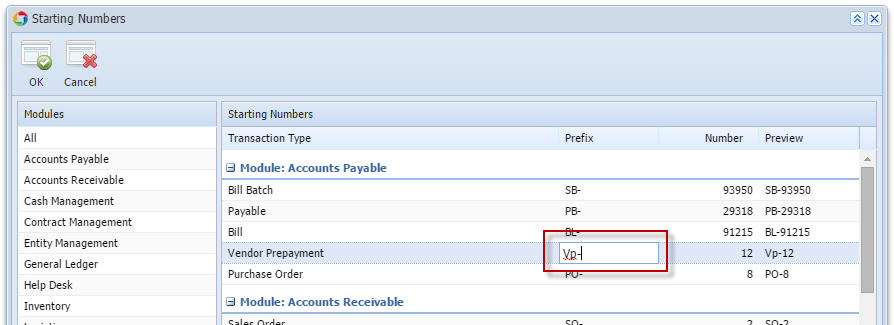
| 5. Change the Starting Number and Prefix of a transaction type | Go to System Manager menu > Starting Numbers | Select the transaction type and change the starting number from the Number column Click Ok toolbar button
| |||||||
Edit the Prefix then Click OK
| |||||||||
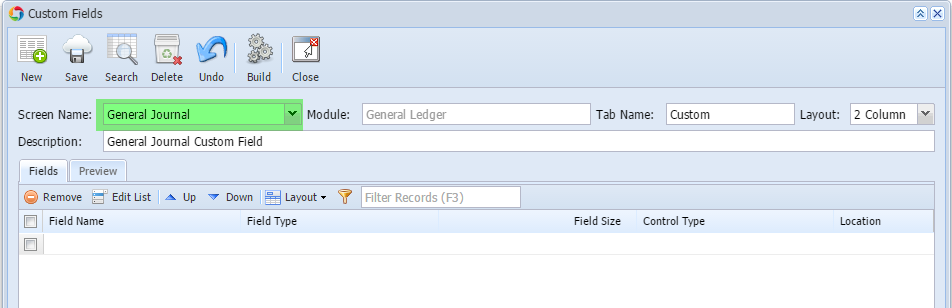
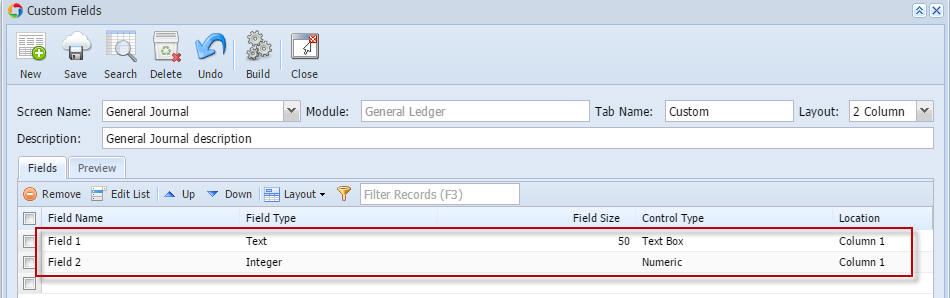
| 6. Create custom groupCustom fields | Go to System Manager menu > Custom Fields | ||||||||
Click New button Select the Screen from the Screen Name combo box
Add the custom fields on the grid:
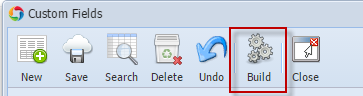
Click Build button to apply the custom fields to the modules
| |||||||||
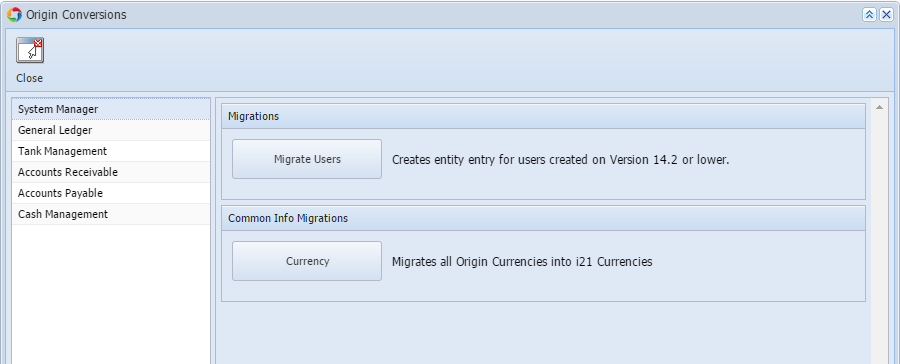
| 7. Migrate Users and Currency from 14.2 and lower version | Go to System Manager menu > Utilities > Origin Conversions | ||||||||
Click Migrate Users to migrate users from 14.2 and lower Click Currency button to migrate all origin currencies
| |||||||||
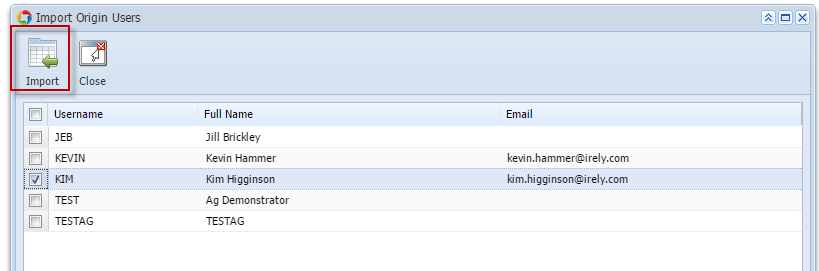
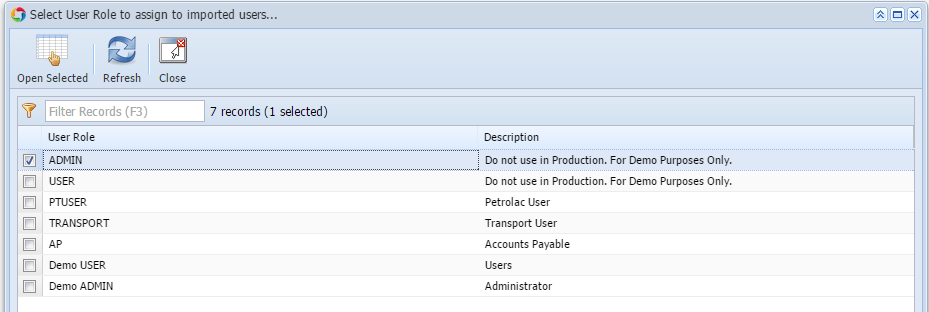
| 8. Import Origin Users | Go to System Manager menu > Utilities > Import Origin Users | Select a user/s then click Import button
Select a user role to assign the imported user/s then click Open Selected
| |||||||
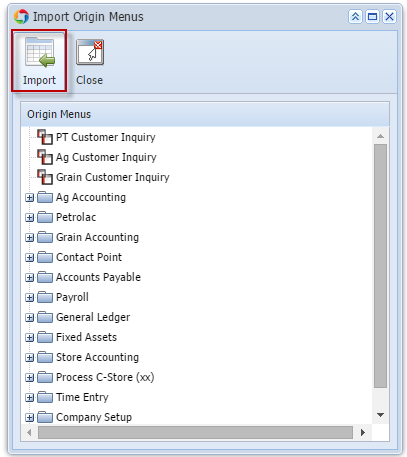
| 9. Import Origin Menus | Go to System Manager menu > Utilities > Import Origin Menus Click Import button
| ||||||||
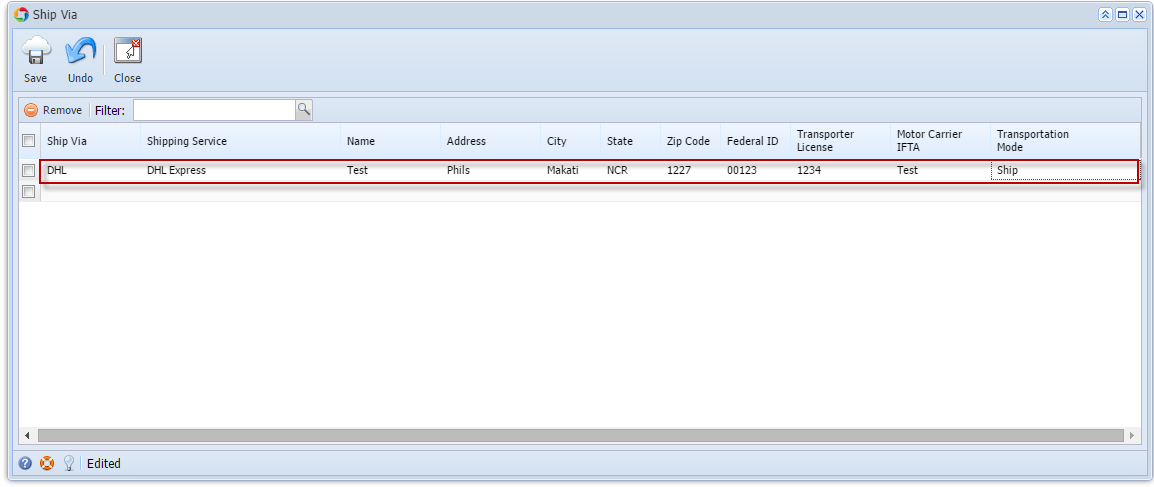
| 10. Setup Ship Via | Go to Common Info menu > Ship Via Input necessary details:
Click Save
| ||||||||
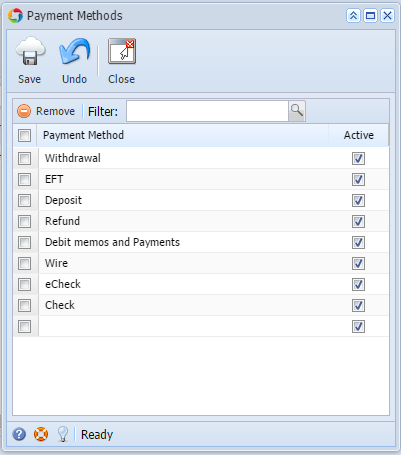
| 11. Setup the Payment Method | Go to Common Info menu > Payment Methods Input the Payment Method Click Save
| ||||||||
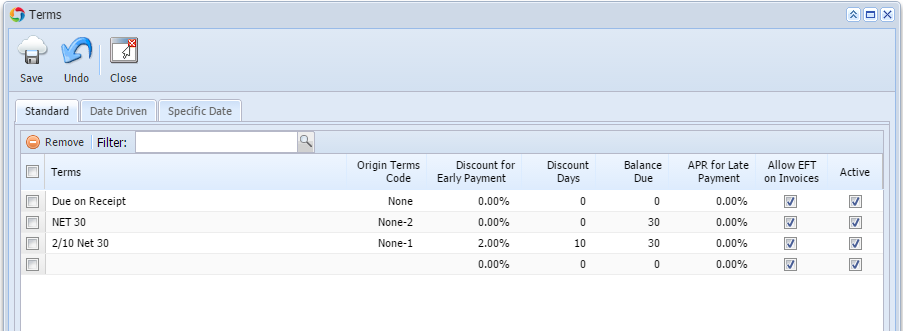
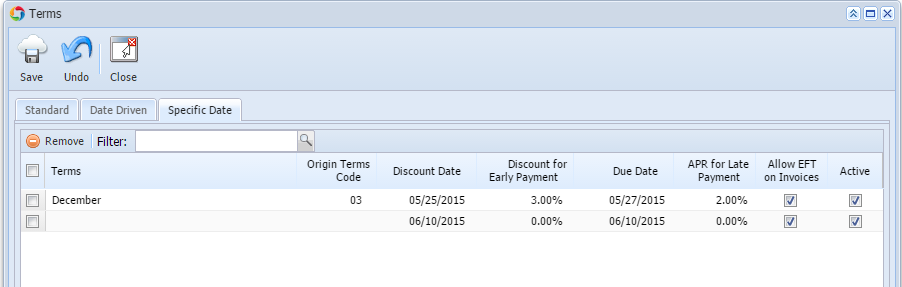
| 12. Setup the Terms | Go to Common Info menu > Terms | ||||||||
Setup the Standard Terms Input the necessary details:
Click Save
| |||||||||
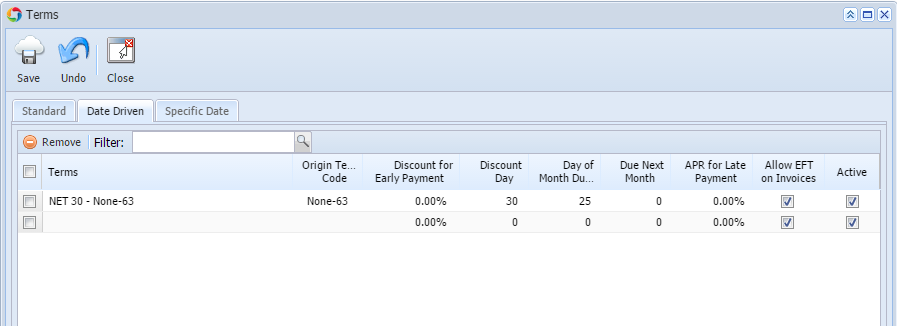
Setup the Date Driven Terms Input the necessary details:
Click Save
| |||||||||
Setup the Specific Date Terms Input the necessary details:
Click Save
Click Import button
| |||||||||
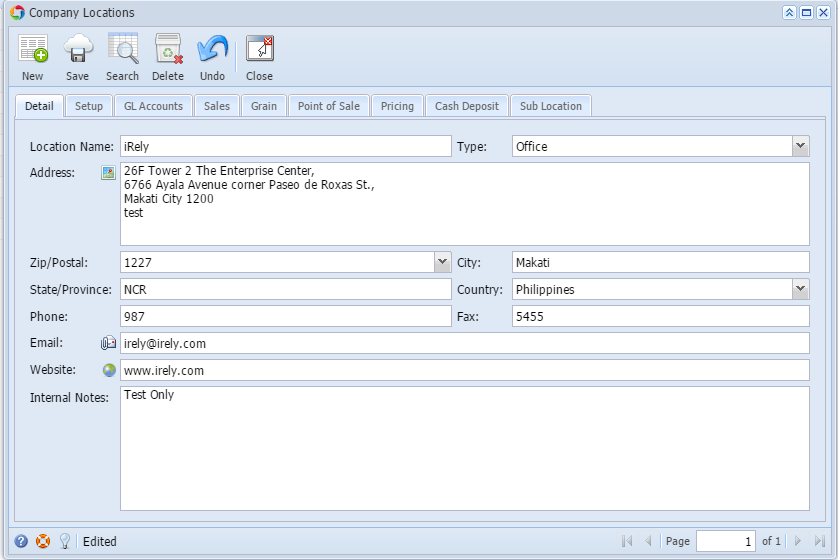
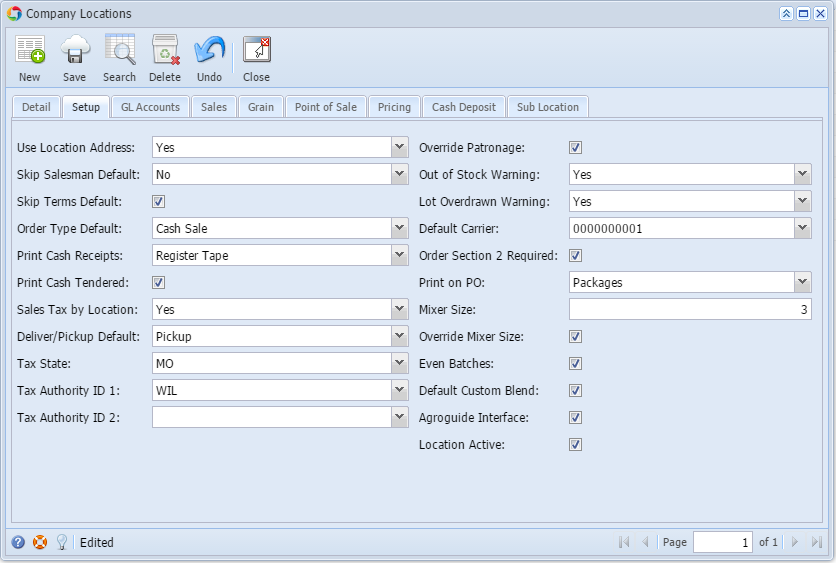
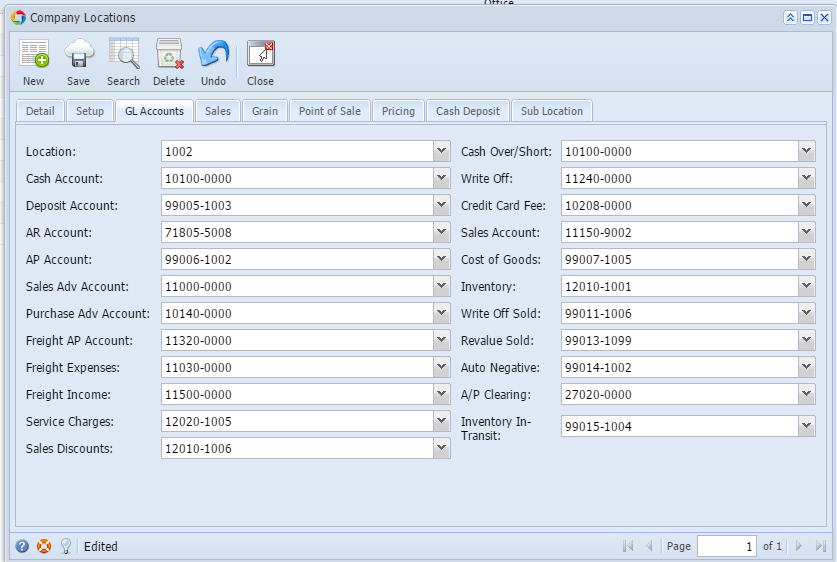
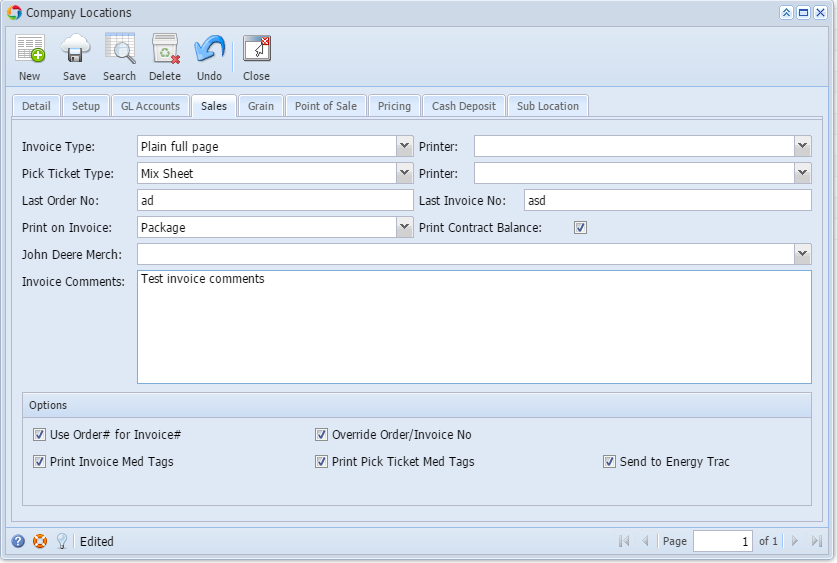
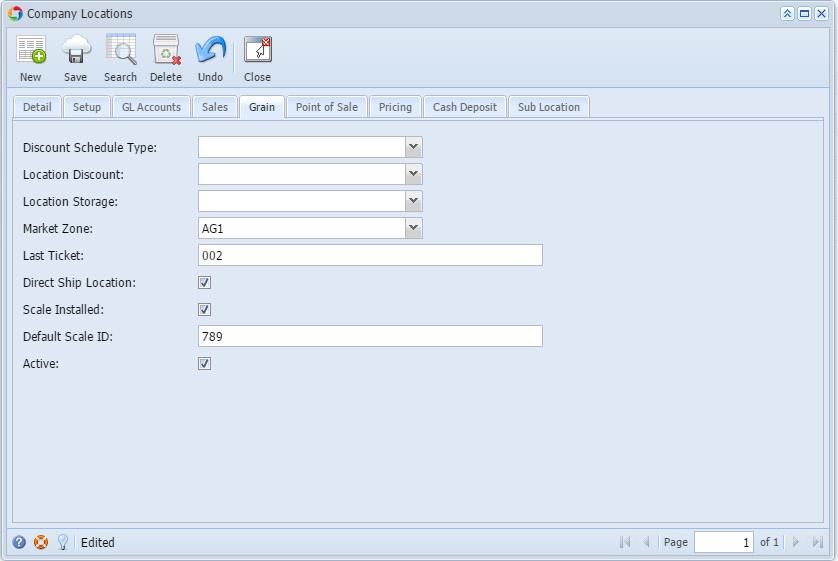
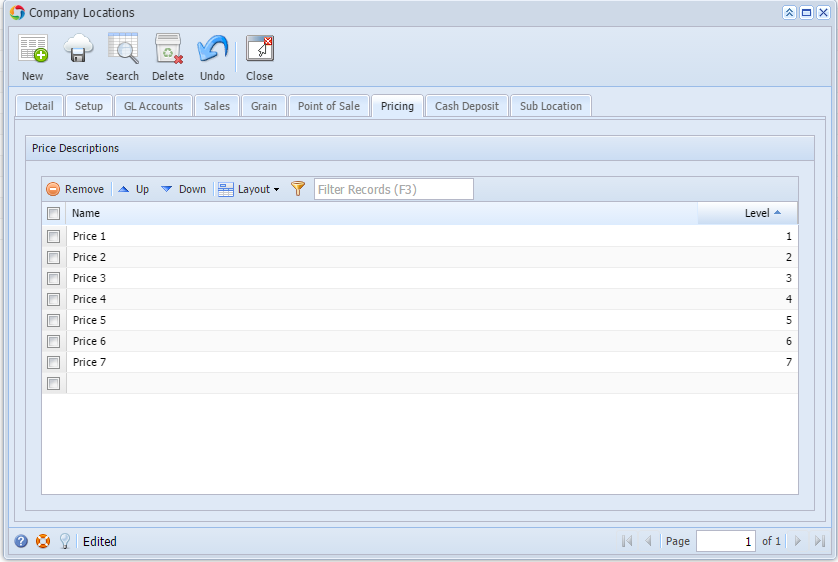
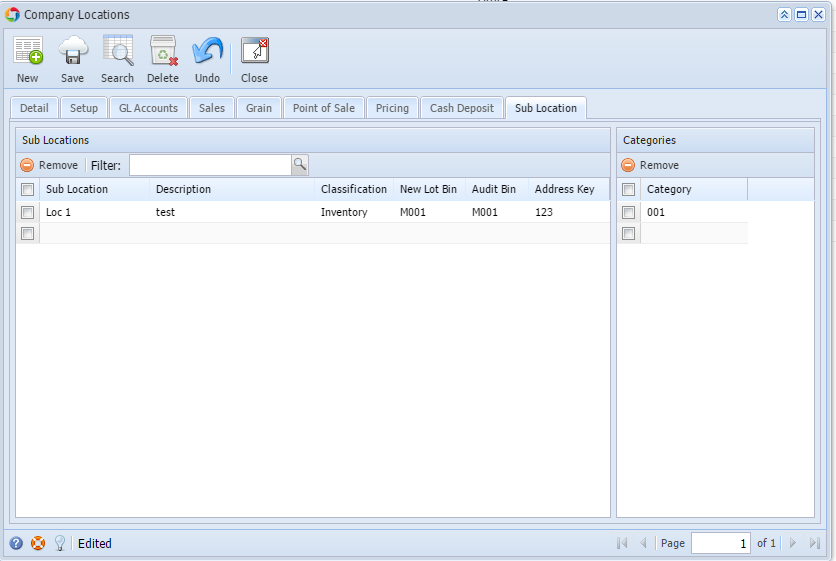
| 1013. Create a Company Location | Go to Common Info menu > Company Locations | ||||||||
Click New button Setup the necessary items on each tab Enter necessary details on the Detail tab
Enter necessary details on the Setup tab
Setup the GL Accounts in this tab
Setup the Sales tab
Setup the Grain tab
Setup the Point of Sale tab
Setup the Pricing tab
Setup the Sub-Location tab
Click Save when done | |||||||||
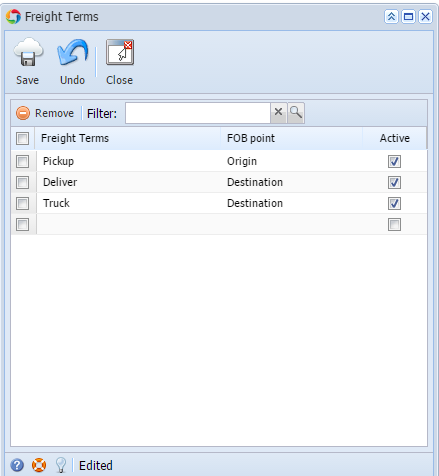
| 1114. Create a Freight Term | Go to Common Info menu > Freight Terms | Enter a Freight Term and Select an FOB Point Tick the Active checkbox Click Save
| |||||||
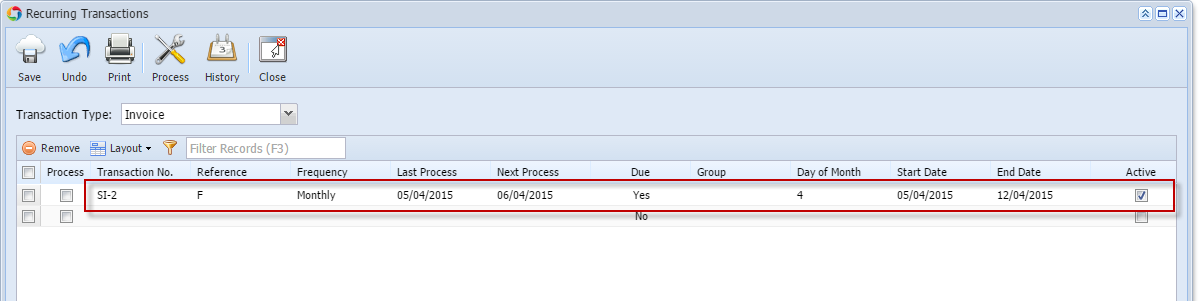
| 1215. Recur Process a recurring transaction | Go to Common Info menu > Recurring Transactions Select a transaction type from combo box
Select a Transaction No. on the grid
If the transaction is already due, tick the checkbox under Process column Click Process toolbar button to process the transactions If a transaction is not yet due but you wish to process, you will just have to confirm processing it. | ||||||||
| 16. Create a Tax Class | Go to Common Info menu > Tax Class Input Tax Class name Click Save | ||||||||
| 17. Create a Tax Code | Go to Common Info menu > Tax Codes Click New button Input necessary details:
Click Save
| ||||||||
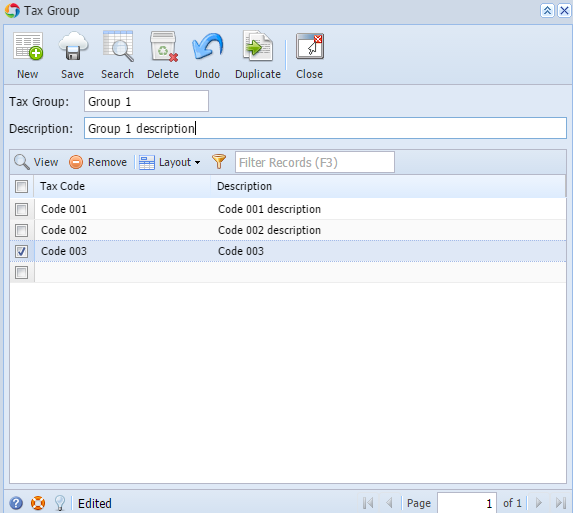
| 18. Create a Tax Group | Go to Common Info menu > Tax Groups Click New button Input necessary details:
Click Save
| ||||||||
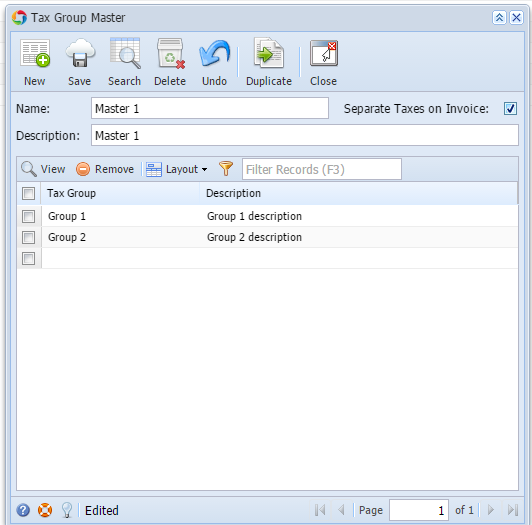
| 19. Create a Tax Group Master | Go to Common Info menu > Tax Group Masters Click New button Input necessary details:
| ||||||||
Click Save
| |||||||||
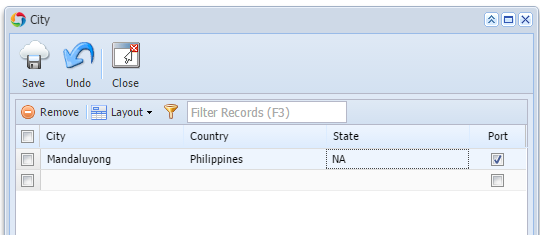
| 20. Create a City | Go to Common Info menu > Cities Input necessary details:
Click Save
| ||||||||
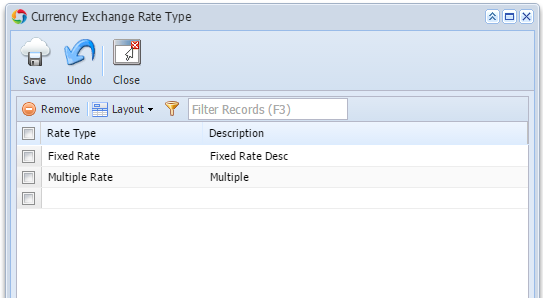
| 21. Create a Currency Exchange Rate Type | Go to Common Info menu > Currency Exchange Rate Types Input necessary details:
Click Save
| ||||||||
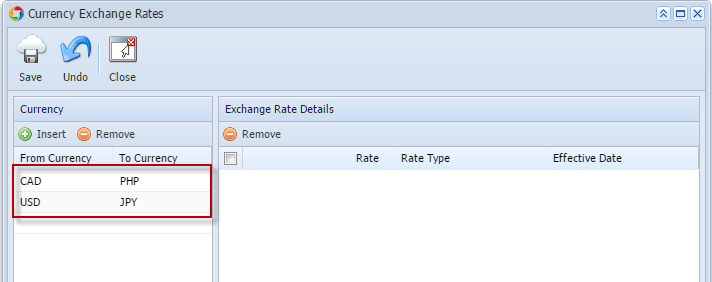
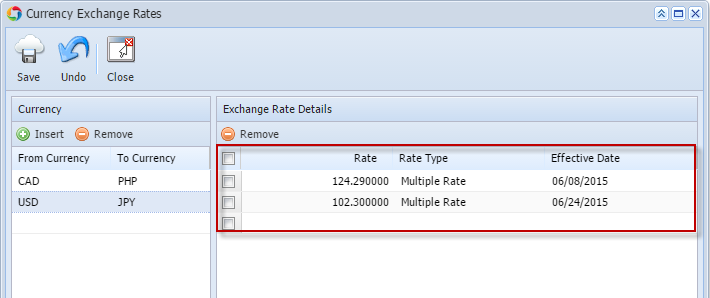
| 22. Create a Currency Exchange Rate | Go to Common Info menu > Currency Exchange Rates On the Currency Panel select a From Currency and To Currency
Select pair from Currency column to enable Exchange rate details Input necessary details:
Click Save
| ||||||||
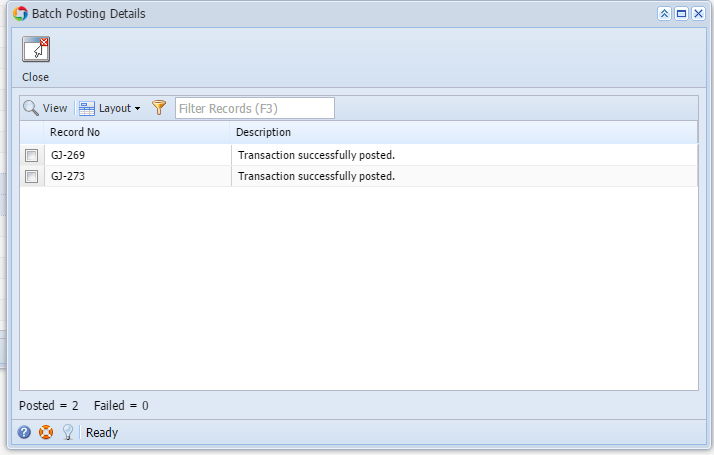
| 23. Batch Posting | Go to Common Info menu > Batch Posting Select Transactions to be posted Click Post toolbar button
| ||||||||
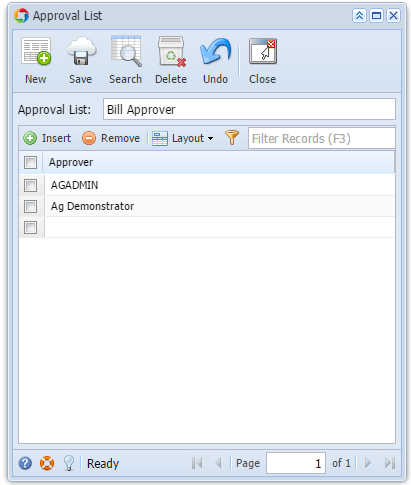
| 24. Create an Approval List | Go to Common Info menu > Approval List Click New
|
|


Overview
Content Tools