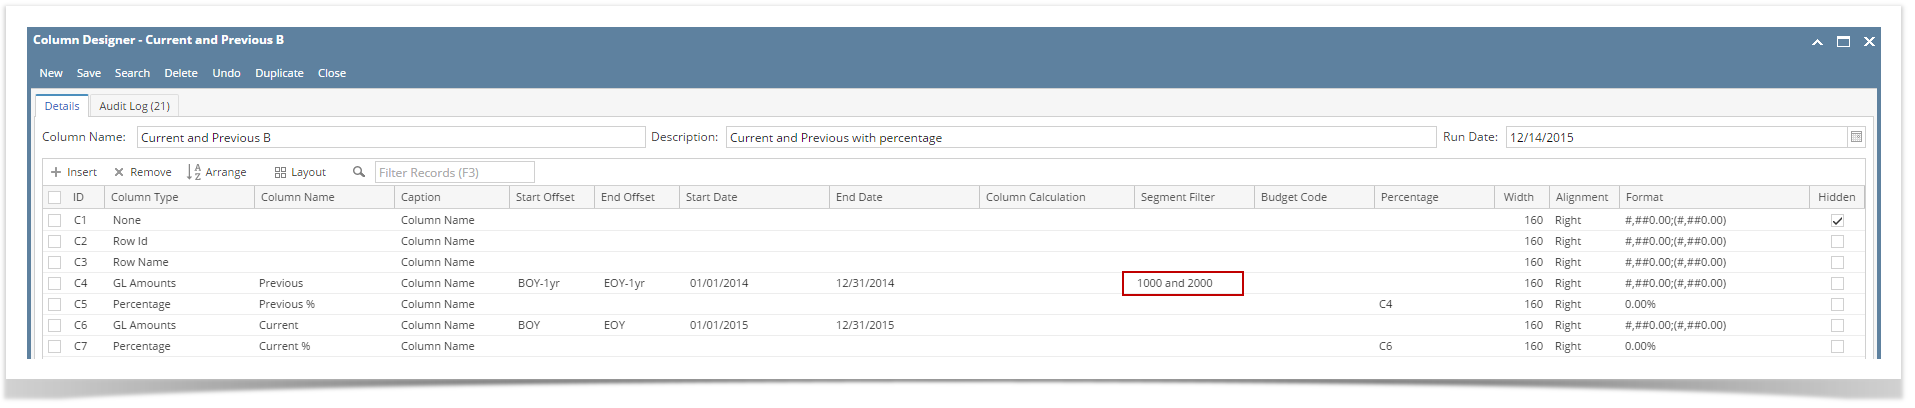
Follow the steps below on how to assign Segment Filter to a column. - Select any of these columns,
- Beginning Balance
- Budget
- Credit
- Credit Units
- Debit
- Debit Units
- End Balance
- GL Amounts
- GL Trend
- Units
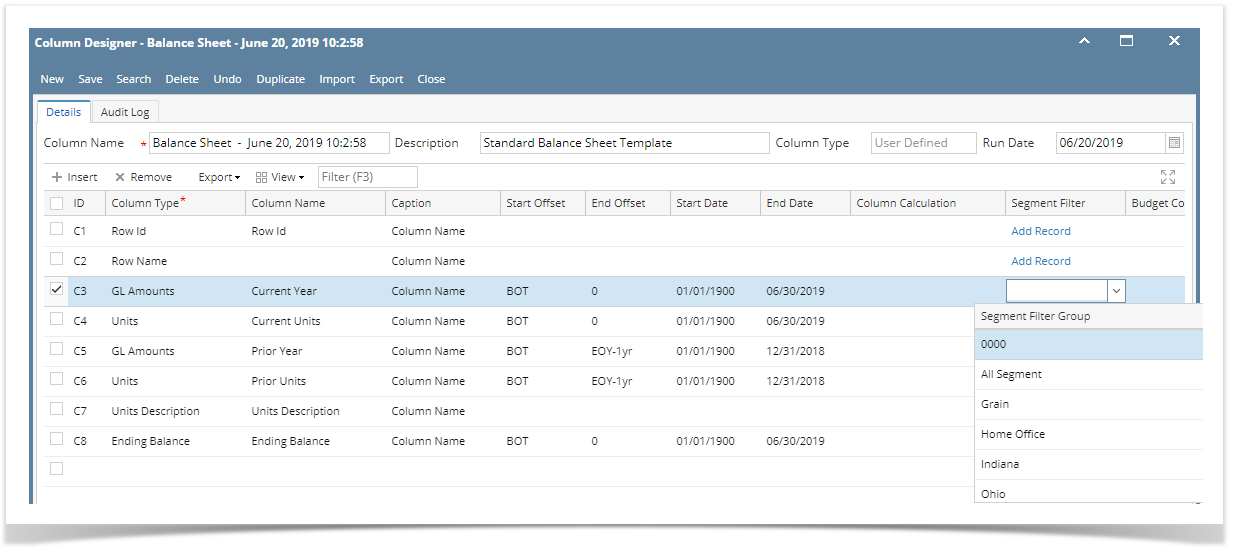
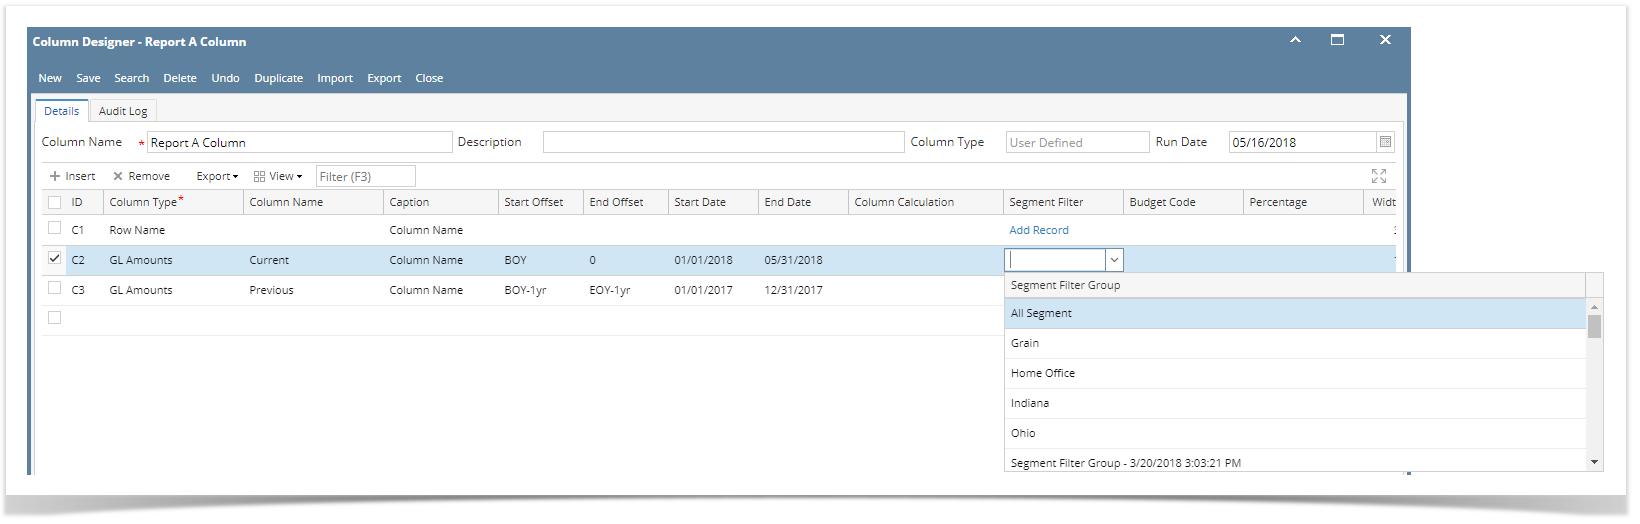
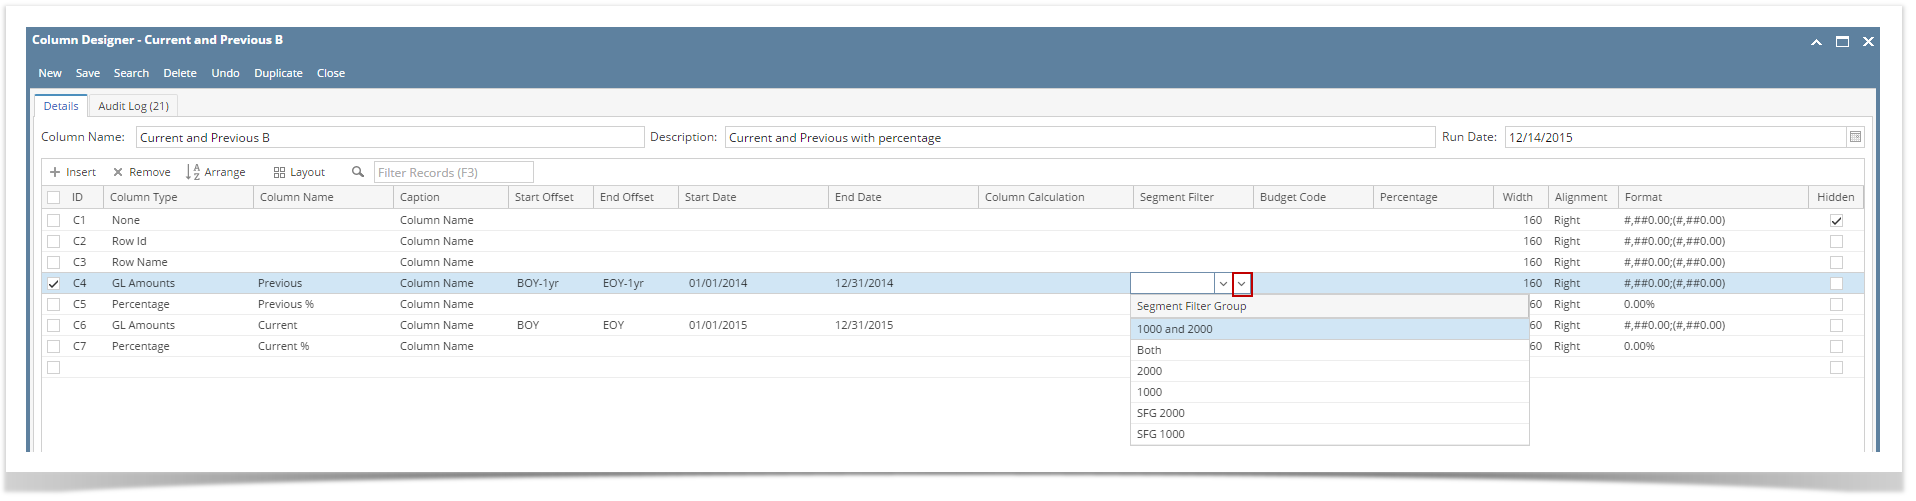
- Place your cursor on the Segment Filter field. A dropdown button will be shown. Click on that button. The Segment Filter Group combo box will be shown.
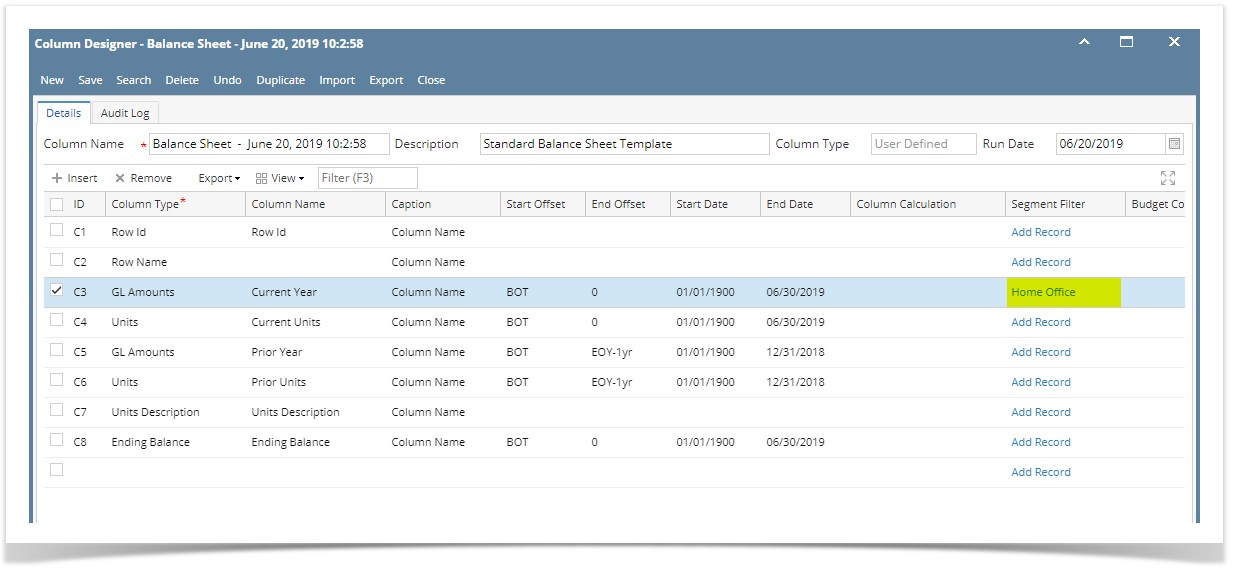
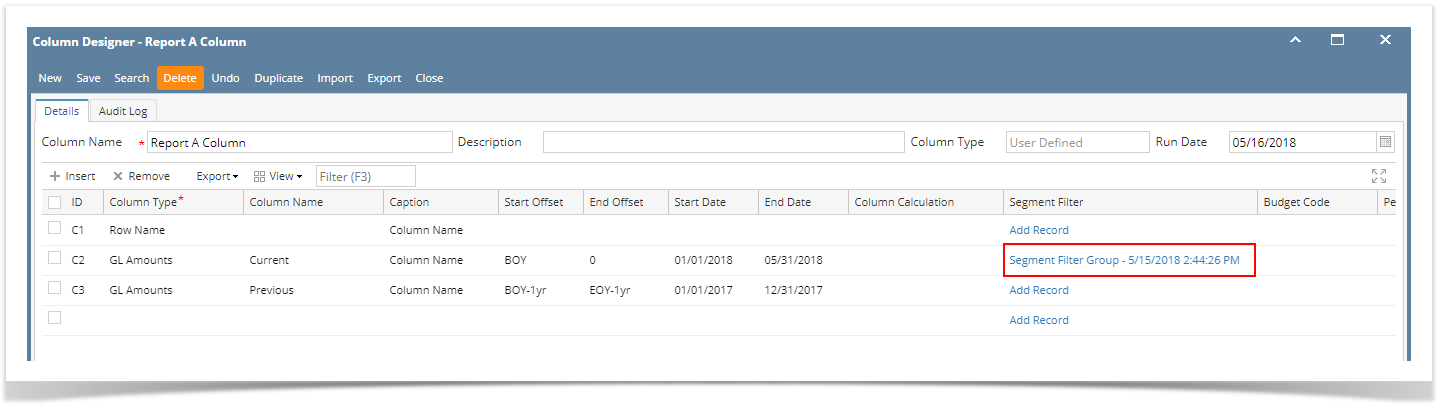
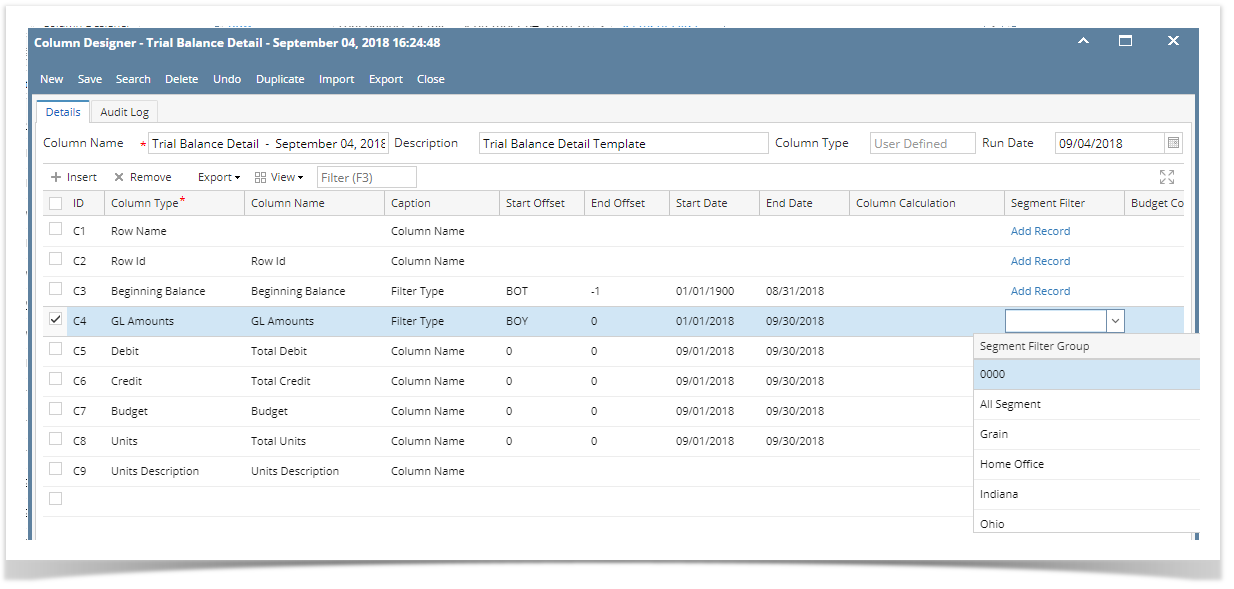 Image Modified Image Modified - Select a Segment Filter for the column.
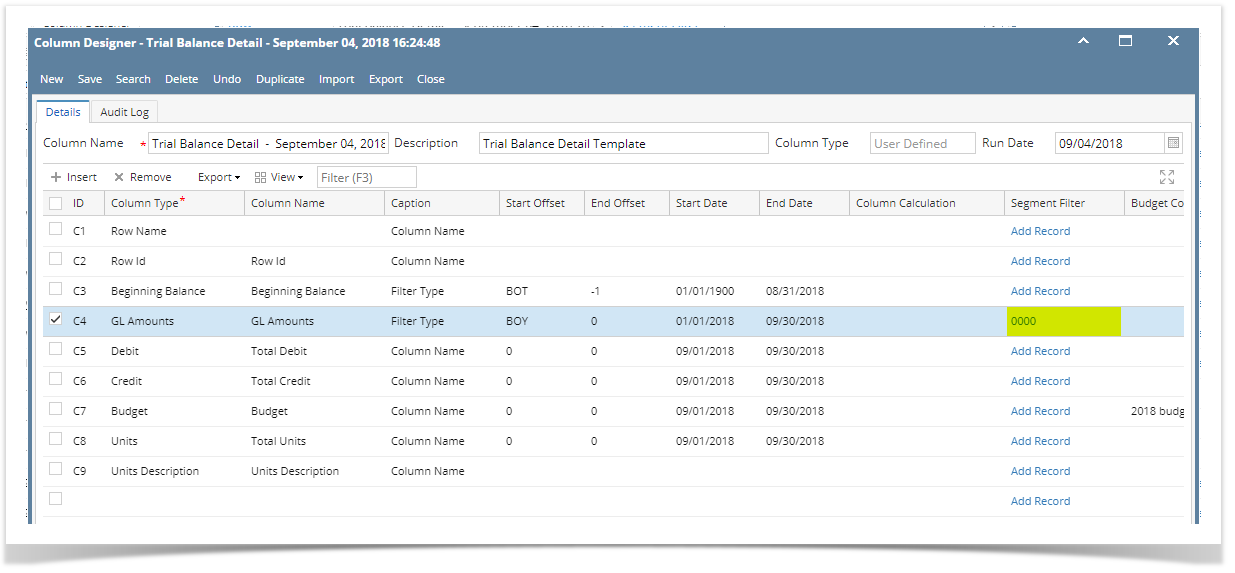 Image Modified Image Modified - Save and close the Column Designer screen.
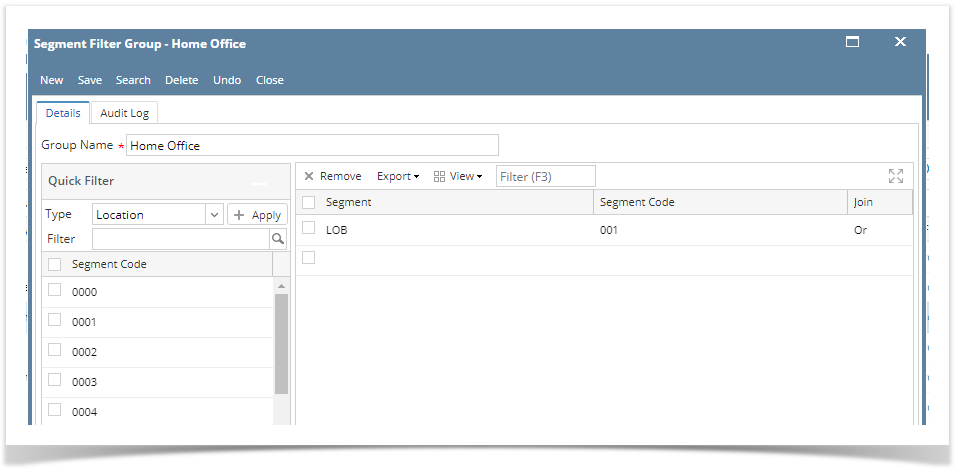
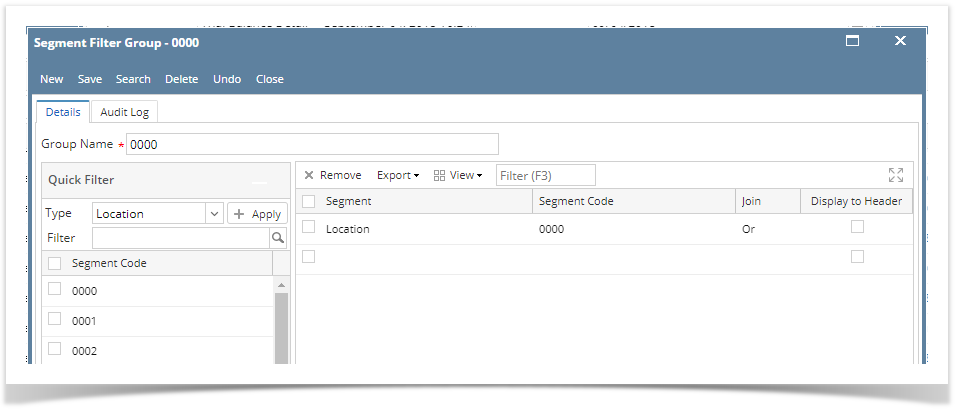
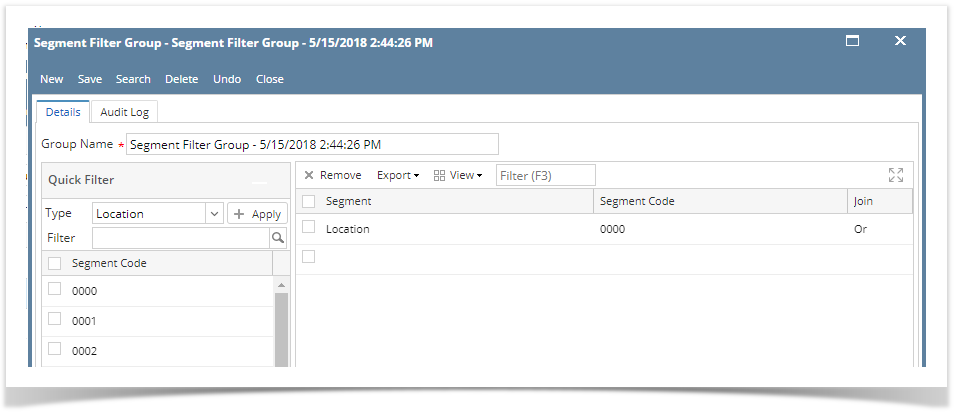
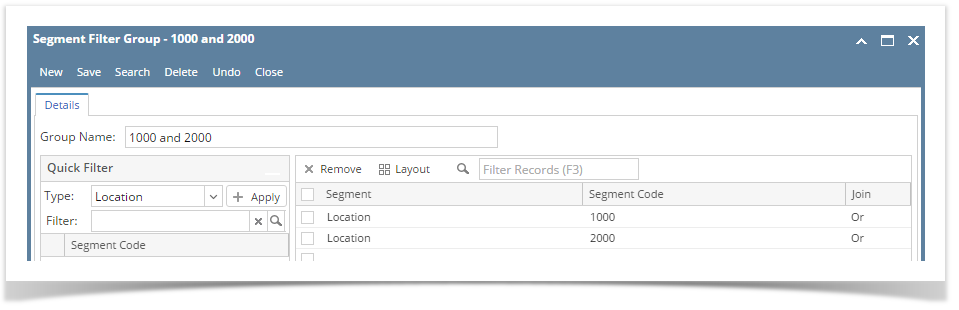
- When printing a report using this column designer, the specific column will be filtered by Location
|