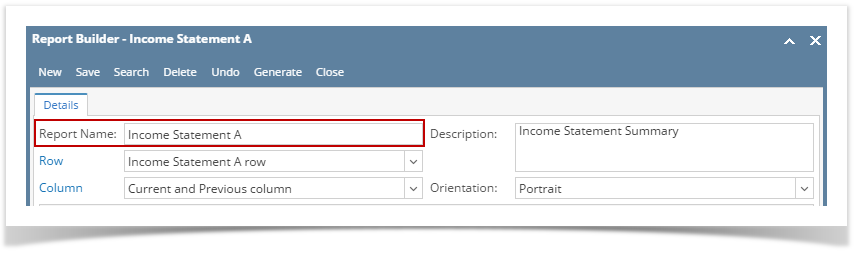
The Report Title header/footer is used to add the report name entered from the Report Builder screen to the report when previewed/printed.
Follow the steps below to guide you on how to add report title header/footer.
- A new row will be available in the grid section.
- In the Type field, select Report Title.
- Leave the Header/Footer Name field blank.
- The Row Number field dictates the order of the header/footer. Set this field to 1 if this will be the first row to show in the header/footer, 2 if second row, so on and so forth. Set this to 1 for this illustration.
- In the Alignment field, set how the value for the column be displayed. Set this to Center.
- In the With field, select Page. This will occupy the entire page.
- Leave Column Description field blank.
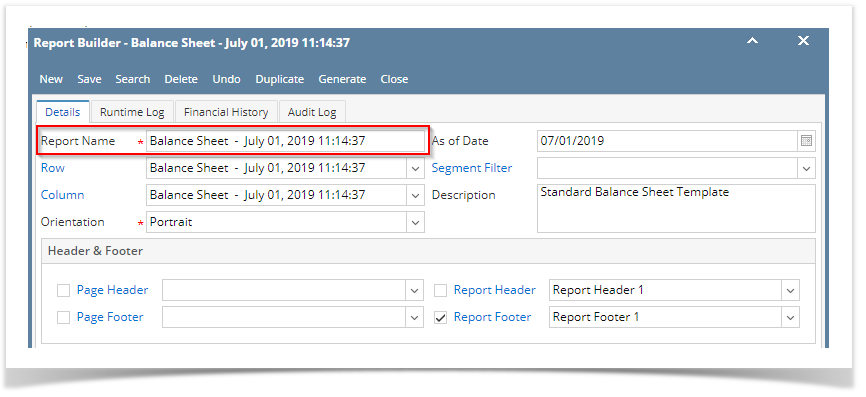
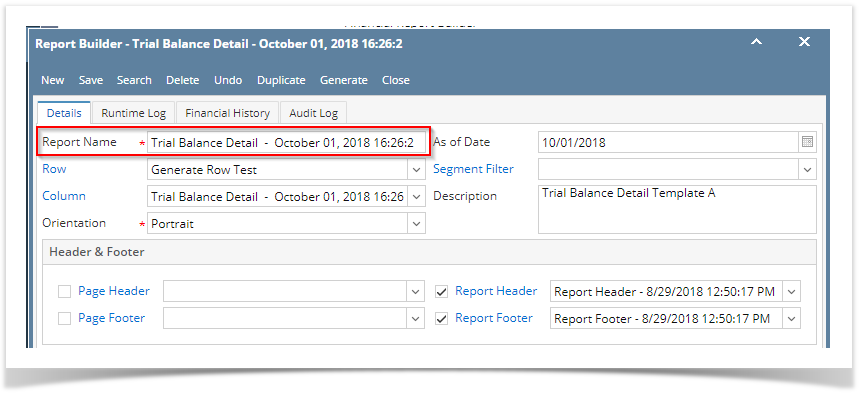
This is how Report Title header/footer setup will look like.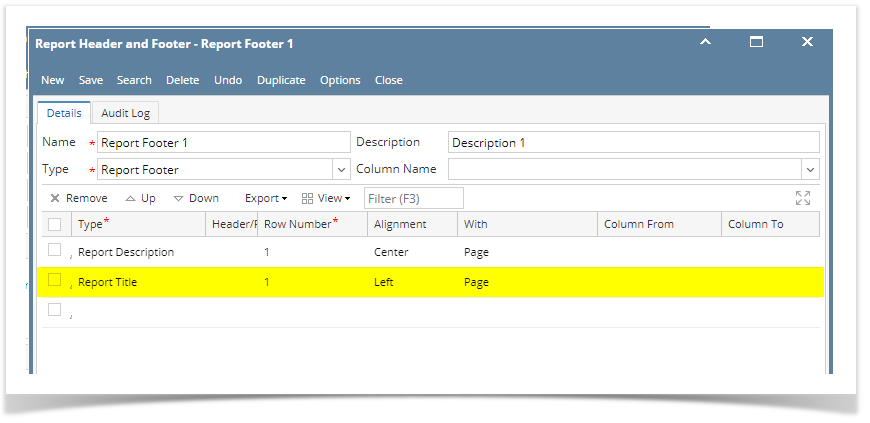
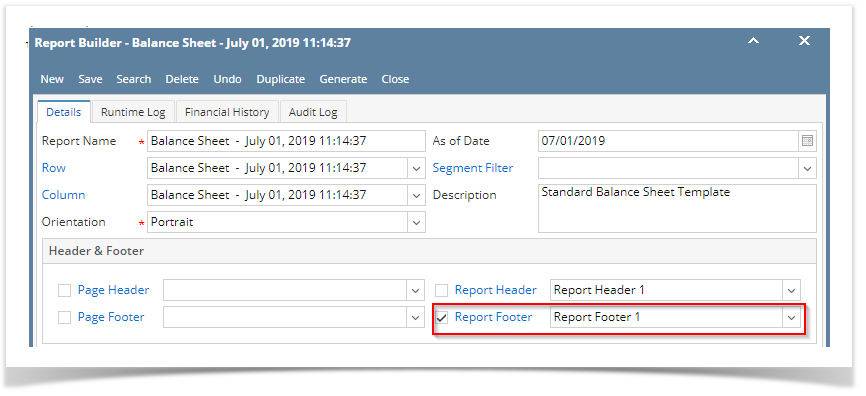
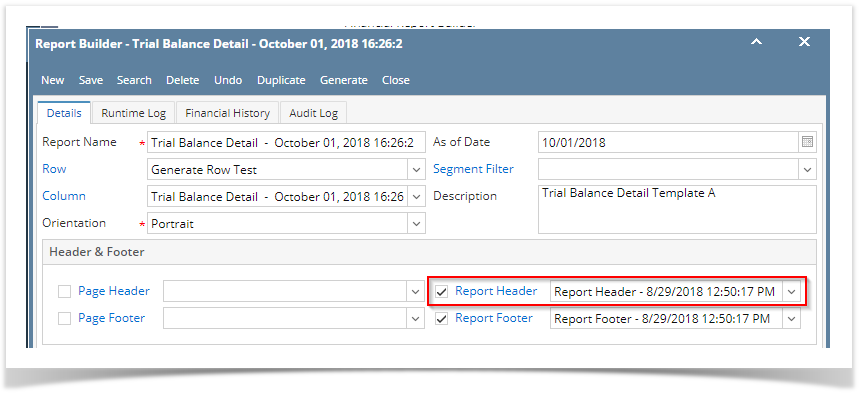
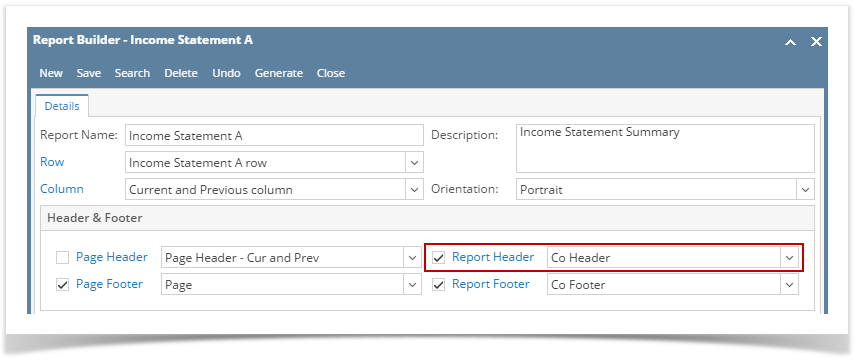
Select this Report Header in the Report Builder and make sure that the checkbox before it is checked when printing/previewing the report.
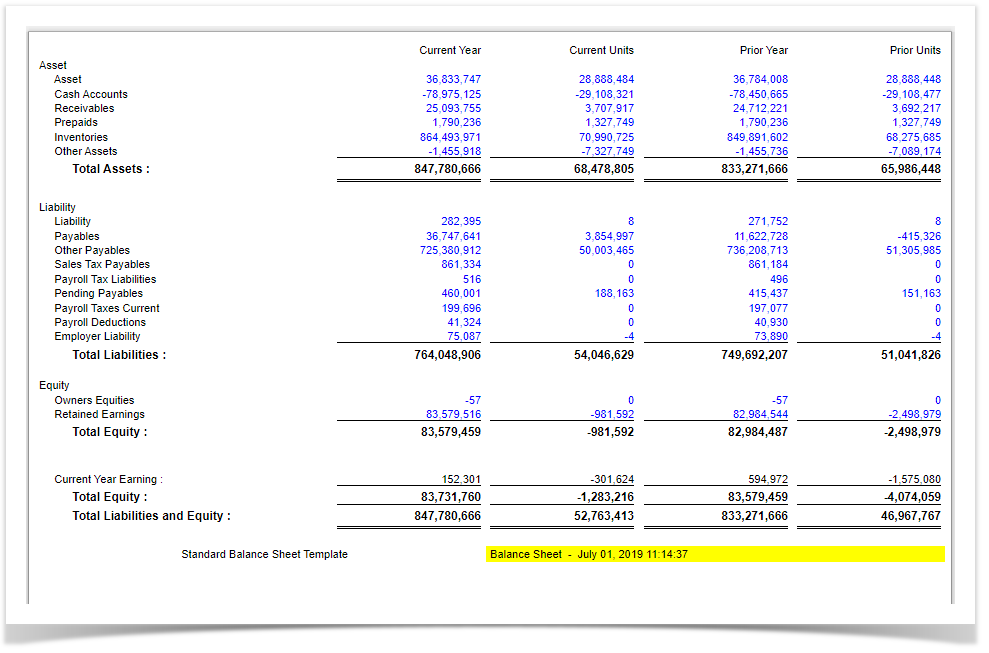
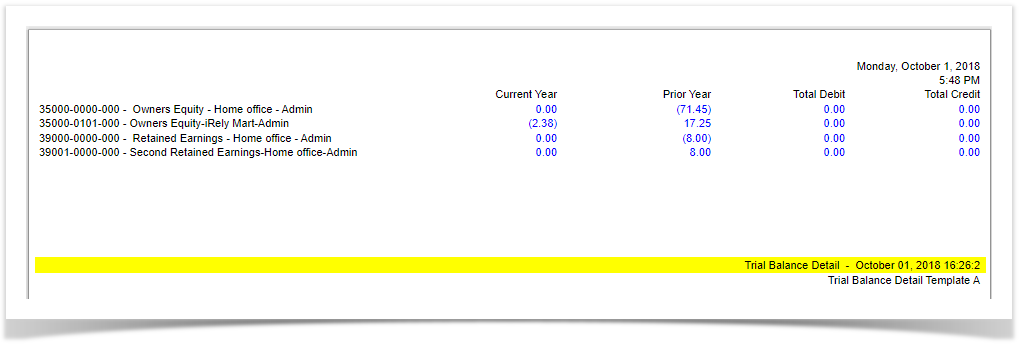
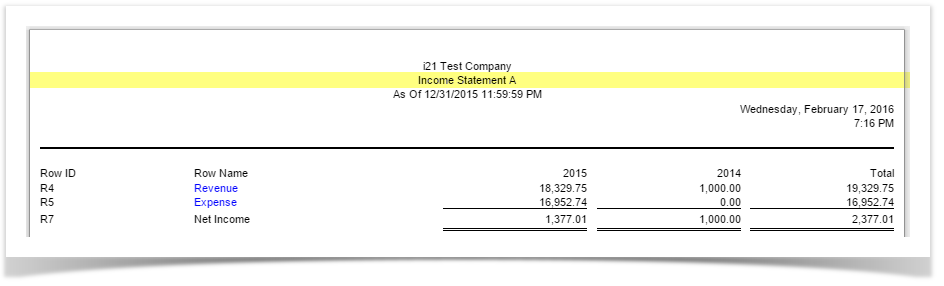
Here's how it is shown when report is previewed/printed. Highlighted section is the Report Title type header/footer. Since this is a report header, this will show on the first page of the report only.
You can enhance this header/footer by setting its Font Properties and Row Height. See How to Configure header and footer font properties and row height topic to guide you on how to do this.
The Report Title header/footer is used to add the report name entered from the Report Builder screen to the report when previewed/printed.
Follow the steps below to guide you on how to add report title header/footer.
- A new row will be available in the grid section.
- In the Type field, select Report Title.
- Leave the Header/Footer Name field blank.
- The Row Number field dictates the order of the header/footer. Set this field to 1 if this will be the first row to show in the header/footer, 2 if second row, so on and so forth. Set this to 1 for this illustration.
- In the Alignment field, set how the value for the column be displayed. Set this to Center.
- In the With field, select Page. This will occupy the entire page.
- Leave Column Description field blank.
This is how Report Title header/footer setup will look like.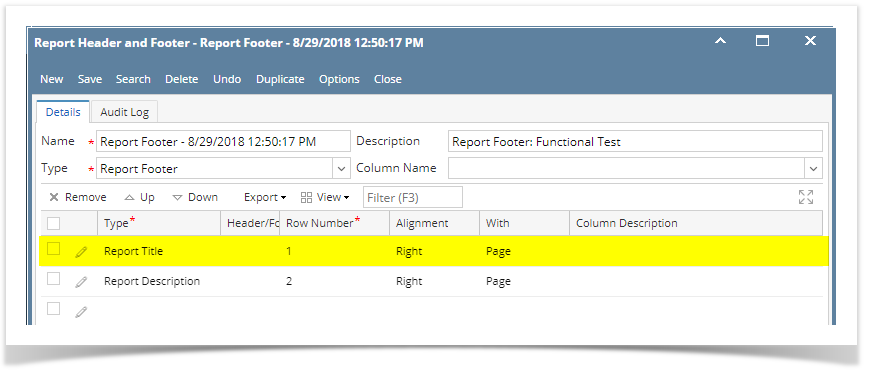
Select this Report Header in the Report Builder and make sure that the checkbox before it is checked when printing/previewing the report.
Here's how it is shown when report is previewed/printed. Highlighted section is the Report Title type header/footer. Since this is a report header, this will show on the first page of the report only.
You can enhance this header/footer by setting its Font Properties and Row Height. See How to Configure header and footer font properties and row height topic to guide you on how to do this.
The Report Title header/footer is used to add the report name entered from the Report Builder screen to the report when previewed/printed.
Follow the steps below to guide you on how to add report title header/footer.
- A new row will be available in the grid section.
- In the Type field, select Report Title.
- Leave the Header/Footer Name field blank.
- The Row Number field dictates the order of the header/footer. Set this field to 1 if this will be the first row to show in the header/footer, 2 if second row, so on and so forth. Set this to 1 for this illustration.
- In the Alignment field, set how the value for the column be displayed. Set this to Center.
- In the With field, select Page. This will occupy the entire page.
- Leave Column Description field blank.
This is how Report Title header/footer setup will look like.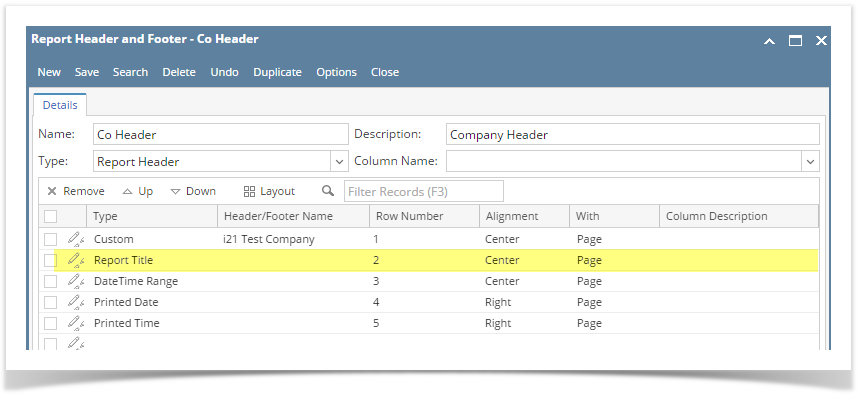
Select this Report Header in the Report Builder and make sure that the checkbox before it is checked when printing/previewing the report.
Here's how it is shown when report is previewed/printed. Highlighted section is the Report Title type header/footer. Since this is a report header, this will show on the first page of the report only.
You can enhance this header/footer by setting its Font Properties and Row Height. See How to Configure header and footer font properties and row height topic to guide you on how to do this.
The Report Title header/footer is used to add the report name entered from the Report Builder screen to the report when previewed/printed.
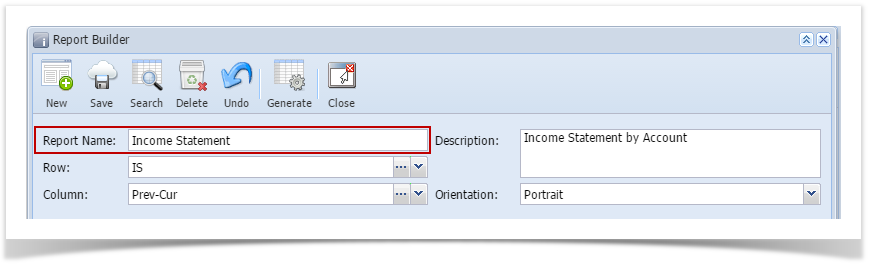
Follow the steps below to guide you on how to add report title header/footer.
- A new row will be available in the grid section.
- Leave the Description field blank.
- In the Type field, select Report Title.
- The Group field dictates the order of the header/footer. Set this field to 1 if this will be the first row to show in the header/footer, 2 if second row, so on and so forth. Set this to 1 for this illustration.
- In the Alignment field, set how the value for the column be displayed. Set this to Center.
- In the With field, select Page. This will occupy the entire page.
- Leave Column Description field blank.
This is how Report Title header/footer setup will look like.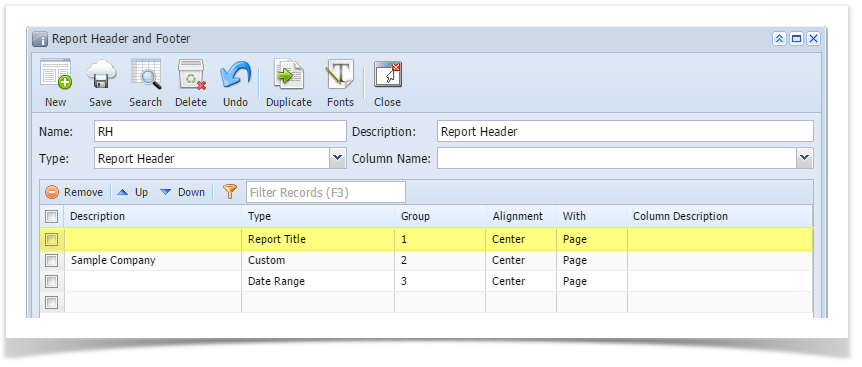
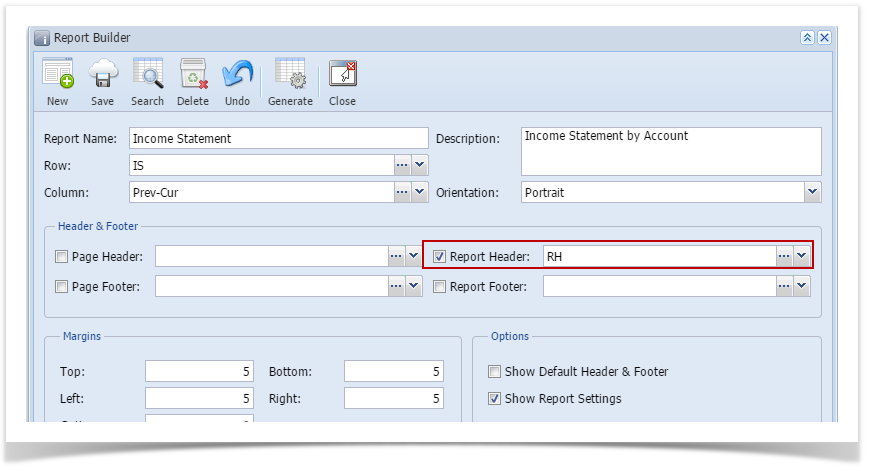
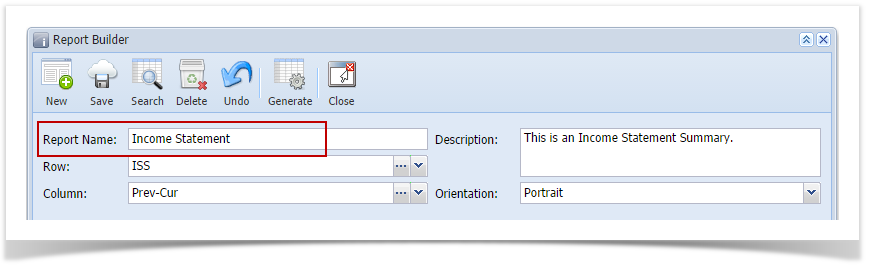
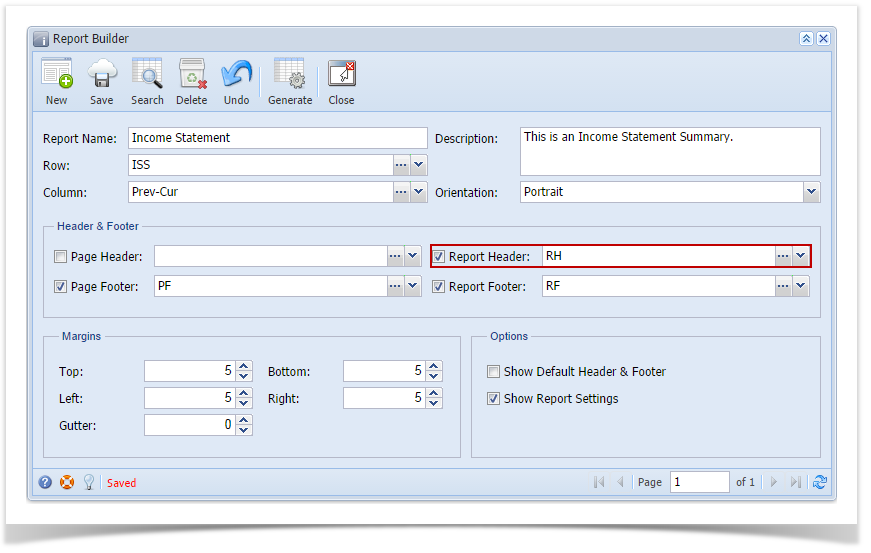
Select this Report Header in the Report Builder and make sure that the checkbox before it is checked when printing/previewing the report.
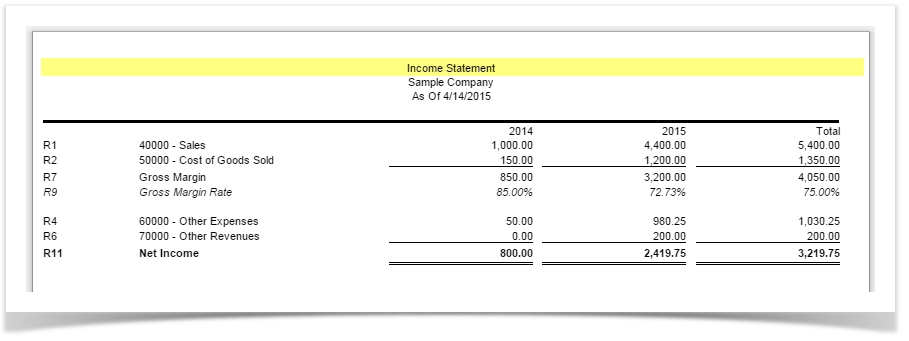
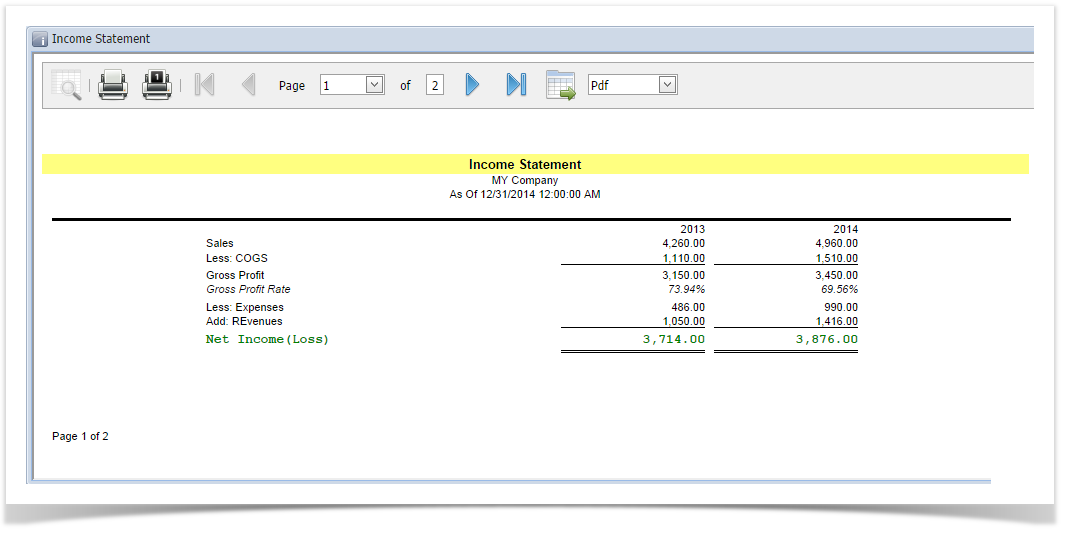
Here's how it is shown when report is previewed/printed. Highlighted section is the Report Title type header/footer.
You can enhance this header/footer by setting its Font Properties and Row Height. See How to Configure header and footer font properties and row height topic to guide you on how to do this.
The Report Title header/footer is used to add the report name entered from the Report Builder screen to the report when previewed/printed.
Follow the steps below to guide you on how to add report title header/footer.
- A new row will be available in the grid section.
- Leave the Description field blank.
- In the Type field, select Report Title.
- The Group field dictates the order of the header/footer. Set this field to 1 if this will be the first row to show in the header/footer, 2 if second row, so on and so forth. Set this to 1 for this illustration.
- In the Alignment field, set how the value for the column be displayed. Set this to Center.
- In the With field, select Page. This will occupy the entire page.
- Leave Column Description field blank.
This is how Report Title report header setup will look like.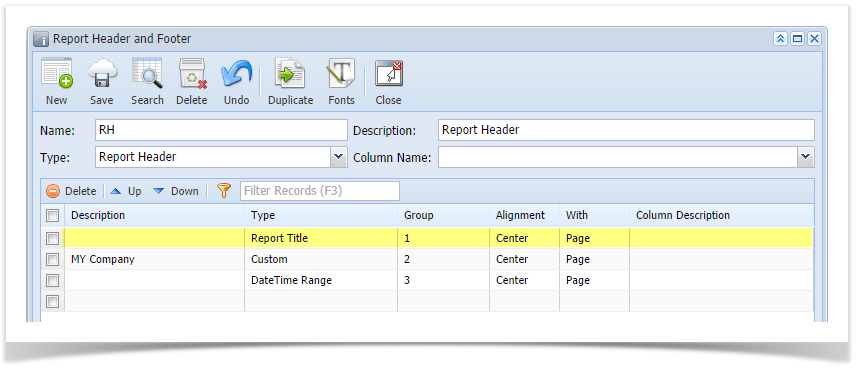
Select this report header/footer in the Report Builder and make sure that checkbox before it is checked when printing/previewing the report.
Here's how it is shown when report is previewed/printed. Highlighted section is the Report Title type header/footer.
You can enhance this header/footer by setting its Font Properties and Row Height. See How to Configure header and footer font properties and row height topic to guide you on how to do this.
Overview
Content Tools