The following will guide you on how to create payments/debits to your bank account.
- From Cash Management module, click Bank Transactions.
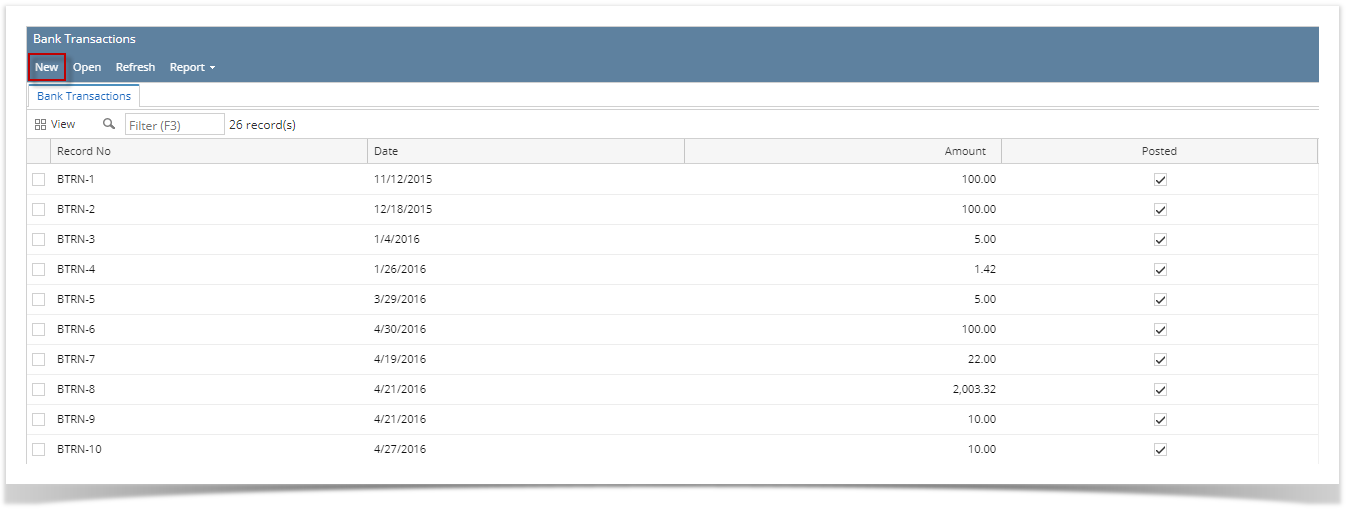
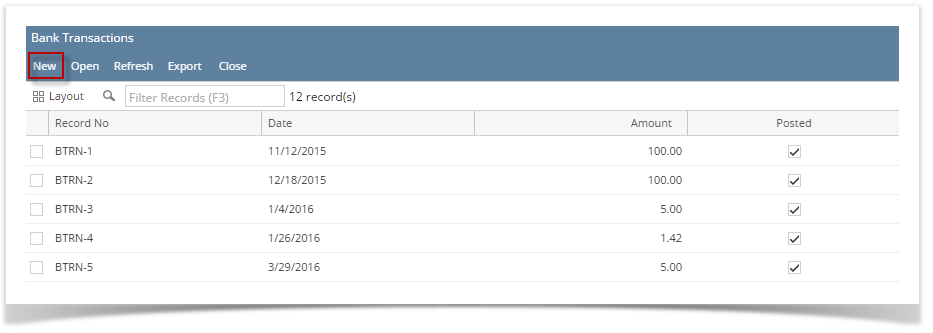
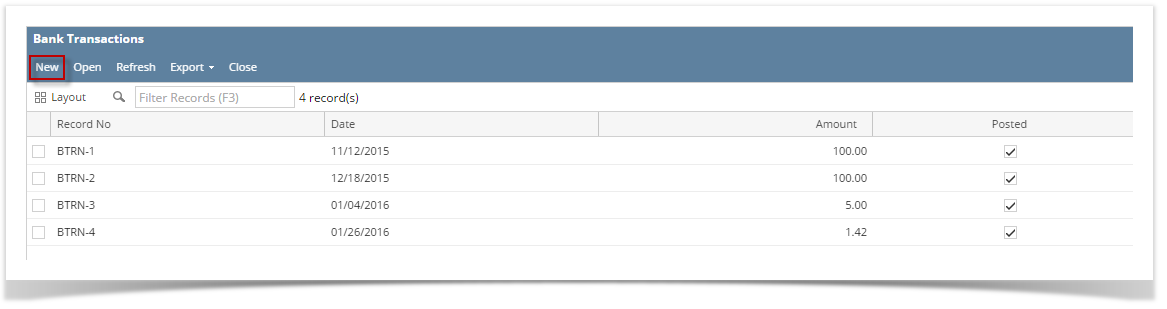
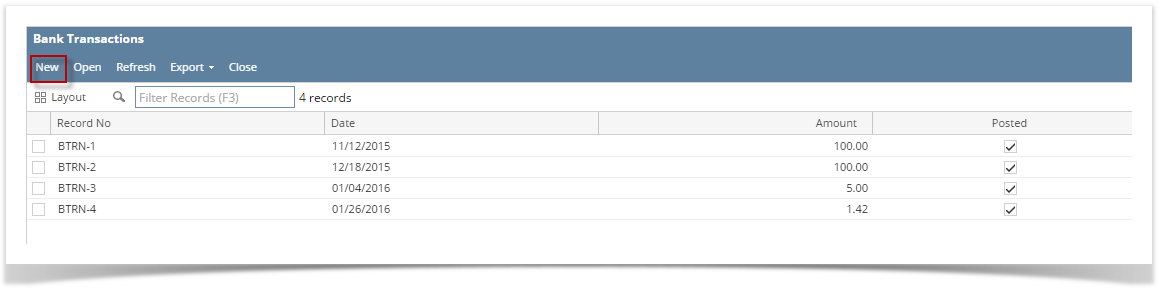
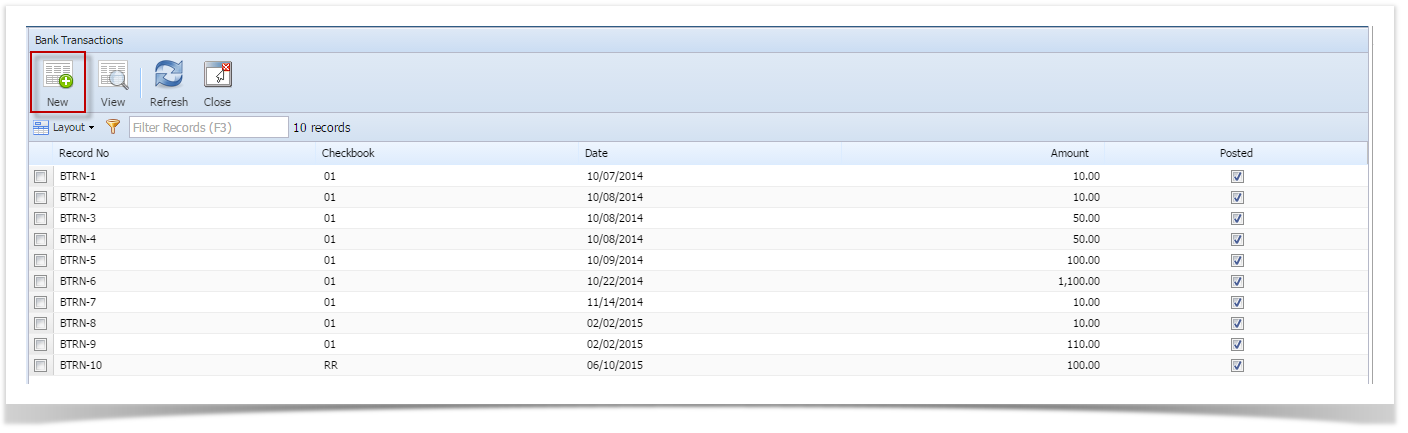
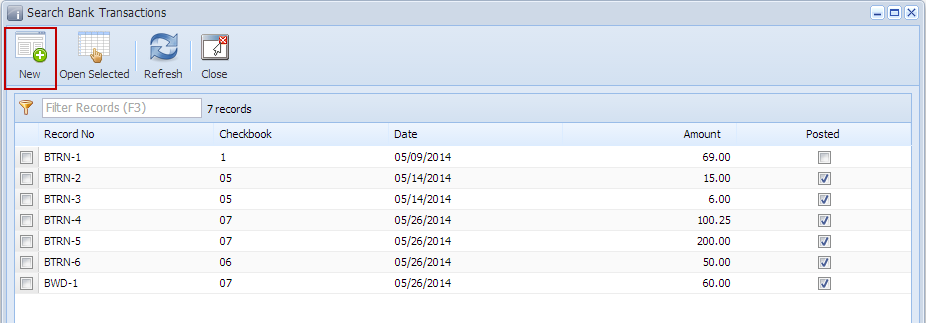
- If this is the first record you are to create, it will open directly on new Bank Transaction screen where you can then add the transaction. Otherwise, it will open the Search Bank Transactions screen where existing bank transactions are displayed. Click the New toolbar button to open the new Bank Transaction screen.

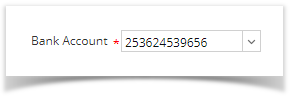
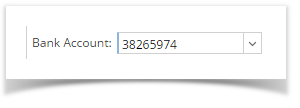
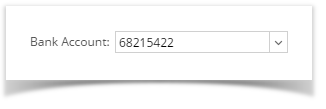
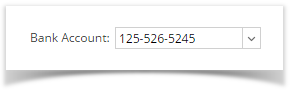
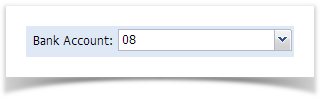
In the Bank Account field, click the dropdown combo box button to open the combo box list and select the bank account you want to take the amount of the charge from.
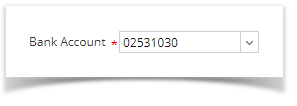
Make sure that the bank account you want to use for the bank transaction had been added in the Bank Accounts screen. If not, see How to Add new Bank Account to guide you on how to add it.
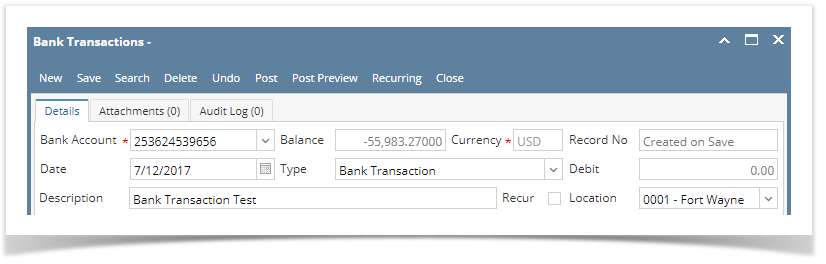
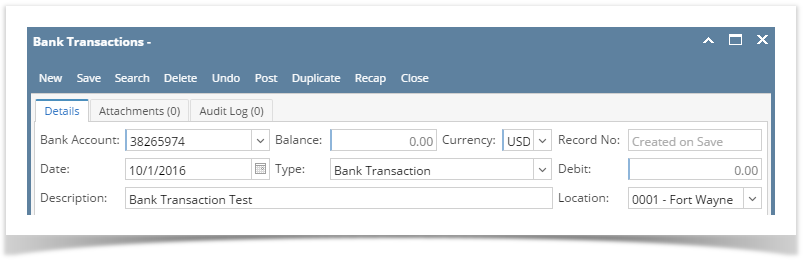
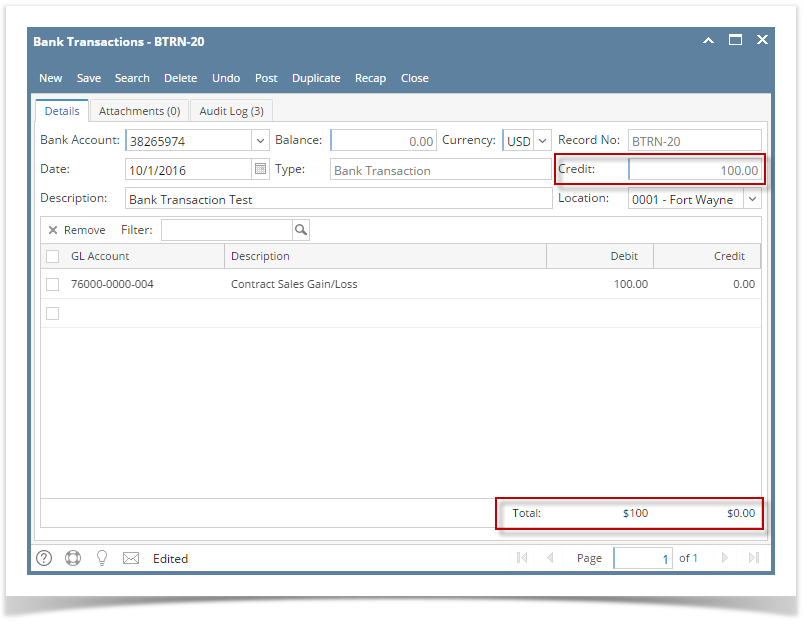
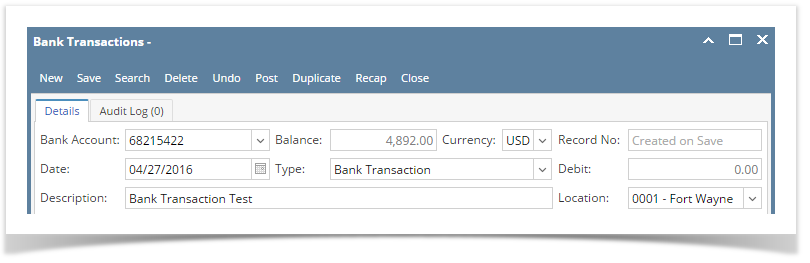
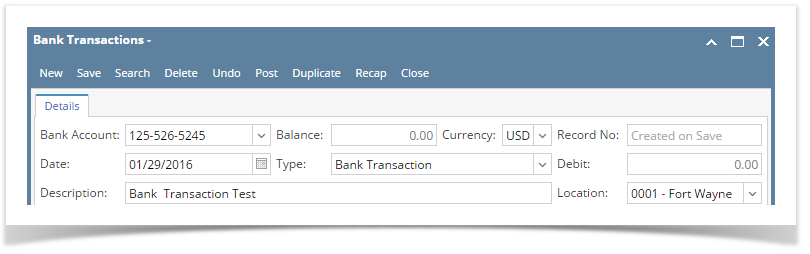
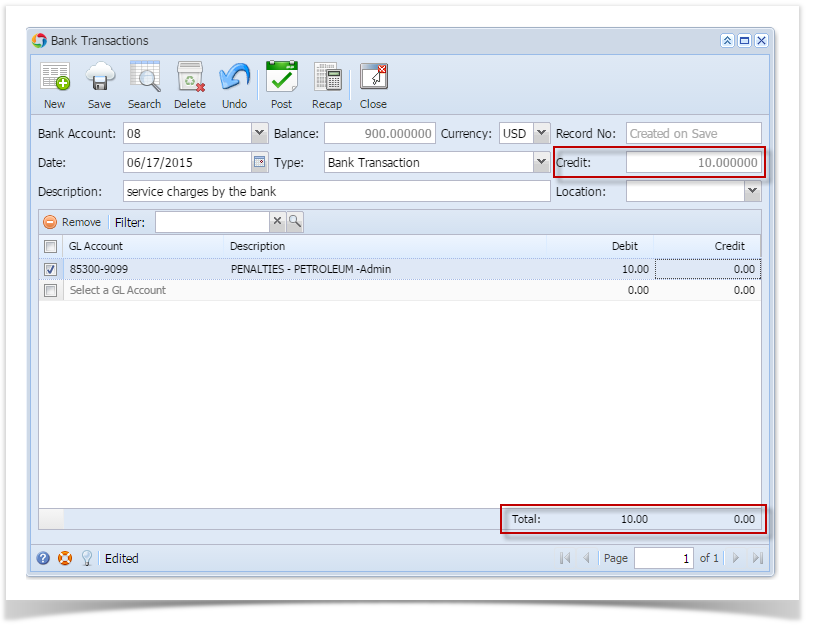
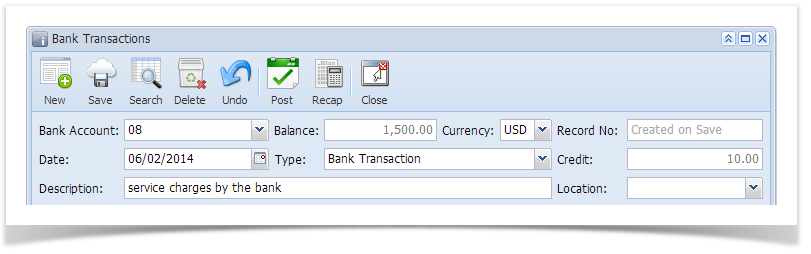
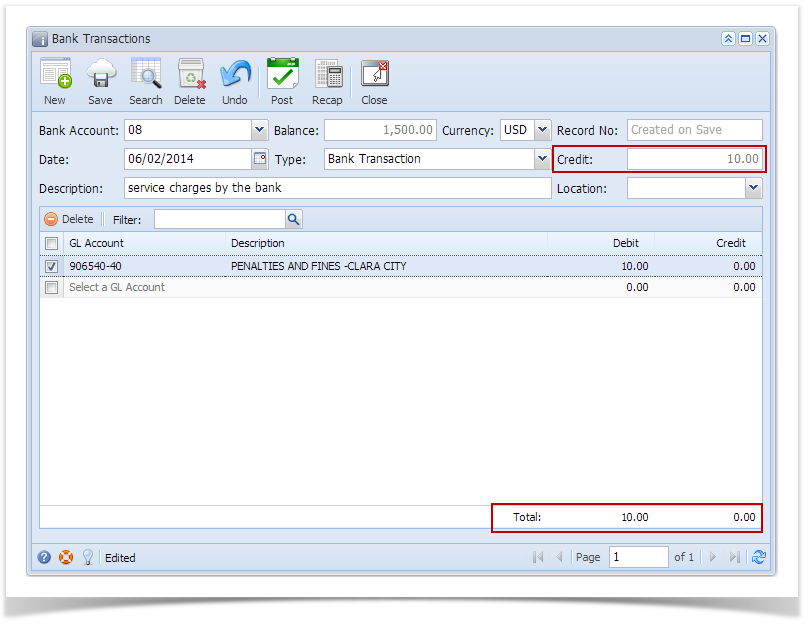
- Fill in Bank Transaction header information.
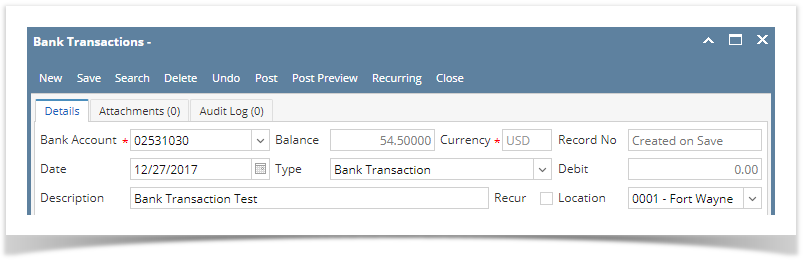
- The Balance field will show the current balance for the selected back account. This is a good way to track how much is the current bank account balance.
- The Currency field by default will show the Currency setup from the selected Bank Account.
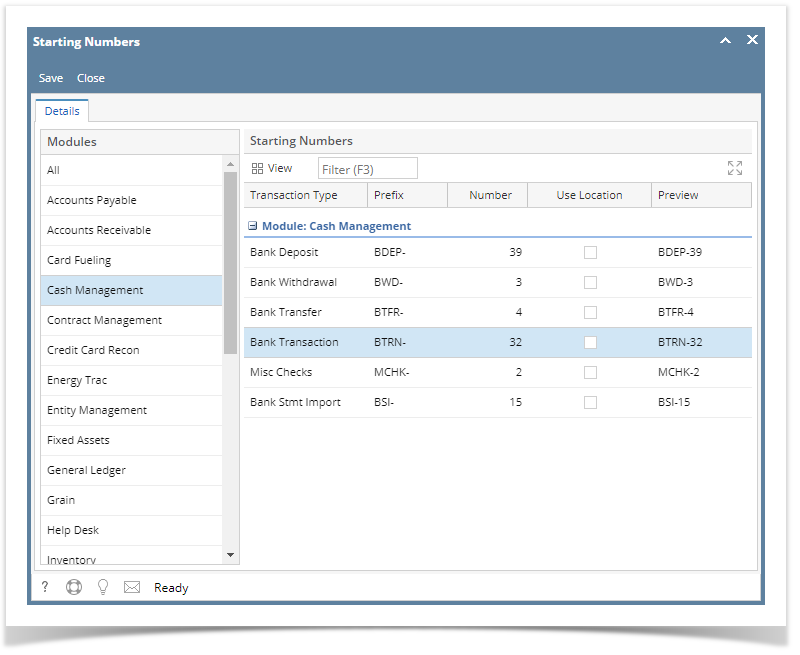
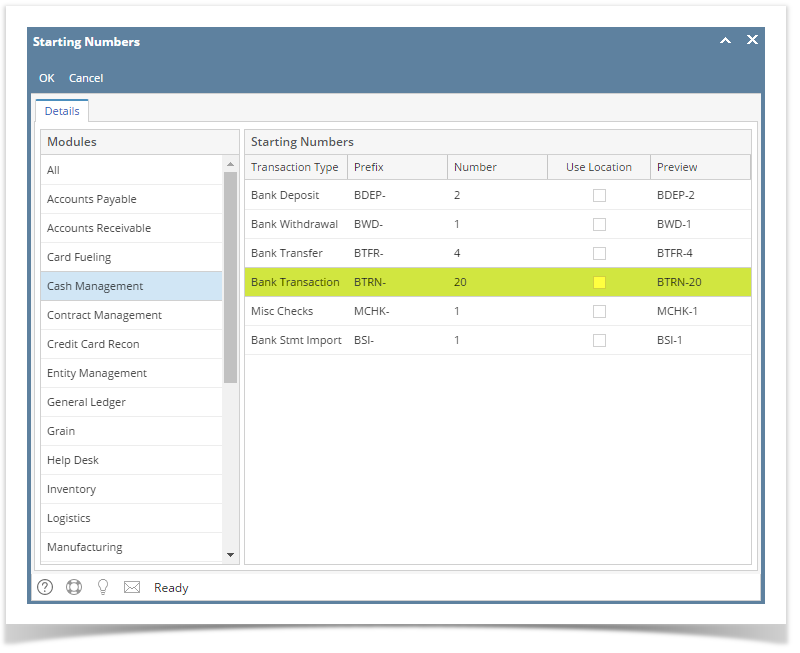
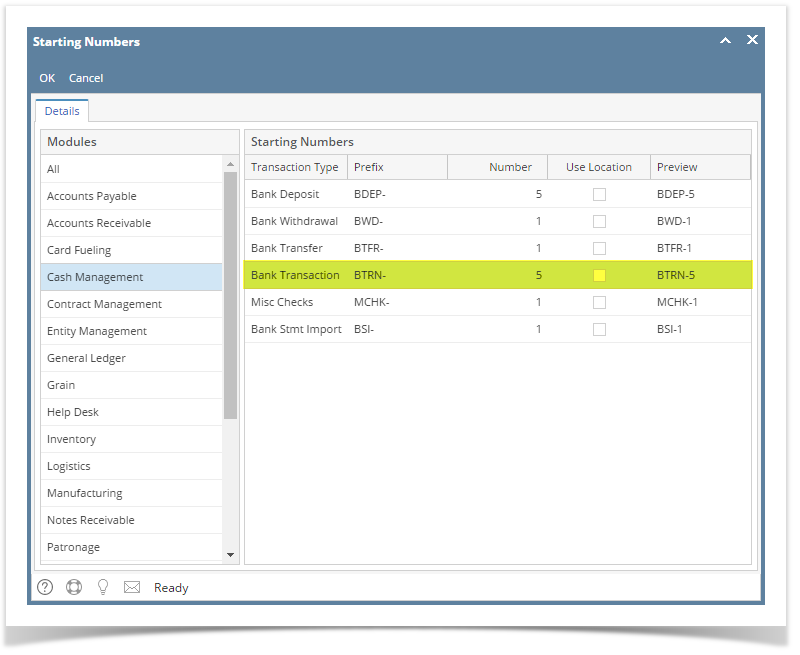
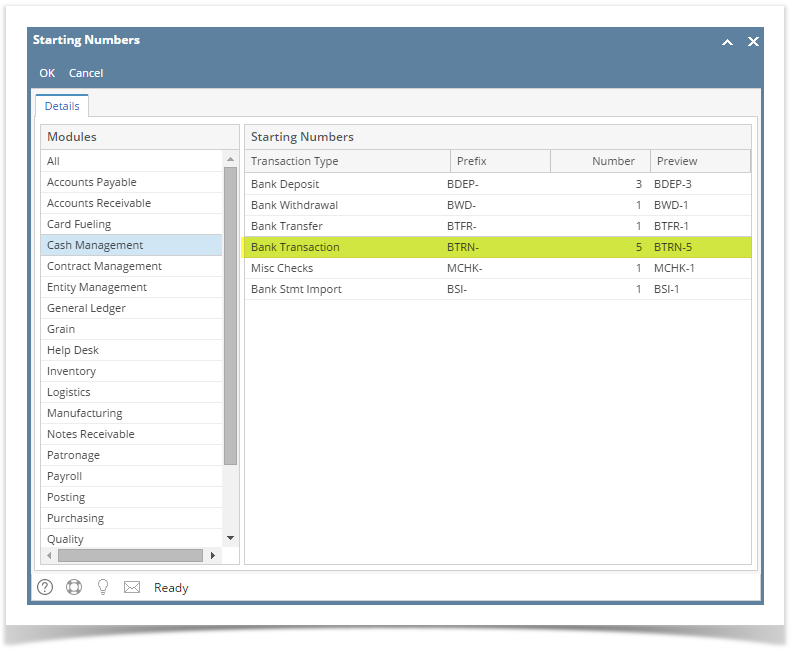
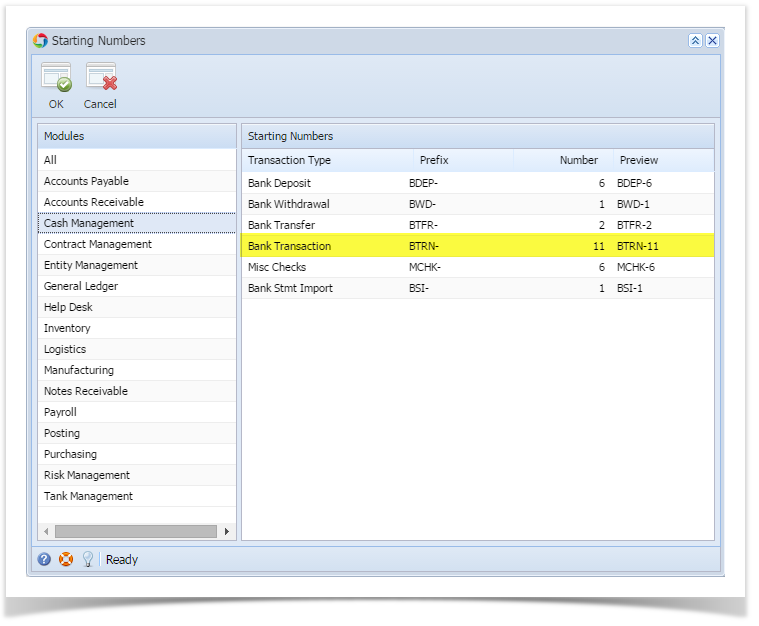
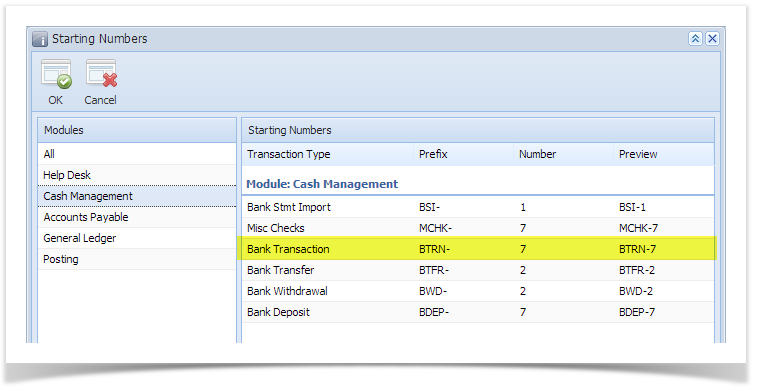
- The Record No field will only be filled with the bank transaction number as soon as the Bank Transaction is saved. This will be based in the Starting Numbers setup from the Starting Numbers screen > Bank Transaction. That screen can be opened from System Manager > Starting Numbers.
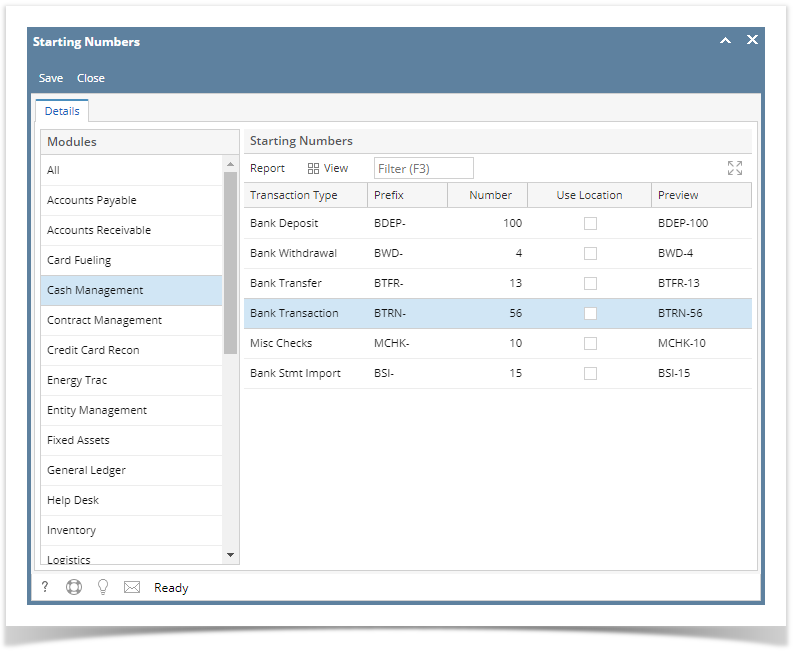
This number will also be used to track the transaction later on. - The Date field by default will show today's date. Change this date as you feel necessary.
- In the Type field click the dropdown combo box button to bring down the combo box list. Options to select from are Bank Transaction and Bank Withdrawal. Select Bank Withdrawal if you are to make Withdrawal transaction. See How to Create Bank Transaction - Withdrawals. Select Bank Transaction if you are to make any of the following transactions:
- Miscellaneous Debits like Service Charges.
- Miscellaneous Credits like Interest Gained, see How to Create Bank Transaction - Interest Gained.
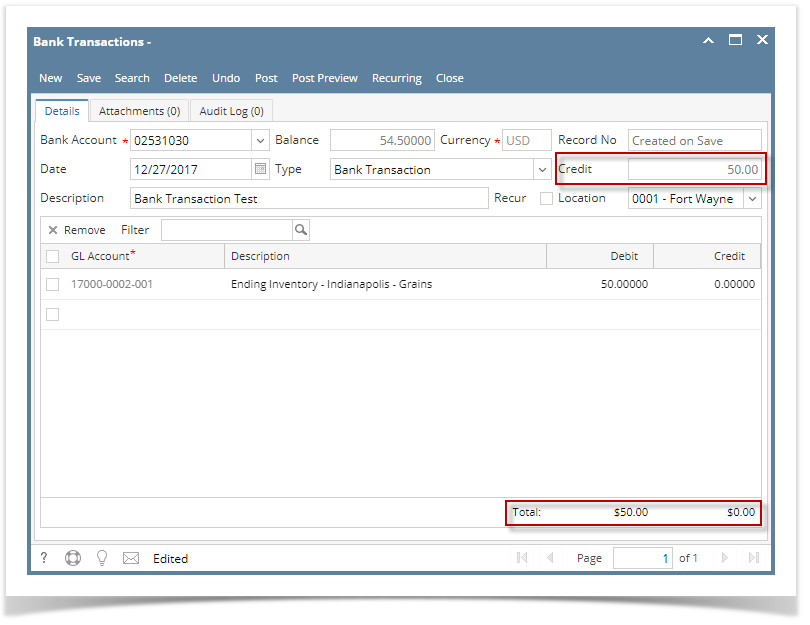
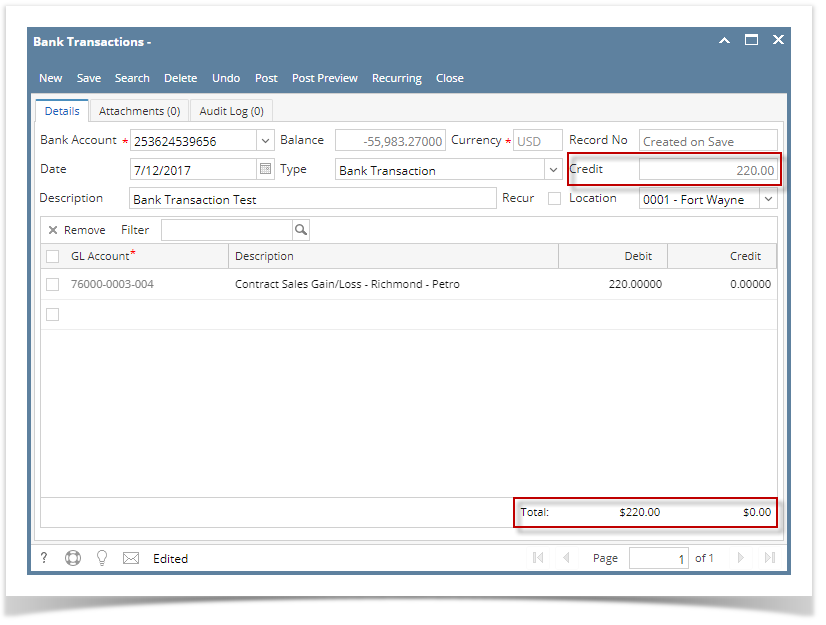
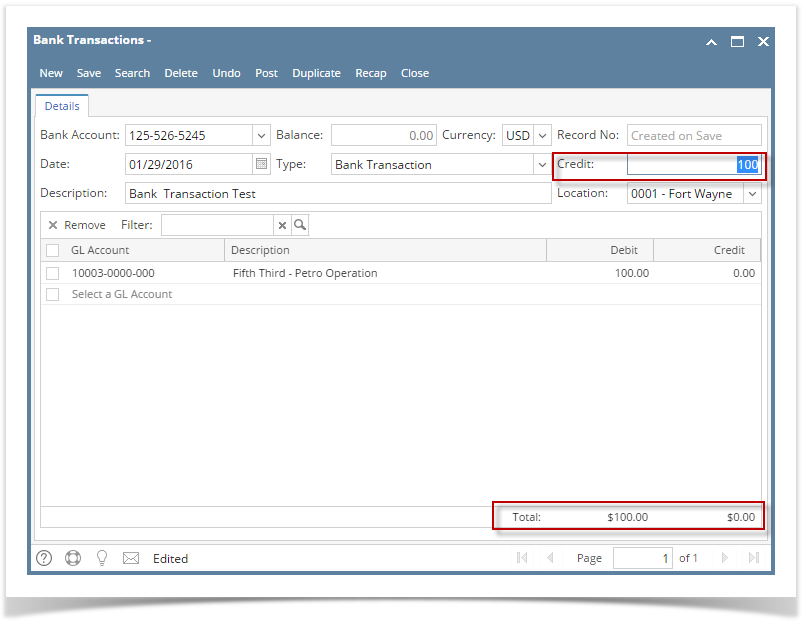
- The next field will show Credit caption. This shows that any amount shown here is to be credited to the bank account when this transaction is posted to the GL Account Detail.
- Enter a description for the Bank Transaction in the Description field.
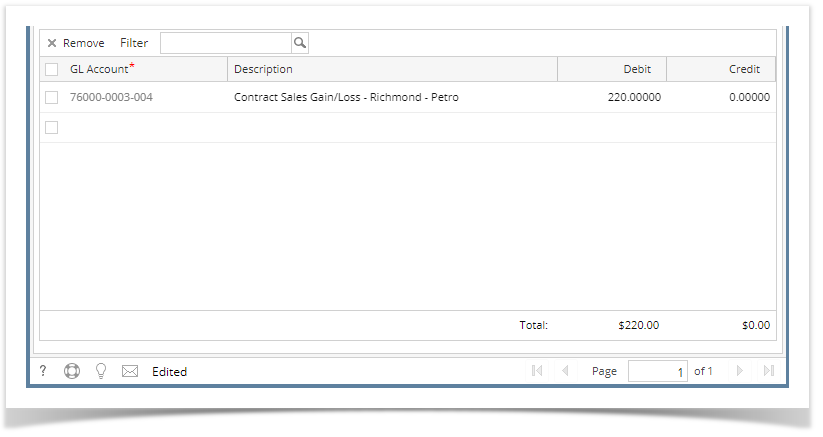
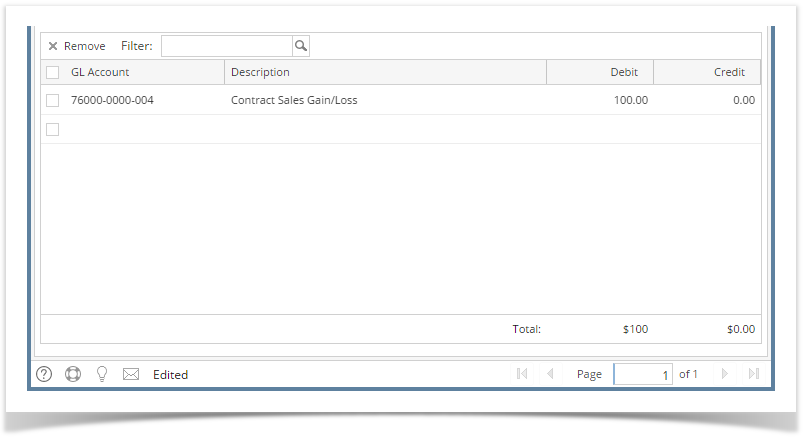
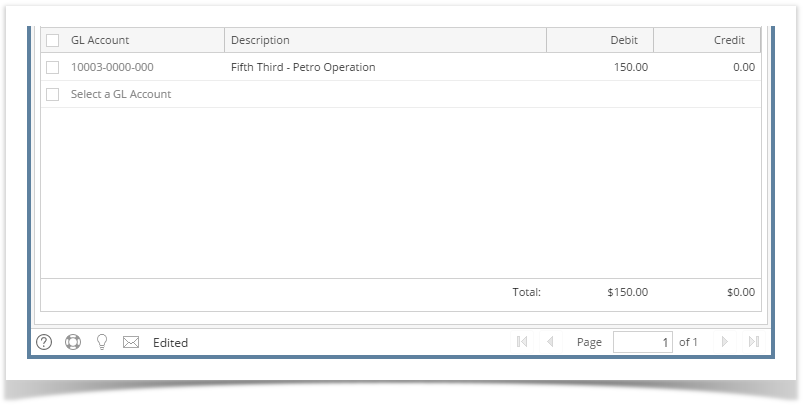
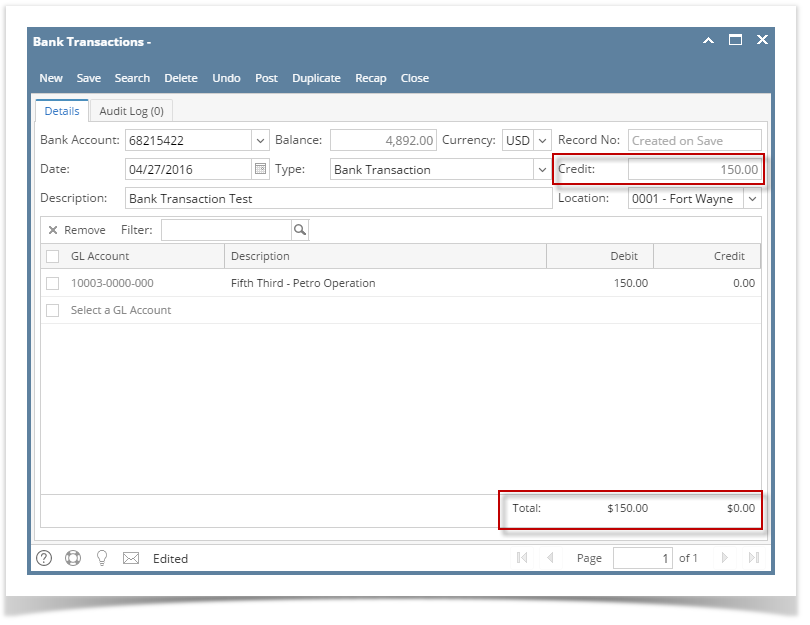
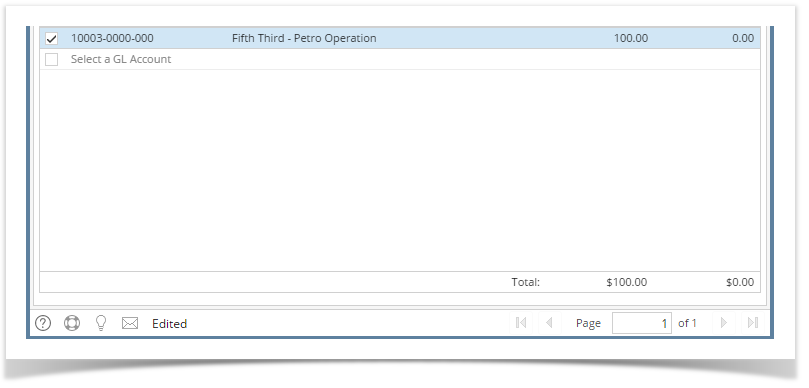
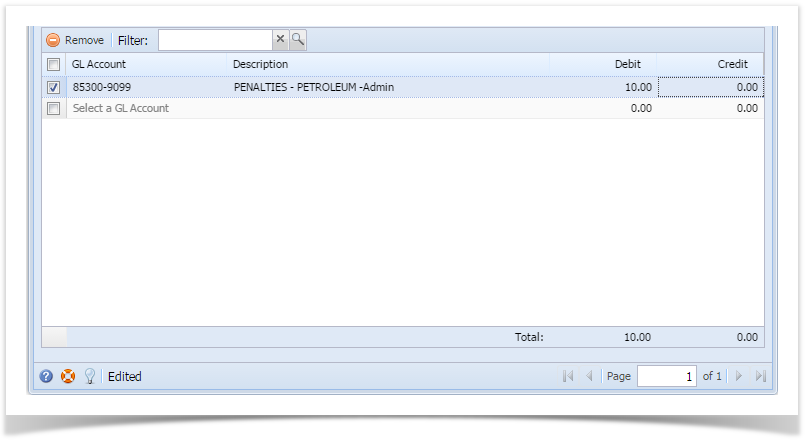
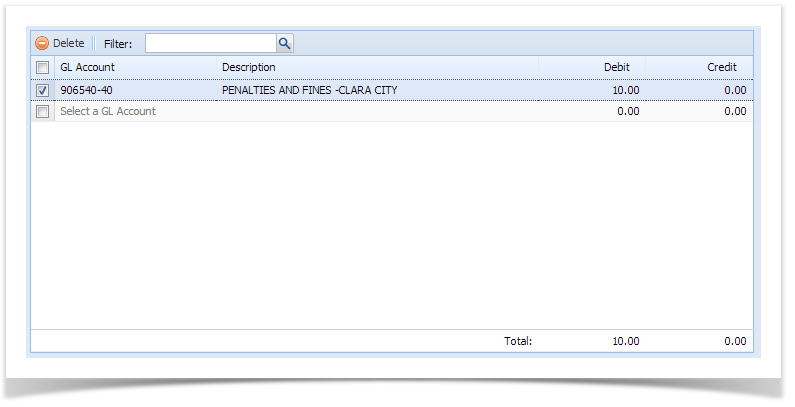
- In the grid area, add the counter-entry/ies for the cash account assigned for the bank account selected.
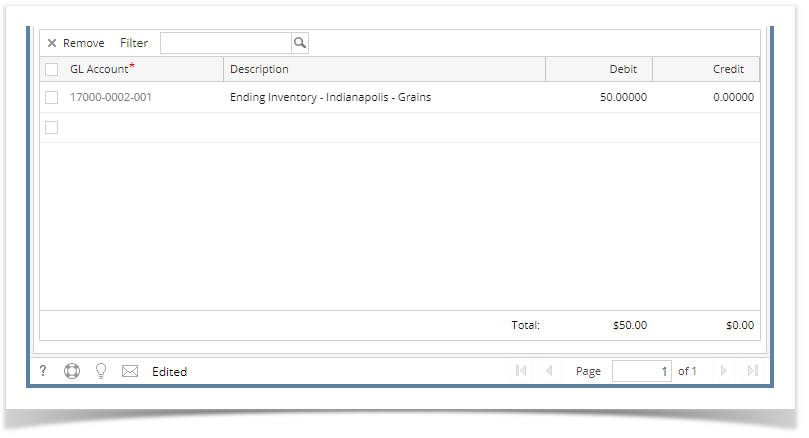
- In the GL Account field, select GL Account.
- Enter the amount for the service charge transaction in the Debit field. As soon as amount is entered, the field that follows the Type field in the header part of the screen is automatically captioned Credit. This tells that the bank account entry has a credit value, thus resulting to decreasing the bank account balance when the transaction is posted. See How to Post Bank Transaction - Misc Debits .
- At the bottom of the grid, a Total of all debits and/or credits added in the grid is shown. The difference of the Total Debits and Total Credits will automatically appear on Credit field, header section of the screen.
Click Save toolbar button to save the bank transaction.

The Record No field will then show the bank transaction number assigned for this transaction.
If the transaction is to be posted right away, you may skip saving it. Instead, click Post toolbar button and it will save and post the transaction. See How to Post Bank Transaction - Misc Debits .
Click Close toolbar button to close the screen.

The following will guide you on how to create payments/debits to your bank account.
- From Cash Management module, click Bank Transactions.
- If this is the first record you are to create, it will open directly on new Bank Transaction screen where you can then add the transaction. Otherwise, it will open the Search Bank Transactions screen where existing bank transactions are displayed. Click the New toolbar button to open the new Bank Transaction screen.
In the Bank Account field, click the dropdown combo box button to open the combo box list and select the bank account you want to take the amount of the charge from.
Make sure that the bank account you want to use for the bank transaction had been added in the Bank Accounts screen. If not, see How to Add new Bank Account to guide you on how to add it.
- Fill in Bank Transaction header information.
- The Balance field will show the current balance for the selected back account. This is a good way to track how much is the current bank account balance.
- The Currency field by default will show the Currency setup from the selected Bank Account.
- The Record No field will only be filled with the bank transaction number as soon as the Bank Transaction is saved. This will be based in the Starting Numbers setup from the Starting Numbers screen > Bank Transaction. That screen can be opened from System Manager > Starting Numbers.
This number will also be used to track the transaction later on. - The Date field by default will show today's date. Change this date as you feel necessary.
- In the Type field click the dropdown combo box button to bring down the combo box list. Options to select from are Bank Transaction and Bank Withdrawal. Select Bank Withdrawal if you are to make Withdrawal transaction. See How to Create Bank Transaction - Withdrawals. Select Bank Transaction if you are to make any of the following transactions:
- Miscellaneous Debits like Service Charges.
- Miscellaneous Credits like Interest Gained, see How to Create Bank Transaction - Interest Gained.
- The next field will show Credit caption. This shows that any amount shown here is to be credited to the bank account when this transaction is posted to the GL Account Detail.
- Enter a description for the Bank Transaction in the Description field.
- In the grid area, add the counter-entry/ies for the cash account assigned for the bank account selected.
- In the GL Account field, select GL Account.
- Enter the amount for the service charge transaction in the Debit field. As soon as amount is entered, the field that follows the Type field in the header part of the screen is automatically captioned Credit. This tells that the bank account entry has a credit value, thus resulting to decreasing the bank account balance when the transaction is posted. See How to Post Bank Transaction - Misc Debits .
- At the bottom of the grid, a Total of all debits and/or credits added in the grid is shown. The difference of the Total Debits and Total Credits will automatically appear on Credit field, header section of the screen.
Click Save toolbar button to save the bank transaction.
The Record No field will then show the bank transaction number assigned for this transaction.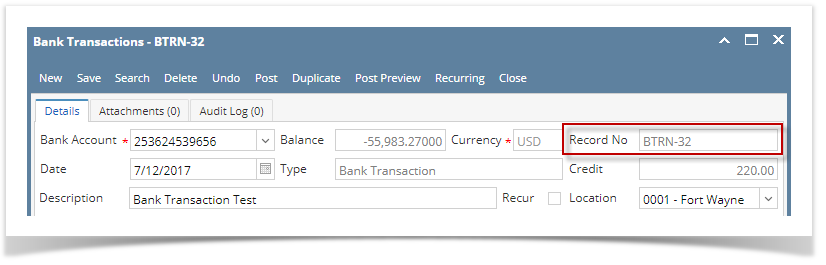
If the transaction is to be posted right away, you may skip saving it. Instead, click Post toolbar button and it will save and post the transaction. See How to Post Bank Transaction - Misc Debits .
Click Close toolbar button to close the screen.

The following will guide you on how to create payments/debits to your bank account.
- From Cash Management module, click Bank Transactions.
- If this is the first record you are to create, it will open directly on new Bank Transaction screen where you can then add the transaction. Otherwise, it will open the Search Bank Transactions screen where existing bank transactions are displayed. Click the New toolbar button to open the new Bank Transaction screen.
In the Bank Account field, click the dropdown combo box button to open the combo box list and select the bank account you want to take the amount of the charge from.
Make sure that the bank account you want to use for the bank transaction had been added in the Bank Accounts screen. If not, see How to Add new Bank Account to guide you on how to add it.
- Fill in Bank Transaction header information.
- The Balance field will show the current balance for the selected back account. This is a good way to track how much is the current bank account balance.
- The Currency field by default will show the Currency setup from the selected Bank Account.
- The Record No field will only be filled with the bank transaction number as soon as the Bank Transaction is saved. This will be based in the Starting Numbers setup from the Starting Numbers screen > Bank Transaction. That screen can be opened from System Manager > Starting Numbers.
This number will also be used to track the transaction later on. - The Date field by default will show today's date. Change this date as you feel necessary.
- In the Type field click the dropdown combo box button to bring down the combo box list. Options to select from are Bank Transaction and Bank Withdrawal. Select Bank Withdrawal if you are to make Withdrawal transaction. See How to Create Bank Transaction - Withdrawals. Select Bank Transaction if you are to make any of the following transactions:
- Miscellaneous Debits like Service Charges.
- Miscellaneous Credits like Interest Gained, see How to Create Bank Transaction - Interest Gained.
- The next field will show Credit caption. This shows that any amount shown here is to be credited to the bank account when this transaction is posted to the GL Account Detail.
- Enter a description for the Bank Transaction in the Description field.
- In the grid area, add the counter-entry/ies for the cash account assigned for the bank account selected.
- In the GL Account field, select GL Account.
- Enter the amount for the service charge transaction in the Debit field. As soon as amount is entered, the field that follows the Type field in the header part of the screen is automatically captioned Credit. This tells that the bank account entry has a credit value, thus resulting to decreasing the bank account balance when the transaction is posted. See How to Post Bank Transaction - Misc Debits .
- At the bottom of the grid, a Total of all debits and/or credits added in the grid is shown. The difference of the Total Debits and Total Credits will automatically appear on Credit field, header section of the screen.
Click Save toolbar button to save the bank transaction.

The Record No field will then show the bank transaction number assigned for this transaction.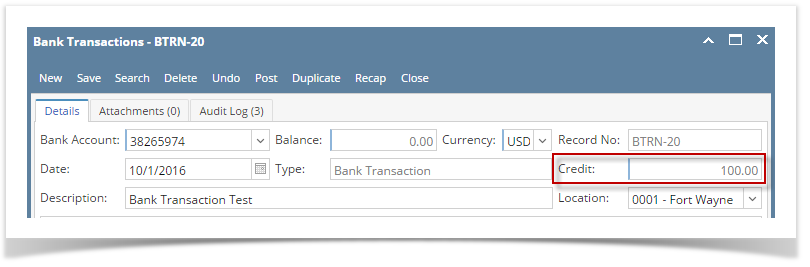
If the transaction is to be posted right away, you may skip saving it. Instead, click Post toolbar button and it will save and post the transaction. See How to Post Bank Transaction - Misc Debits .
Click Close toolbar button to close the screen.

The following will guide you on how to create payments/debits to your bank account.
- From Cash Management module, click Bank Transactions.
- If this is the first record you are to create, it will open directly on new Bank Transaction screen where you can then add the transaction. Otherwise, it will open the Search Bank Transactions screen where existing bank transactions are displayed. Click the New toolbar button to open the new Bank Transaction screen.
In the Bank Account field, click the dropdown combo box button to open the combo box list and select the bank account you want to take the amount of the charge from.
Make sure that the bank account you want to use for the bank transaction had been added in the Bank Accounts screen. If not, see How to Add new Bank Account to guide you on how to add it.
- Fill in Bank Transaction header information.
- The Balance field will show the current balance for the selected back account. This is a good way to track how much is the current bank account balance.
- The Currency field by default will show the Currency setup from the selected Bank Account.
- The Record No field will only be filled with the bank transaction number as soon as the Bank Transaction is saved. This will be based in the Starting Numbers setup from the Starting Numbers screen > Bank Transaction. That screen can be opened from System Manager > Starting Numbers.
This number will also be used to track the transaction later on. - The Date field by default will show today's date. Change this date as you feel necessary.
- In the Type field click the dropdown combo box button to bring down the combo box list. Options to select from are Bank Transaction and Bank Withdrawal. Select Bank Withdrawal if you are to make Withdrawal transaction. See How to Create Bank Transaction - Withdrawals. Select Bank Transaction if you are to make any of the following transactions:
- Miscellaneous Debits like Service Charges.
- Miscellaneous Credits like Interest Gained, see How to Create Bank Transaction - Interest Gained.
- The next field will show Credit caption. This shows that any amount shown here is to be credited to the bank account when this transaction is posted to the GL Account Detail.
- Enter a description for the Bank Transaction in the Description field.
- In the grid area, add the counter-entry/ies for the cash account assigned for the bank account selected.
- In the GL Account field, select GL Account.
- Enter the amount for the service charge transaction in the Debit field. As soon as amount is entered, the field that follows the Type field in the header part of the screen is automatically captioned Credit. This tells that the bank account entry has a credit value, thus resulting to decreasing the bank account balance when the transaction is posted. See How to Post Bank Transaction - Misc Debits .
- At the bottom of the grid, a Total of all debits and/or credits added in the grid is shown. The difference of the Total Debits and Total Credits will automatically appear on Credit field, header section of the screen.
Click Save toolbar button to save the bank transaction.

The Record No field will then show the bank transaction number assigned for this transaction.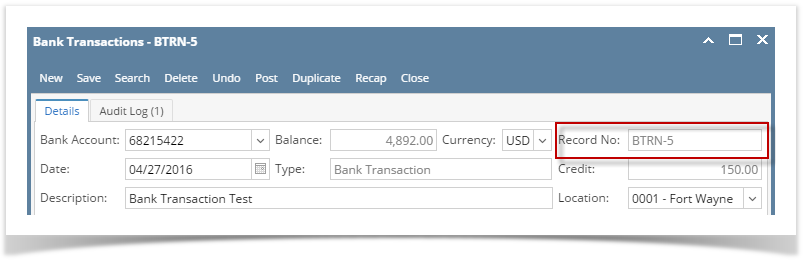
If the transaction is to be posted right away, you may skip saving it. Instead, click Post toolbar button and it will save and post the transaction. See How to Post Bank Transaction - Misc Debits .
Click Close toolbar button to close the screen.

The following will guide you on how to create payments/debits to your bank account.
- From Cash Management module, click Bank Transactions.
- If this is the first record you are to create, it will open directly on new Bank Transaction screen where you can then add the transaction. Otherwise, it will open the Search Bank Transactions screen where existing bank transactions are displayed. Click the New toolbar button to open the new Bank Transaction screen.
In the Bank Account field, click the dropdown combo box button to open the combo box list and select the bank account you want to take the amount of the charge from.
Make sure that the bank account you want to use for the bank transaction had been added in the Bank Accounts screen. If not, see How to Add new Bank Account to guide you on how to add it.
- Fill in Bank Transaction header information.
- The Balance field will show the current balance for the selected back account. This is a good way to track how much is the current bank account balance.
- The Currency field by default will show the Currency setup from the selected Bank Account.
- The Record No field will only be filled with the bank transaction number as soon as the Bank Transaction is saved. This will be based in the Starting Numbers setup from the Starting Numbers screen > Bank Transaction. That screen can be opened from System Manager > Starting Numbers.
This number will also be used to track the transaction later on. - The Date field by default will show today's date. Change this date as you feel necessary.
- In the Type field click the dropdown combo box button to bring down the combo box list. Options to select from are Bank Transaction and Bank Withdrawal. Select Bank Withdrawal if you are to make Withdrawal transaction. See How to Create Bank Transaction - Withdrawals. Select Bank Transaction if you are to make any of the following transactions:
- Miscellaneous Debits like Service Charges.
- Miscellaneous Credits like Interest Gained, see How to Create Bank Transaction - Interest Gained.
- The next field will show Credit caption. This shows that any amount shown here is to be credited to the bank account when this transaction is posted to the GL Account Detail.
- Enter a description for the Bank Transaction in the Description field.
- In the grid area, add the counter-entry/ies for the cash account assigned for the bank account selected.
- In the GL Account field, select GL Account.
- Enter the amount for the service charge transaction in the Debit field. As soon as amount is entered, the field that follows the Type field in the header part of the screen is automatically captioned Credit. This tells that the bank account entry has a credit value, thus resulting to decreasing the bank account balance when the transaction is posted. See How to Post Bank Transaction - Misc Debits .
- At the bottom of the grid, a Total of all debits and/or credits added in the grid is shown. The difference of the Total Debits and Total Credits will automatically appear on Credit field, header section of the screen.
Click Save toolbar button to save the bank transaction.
The Record No field will then show the bank transaction number assigned for this transaction.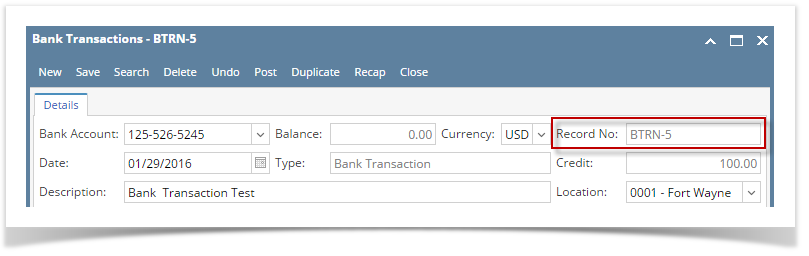
If the transaction is to be posted right away, you may skip saving it. Instead, click Post toolbar button and it will save and post the transaction. See How to Post Bank Transaction - Misc Debits .
Click Close toolbar button to close the screen.

The following will guide you on how to create payments/debits to your bank account.
- From Cash Management module, click Bank Transactions.
- If this is the first record you are to create, it will open directly on new Bank Transaction screen where you can then add the transaction. Otherwise, it will open the Search Bank Transactions screen where existing bank transactions are displayed. Click the New toolbar button to open the new Bank Transaction screen.
In the Bank Account field, click the dropdown combo box button to open the combo box list and select the bank account you want to take the amount of the charge from.
Make sure that the bank account you want to use for the bank transaction had been added in the Bank Accounts screen. If not, see How to Add new Bank Account to guide you on how to add it.
- Fill in Bank Transaction header information.

- The Balance field will show the current balance for the selected back account. This is a good way to track how much is the current bank account balance.
- The Currency field by default will show the Currency setup from the selected Bank Account.
- The Record No field will only be filled with the bank transaction number as soon as the Bank Transaction is saved. This will be based in the Starting Numbers setup from the Starting Numbers screen > Bank Transaction. That screen can be opened from System Manager > Starting Numbers.
This number will also be used to track the transaction later on. - The Date field by default will show today's date. Change this date as you feel necessary.
- In the Type field click the dropdown combo box button to bring down the combo box list. Options to select from are Bank Transaction and Bank Withdrawal. Select Bank Withdrawal if you are to make Withdrawal transaction. See How to Create Bank Transaction - Withdrawals. Select Bank Transaction if you are to make any of the following transactions:
- Miscellaneous Debits like Service Charges.
- Miscellaneous Credits like Interest Gained, see How to Create Bank Transaction - Interest Gained.
- The next field will show Credit caption. This shows that any amount shown here is to be credited to the bank account when this transaction is posted to the GL Account Detail.
- Enter a description for the Bank Transaction in the Description field.
- In the grid area, add the counter-entry/ies for the cash account assigned for the bank account selected.
- In the GL Account field, select GL Account.
- Enter the amount for the service charge transaction in the Debit field. As soon as amount is entered, the field that follows the Type field in the header part of the screen is automatically captioned Credit. This tells that the bank account entry has a credit value, thus resulting to decreasing the bank account balance when the transaction is posted. See How to Post Bank Transaction - Misc Debits .
- At the bottom of the grid, a Total of all debits and/or credits added in the grid is shown. The difference of the Total Debits and Total Credits will automatically appear on Credit field, header section of the screen.
Click Save toolbar button to save the bank transaction.
The Record No field will then show the bank transaction number assigned for this transaction.
If the transaction is to be posted right away, you may skip saving it. Instead, click Post toolbar button and it will save and post the transaction. See How to Post Bank Transaction - Misc Debits .
Click Close toolbar button to close the screen.
The following will guide you on how to create payments/debits to your bank account.
- From Cash Management module > Activities folder > double-click Bank Transactions.
- If this is the first record you are to create, it will open directly on new Bank Transaction screen where you can then add the transaction. Otherwise, it will open the Search Bank Transactions screen where existing bank transactions are displayed. Click the New toolbar button to open the new Bank Transaction screen.
In the Bank Account field, click the dropdown combo box button to open the combo box list and select the bank account you want to take the amount of the charge from.
Make sure that the bank account you want to use for the bank transaction had been added in the Bank Accounts screen. If not, see How to Add new Bank Account to guide you on how to add it.
- Fill in Bank Transaction header information.
- The Balance field will show the current balance for the selected back account. This is a good way to track how much is the current bank account balance.
- The Currency field by default will show the Currency setup from the selected Bank Account.
- The Record No field will only be filled with the bank transaction number as soon as the Bank Transaction is saved. This will be based in the Starting Numbers setup from the Starting Numbers screen > Bank Transaction. That screen can be opened from Admin folder > Starting Numbers.
This number will also be used to track the transaction later on. - The Date field by default will show today's date. Change this date as you feel necessary.
- In the Type field click the dropdown combo box button to bring down the combo box list. Options to select from are Bank Transaction and Bank Withdrawal. Select Bank Withdrawal if you are to make Withdrawal transaction. See How to Create Bank Transaction - Withdrawals. Select Bank Transaction if you are to make any of the following transactions:
- Miscellaneous Debits like Service Charges.
- Miscellaneous Credits like Interest Gained, see How to Create Bank Transaction - Interest Gained.
- The next field will show Credit caption. This shows that any amount shown here is to be credited to the bank account when this transaction is posted to the GL Account Detail.
- Enter a description for the Bank Transaction in the Description field.
- In the grid area, add the counter-entry/ies for the cash account assigned for the bank account selected.
- In the GL Account field, select GL Account.
- Enter the amount for the service charge transaction in the Debit field. As soon as amount is entered, the field that follows the Type field in the header part of the screen is automatically captioned Credit. This tells that the bank account entry has a credit value, thus resulting to decreasing the bank account balance when the transaction is posted. See How to Post Bank Transaction - misc debits .
- At the bottom of the grid, a Total of all debits and/or credits added in the grid is shown. The difference of the Total Debits and Total Credits will automatically appear on Credit field, header section of the screen.
Click Save toolbar button to save the bank transaction.
The Record No field will then show the bank transaction number assigned for this transaction.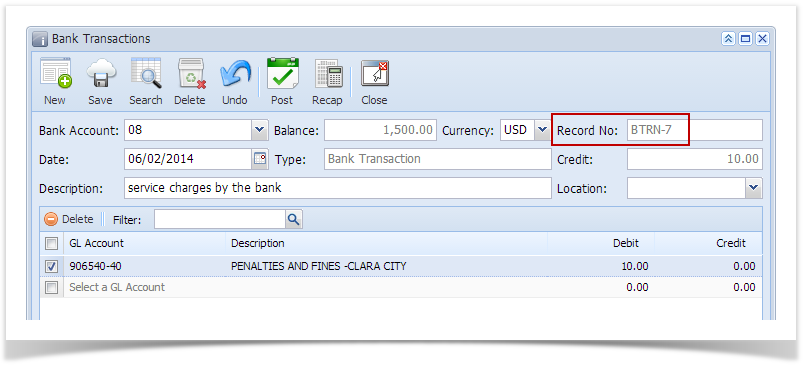
If the transaction is to be posted right away, you may skip saving it. Instead, click Post toolbar button and it will save and post the transaction. See How to Post Bank Transaction - Misc Debits .
Click Close toolbar button to close the screen.
Overview
Content Tools