Although many states don't require the prior month's MFT return be turned in until the 15th of the following month (or later), it is strongly recommended that you start the verification process early. i21 MFT uses data entries from other processes, such as Inventory Receipts, Sales Invoices, and Transports Loads. Starting verification sooner means potential programming and/or data entry errors can be caught and addressed sooner, which in turn ensures timely filing of the finalized return. 

To run your Schedules and Forms for verification purposes, follow these steps: 

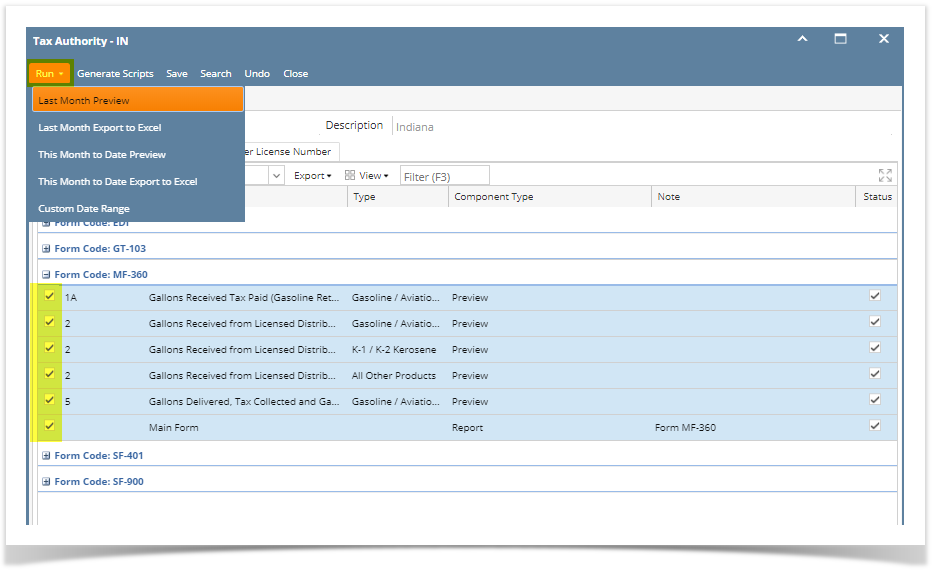
  1. On Tax Authority Screen, choose the Forms and Schedules you wish to verify by checking the boxes on the far left, then click the Run button > and selected option (ie. Last Month Preview).


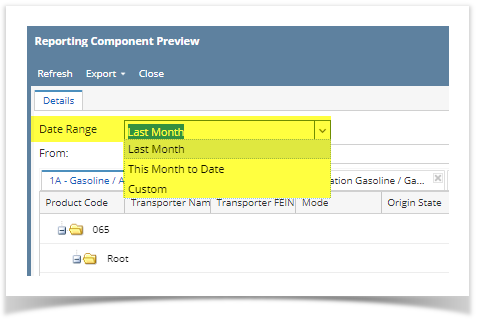
  2. The Reporting Components Preview screen appears. Date Range defaults to "Last Month", and you can use the dropdown to change Date Range to "This Month to Date" and "Custom". When Custom is selected, you can enter the From and To dates directly. To re-generate results based on newly specified Dates, click the Refresh button. 


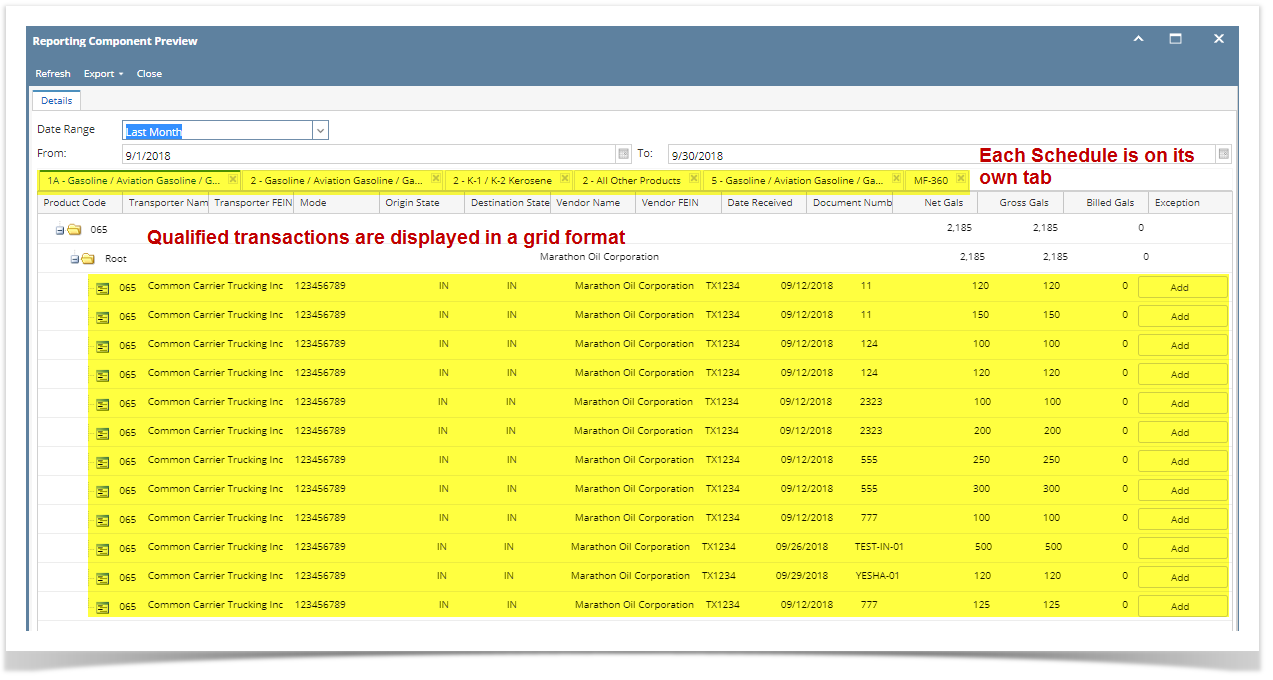
  3. Transactions fitting predetermined criteria are displayed in a grid format. Each Schedule or Form you select has its own tab. 


  4. Review each tab and verify totals are correct, and each transaction has correct and full data, such as Names, FEINs, Document Numbers (Bill of Lading Numbers), etc. To switch to a different Schedule, simply click that tab. You can also export the reported transactions into Excel spreadsheets.

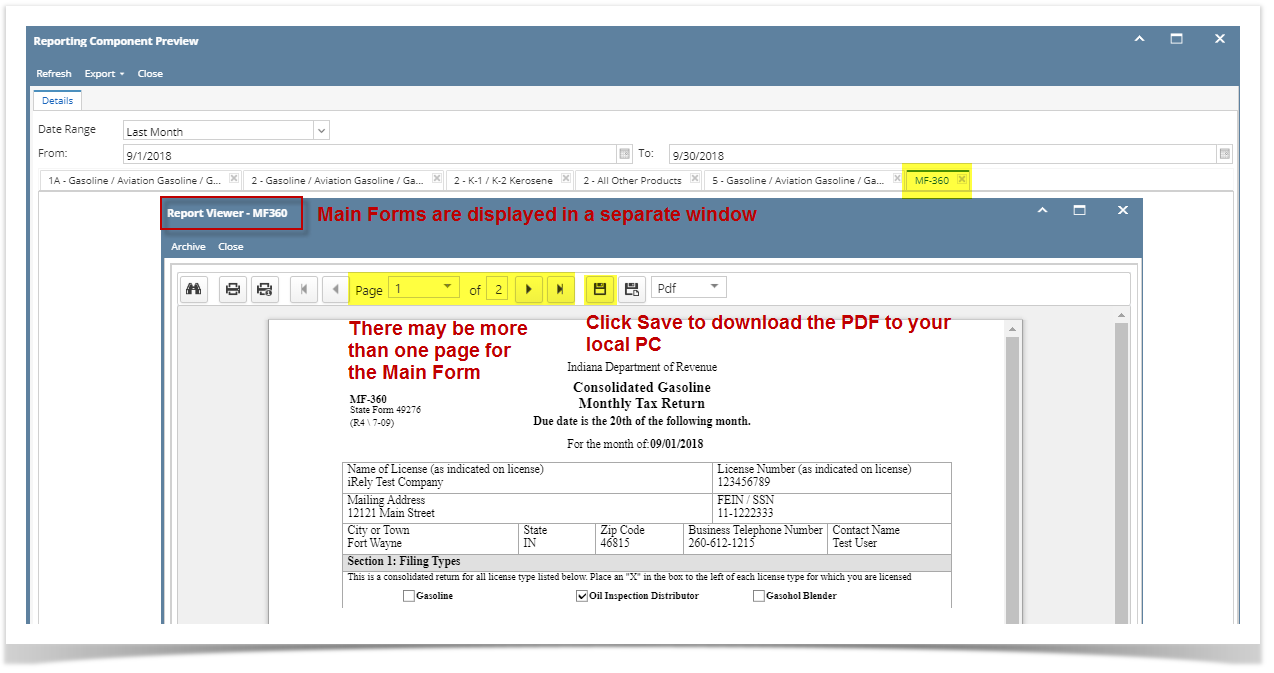
  5. Main Forms (or Summaries) are displayed in a separate windows, from where you can review (note there may be more than one page), print, or save the Main Form.


Although many states don't require the prior month's MFT return be turned in until the 15th of the following month (or later), it is strongly recommended that you start the verification process early. i21 MFT uses data entries from other processes, such as Inventory Receipts, Sales Invoices, and Transports Loads. Starting verification sooner means potential programming and/or data entry errors can be caught and addressed sooner, which in turn ensures timely filing of the finalized return. 

To run your Schedules and Forms for verification purposes, follow these steps: 

  1. On Tax Authority Screen, choose the Forms and Schedules you wish to verify by checking the boxes on the far left, then click the Run button.


  2. The Reporting Components Preview screen appears. Date Range defaults to "Last Month", and you can use the dropdown to change Date Range to "This Month to Date" and "Custom". When Custom is selected, you can enter the From and To dates directly. To re-generate results based on newly specified Dates, click the Refresh button. 


  3. Transactions fitting predetermined criteria are displayed in a grid format. Each Schedule or Form you select has its own tab. 


  4. Review each tab and verify totals are correct, and each transaction has correct and full data, such as Names, FEINs, Document Numbers (Bill of Lading Numbers), etc. To switch to a different Schedule, simply click that tab. You can also export the reported transactions into Excel spreadsheets.

  5. Main Forms (or Summaries) are displayed in a separate windows, from where you can review (note there may be more than one page), print, or save the Main Form.