- Open the Bank Reconciliation screen from Cash Management module > Bank Reconciliation.
 - In the Bank Account field, select the Bank Account you want to reconcile.
 - Enter the date appearing on your Bank Statement in the Statement Date field.
 - Enter the ending balance appearing on your Bank Statement in the Bank Statement Ending Balance field.
 - Check the transaction in the Payments and Debits and Deposits and Credits panels that appears on your Bank Statement. If all transactions shown on your bank statement are present in these panels and none are left unchecked in these panels, then all transactions were recorded accordingly by your bank and on your book. This scenario will result to showing 0.00 in the Difference field at the bottom left corner of the screen.

- Click Reconcile toolbar button.
 - This message is shown. Click Yes button to continue with reconciling the bank account.
 - Another message is shown. Click Yes button to print a Bank Reconciliation report.
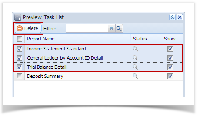
 - The Preview Task List screen will open.

- The Tools button in the Bank Reconciliation report > Status field signifies that i21 is in the process of generating the report.
- This screen stores previous reports previewed/printed. If you would like to clear this screen, select report/s to delete and click Remove button.
 - You can also preview report that is existing on this list by clicking the Magnifying glass button in the Status field for the selected report.
- Bank Reconciliation report will be printed. The report will show significant information when you reconciled the transactions for the bank account.
- Bank Reconciliation report will be printed. The report will show significant information when you reconciled the transactions for the bank account.
 - Close the Bank Reconciliation report by clicking the x button on the Bank Reconciliation tab to close the said report or click the X button at the top right corner of the Report Viewer to close all reports. You will then be asked to archive the report. See How to Archive a report.
 - Bank Reconciliation screen will then be closed. This signifies that the Reconciliation was successfully done.
- Re-open Bank Reconciliation screen, select the bank account previously reconciled and set date on Statement Date field at the top of the screen to a date that is 1 or more days later than the previous reconciliation date. The Prior Reconciliation Ending Balance field will show the amount entered in the Bank Statement Ending Balance field last time you reconciled it.

|