Page History
...
- During Pay Bills creation (see How To Select Payables for Multiple Vendors), select Check as your payment method to enable Print button.
- Post the transaction and click OK on message.


- Click Print toolbar button and select Print Checks Check to open Print Checks screen.

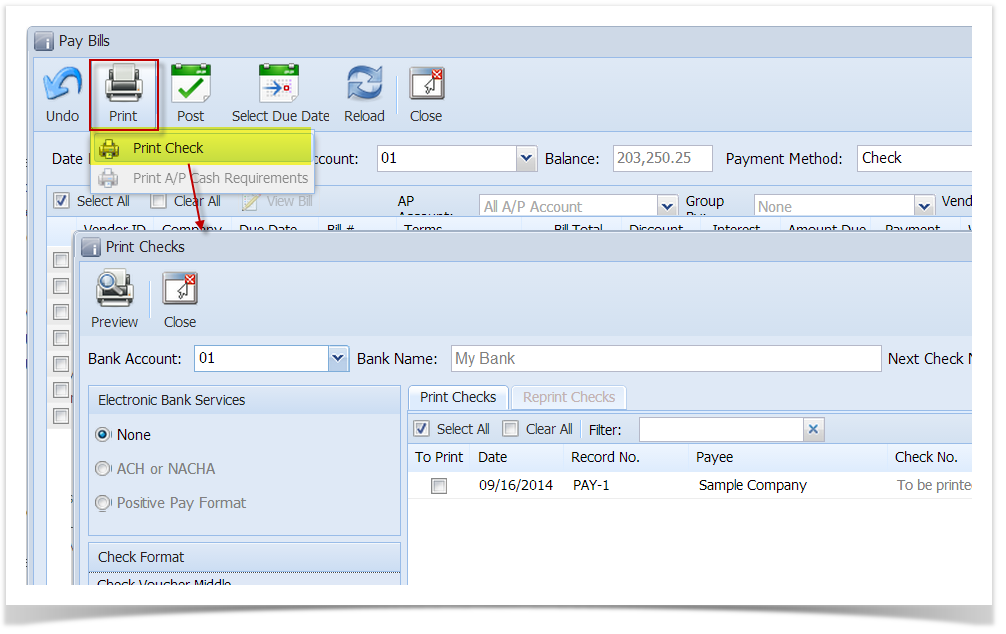
On the grid, all posted payables but not yet printed under the selected bank account will be displayed.
Select Select the payable you wish to print. You can either assign check number manually or let the system automatically assign the next check number available.
Click Preview button to actually print the check. Preview Task List screen will open while the system is generating the report.


- Then, Report Preview screen will also open.

- On the Report Preview, click Print button and the one from the Print Dialog window to actually print the check.

- The Print Check Verification screen will open.

- Click Commit if the check is successfully printed and click Yes on message.

- Close report. Assigned check number will be displayed in the Check No. field and pay bills is now marked as Printed. (not yet implemented.)

Overview
Content Tools