Page History
...
- DOWNLOAD AUTOFEL V10.1 Install script and folder.
- MAKE SURE ALL AUTOFUEL PROCESSING IS FINISHED FOR THE DAY!
- MAKE SURE ALL USERS ARE LOGOUT AND AUTOFUEL CLOSED ON ALL WORKSTATIONS BEFORE PROCEEDING!
- MAKE SURE You have at least double the autofuel folder size for the available free space on the drive that contains the Autofuel folder.
- Open a browser and navigate to http://www.irely.com/downloadsDownload V101Setup.exe from this Help Page
- Click on the V101setup download, save it to either downloads, or your current autofuel folder.
- Example c:\autofuel or g:\apps\autofelautofuel. If you start the V101setup.exe it will ask you where you want to place the install folder. Make that the current the autofuel folder. I.E. c:\autofuel, or if a server save it to the drive and autofuel folder on the server. I.E. g:\apps\autofuel. Note these Drives and paths as you will be asked to enter parts of them later during the actual software load.
- Once it has downloaded open right click on it and click run as Administrator. Follow the prompts in the software load and update section.
...
- RUN PT PROCESSING FILE UPDATES
- WHATS NEW in V10.1
- UPDATE HOSTS FILE.
- ADD SITE XREF FILE.
- UPDATE SITE FILE.
- UPDATE PRICES RECORDS for NEW SITES.
- UPDATE SITE TAX Records for new SITES.
- ADDITIONAL UPDATES and CHECKS.
- Whats new V10.1
Main login screen should have the version number in it.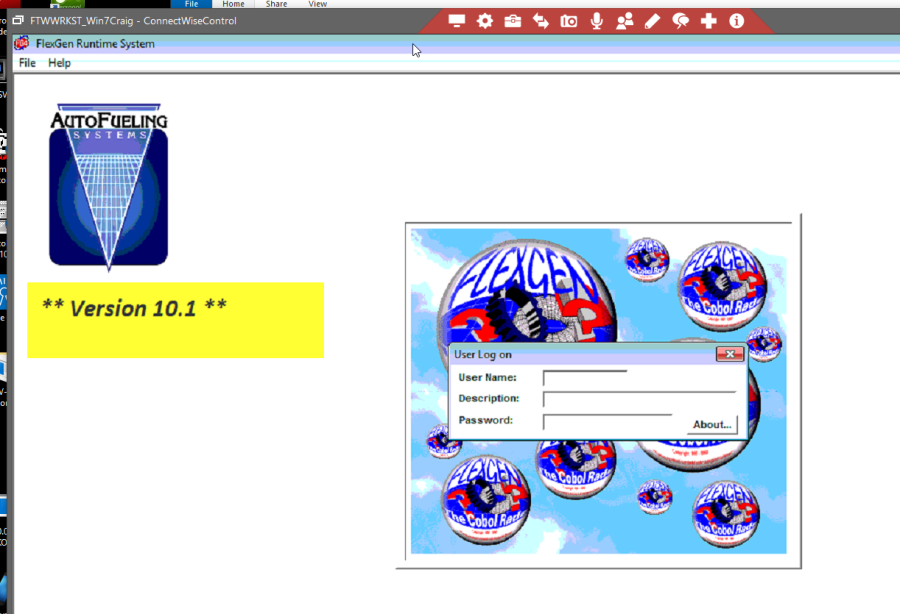
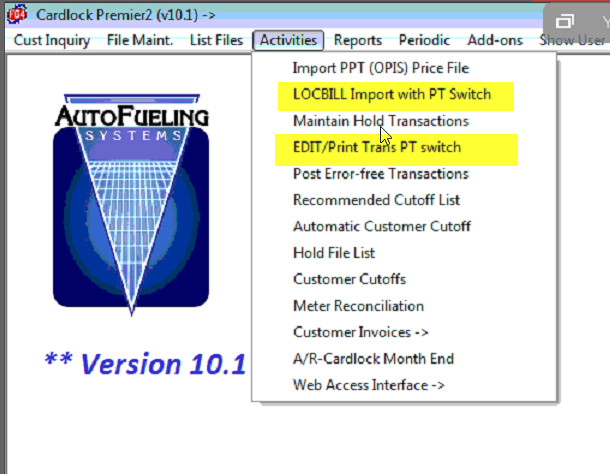
Main menu unchanged Activities menu will have one addition one subtraction and 2 changes.
Added was the Import PPT OPIS. Changed were the Pacpride Import, and the Edit-Print, and Deleted was the Card download from Pacpride. Which no longer worked.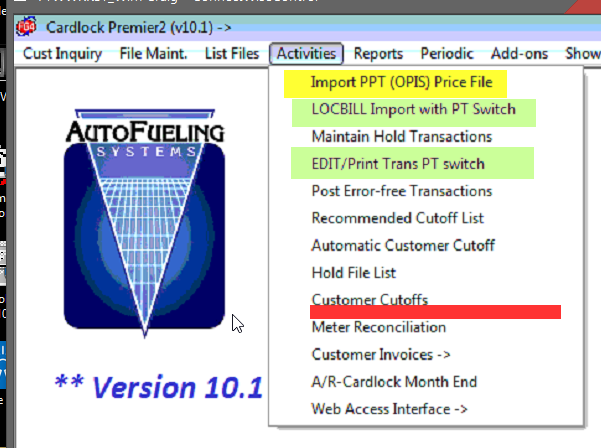
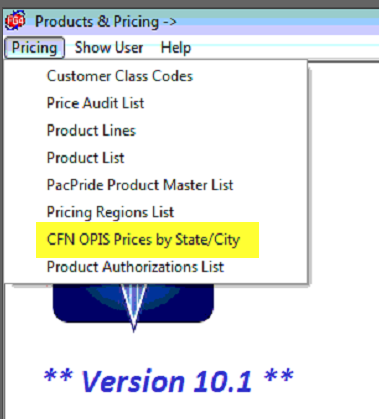
Additions to the maintenance and List menu's
Maintenance added an OPIS cost record add/edit function.
List added an OPIS Cost records List by State and site.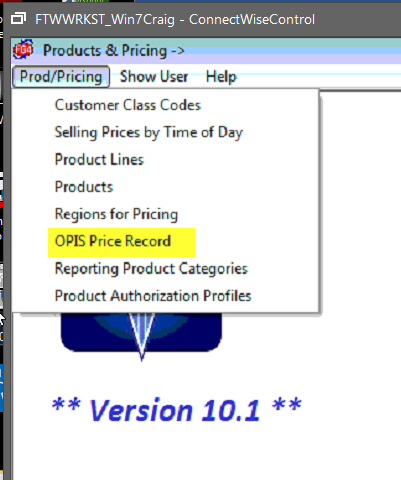
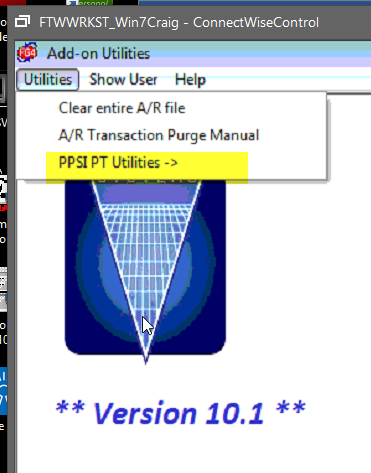
Additions to the Add-on Add-on Utilities is the PPSI PT Utilities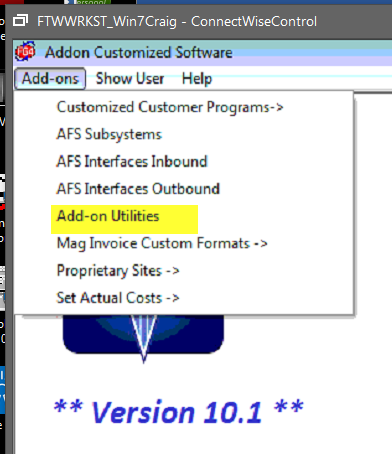
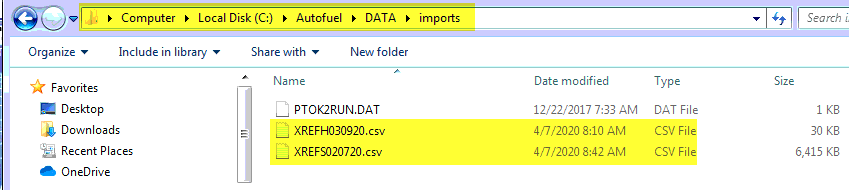
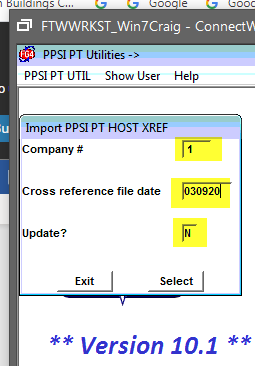
b. UPDATE HOST FILE. A date of the latest Host cross reference file will be sent with the Install. Or you can check the autofuel\data\imports folder for the Host and Site files. The date is part of the file. You will need this to have it find the correct file to import.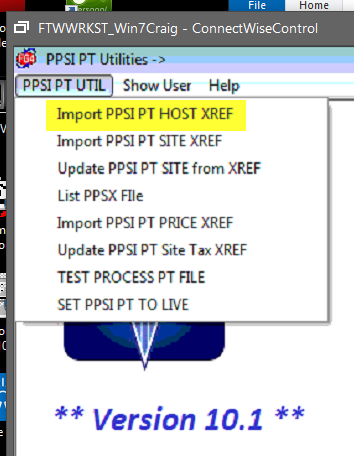
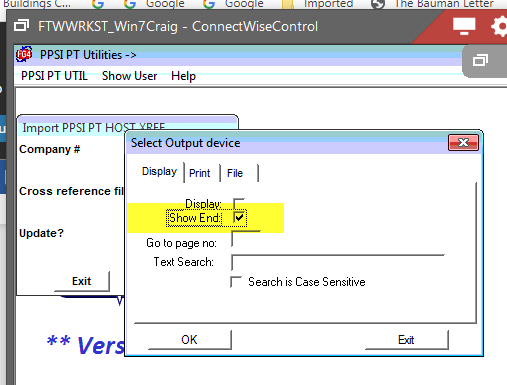
The import run screen has the company set to 1 by default. No date initially and the update flag = No. You set the company, the date of the Host Cross reference file, and if you want to run a Preliminary non update run leave no. Other wise set Y for Yes to update. The select option window will open. Always select Show end, as there is no need to print these, as they create an audit file in Autofuel\data\reports folder.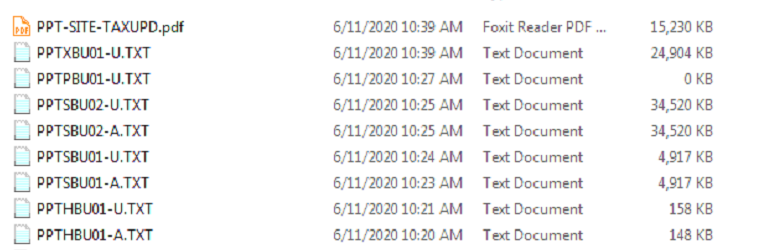
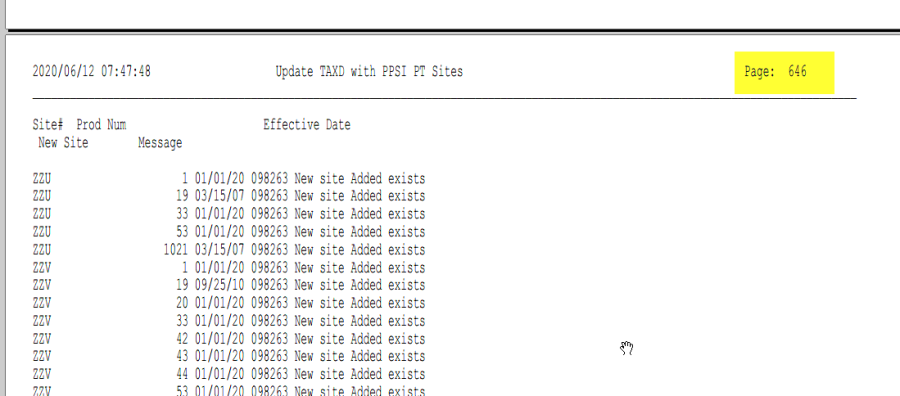
A total number of records added, or changed will display on the screen. The audit and update files in the reports folder, show what was done. If a host number is the same it skips it. If the new host number doesn't exist it add's it with the information from the XREF file. If the new Host Does exist it updates it from the X-REF file.
SCREEN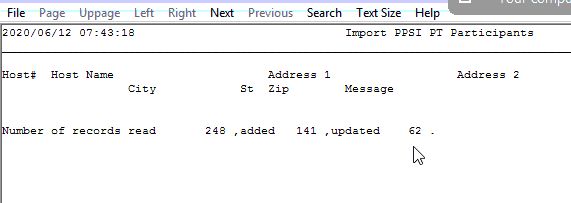
REPORT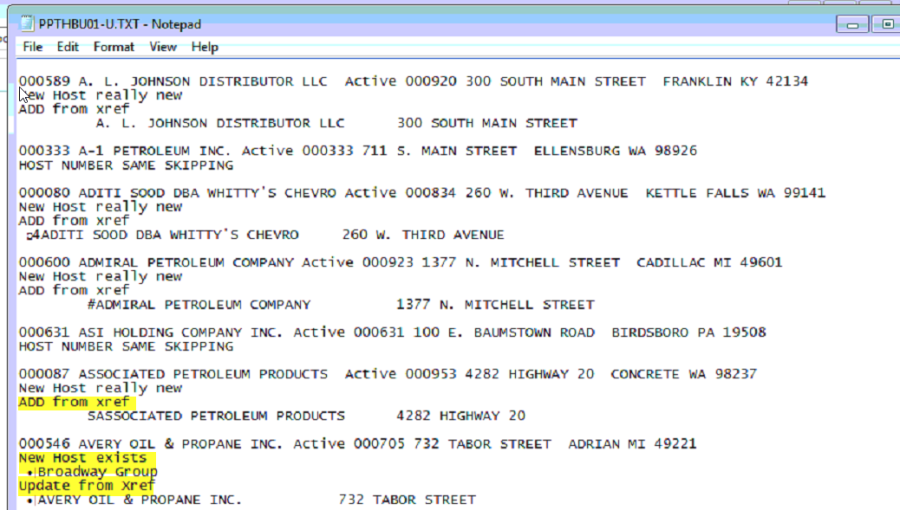
SITE FILE.
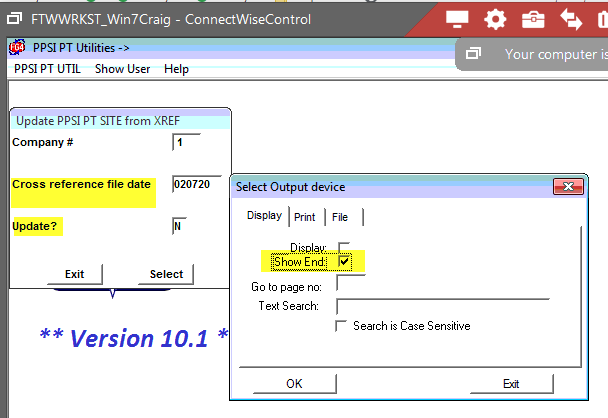
The Site File has 2 runs, one to create an index of the cross reference to the old and new numbers for the customer to be able to look up one or the other. The second will actually update the Site file with the new number. The number of sites added or updated depends on how many sites your current site file has already. First site file update run loads the index.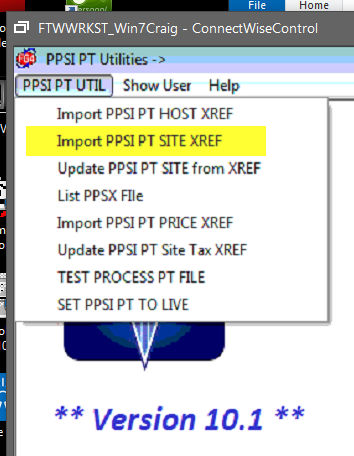

Set the company, the date of the xref file, here that is 020720. Then an audit run or Update
Again you can run the N first to see how many sites would be added. Then again with Update Y to actually do it. Both make sure SHOW END is checked in the display. This will put both audit and update reports in the reports folder for future reference. It will display to the screen the total records added, or changed. Some hosts numbers are now on all the sites a Marketer has, if they had several sites and hosts before.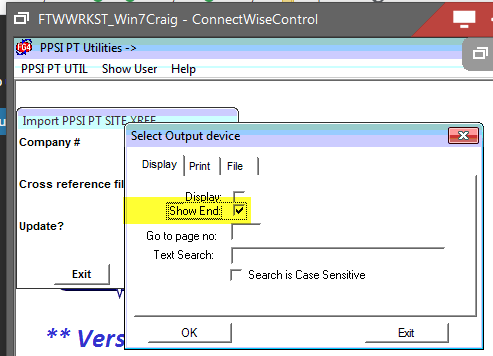
SCREEN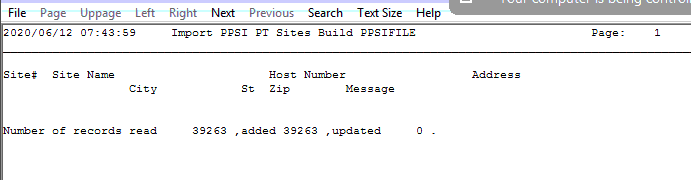
REPORT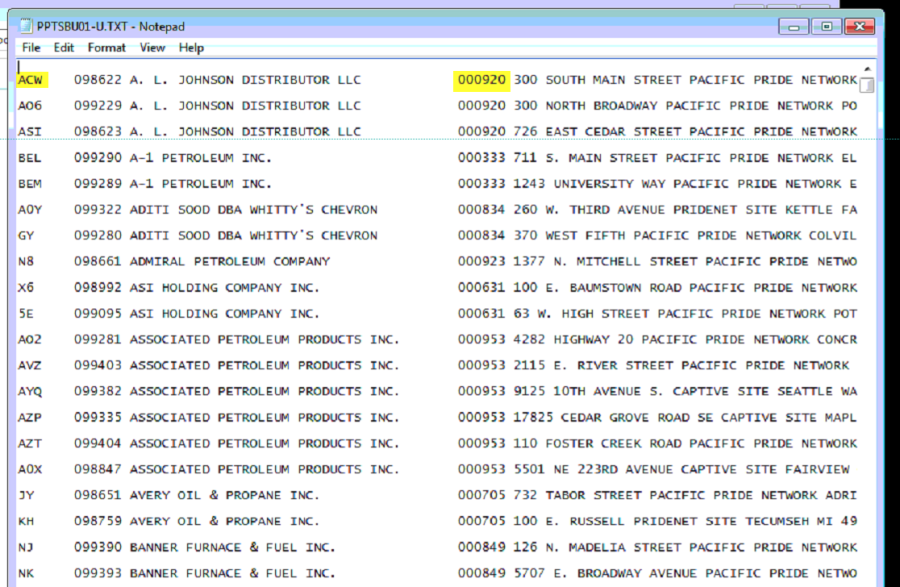
Site Update 2, Actually updates the site file with the new sites. Again you set the company, date, and update No or Yes.
Very few sites already exist so if this is all adds that is most likely.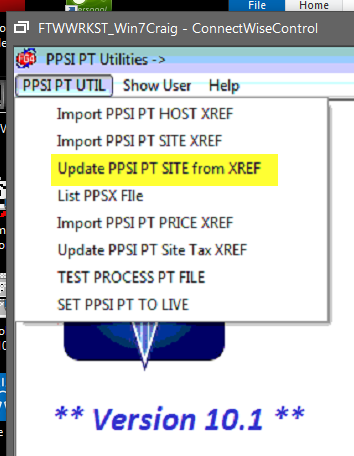
SCREEN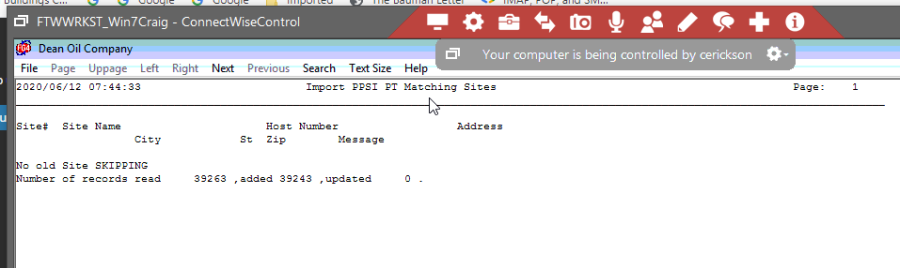
REPORT
Next is the list utility. It simply lists the site cross reference file built in the First site program.
Update PRICEs by time of day with new Sites.
Again, you can choose to do an audit run first to see what it would do before an actual update. When run it shows the sites found in the Prices by time of day, and the new site number records added. You can then go list the Price audit list in the Carlock lists menu to see the full current prices. 
SCREEN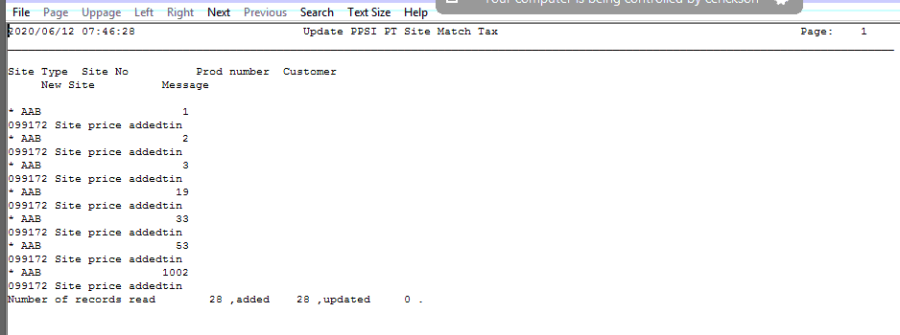
List the Price Audit list in regular Card-Lock Lists.
SITE TAX UPDATE.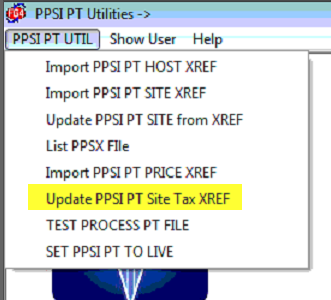
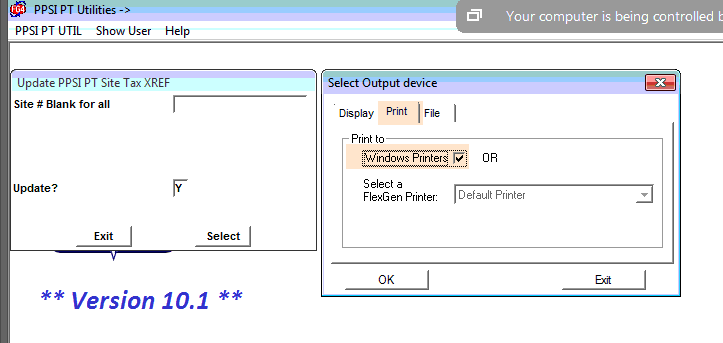
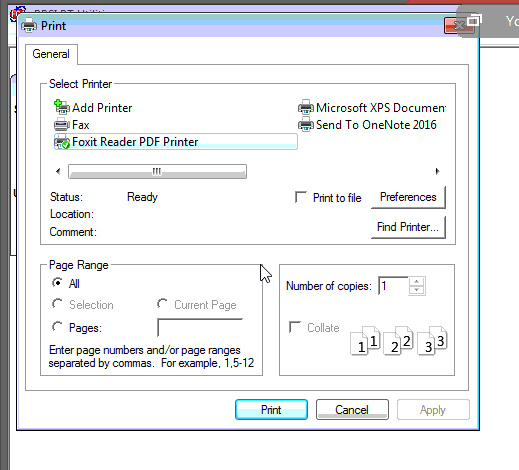
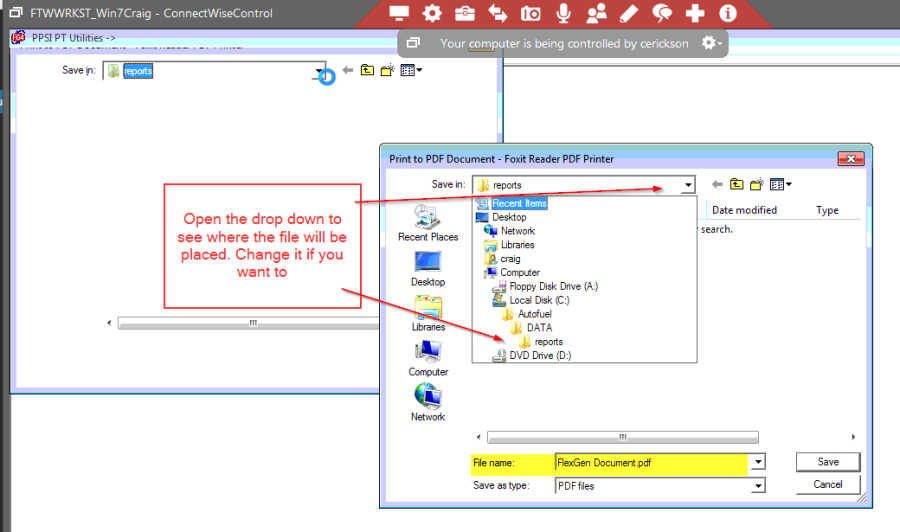
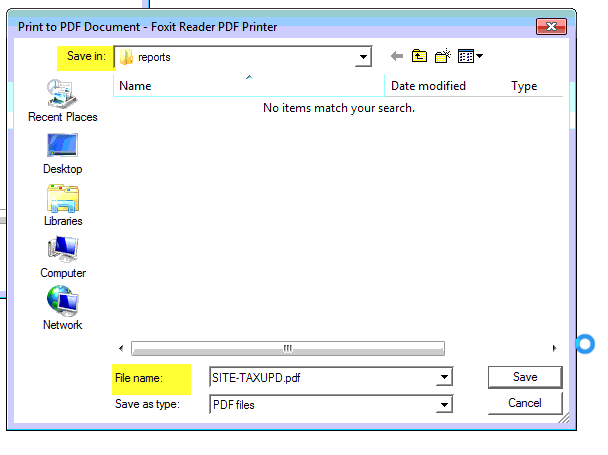
This run is a bit different in that you do not want to print this to the screen or a printer. We will want to send the output to either Disk or PDF, or xps printer. This can be up to 3000 pages long. So again, you can do this Audit, or Update. You will want to select Print or File in the Output screen. Selecting print, if your system is not set to print to windows printers change it now. It will open the Windows Printer API screen to select the printer. You can choose either a PDF or xps printer if you have one. It will then ask you to name the print file. You can make it what you want. I use SITE-TAXAUD for audit run and SITE-TAXUPD for update run. If you don't have a PDF or XPS printer, then you should choose FILE at the Output screen. And use the same name in the file name box. Then Hit select. This will run for 20 minutes at a minimum. So, take a break. The output of the file will show in the bottom left corner, if PDF or XPS. It will the show the pages being created. When it is done, it will go back to the UPDATE PPSI PT Site Tax screen. If you have a PDF viewer, it may open the PDF file when done. You can close that, and it will be back at the Run screen. 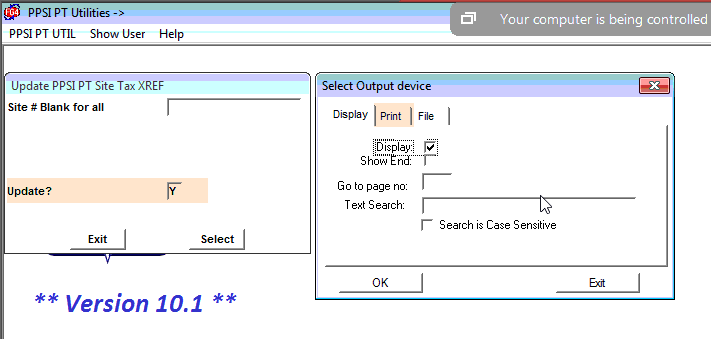
Pages being created in lower left.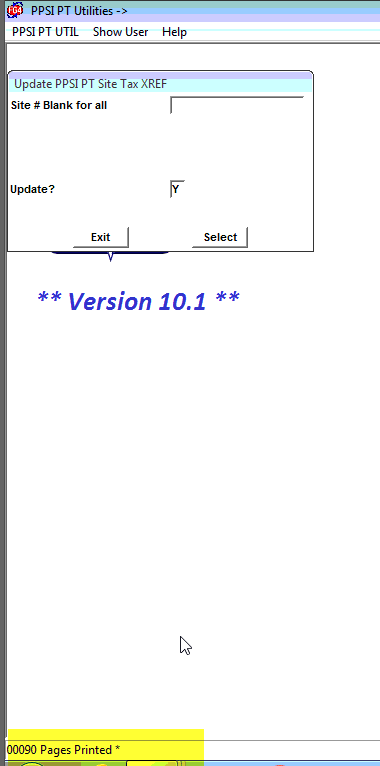
You can close the PDF viewer. And then close the UPDATE TAX screen.
CONGRADULATIONS you have completed the base portions of the PPSI PT upgrade.
Some systems have additional modules or setup options that now must be checked or manually updated. Please Check the Additional UPDATES and CHECKS section to see if it applies to your setup.
Please also process a LOCBILL file through the new Menu Options. See TEST LOCBILL Section.
You cannot process a PT file yet through the main Cardlock menu. We must wait for Pacific Pride at this point.
DO NOT OPEN THESE MENU ITEMS IN THE PPSI PT UTILITIES UNLESS INSTRUCTED BY IRELY SUPPORT.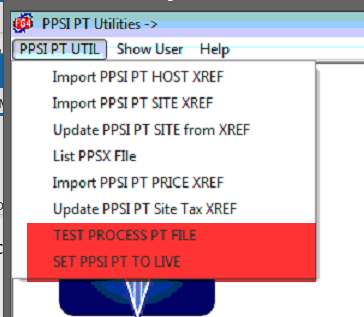
Additional UPDATES and CHECKS
...
CURRENT LOCK BILL PROCSS CHECK
- CHECK THAT LOCBILL FILE STILL PROCESSES.
- Import a locbill file using the new menu choice. It should run the same process as before.
- Check the edit. It Should run the same as before.
- Post the locbill. It should post as before.
...
What you will be doing in this process.
- You will Logon to the Pacpridenet.com
- You will download the OPIS COST file for the date(s) needed for the transfer costs.
- You will download the needed PT file for the date.
- You will import the OPIS Cost file(s).
- You will Import the PT Transaction file
- You will run and check the edit as usual. Check for Price, and costs to be what is expected.
- IF there is any price or cost that appears not correct DO NOT POST. The POST may post them anyway as they are not errors the system would catch. A too low price for the day would be a warning, not an error, so it would post it.
- If all Prices and costs look to be in line. And totals match the Pacific Pride new balancing reports (refer to PPSI ICB instructions for the PT file). Post transactions.
- Check the Posting report for correct accounts.
Overview
Content Tools