Generate default earning, approved time entries and posted Time Off Requests:
- Click Process Pay Groups from Payroll module.
Select Pay Group by checking the corresponding checkbox.
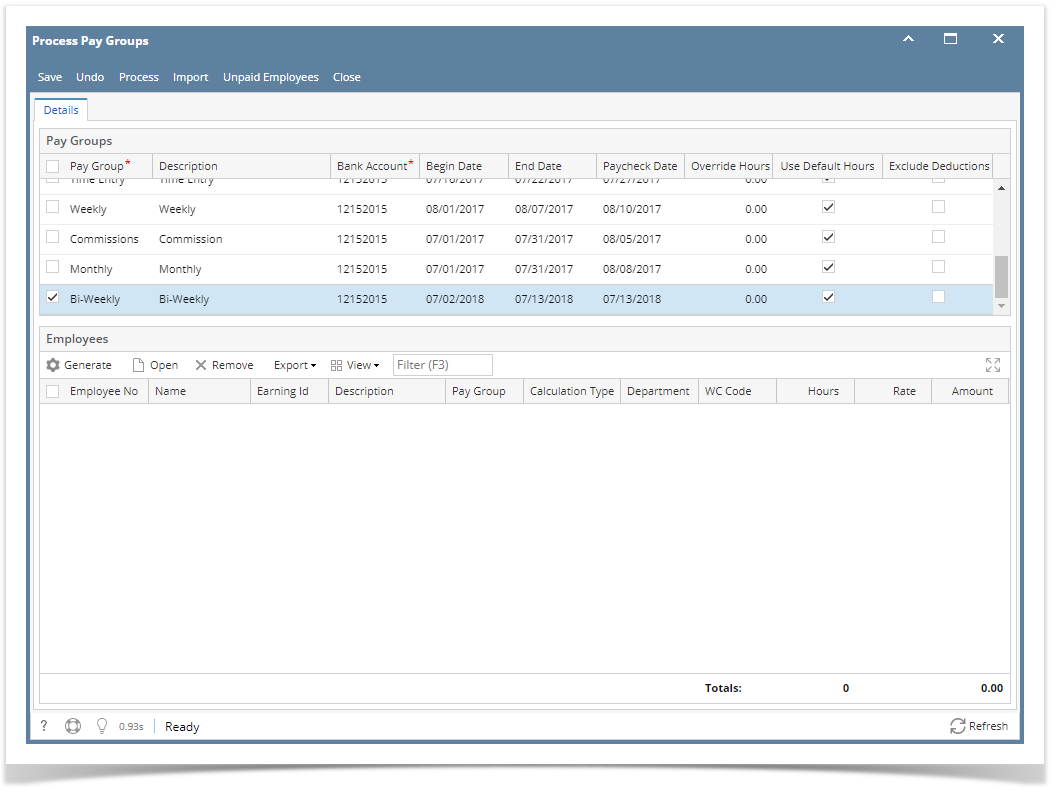 Image Added
| Info |
|---|
Multiple pay groups can be selected if needed. |
- Set the value for the following fields:
- Bank Account
- Begin Date
- End Date
Paycheck Date
| Info |
|---|
If approved time entries from Time Approval and posted Time Off is within the selected pay period, earnings are displayed |
- Click Save button
Click Generate grid button to generate the employees under the selected Pay Group.
| Info |
|---|
Existing earning from approved time entries and time off are not overridden by generated earnings To use default hours specified in the earnings, check the Use Default Hours checkbox. To use a different hour, do not check the Use Default Hours but instead set hours in the Override Hours column. |
Click Process toolbar To edit generated earnings, double click on the cell data to edit
Editable columns:
- Department
- WC Code
- Hours
- Rate
Import time entries:
- Click Process Pay Groups from Payroll module.
- Click Import
- Select CSV file
 Image Added
| Expand |
|---|
|
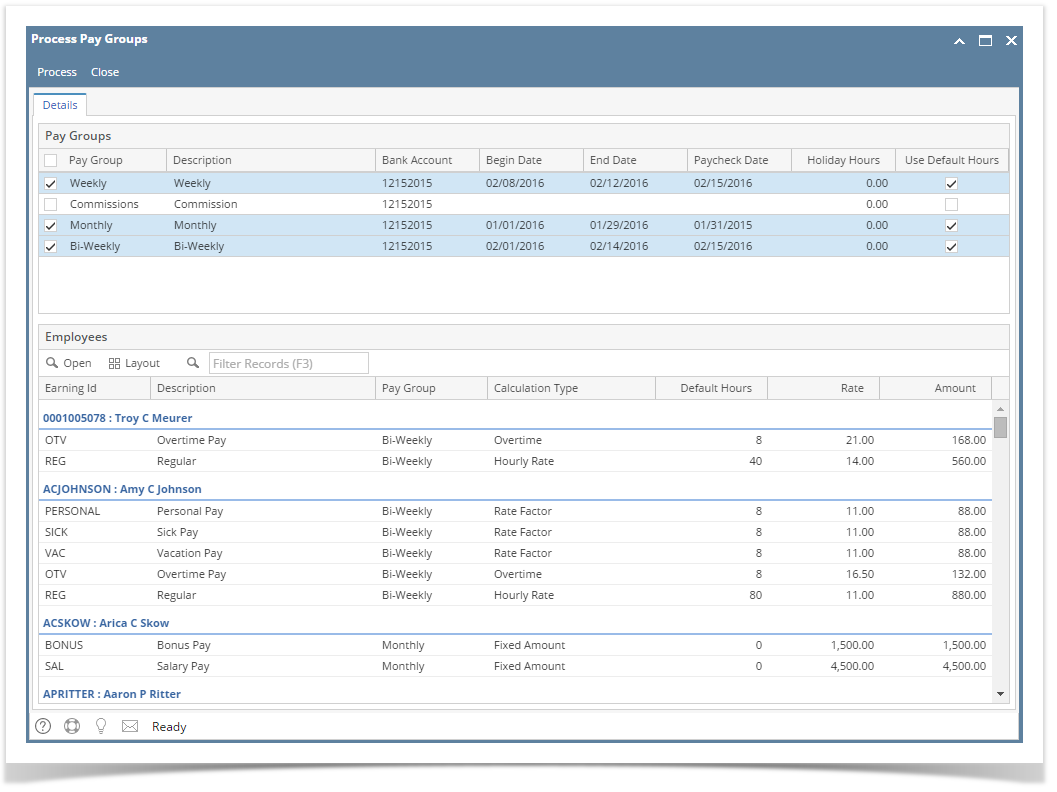
- Click Process Pay Groups from Payroll module.
Select Pay Group by checking the corresponding checkbox. | Info |
|---|
Multiple pay groups can be selected if needed. |
- Set the value for the following fields:
- Bank Account
- Begin Date
- End Date
- Paycheck Date
Click Generate grid button to generate the employees under the selected Pay Group. | Info |
|---|
To use default hours specified in the earnings, check the Use Default Hours checkbox. To use a different hour, do not check the Use Default Hours but instead set hours in the Override Hours column. |
Click Process toolbar button to generate paychecks.
|
...
 Image Added Image Added
|
...
the Generate grid button will also add to the grid newly created time entries (if there are any) as well as records the were already processed. |
- If there are paychecks generated under the selected Pay Group
|
...
- already, the system will prompt to confirm the generating of paycheck.
- Click Yes
|
...
- button to proceed with the process and No
|
...
...
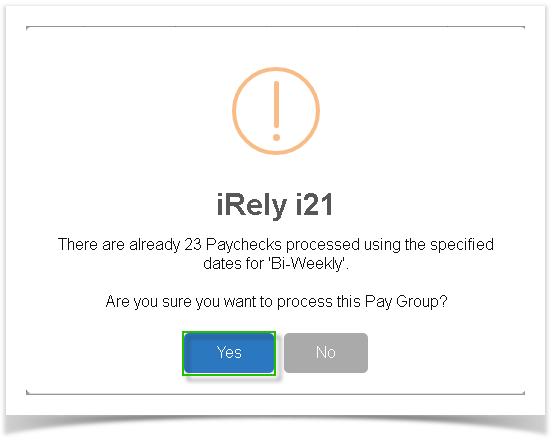 Image Added Image Added- Employees to Process
|
...
- screen will be displayed.
- By default, all records are selected. The Payroll Admin can control which of the employees will be generated a paycheck.
- Click OK
|
...
- toolbar button to continue.
|
...
 Image Added Image Added
|
...
...
of the progress and the number of paychecks generated.
|
...
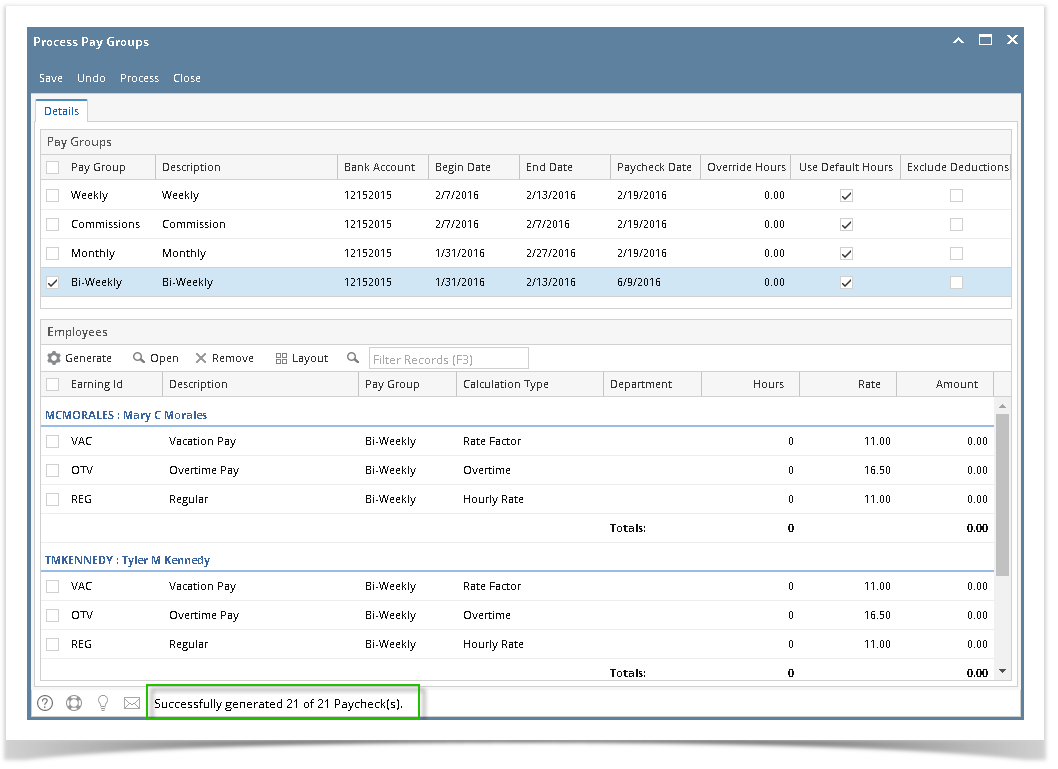 Image Added Image Added
| Info |
|---|
The system will generate single Paycheck for each Employee on the selected pay group even if there are multiple Departments. |
- Generated paychecks will be shown in Paychecks
|
...
| Expand |
|---|
|
Process Pay Group screen is used to create paychecks for one or more pay groups at one time.This is a good way of processing paychecks for a large number of Employees. By selecting the Pay Groups, all the Employees that has the pay group setup on the Earnings will be listed. - From the Payroll module, single click the Process Pay Groups menu.
- In Pay Groups lists, select the Pay Group by checking the checkbox.
Select the default Bank Account, Pay Period and the Pay Date.
 | Info |
|---|
Check the 'Use Default Hours' checkbox column if you would want to use the Employee default Earning Hours setup and process to paycheck. |
Click the Process toolbar button to display the Employee To Process screen. - By default, all Employees are selected. The Payroll Admin has the control to generate Paychecks on the selected Employees.
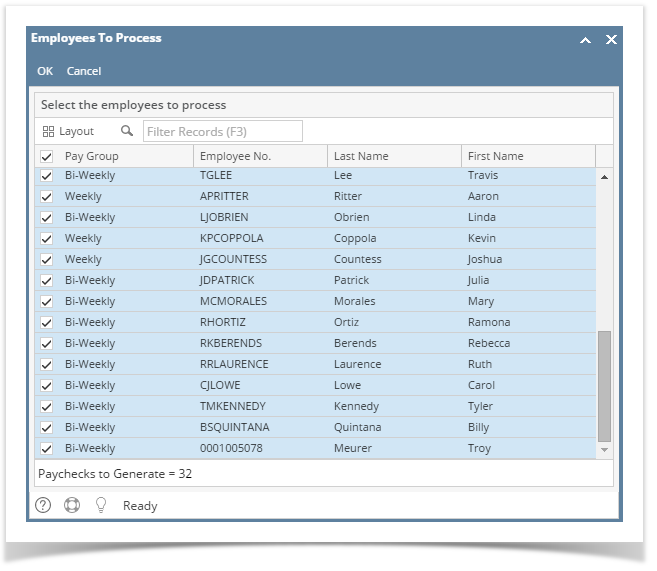 - Click the OK toolbar button to generate Paychecks.
The number of generated paychecks is displayed in the Process Pay Groups screen.
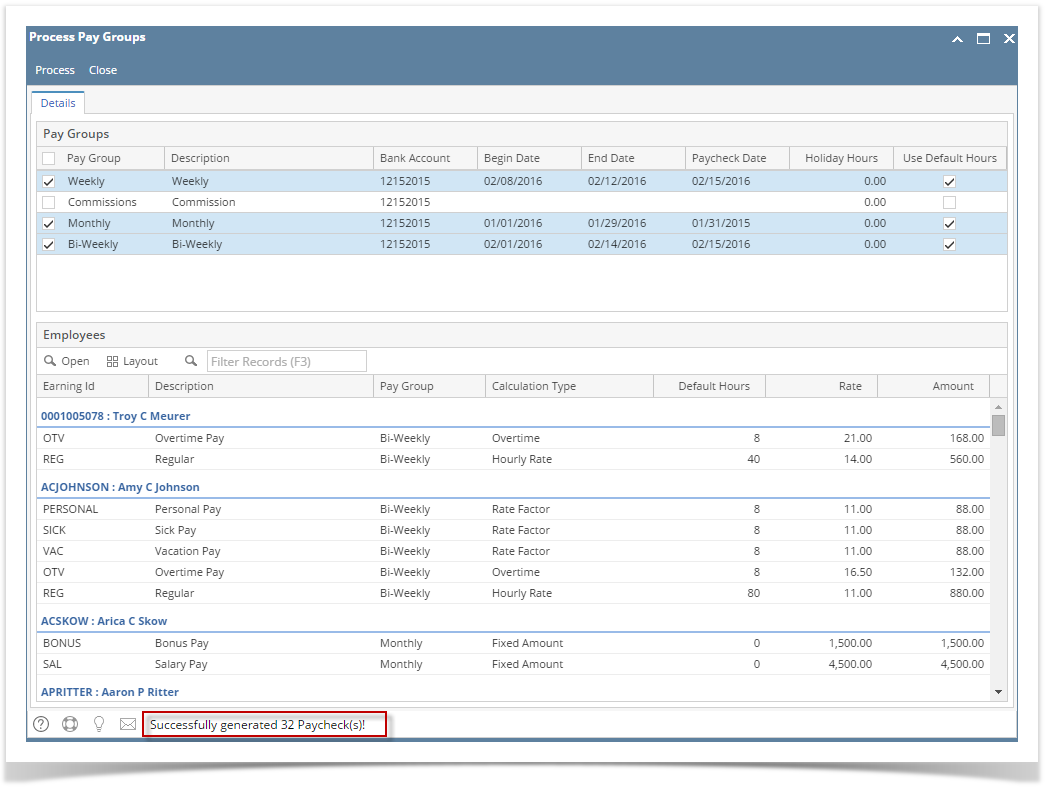 | Info |
|---|
The system will generate single Paycheck for each Employee on the selected pay group even if there are multiple Departments. |
- Generated Paychecks will be shown in the Payroll module > click Paychecks menu.
|