Here are the steps on how to add Vendors:
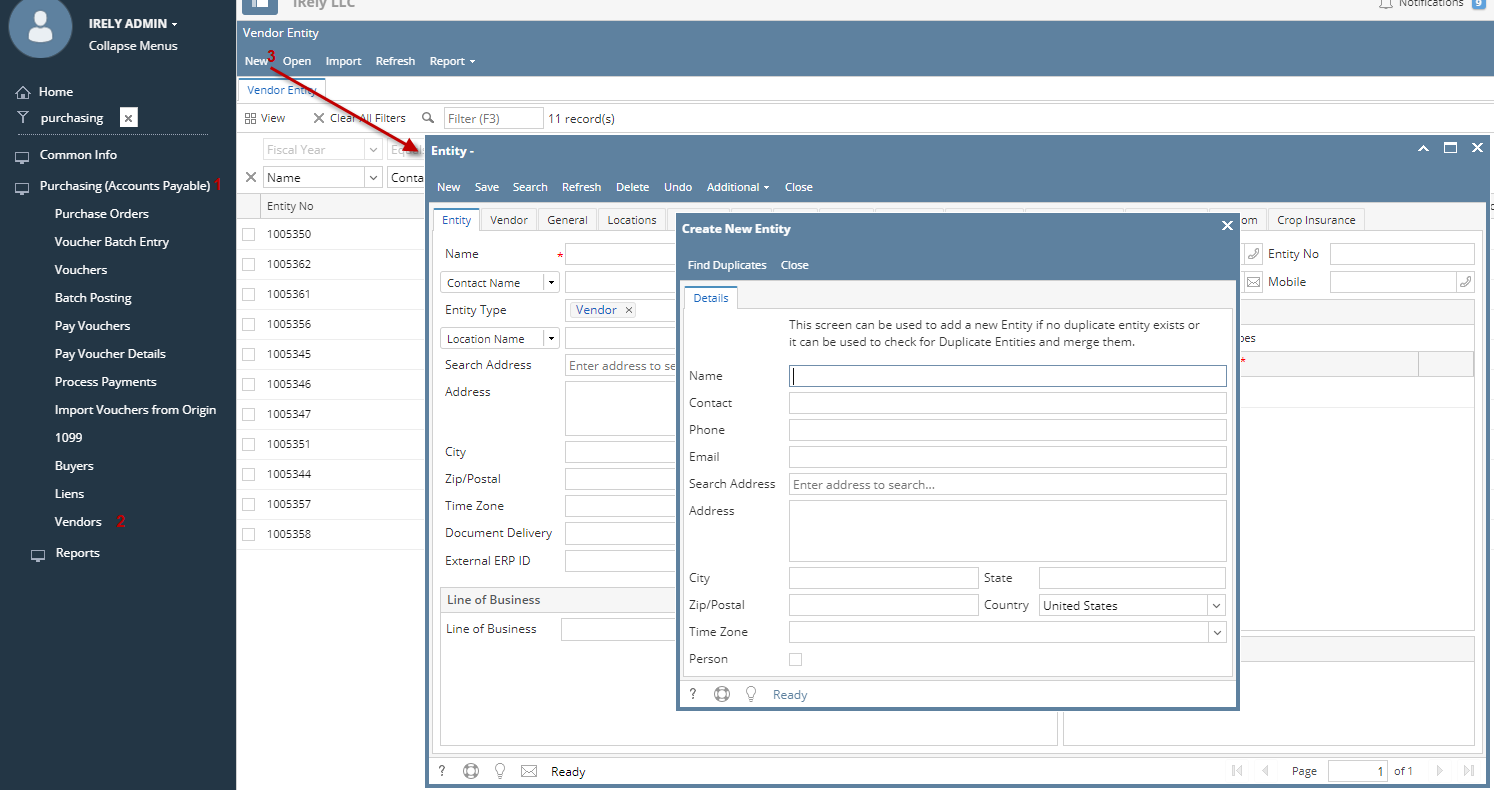
- From the Main Menu, Navigate to Purchasing (Accounts Payable) and click on Vendors to open Search Vendor Screen
- Upon click of New toolbar button, Create New Entity Screen will open.
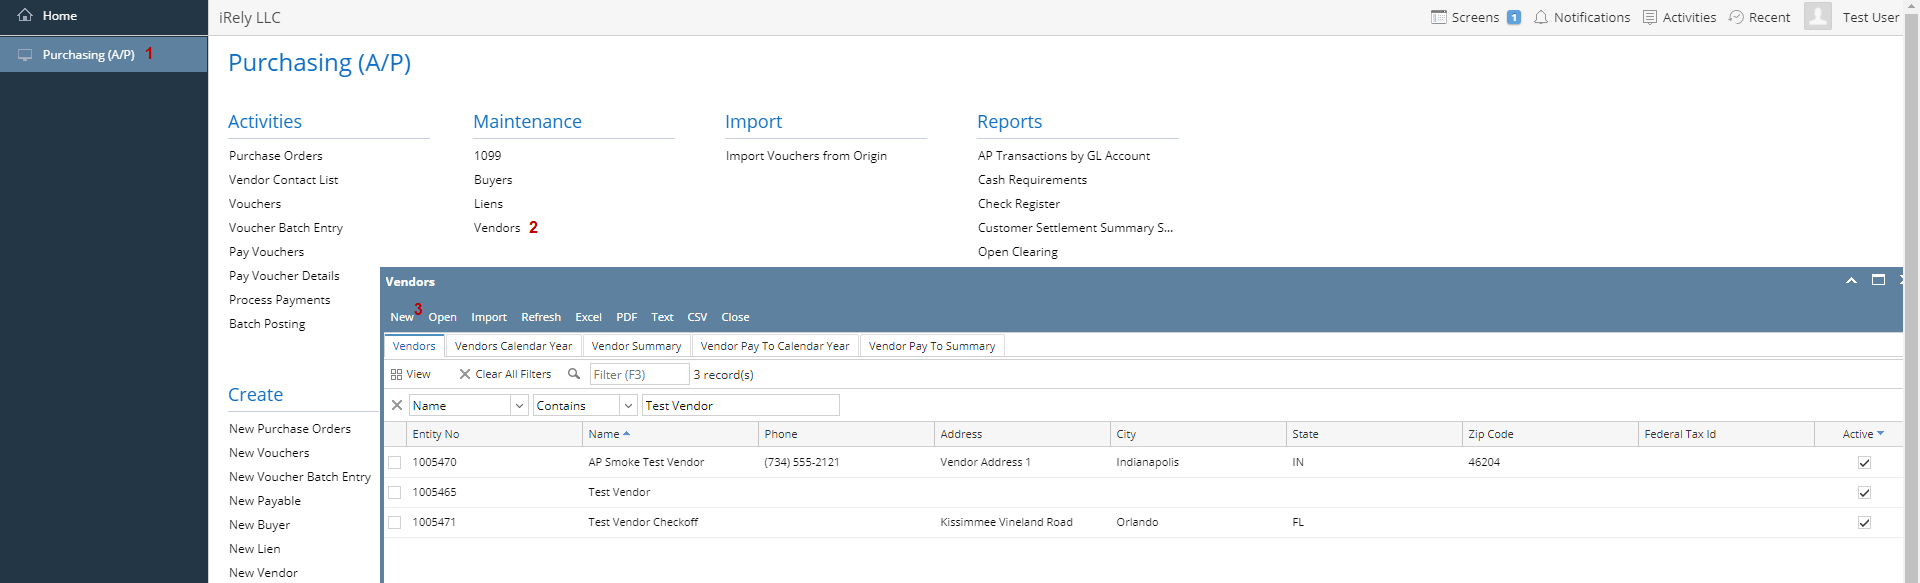 Image Added
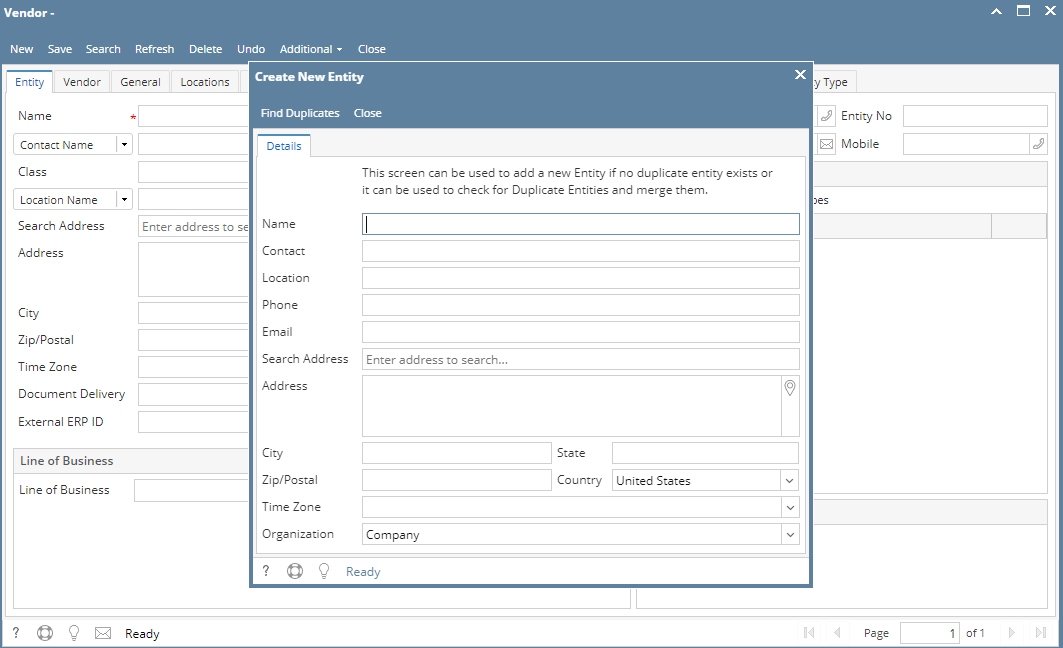 Image Added
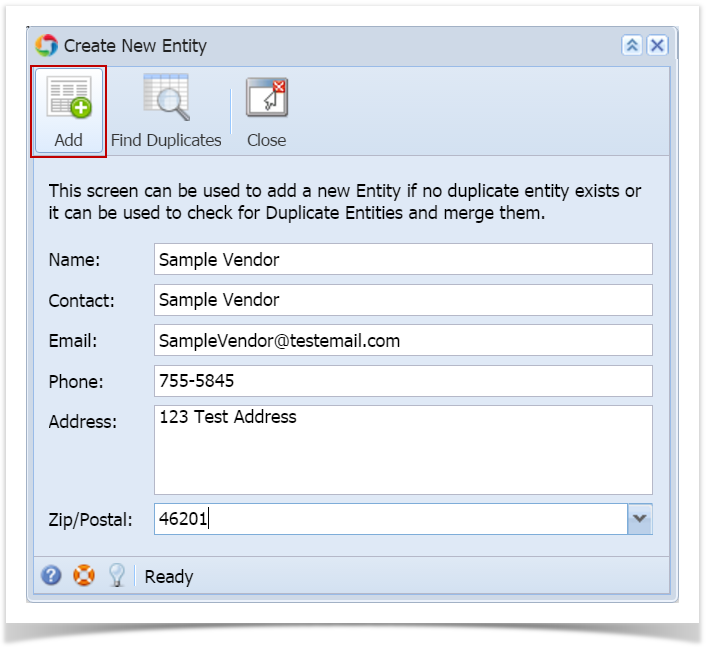
- Populate fields. Enter values on the fields > Click Find Duplicates
- Name
- Contact
- Phone
- Email
- Address (City , State, Zip/Postal, Country)
- Time Zone
- Person
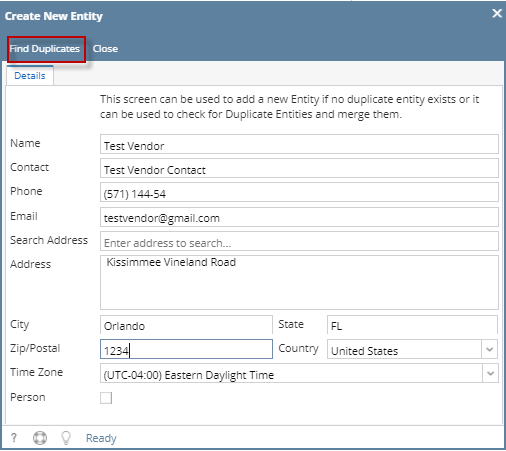 Image Added
 - Click Add
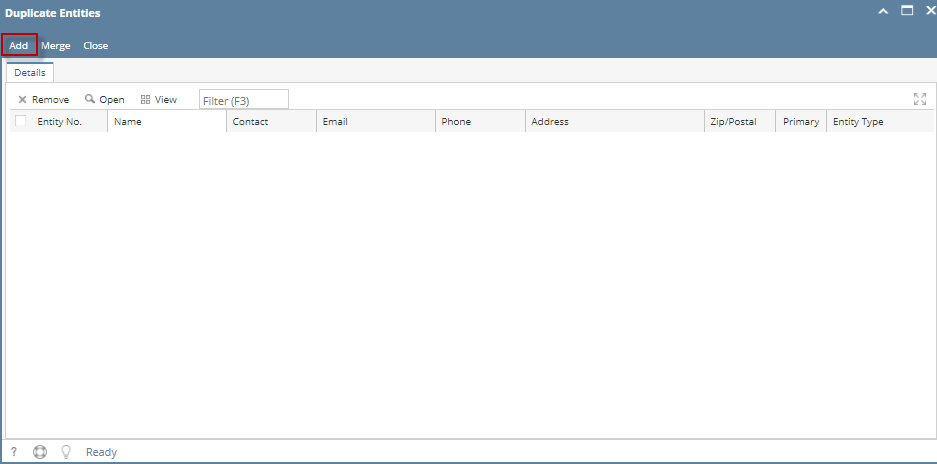 Image Added
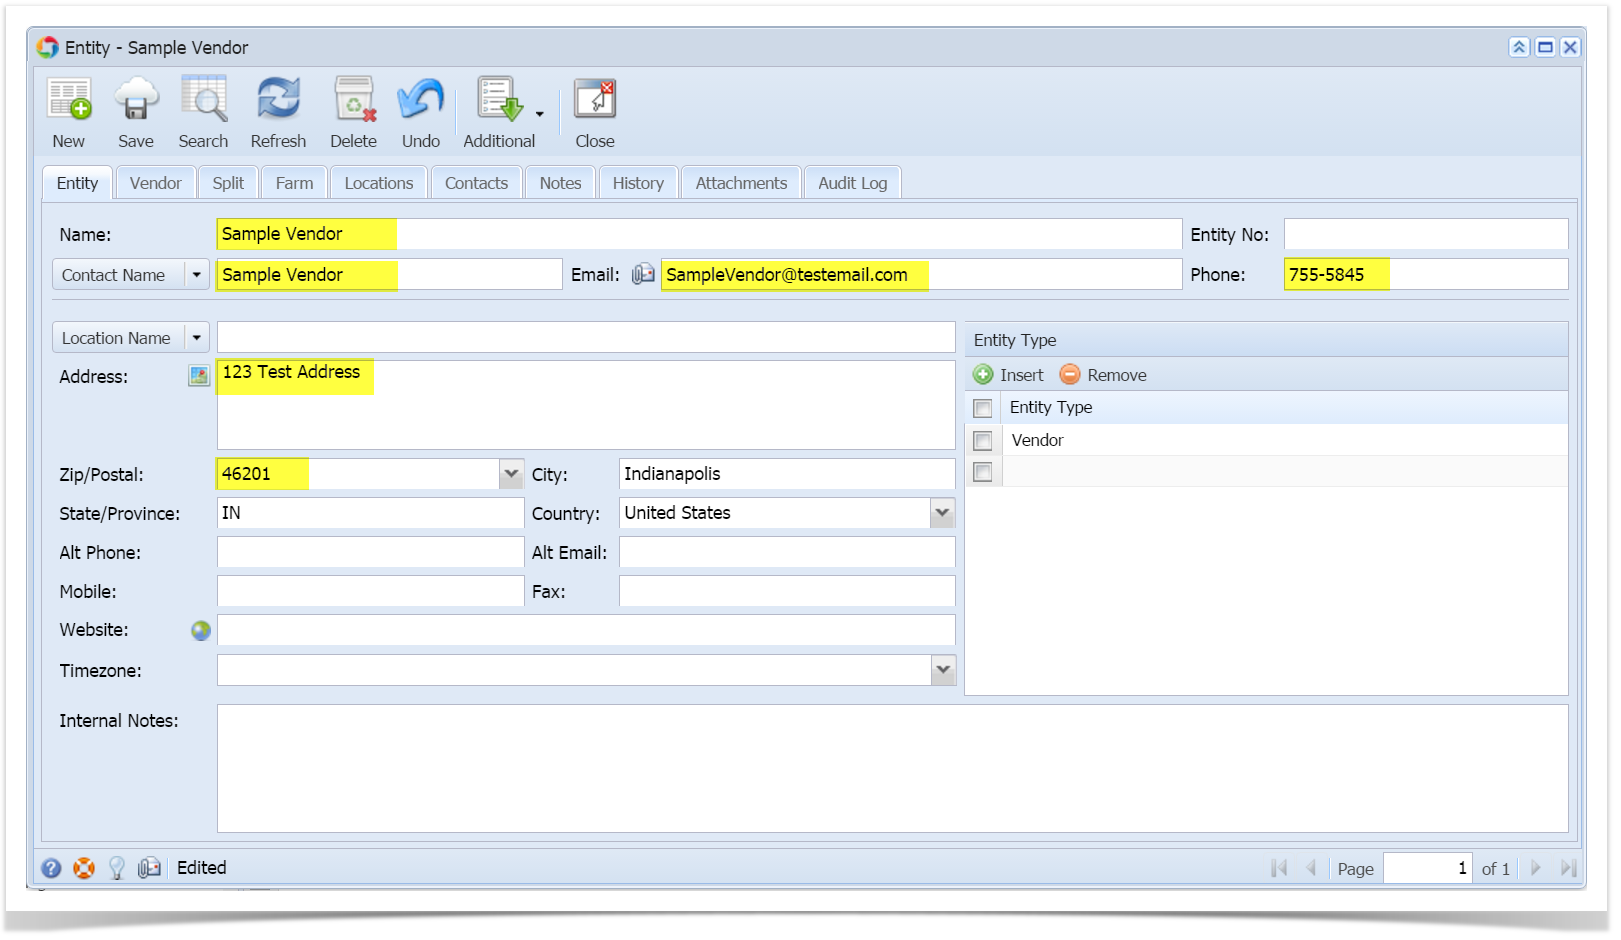
- Vendor Entity screen will open with the details entered in Create New Entity screen. Also the Entity screen will be named as Vendor Name
- Enter Location Name on entity tab
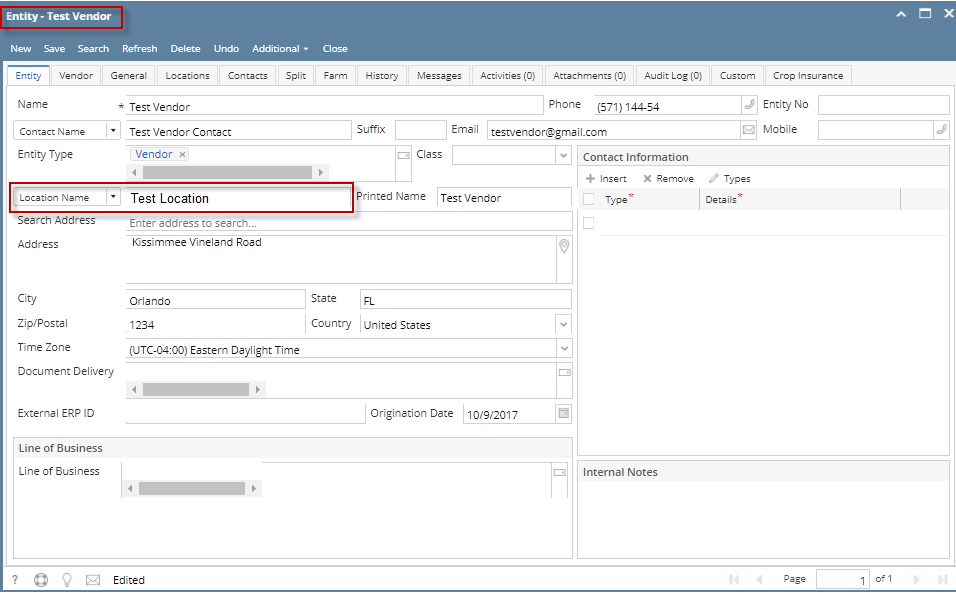 Image Added
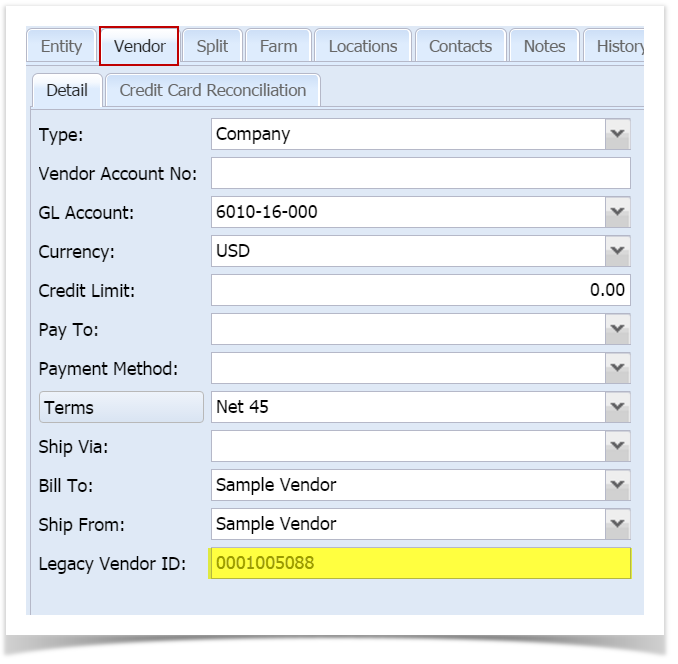
Click on the Vendor Tab > Detail tab
- Select default terms on the dropdown
- Selected value on default terms should also selected on the specific terms panel
- User can enter multiple terms under specific terms
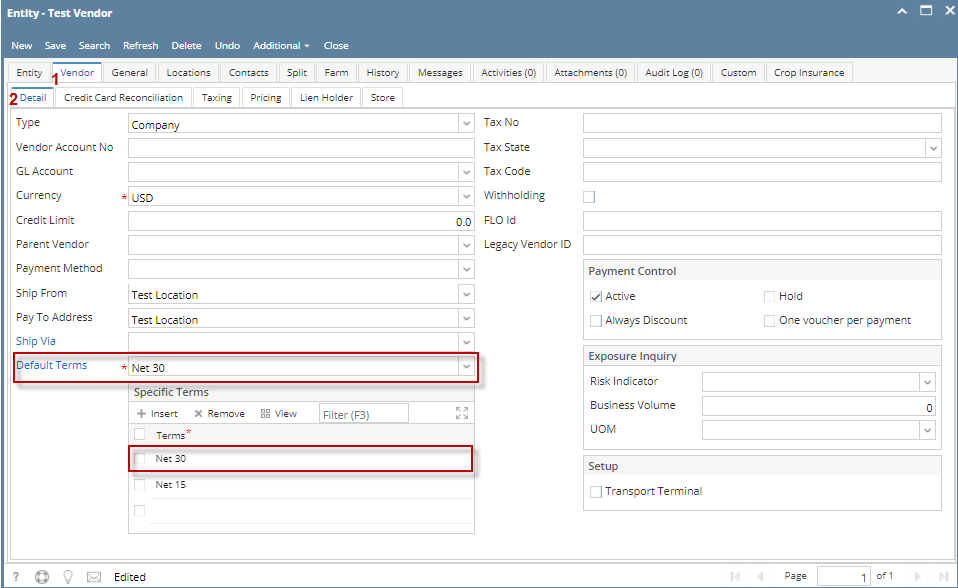 Image Added
Click Save
...
Click on the Vendor Tab > Detail tab - Select default terms on the dropdown
- Selected value on default terms should also selected on the specific terms panel
- User can enter multiple terms under specific terms
Image Added
Click Save
|
| Expand |
|---|
|
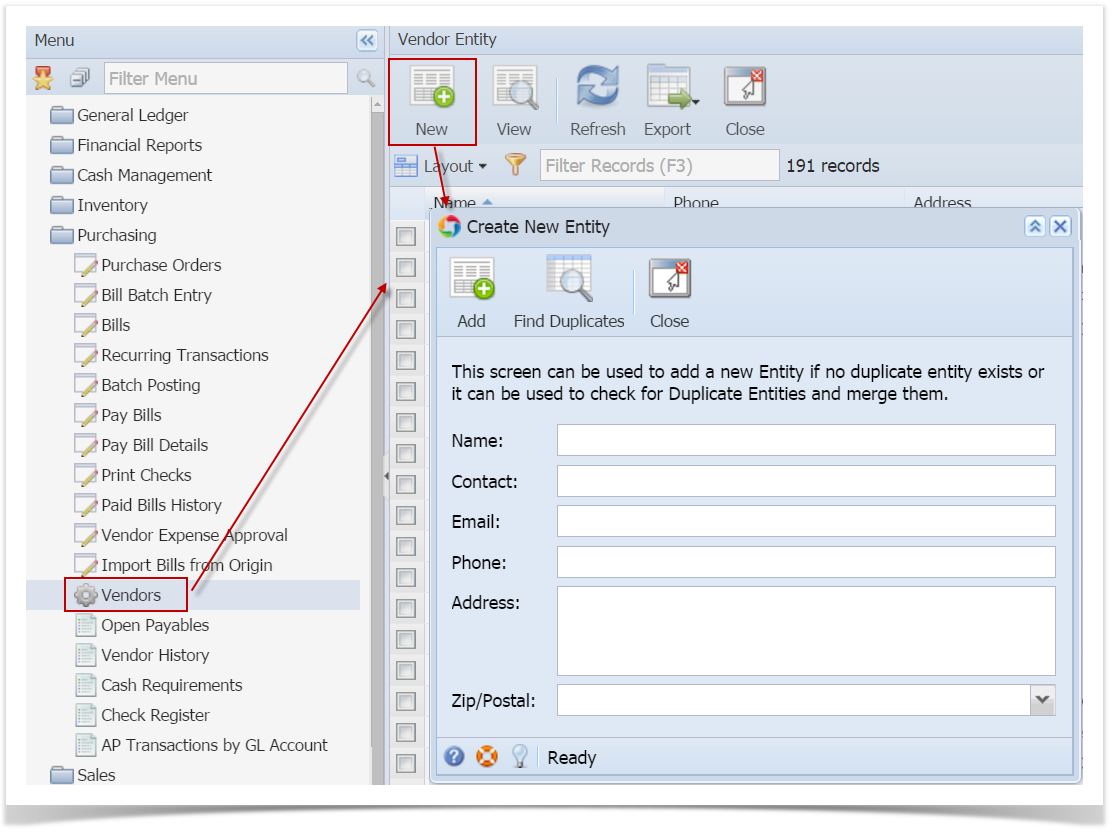
- Here are the steps on how to add vendors:
- From Main Menu, expand Purchasing and then click on Vendors to openSearch Vendor screen.
- Click on New button. Create New Entity screen will open
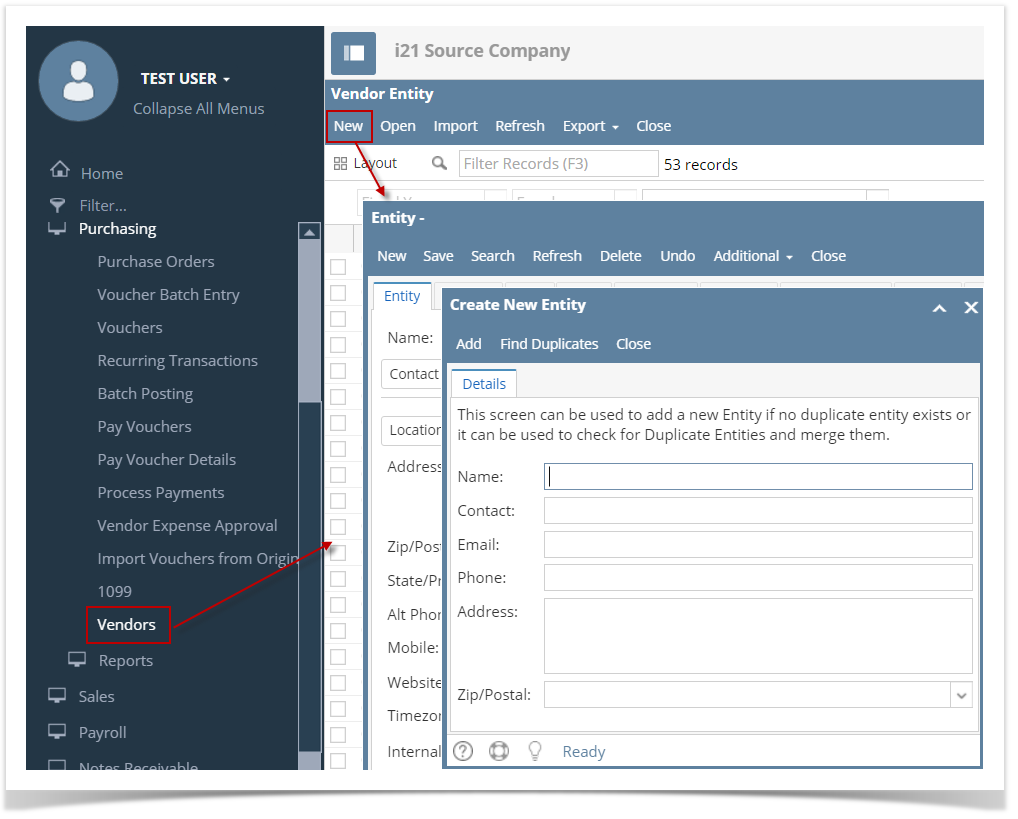 Image Modified Image Modified - Enter Name, Contact, Email, Phone, Address and select Zip Code.
- Click Add button.
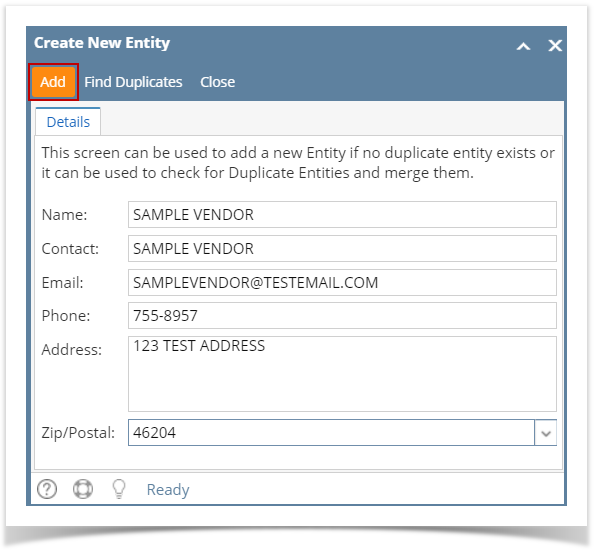 Image Modified Image Modified - Vendor Entity screen will open with the details entered in Create New Entity screen.
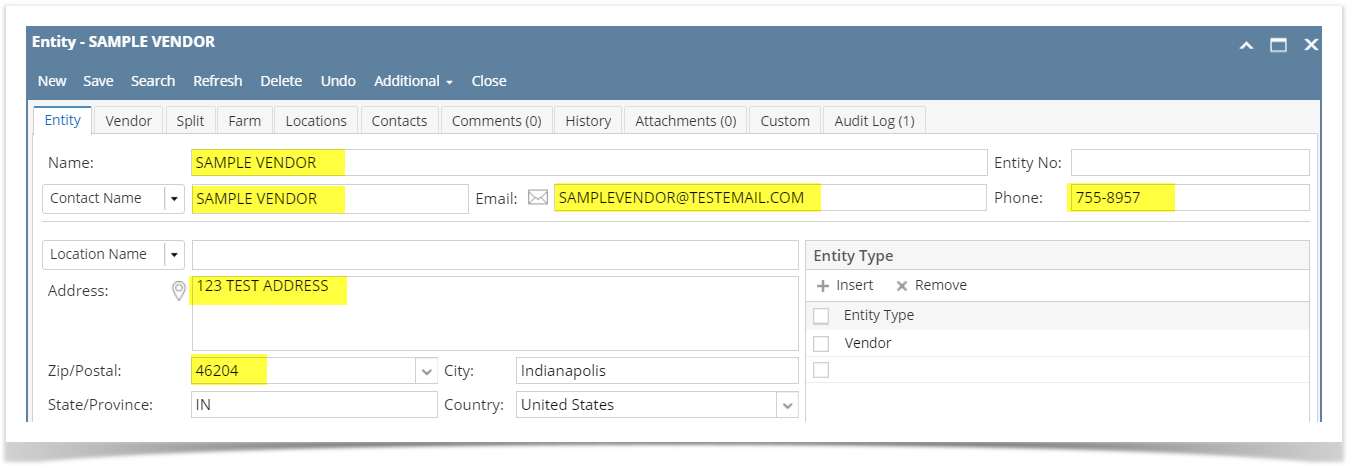 Image Modified Image Modified - Enter details on Entity Tab specially the required fields like Location.
- Do the same on the VendorTab. Required fields on this tab are GL Account and Terms.
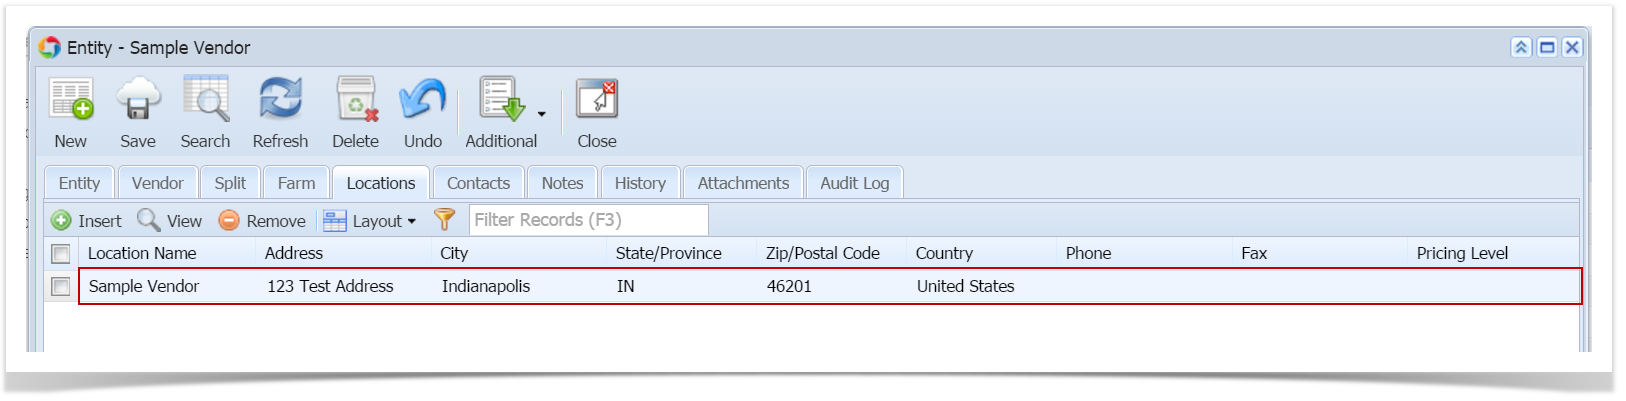
- Navigate to Locations Tab. Location entered on the Entity Tab together with its details will be displayed on the grid. Add more locations if necessary by clicking Insert button.
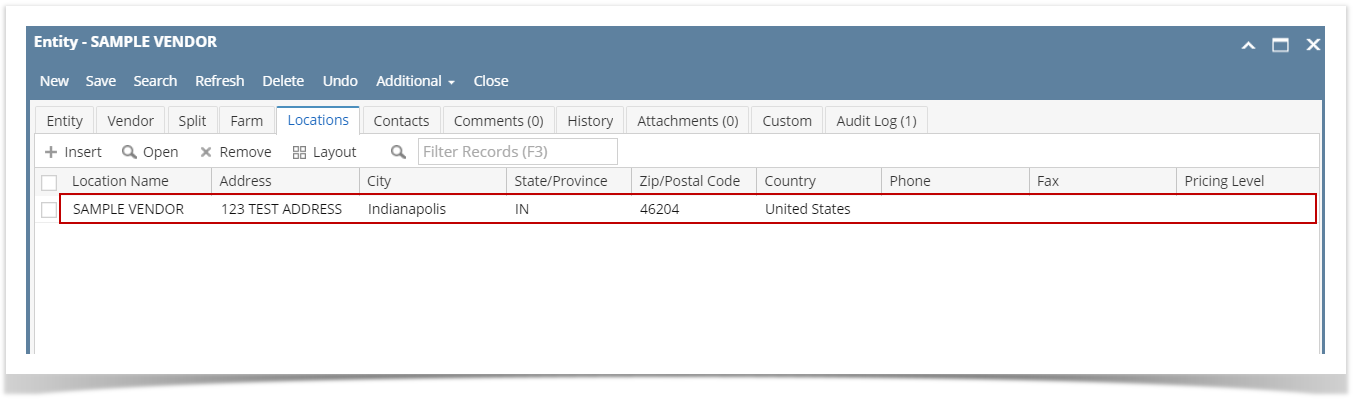 Image Modified Image Modified - Navigate to Contacts Tab. Contact entered on the Entity Tab together with its details will be displayed on the grid. Add more contacts if necessary by clicking Insert button.
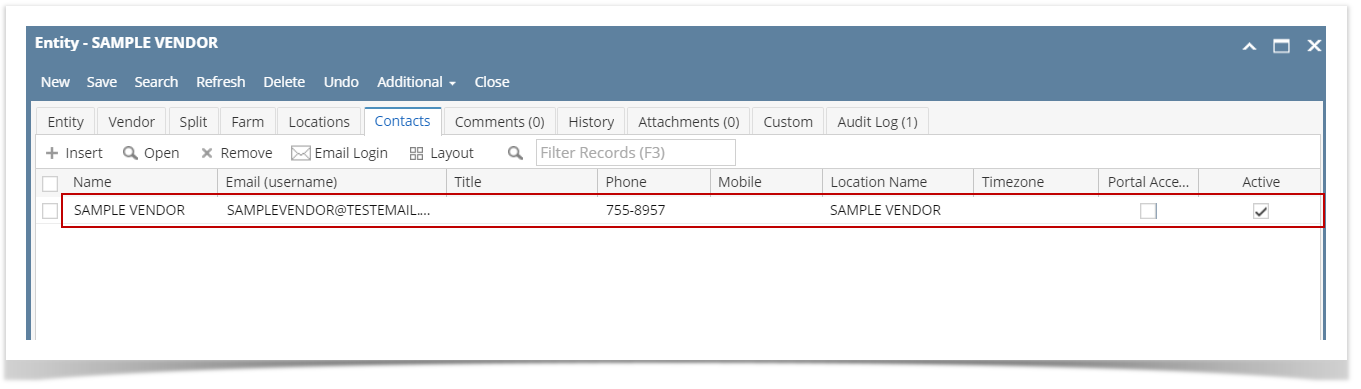 Image Modified Image Modified - Click Save toolbar button to save newly created vendor. However Entity No is entered (manually or system-generated), whatever is entered on this field will also be the vendor's Legacy Vendor ID.
 Image Modified Image Modified
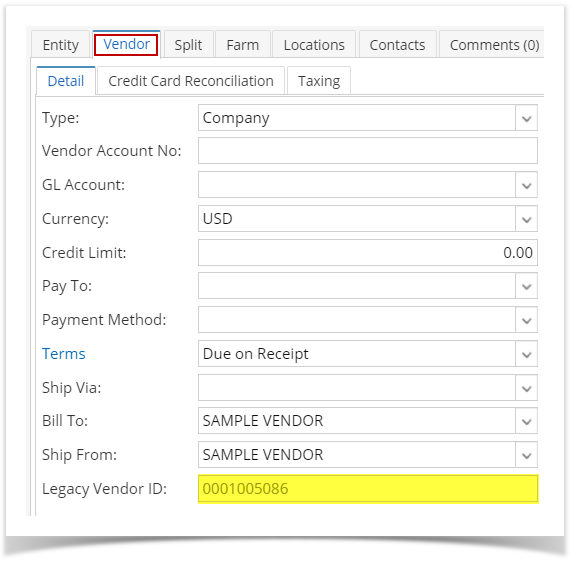 Image Modified Image Modified
|
| Expand |
|---|
|
Here are the steps on how to add vendors: - From Main Menu, select Purchasing and then click on Vendors. If there's an existing record, docked Search Vendor screen will open. Otherwise, blank Vendor screen will open.
- If Search Vendor screen opens, click on New button to open blank Vendor screen.
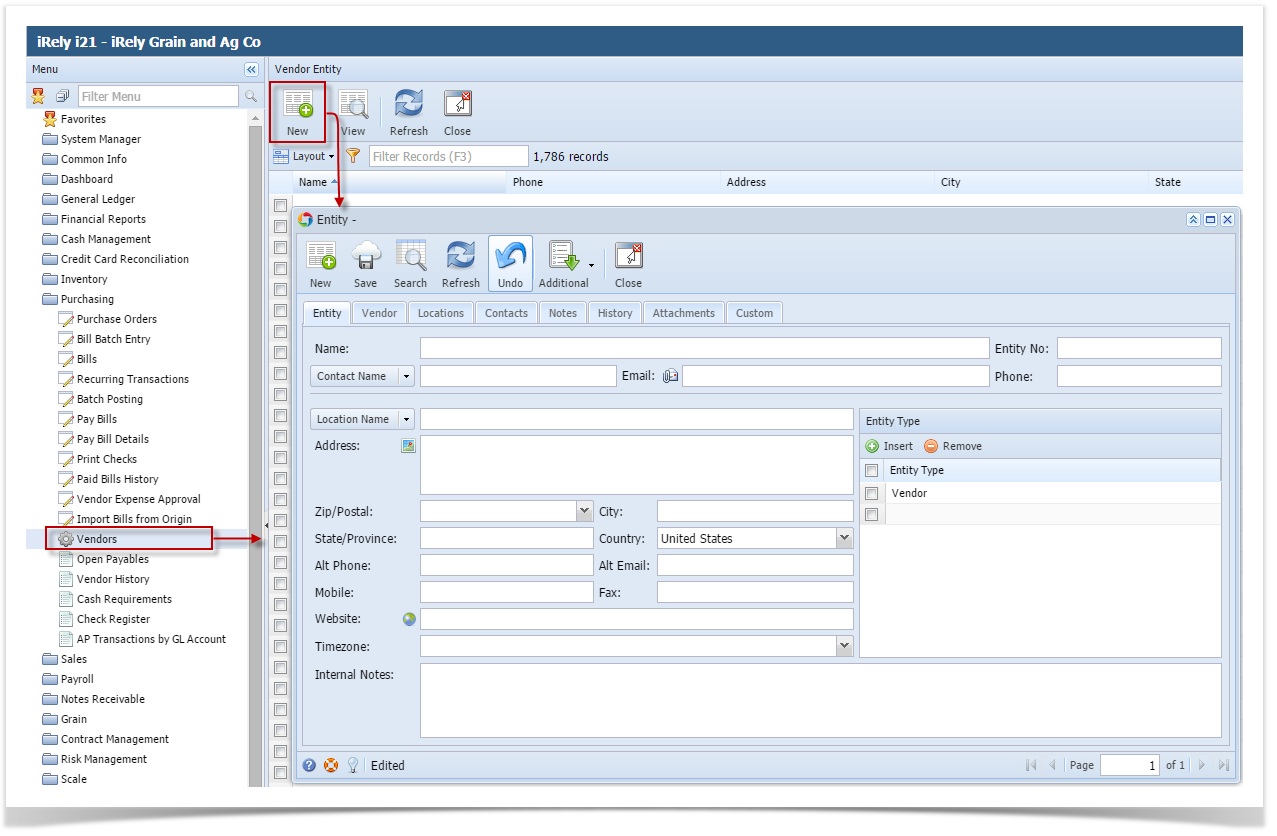 Image Modified Image Modified - Default Entity type will be Vendor but you can still add other entities if necessary. If Customer or Salesperson is added, tabs for these entities will be added too.
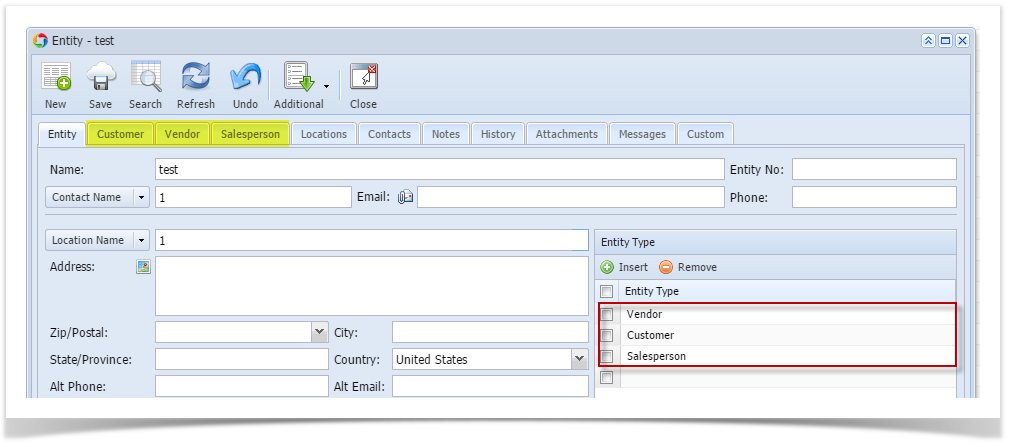 Image Modified Image Modified - Enter entity details on Detail tab. Required fields are Name, Contact Name, Location Name.
- On Vendor tab, enter vendor details specially on required fields like: GL Account and Terms.
- Navigate to Locations tab. location entered on the Detail tab together with its details will be displayed on the grid. Add more locations if necessary by clicking Insert button.
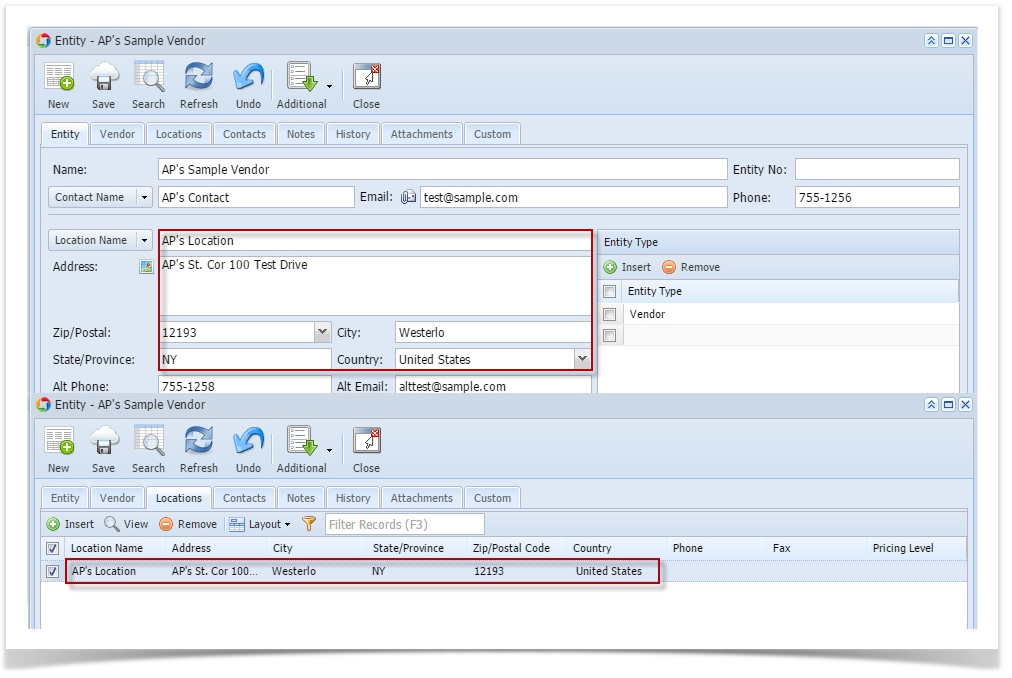 Image Modified Image Modified - Navigate to Contacts tab, contact entered on the Detail tab together with its details will be displayed on the grid. Add more contacts if necessary by clicking Insert button.
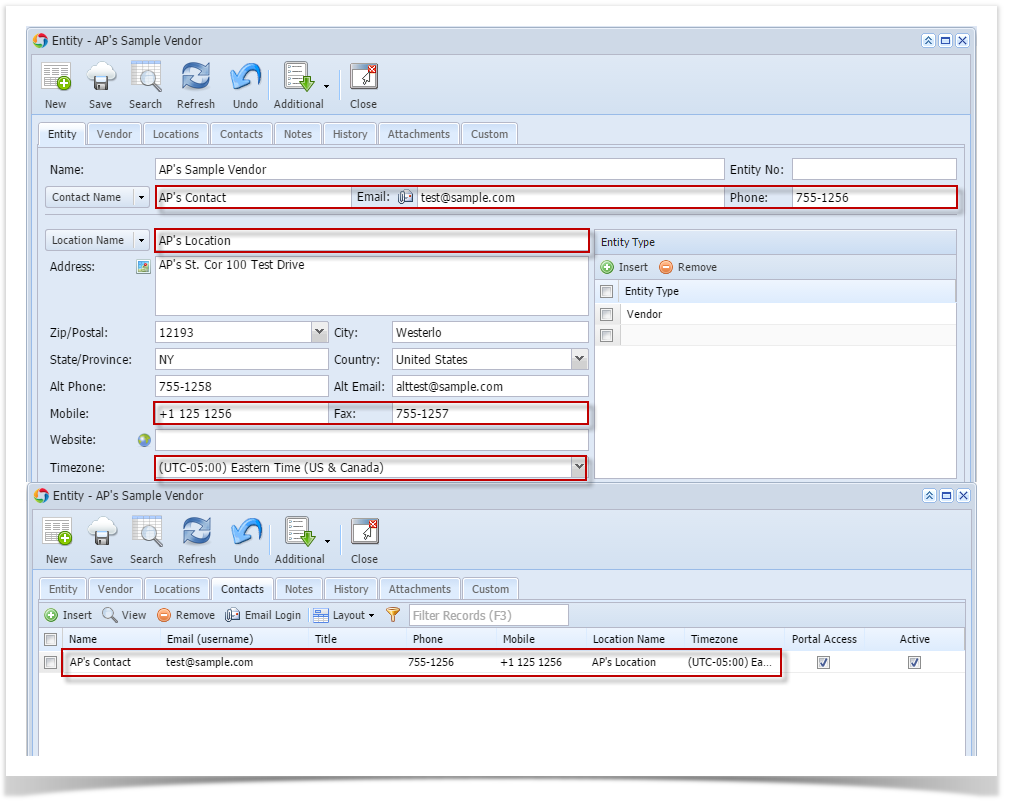 Image Modified Image Modified - Click Save toolbar button to save newly created vendor. However Entity No is entered (manually or system-generated), whatever is entered on this field will also be the vendor's Legacy Vendor ID.
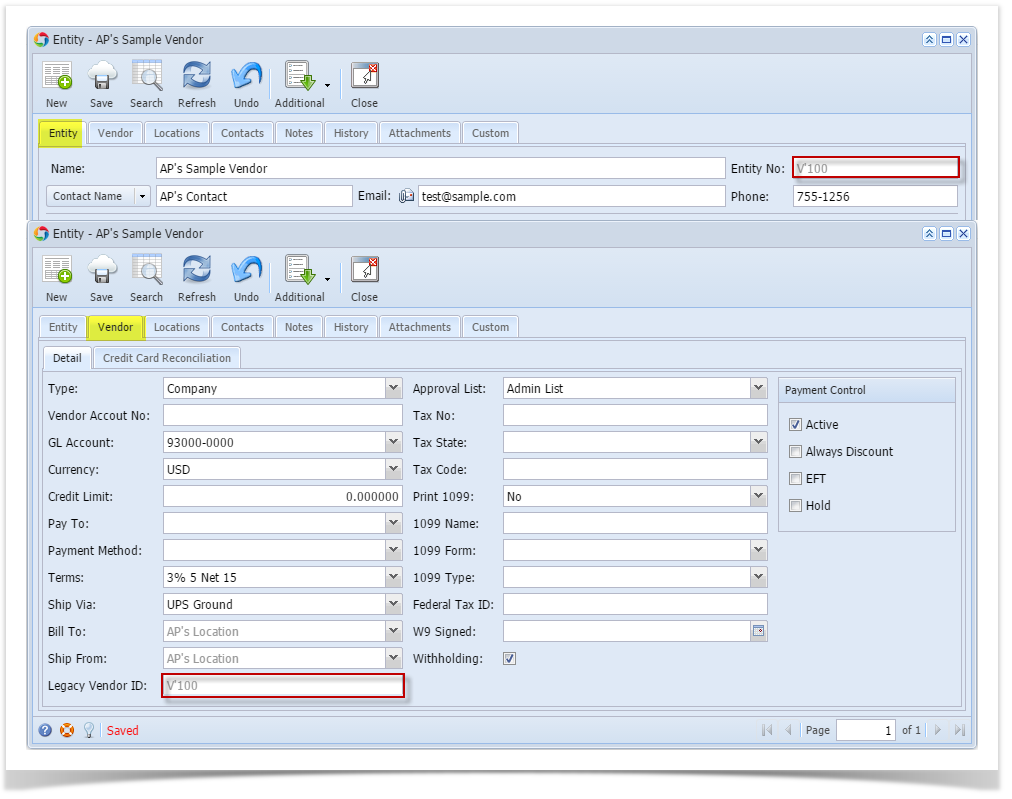 Image Modified Image Modified
|
| Expand |
|---|
|
Here are the steps on how to add vendors: - From Main Menu, select Account Payables > Maintenance and then click on Vendors. If there's an existing record, Search Vendor screen will open. Otherwise, Vendor screen will open.
- If Search Vendor screen opens, click on New button to open blank Vendor screen.
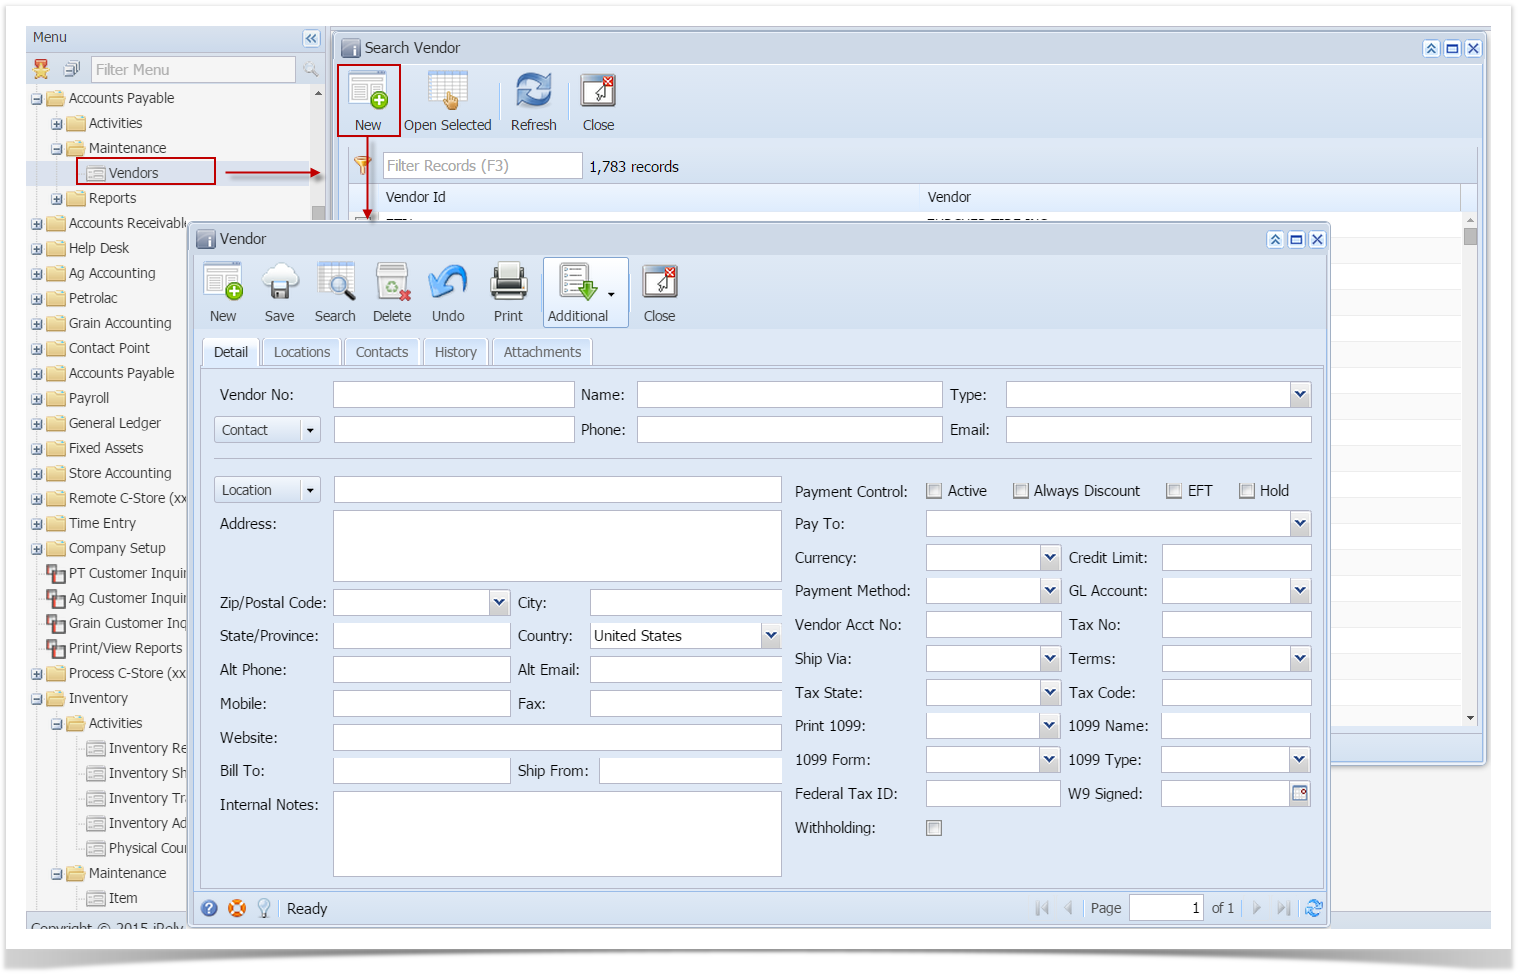 Image Modified Image Modified - Enter vendor details on Detail tab. Required fields are Vendor No, Name, Type, Contact, Location, GL Account, Ship Via and Terms.
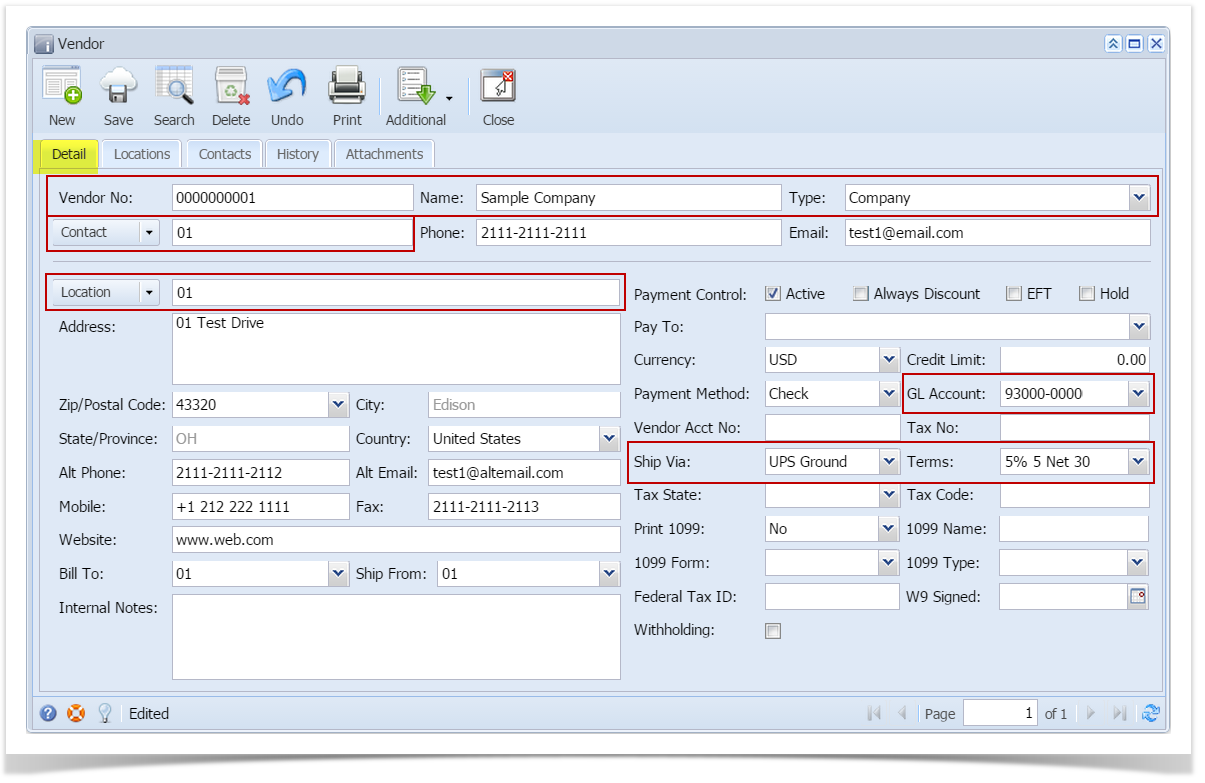 Image Modified Image Modified - On Locations tab, location entered on the Detail tab is also displayed. Adding more locations is possible but this is only available when Origin Integration is turned OFF.
 Image Modified Image Modified - On Contacts tab, contact entered on the Detail tab is also displayed. Click Add button to add more contacts for this vendor.
 Image Modified Image Modified - Click Save toolbar button to save newly created vendor.
|
| Expand |
|---|
|
Here are the steps on how to add vendors: - From Main Menu, select Account Payables > Maintenance and then click on Vendors. If there's an existing record, Search Vendor screen will open. Otherwise, Vendor screen will open.
- If Search Vendor screen opens, click on New button to open blank Vendor screen.
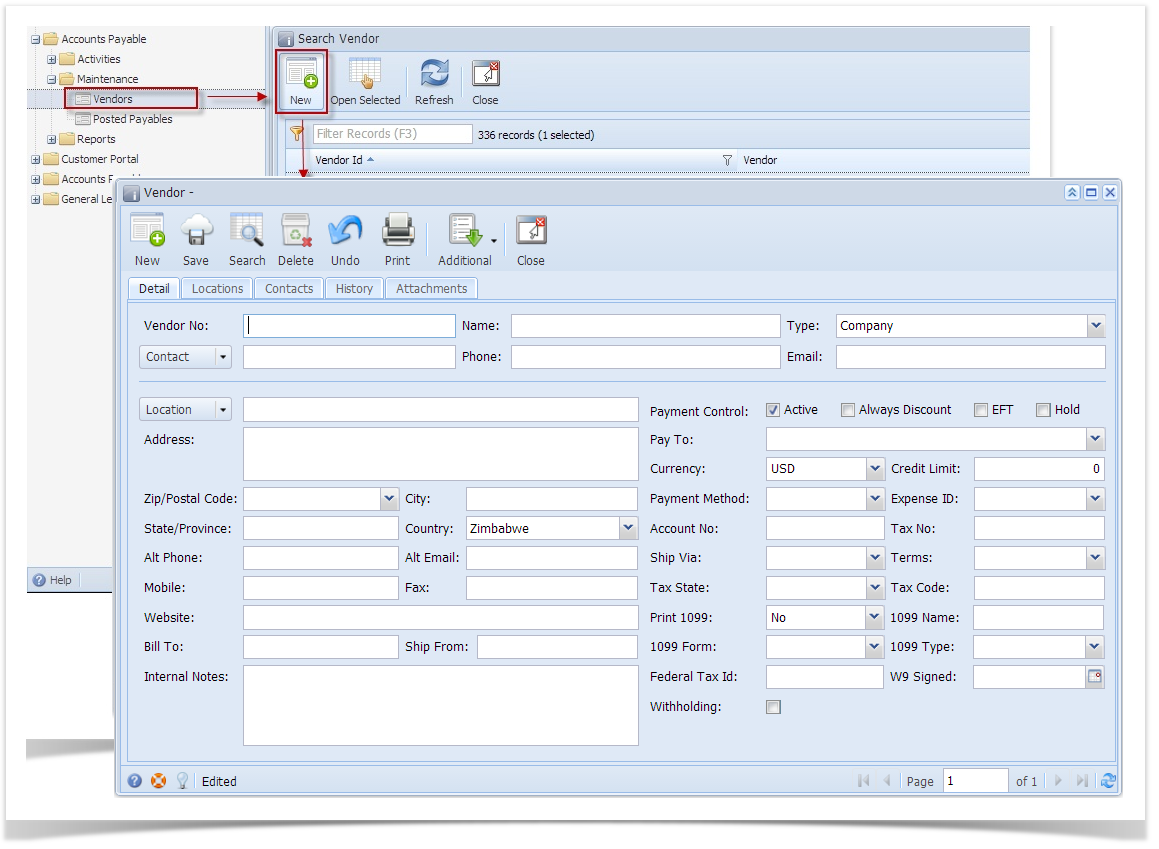 Image Modified Image Modified - Enter vendor details on Detail tab. Required fields are Vendor No, Name, Type, Contact, Location, Expense ID, Ship Via and Terms.
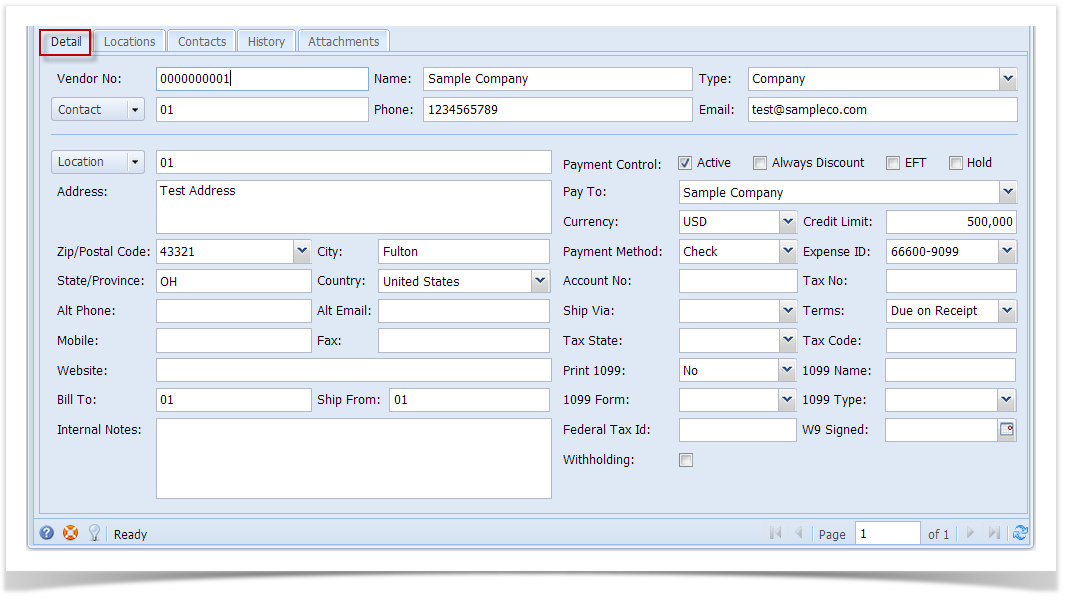 Image Modified Image Modified - On Locations tab, location entered on the Detail tab is also displayed. Adding more locations is possible but this is only available when Origin Integration is turned OFF.
 Image Modified Image Modified - On Contacts tab, contact entered on the Detail tab is also displayed. Click Add button to add more contacts for this vendor.
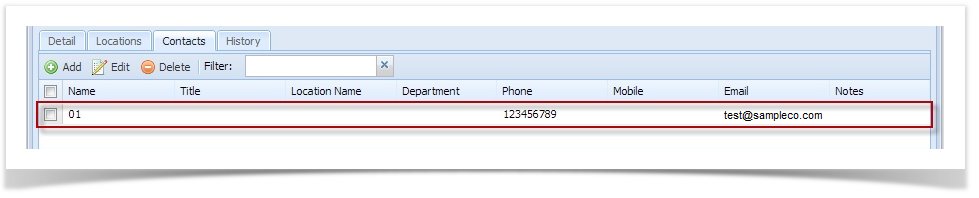 Image Modified Image Modified - Click Save toolbar button to save newly created vendor.
|