Page History
1. From CRM module, click Campaigns. Campaign Campaigns search screen will appear.
2. In Campaigns search screen, click the New toolbar button to open the New Campaign screen.
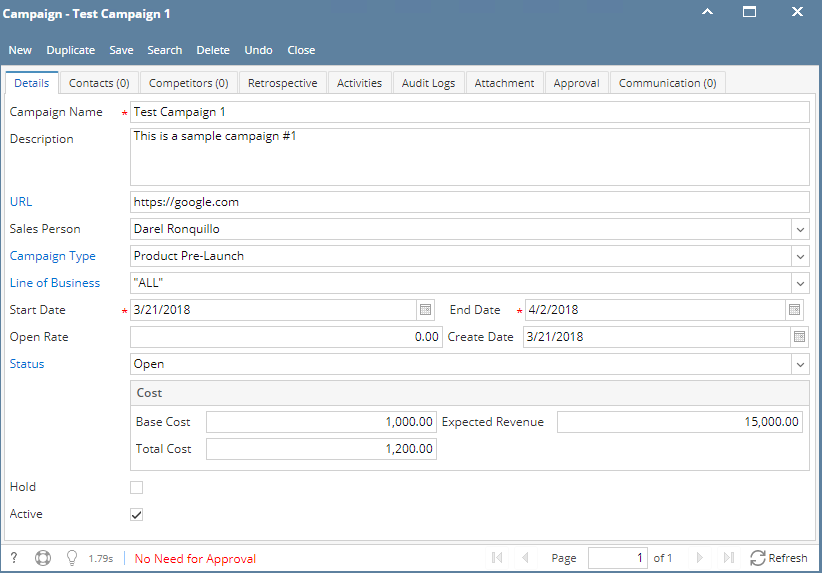
3. Enter unique *Campaign Name.
...
5. Enter Description, URL, Open Rate, Base Cost, Expected Revenue and Total Cost.
6. Select Sales Person, Campaign type, Line of Business and Status from their respective drop downs.
7. Click Save toolbar button to save the newly-added campaign. campaign.
Screen status should be of the following:
- "No Need for Approval" - campaign does not need an approval
- "Waiting for Approval" - campaign is subject for approval
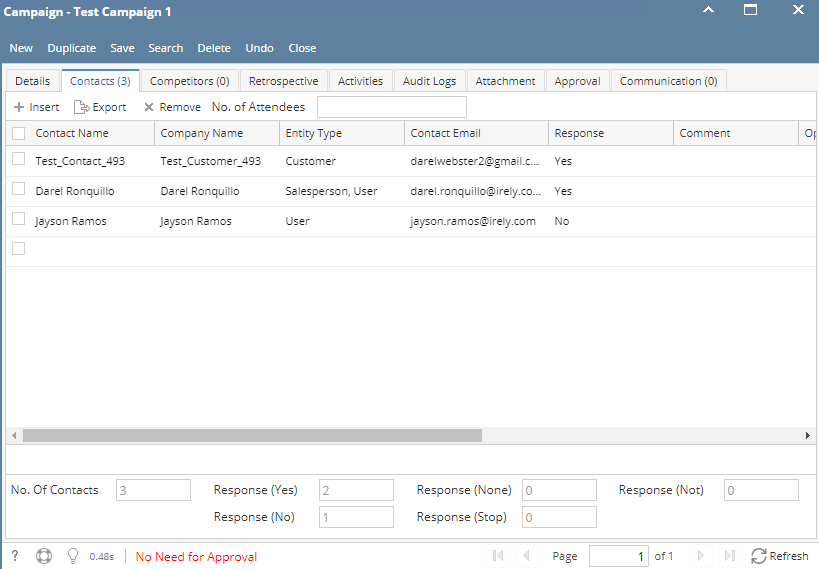
8. To add Contacts, click Contacts tab. Add contact by searching the contact from the Contact Name grid drop down. Select Response(Yes, No, Stop, None) then save.
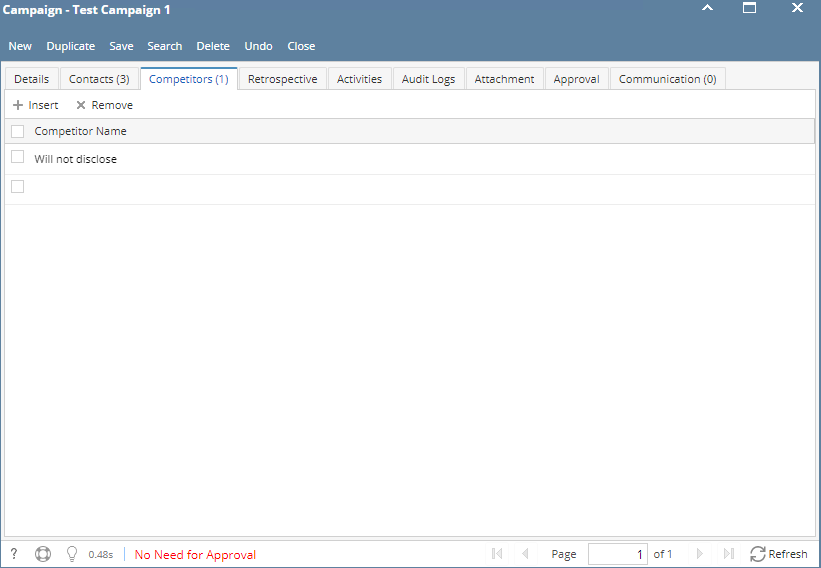
9. To add Competitors, click Competitors tab. Add contact by searching the competitor from the Competitor Name grid drop down then save.
10. To add Retrospective, click Retrospective tab.Type in the space provided then save.
11. To add an activity, click Activities tab. Click New Event, New Task, New Comment, Log Call or Email then proceed.
12. To add Attachments, click Attachments tab. Click Add Item button then select attachment to be added.
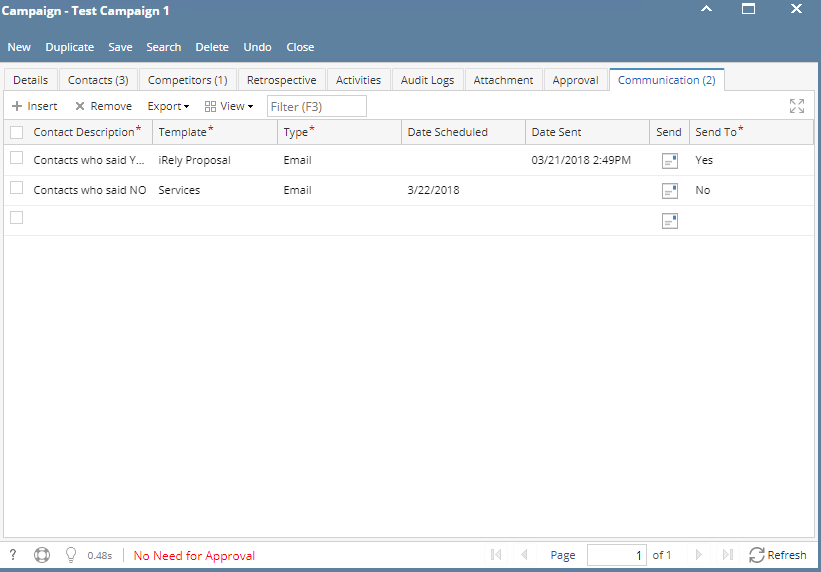
13. To send email to the contacts added in the Contacts tab, click Communication tab. Provide Contact Description, Template, Type and Send To then save. To send, click the Send icon button.
*text - denotes required field to create campaign


