Page History
...
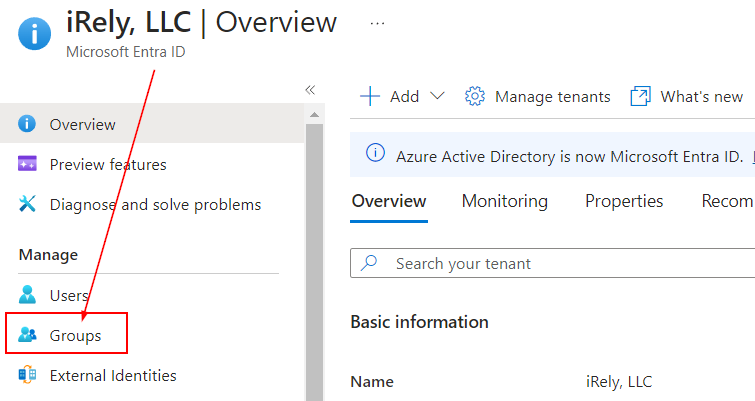
- Log into your Azure Portal as an Administrator.
- Select Microsoft Entra ID (previously named Azure Active Directory).
- Click Groups
- Click New group
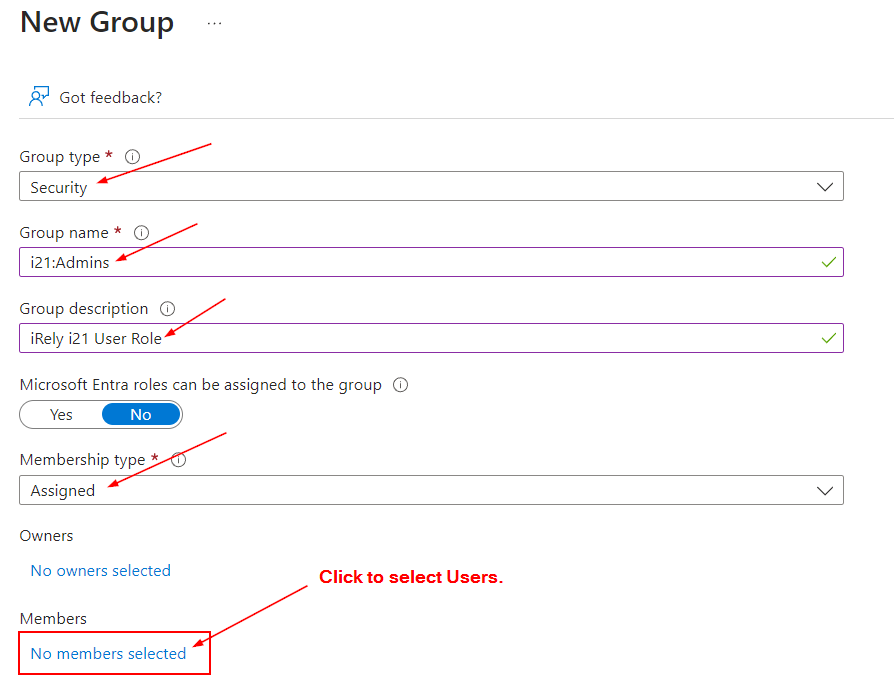
- Enter the following for the New Group:
- Group type = Security
Group name = i21:[i21UserRole]
- Replace [i21UserRole] with any roles from i21. E.g. i21:PETRO ADMIN. Anything after "i21:" will be the role of the users in this group.
- Group description = Enter any description you want for this group.
- Membership type = Assigned
- Under Members, click No members selected hyperlink then add members/users.
- Click Create
- Add all of the 365 accounts that correspond to the active i21 users.


Step 2 - App Registration
- Select App registrations then New registration.
- In the Register an application form, enter the following:
- Name = iRely i21
- Supported account types = Accounts in this organizational directory only (single tenant)
- Important: Follow the steps below depending on what version of iRely i21 you are running.
- iRely i21 version 23.1 and Prior:
- Redirect URI (web) = The URL of the i21 plus /identityserver
- E.g. https://helpdesk.irely.com/identityserver
- iRely i21 version 24.1 and newer:
- Redirect URI (web) = The URL of the i21 plus /signin-oidc
- E.g. https://helpdesk.irely.com/signin-oidc
- Note: This is case sensitive.
- iRely i21 version 23.1 and Prior:
- Click Register

- Go back to App registrations and select the app that you have just created (iRely i21)
- Click Certificates & secrets and create a Secret
- Important: Make sure you copy the "value" field of the client secret value and save it locally because you won't be able to read it again after you leave this page.

- Under API permissions, verify that the following are present especially those underlined ones. If not, add those permissions.
- Group.Read.All
- User.Read.All

- Under Authentication, make sure the Access Tokens and ID Tokens checkboxes are checked.
- Ensure your Web Redirect URIs are correct.


...
Overview
Content Tools