Page History
Adding item location is a must MUST. This is where you set the location where the item will be available. When making Purchasing, Sales, Inventory and other Inventory related transactions, you will have to select first the location. Then items available for that location will be available for selection.
There are 2 ways to add item location.
- One Item Location at a time.
- Multiple Locations at a time.
The following will detail how to add item location.
One item Location at a time
...
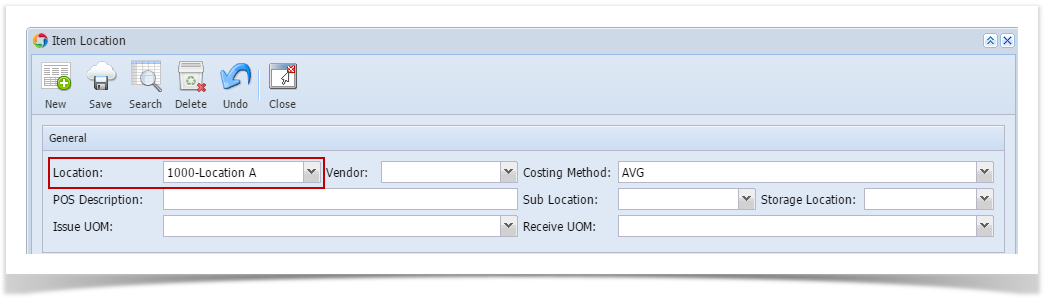
In the General & Default section,
Select a company location where the item will be available in the Location field.
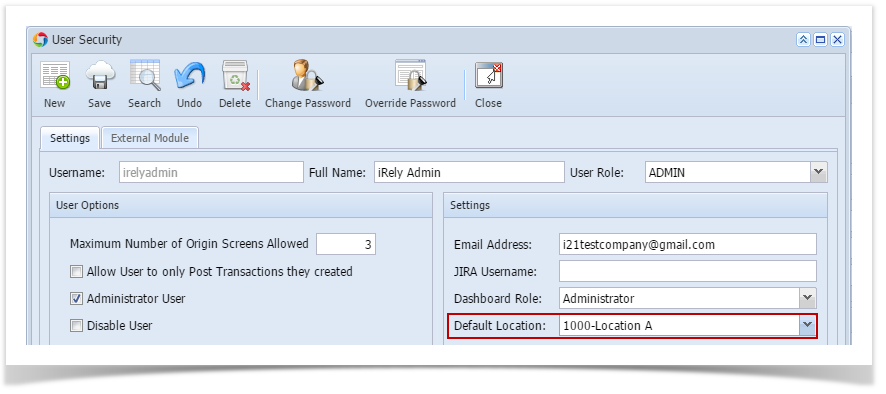
Info title Default Location You can default Location fields to always show the default location of the user that is currently logged on. This is done on User Security screen > Settings tab > Default Location. This will save you an extra step in selecting the Location when creating record/transaction.
- In the Vendor field select a vendor if applicable.
- The Costing Method field is defaulted to AVG (Average). Other costing methods available is FIFO (First In First Out) and LIFO (Last In Last Out). Change this Costing method as needed.
- Enter POS Description.
- In the Sub Location field select the default Sub Location for this Item Location.
- In the Storage Location fieldselect the default Sub Location for this Item Location.
- In the Sale UOM field, select the default UOM when the item from this location is selected in Inventory Shipment and Sales screens.
- In the Purchase UOM field, select the default UOM when the item from this location is used in Inventory Receipt and Purchasing screens.
...
- In the Negative Stock field select:
- No, if the item for this location is NOT allowed to go negative. This means that you cannot sell or consume the item when there is NO stock available.
- Yes, if it is allowed to go negative. This means that you can sell or consume the item even without stock available.
- Enter other relevant item location information. See Item Location - Field Description.
...
- Add Single item location. See How to Add Single Location to the item
- Add Multiple item Location. See How to Add Multiple Locations to the item.
...
| Expand | ||
|---|---|---|
| ||
Adding item location is a must. This is where you set the location where the item can be available. When making Purchasing, Sales and Inventory transactions, you will have to select first the location. Then items available for that location will be available for selection.
|
Overview
Content Tools