Page History
...
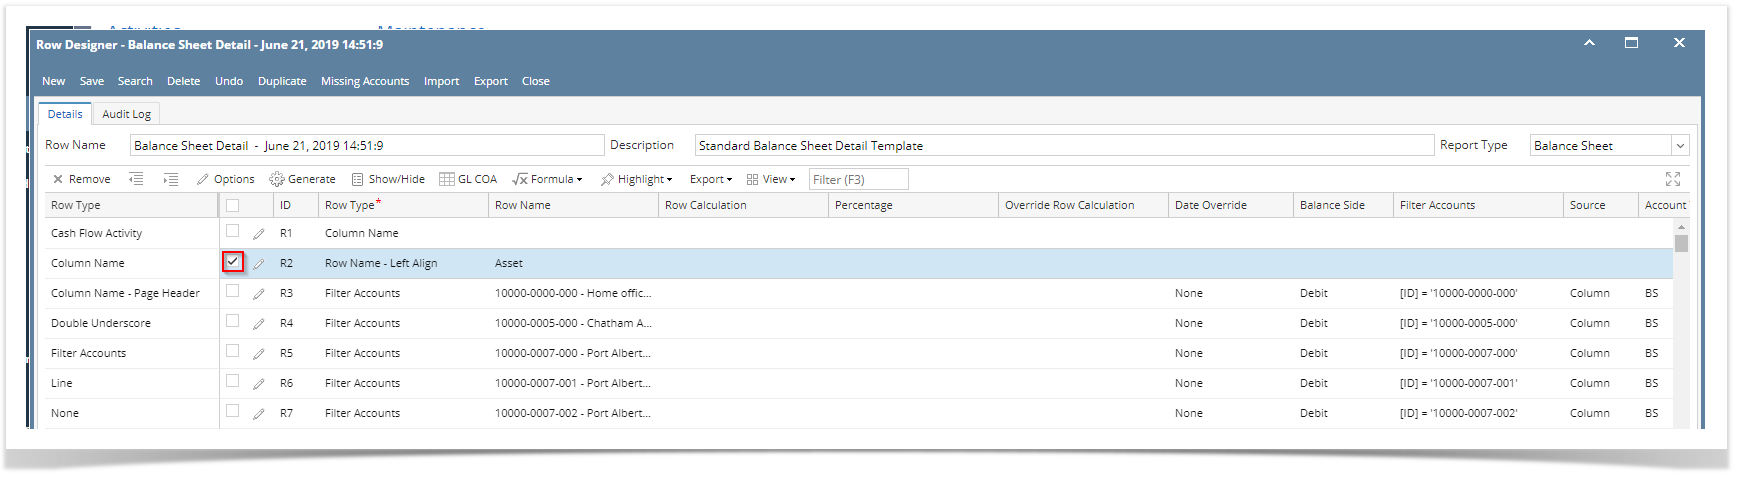
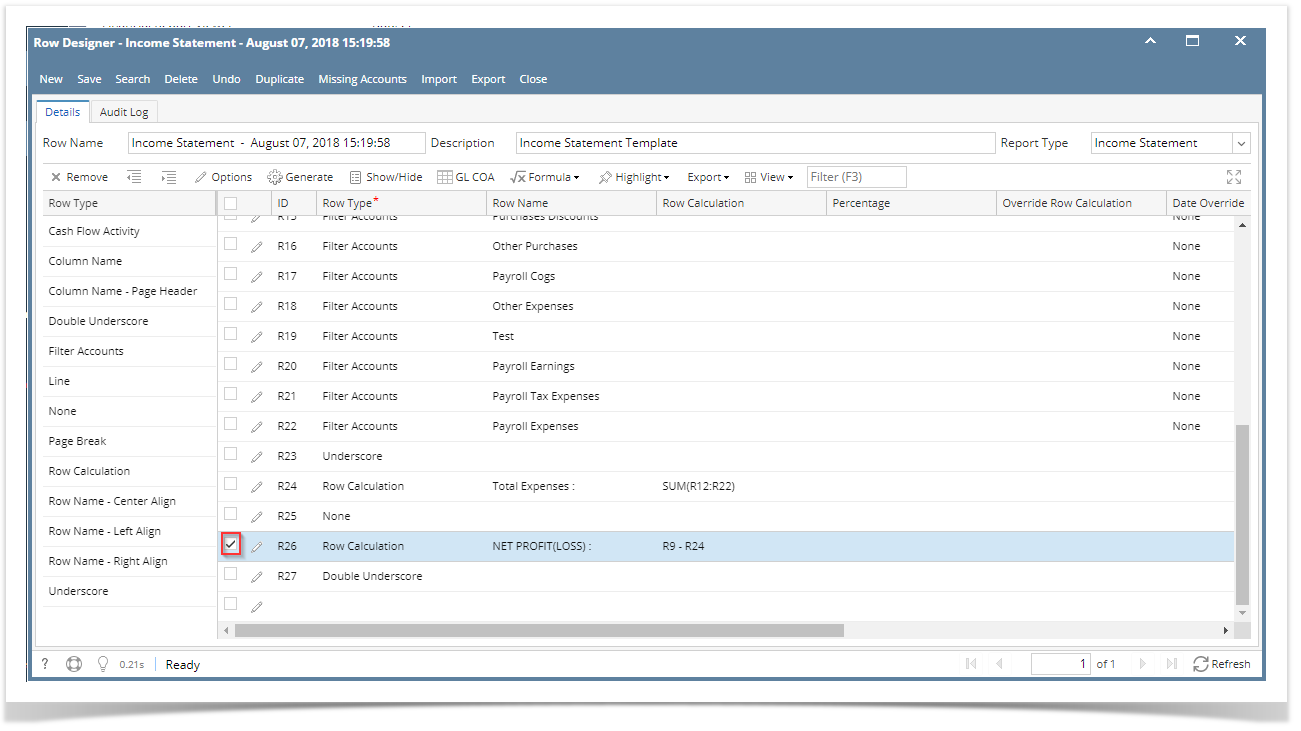
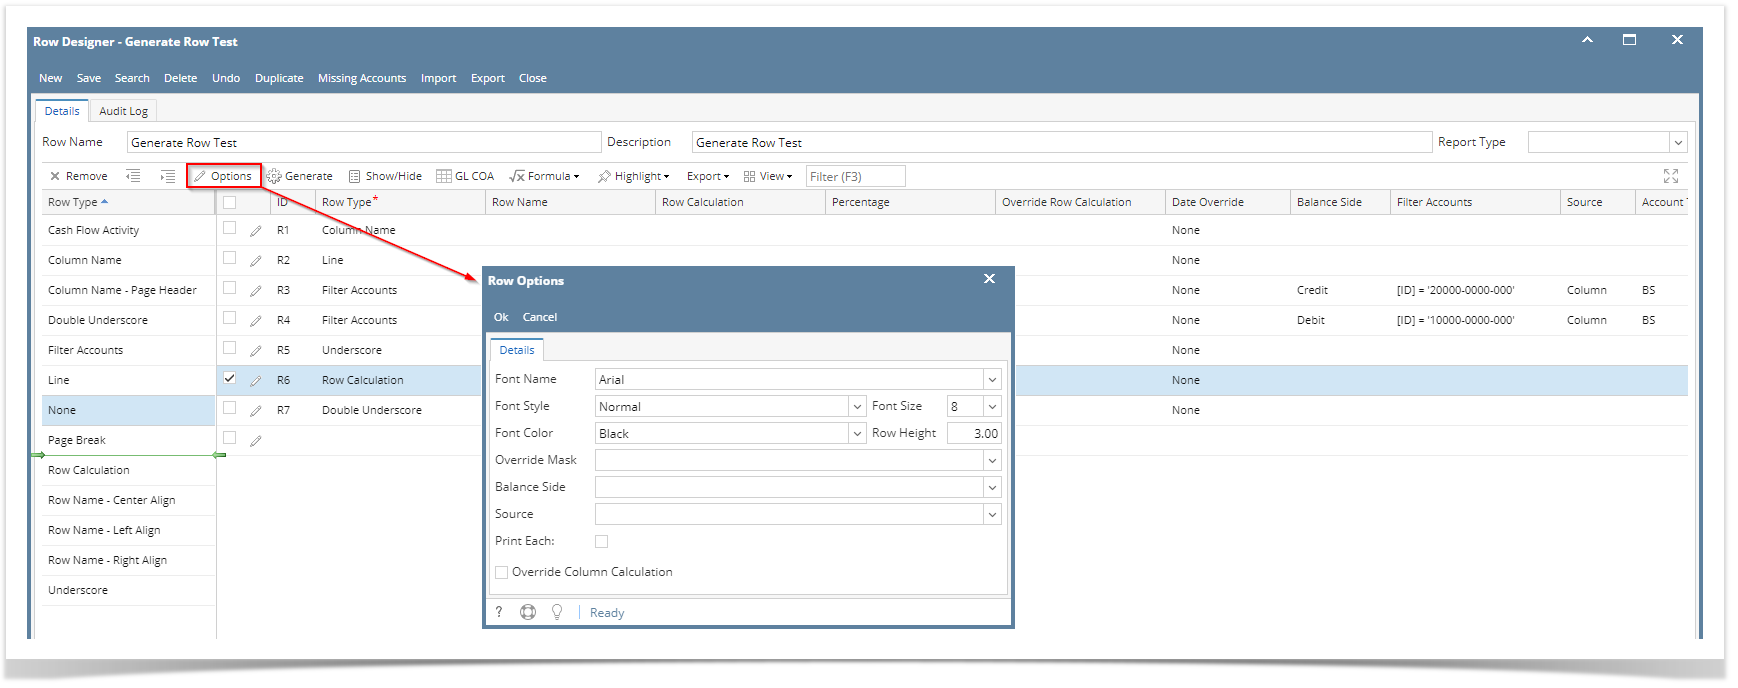
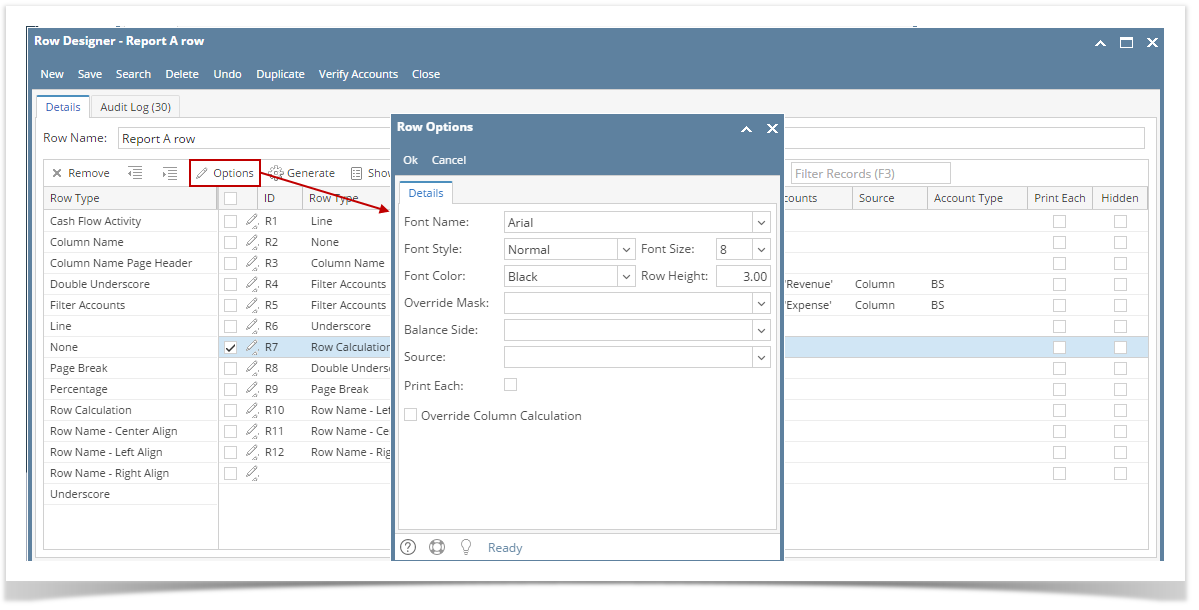
- Open selected row designer record.
- Select the row/s you would like to configure the Font and Row Height.
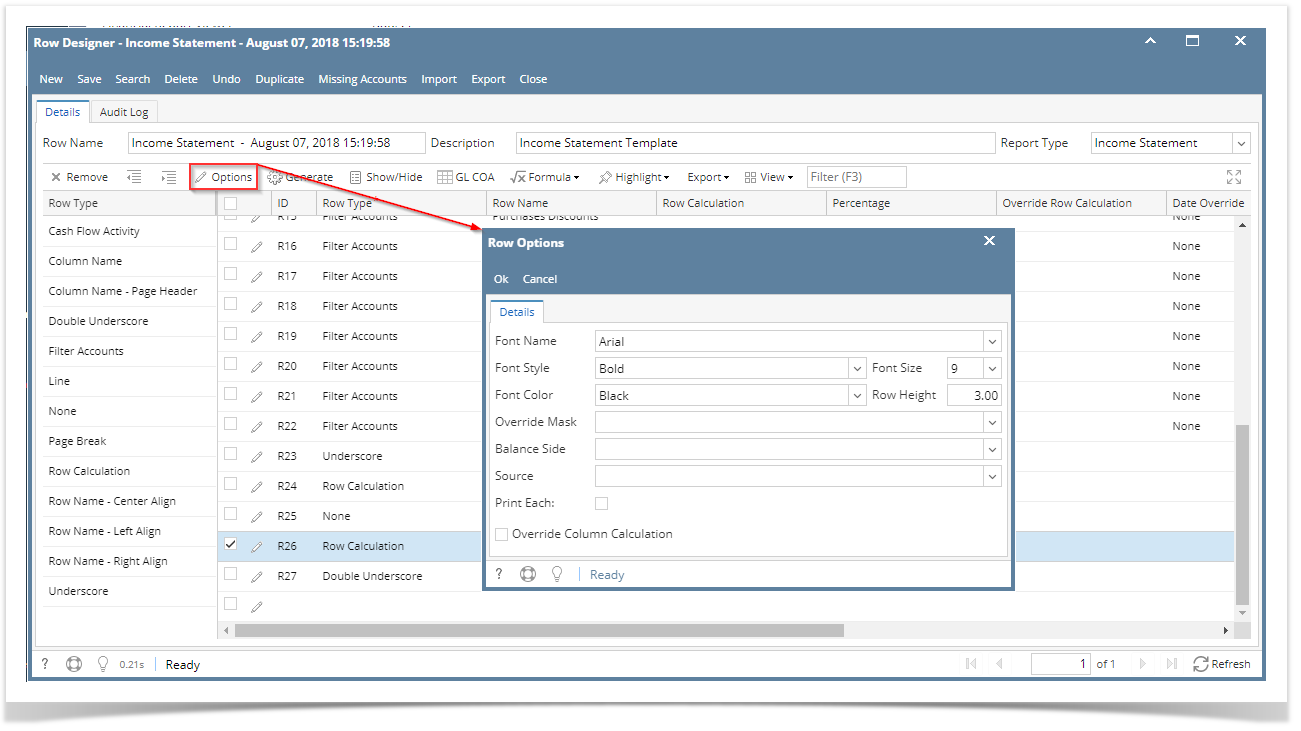
- Click Options button. The Row Options screen will then be opened.
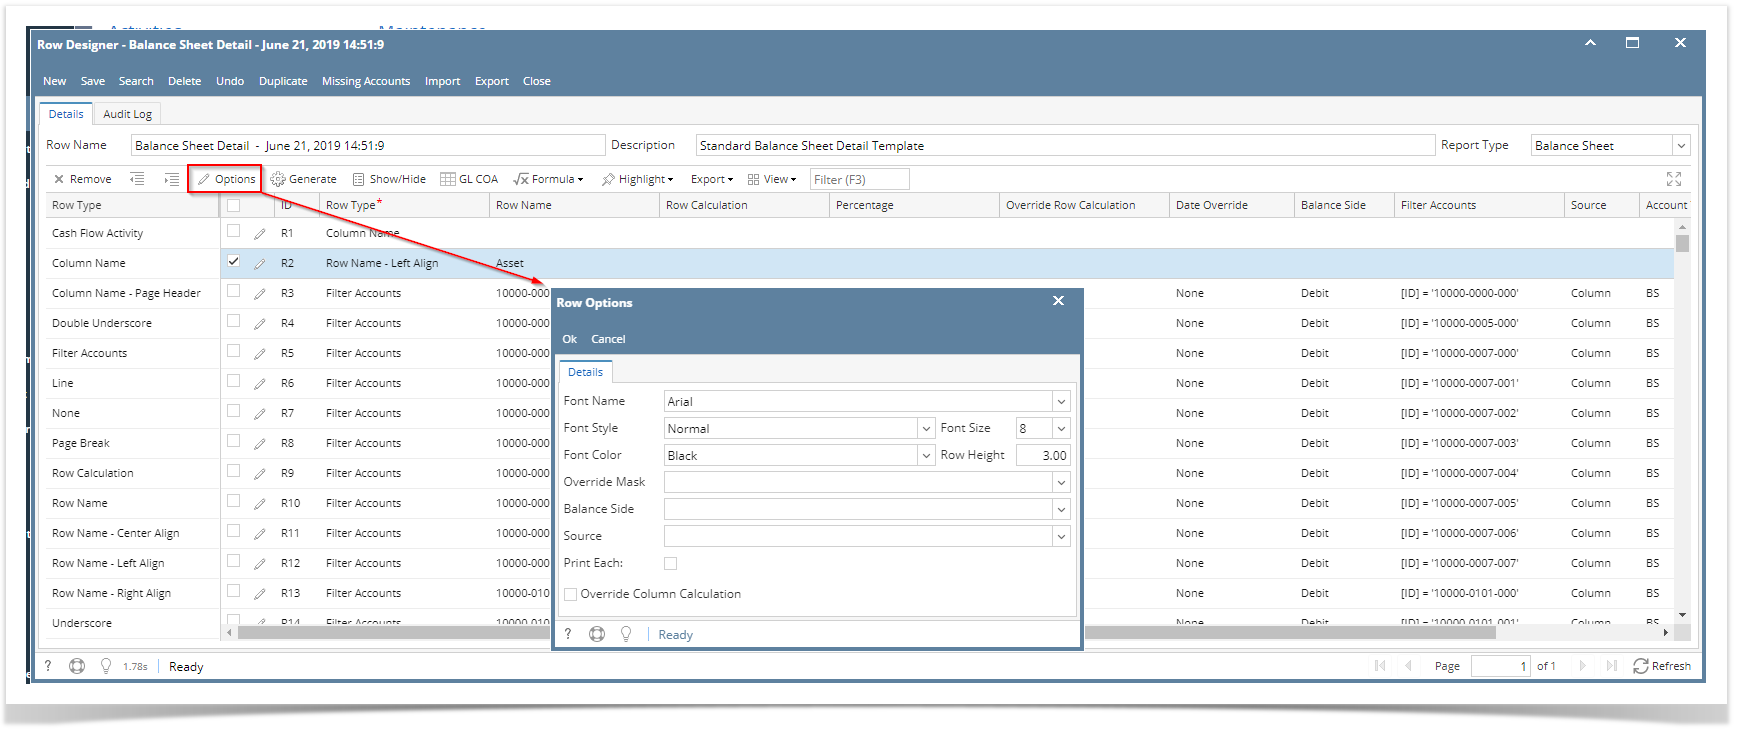
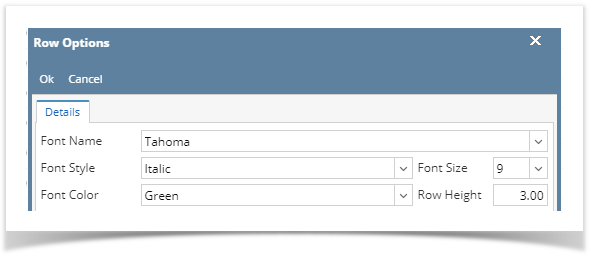
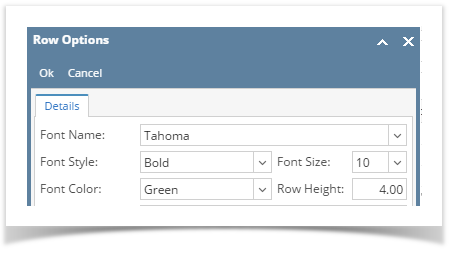
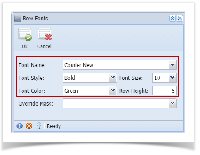
- Configure Font Name, Font Style, Font Size, Font Color and Row Height fields as you want those rows to look like. Then click Ok button to close the screen and apply the Row Font properties.
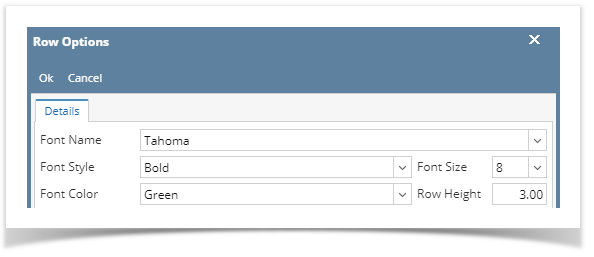
You will be back on the Row Designer screen. Click Save button. Close the screen either by clicking Close button or the x button at the top-right corner of the screen.
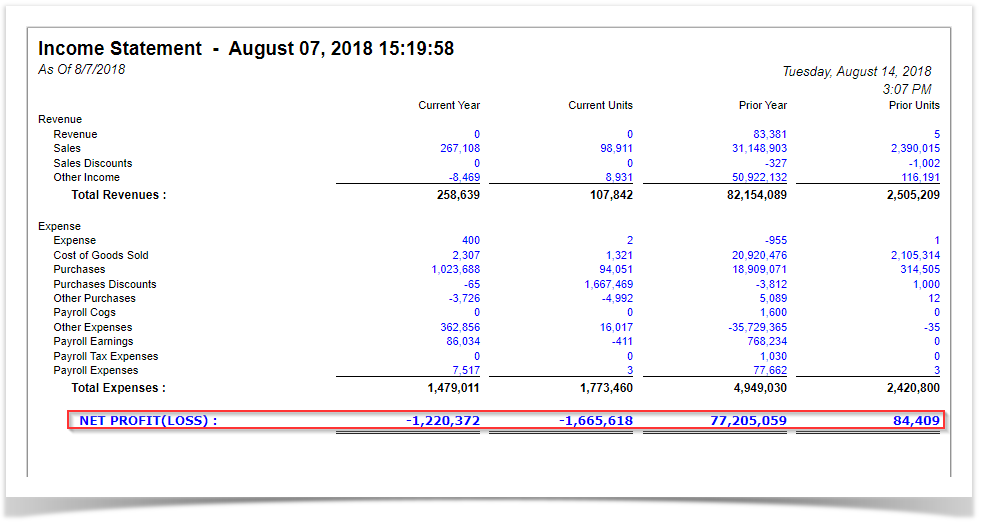
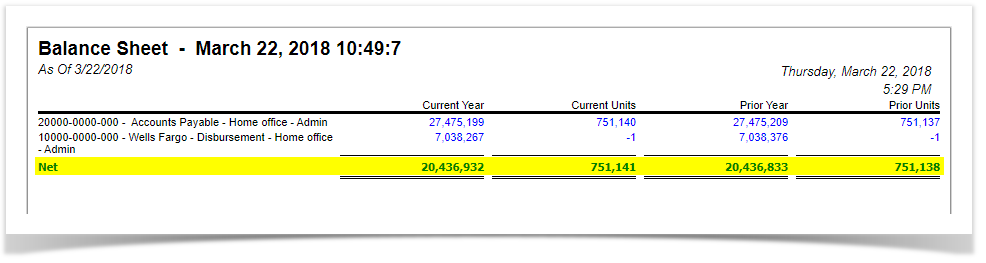
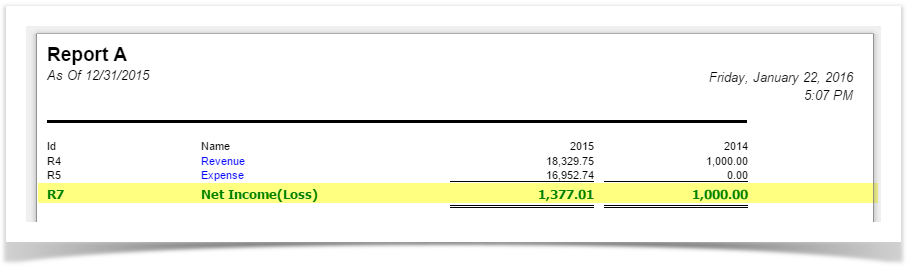
This is how the row will look like with Row Fonts configuration. See row that is highlighted below. These are rows configured.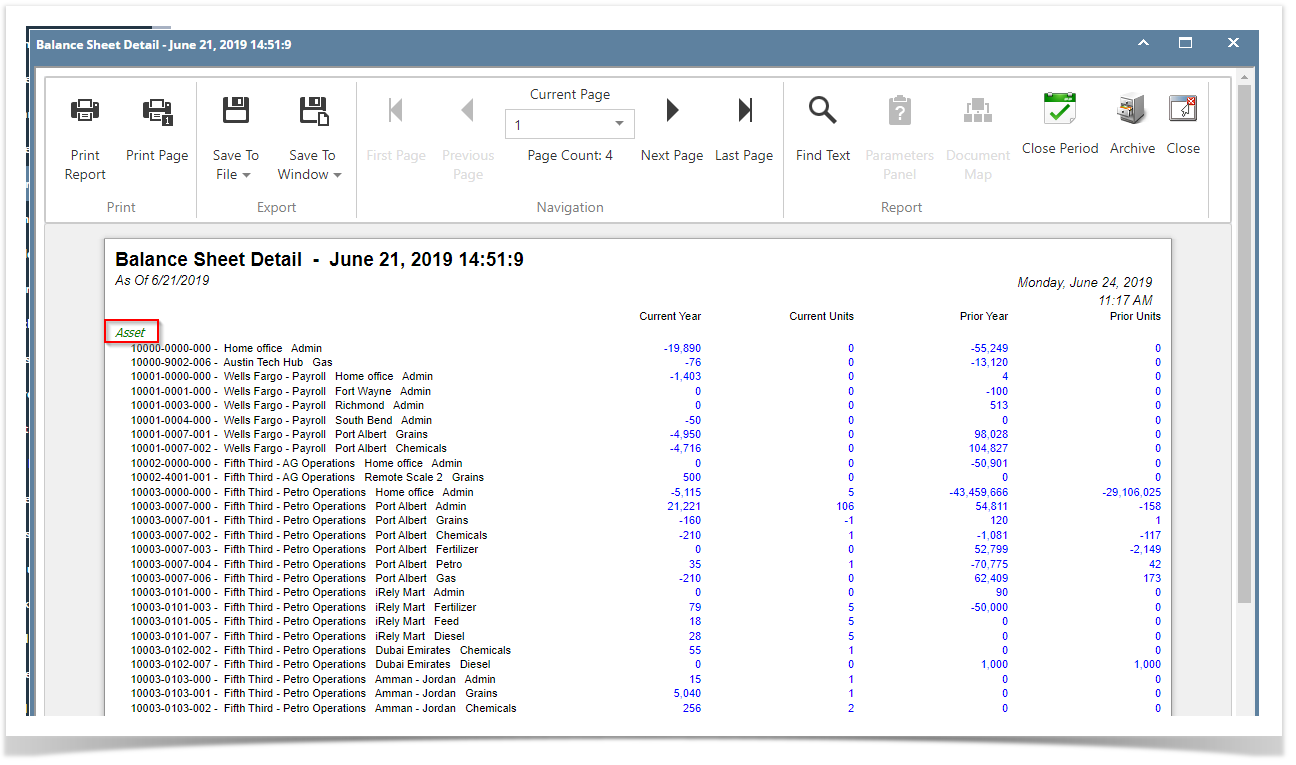
| Expand | ||
|---|---|---|
| ||
You can configure Font and Row Height for your rows. To do this, follow these steps:
You will be back on the Row Designer screen. Click Save button. Close the screen either by clicking Close button or the x button at the top-right corner of the screen. |

| Expand | ||
|---|---|---|
| ||
You can configure Font and Row Height for your rows. To do this, follow these steps:
You will be back on the Row Designer screen. Click Save button. Close the screen either by clicking Close button or the x button at the top-right corner of the screen. |
| Expand | ||
|---|---|---|
| ||
You can configure Font and Row Height for your rows. To do this, follow these steps:
|
...
|
...
You will be back on the Row Designer screen. |
...
Click Save button. Close the screen either by clicking Close button or the x button at the top-right corner of the screen. |
| Expand | ||
|---|---|---|
| ||
You can configure Font and Row Height for your rows. To do this, follow these steps:
|

...
Overview
Content Tools