Page History
This screen is used to setup a store record. A store record is a virtual representation of your physical store. All important configuration is located in this screen that will be necessary for connecting to the POS and creating an End-Of-Day transactions.
Steps:
Here are the steps on how to create a Store:
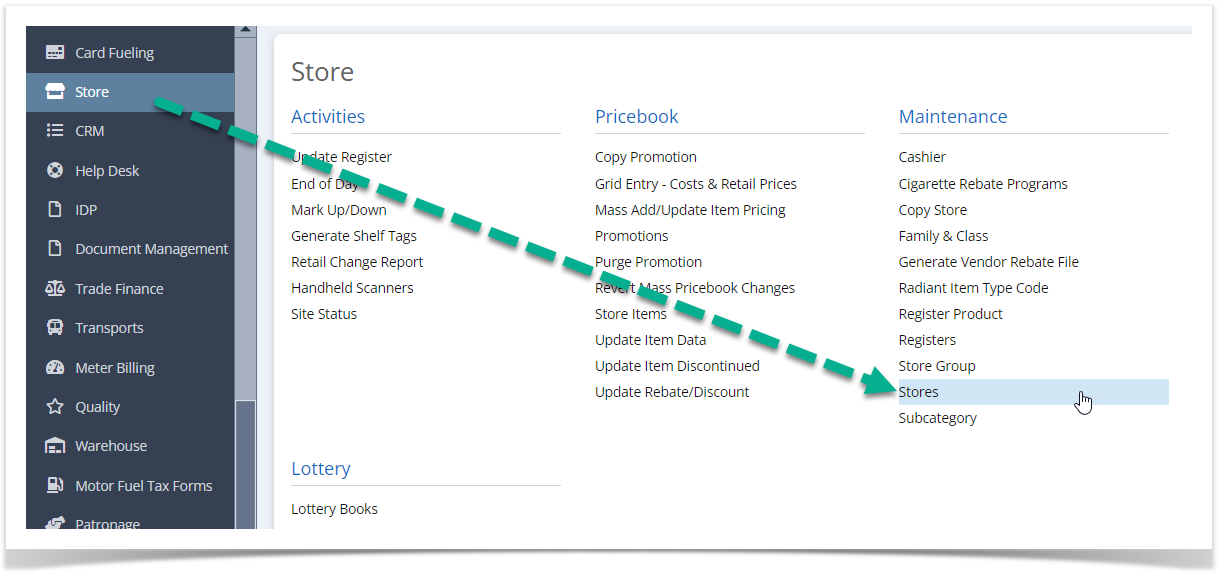
- From
In
Store menu, click
stores.Stores. A search screen for Stores will open
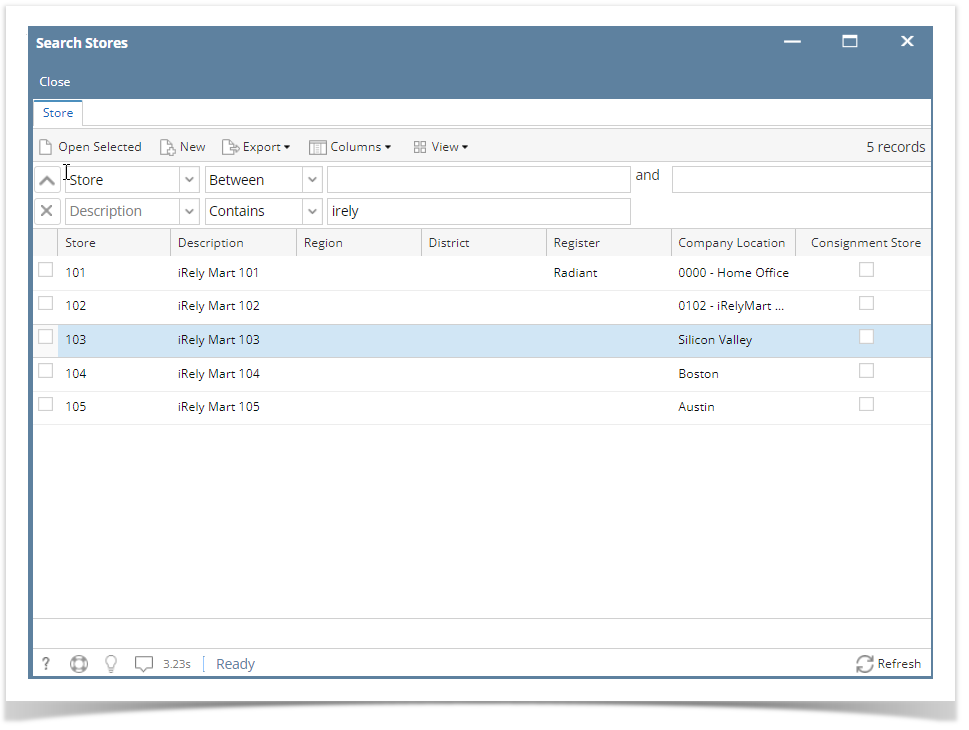
- Click New to open a blank store screen.
| Info | ||
|---|---|---|
| ||
If there's an existing store, Search stores screen will open. Otherwise, Blank store screen will open automatically. |
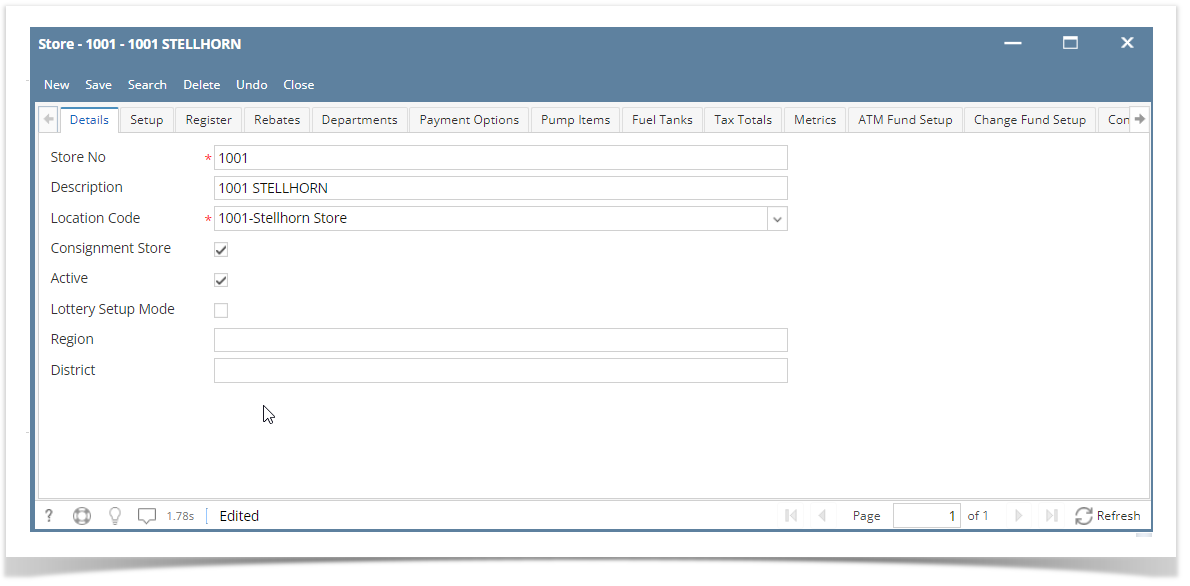
- Enter the following:
- Store No
, this - - this will serve as the name of the store.
Enter - Description - enter any that describes your store
Enter - Location Code
, this field is required to save the store.- Enter Region.
- Enter District.
- Enter address in search address.
- Complete the other details in this tab. Click Setup tab.
- * - Lets you select the location based on the Company Locations setup
- Lottery Setup Mode - if checked, it will be used to validate the Lottery Games if have Sale UOM and Vendor in Item Location.
- Region. - Enter appropriate region to where your store belongs
- District - Enter appropriate district to where your store belongs
Setup tab
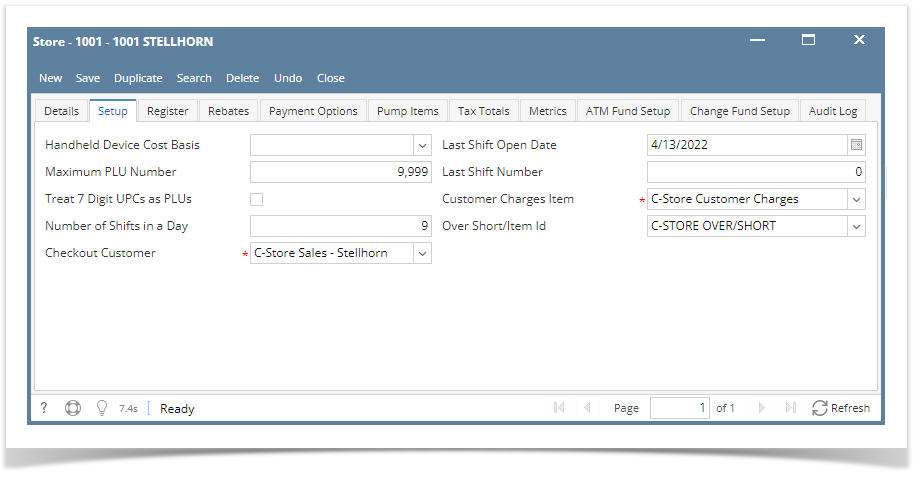
- After completing the steps above, go ahead and click the Setup tab. It is located next to the Details tab.
- Enter the following values:
- Enter Handheld Folder Path, valid folder that is accessible by i21. Select a Handheld Device Cost Basis,
- Handheld Device Cost Basis -
- can be either last or current cost.
Maximum PLU Number - Usually a 4 or 5 digits.
- Treat 7 Digit UPCs as PLUs - When enabled, any 7-digit UPC code will be treated as a PLU
Number of Shifts in a Day - Default value is 9. Some number needs to be added in this field otherwise it prevent you from having more than one shift in a day.
End of Day Customer* - Selection will be based on the setup on Sales (A/R) → Create → New Customer
Customer Charges Item* - Selection will be based on the setup on Inventory → Maintenance → Items
- Over Short/Item Id* - Selection will be based on the setup on Inventory → Maintenance → Items
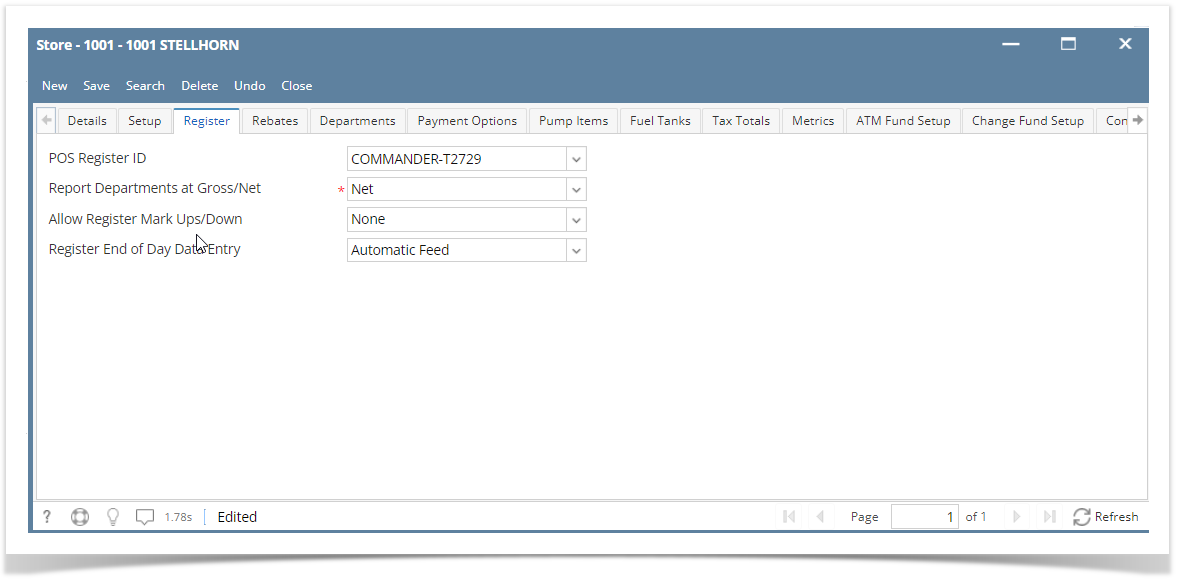
Register tab
- After completing the steps above, go ahead and click the Register tab. It is located next to the Setup tab.
- This tab contains the necessary information when linking to a POS device that is setup in Store → Registers
- Enter the following values:
- POS Register ID - lets you select details from the setup in Store → Maintenance → Register
- Report Departments at Gross/Net - this is a required required. Let's you choose where Gross or Net
- Allow Register Mark Ups/Down - When enabled, this store record will be allowed to be used in the Mark Up / Down process.
- Register End of Day Data Entry - Lets you choose the default end-of-day method; Automatic Feed or Full Manual Entry
Rebate tab
- After completing the steps above, go ahead and click the Rebate tab. It is located next to the Register tab.
- This tab contains the necessary information you want a rebate
- Enter the following values:
- Department - Select the department you want a rebate
- Tobacco - Ticked the box if it is considered a tobacco if not unticked it.

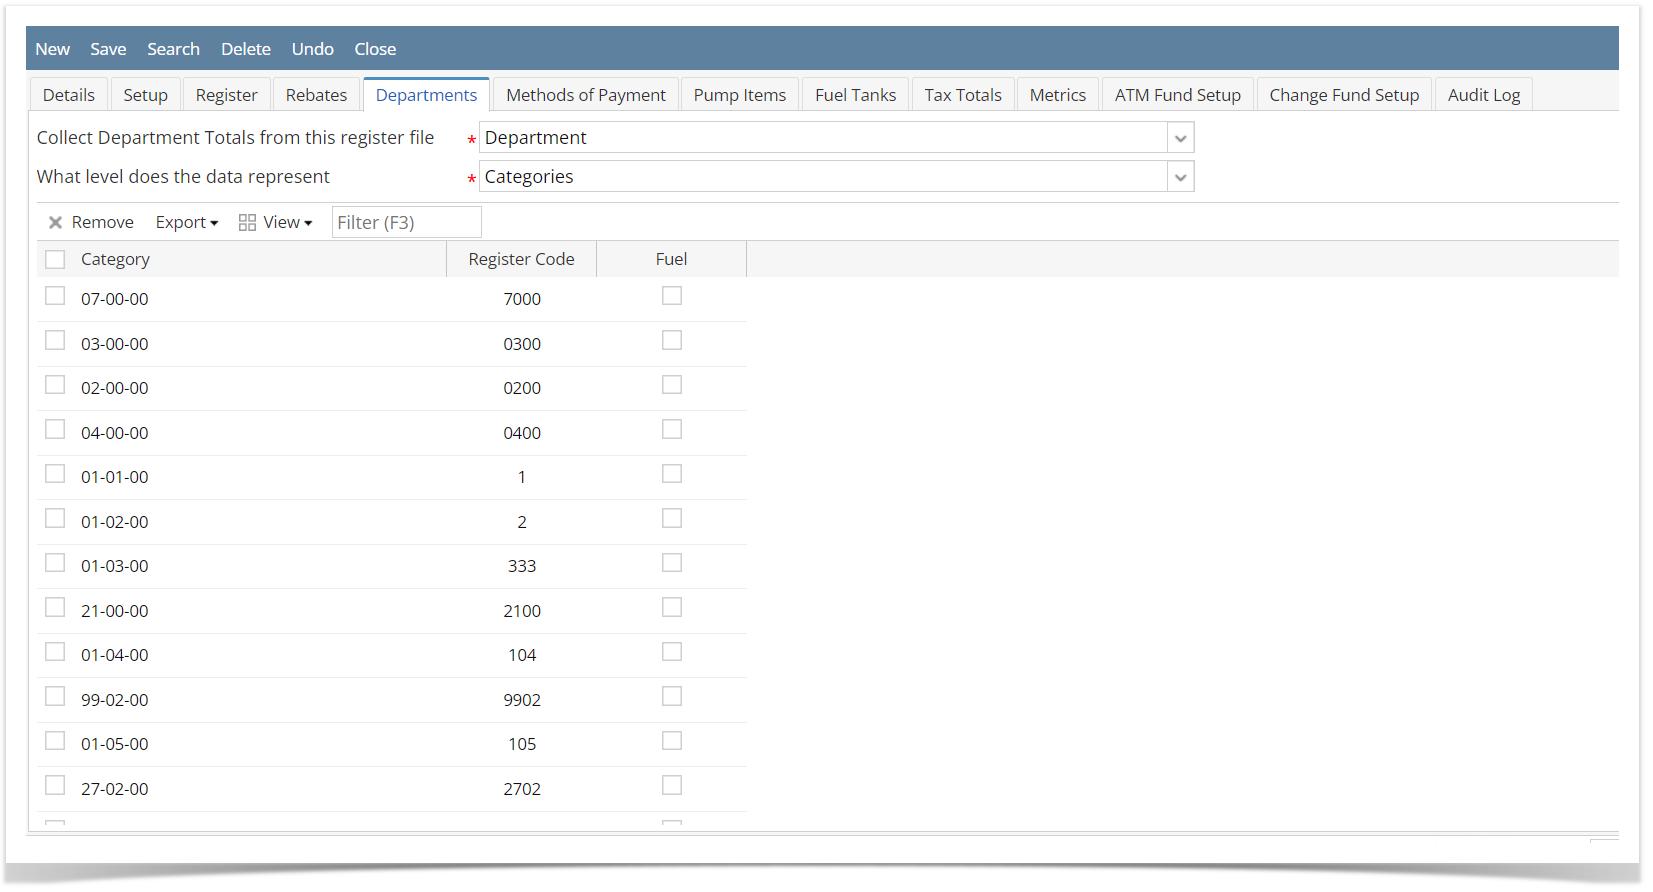
Departments tab
- After completing the steps above, go ahead and click the Departments tab. It is located next to the Rebate tab.
- This tab contains the departments available in your store
- Enter the following values:
- Collect Department Totals from this register file - Choose between where department will be coming from (Dropdown: Department or Category)
- What level does the data represent - Choose the level representation (Dropdown: Category or Subcategory)
- Category - Contains the code for your department
- Register Code - Assigned Register for your Category
- Fuel - Ticked the box if it is considered a fuel if not unticked it.
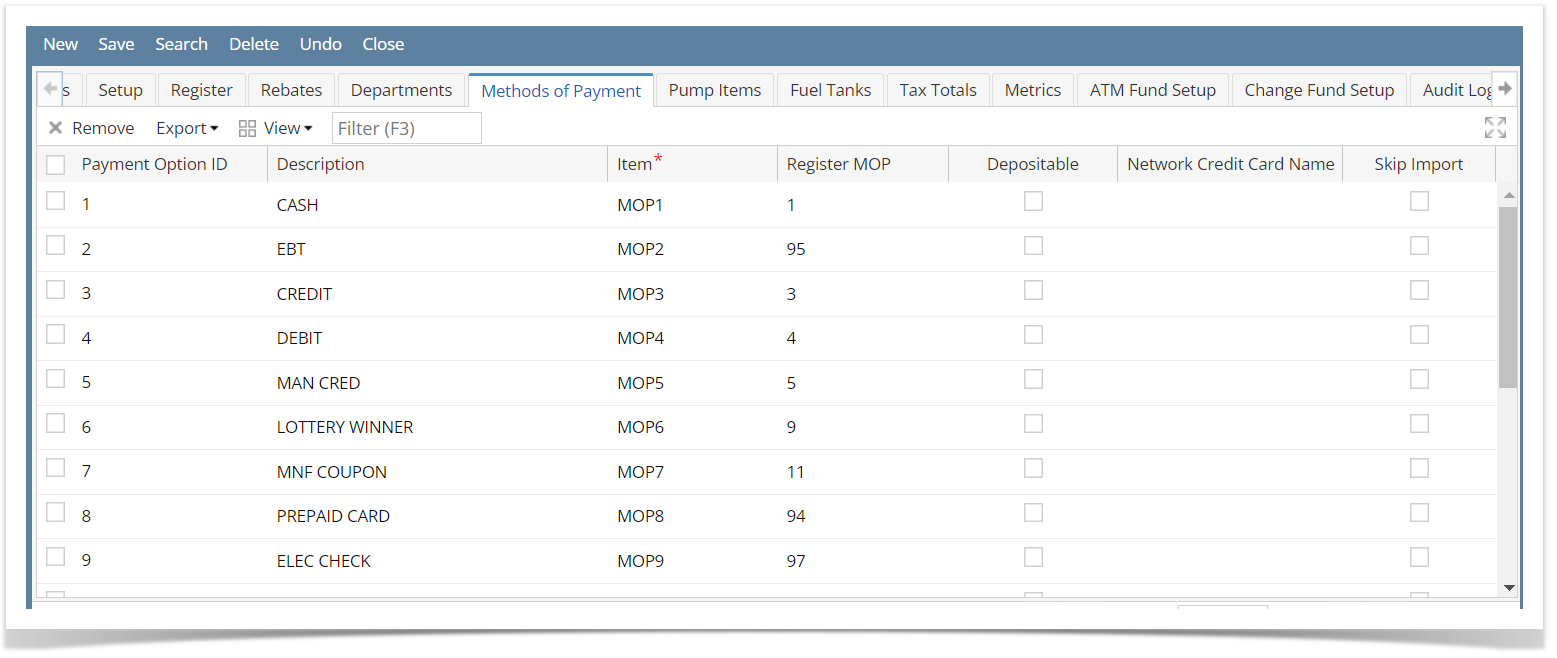
Method of Payment tab
- After completing the steps above, go ahead and click the Method of Payment tab. It is located next to the Departments tab.
- This tab contains the mode of payment available in your store
- Enter the following values:
- Payment Option ID
- Description
- Item
- Register MOP
- Depositable
- Network Credit Card Name
- Skip Import
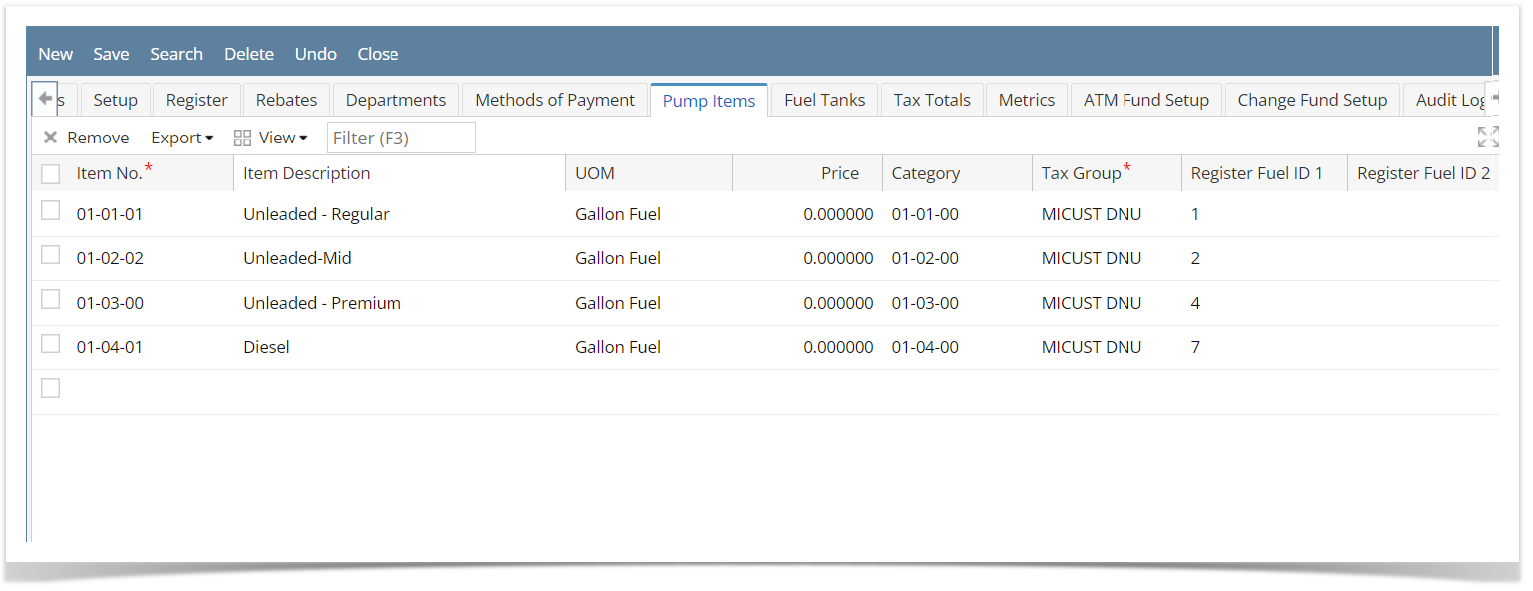
Pumps Items tab
- After completing the steps above, go ahead and click the Pump Items tab. It is located next to the Methods of Payment tab.
- This tab contains the Pump Items available in your store
- Fill up the grid details:
- Select Item No, Item Description, and UPC will automatically filled out
- Enter Price
- Enter Category
- Enter Tax Group, this is required
- Register Fuel ID 1 & 2
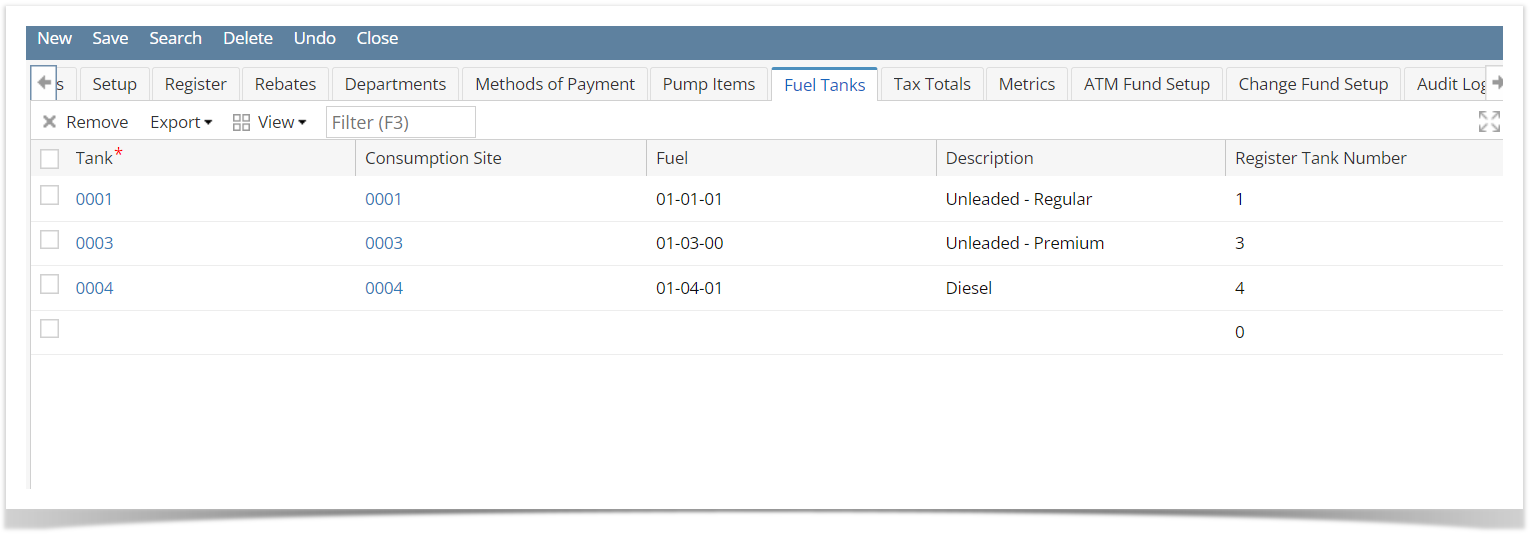
Fuel Tanks tab
- After completing the steps above, go ahead and click the Fuel Tanks tab. It is located next to the Pump Items tab.
- This tab contains the Fuel tanks Items available in your store
- Fill up the grid details:
- Tank
- Consumption Site
- Fuel
- Description
- Register Tank Number
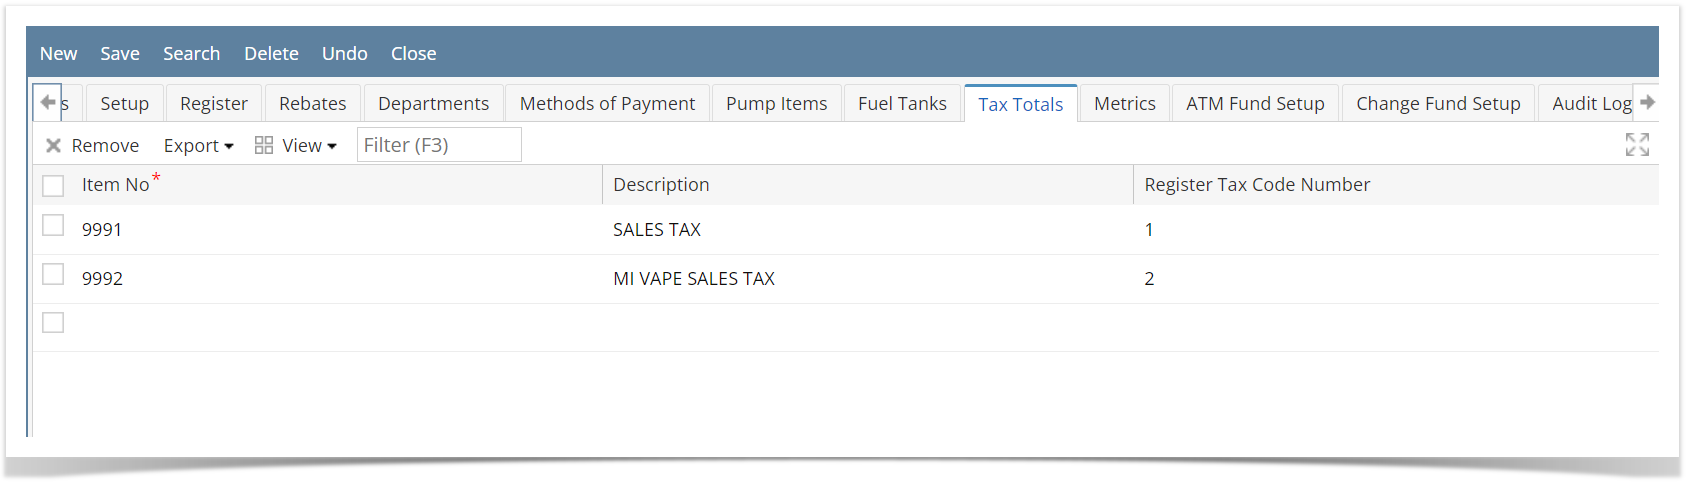
Tax Totals tab
- After completing the steps above, go ahead and click the Tax Totals tab. It is located next to the Fuel Tanks tab.
- This tab contains the Tax Totals Items available in your store
- Fill up the grid details:
- Select Item No
- Description
- Register Tax Code Number
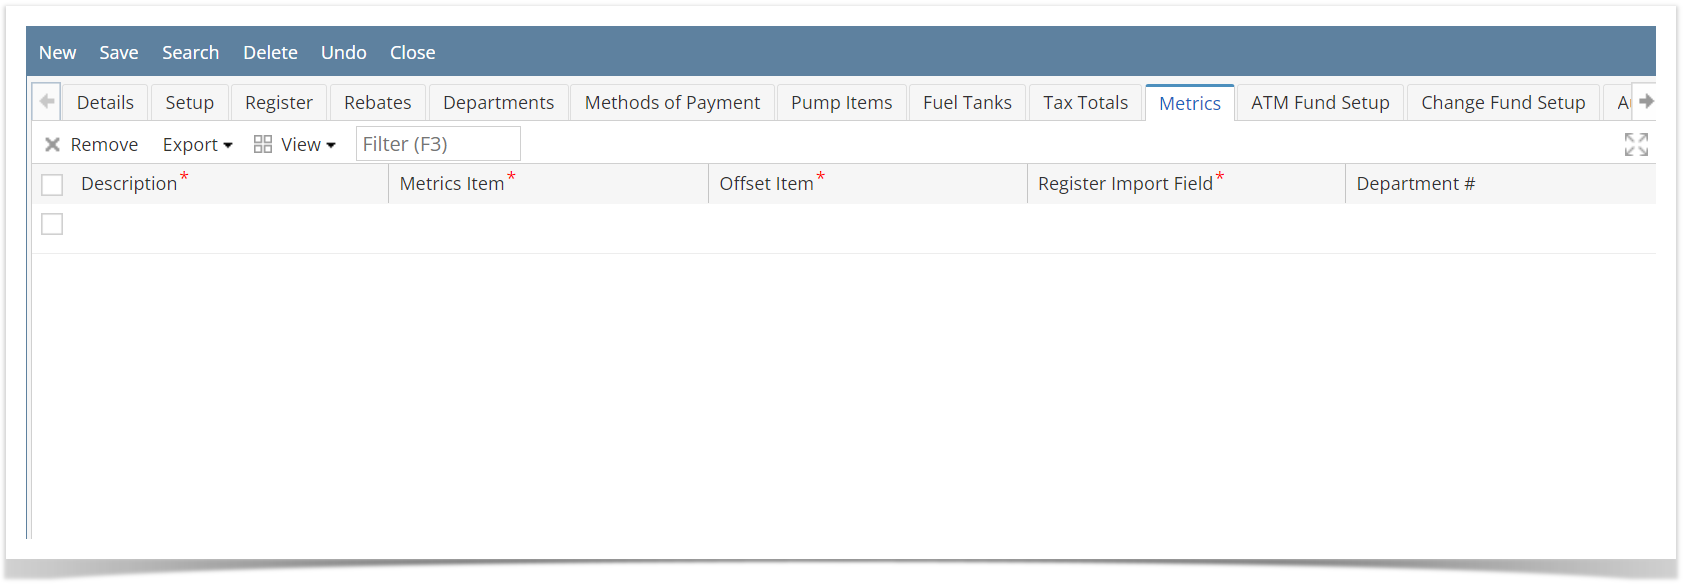
Metrics tab
- After completing the steps above, go ahead and click the Metrics tab. It is located next to the Tax Totals tab.
- This tab contains the Metrics Item available in your store
Enter the Default Vendor.
Info icon false Default Vendor is the vendor to be used in store transaction by default. User can also change the default vendor to any vendor in every store transactions.
- Enter company ID for GL
- Enter company ID for AR
- Enter Maximum PLU number
Enter Handheld Device Model
Info icon false Default Vendor is the vendor to be used in store transaction by default. User can also change the default vendor to any vendor in every store transactions.
- Enter Maximum PLU Number. Usually a 4 or 5 digits.
Enter Number of Shifts in a Day.
Enter GL Sales Indicator
Enter Last Inventory Close Date
Select Tax Group ID, this is required.
Select Checkout Customer, this is required.
Select Customer Charges Item, this is required.
- Select Customer Payment Item, this is required.
- Select Over Short/Item Id, this is required.
- Fill up other details in the setup tab.
- Click Register tab.
- Click tag field and type in to filter the Department/s
- Under the Vendor Setup:
- Select Vendor
- Enter Account Number
- Click Register Product tab.
- Fill up the grid details:
- Enter Product Code
- Enter Description
- Enter Comments
- Click Payment Options tab.
- Fill up the grid details:
- Enter Payment Option Id
- Enter Description
- Select available Item
- Description
- Metrics Item
- Offset Item
- Register Import Field
- Department #
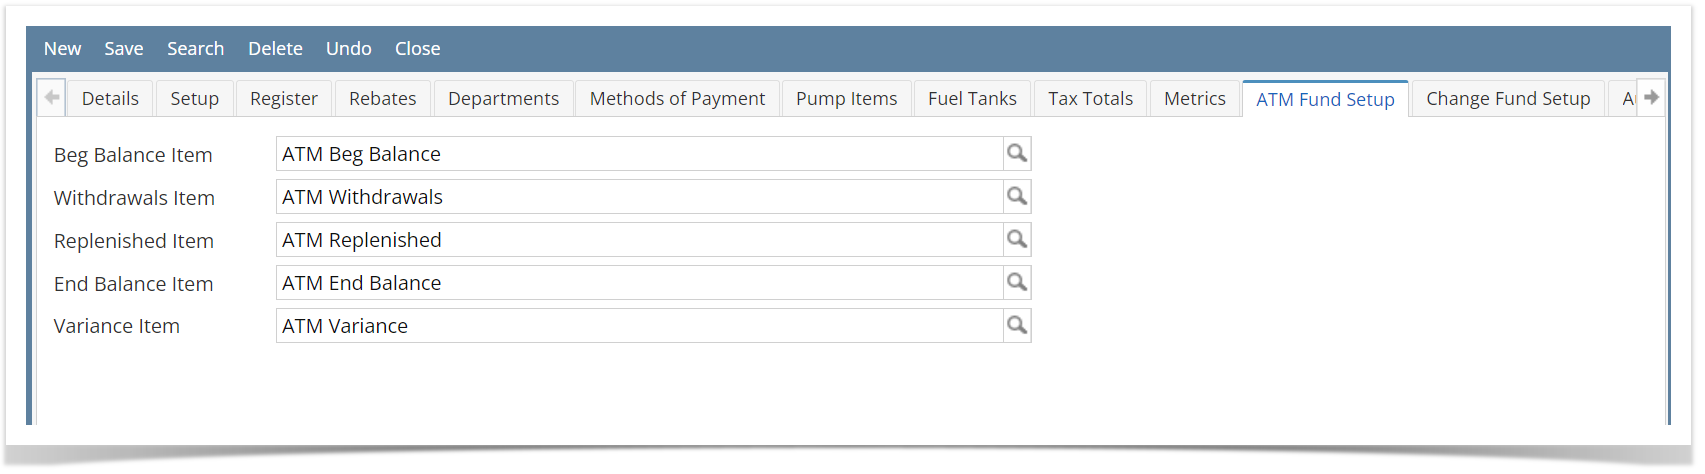
ATM Fund Setup tab
- After completing the steps above, go ahead and click the ATM Fund Setup tab. It is located next to the Metrics tab.
- This tab contains the ATM Fund Item available in your store
- Click Pumps Items tab.Fill up the grid details::
- Enter Pump ID
- Select Item No, Item Description will automatically filled out
- Enter Price
- Enter Category
- Enter Tax Group
- Beg Balance Item
- Withdrawals Item
- Replenished Item
- End Balance Item
- Variance Item
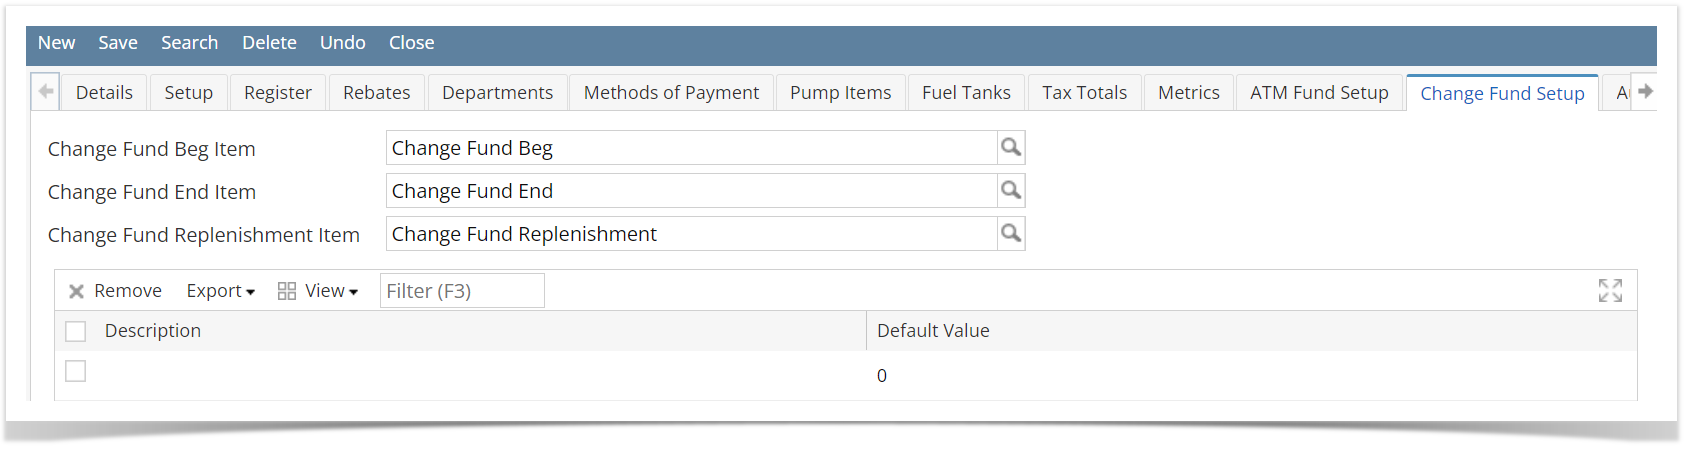
Change Fund Setup tab
- After completing the steps above, go ahead and click the Change Fund Setup tab. It is located next to the ATM Fund Setup tab.
- This tab contains the Change Fund Item available in your store
- Fill up the grid details::
- Enter Tax Code
- Select Item No
- Enter Item Description
- Enter Price
- Enter Category Enter Tax Group
- Change Fund Beg Item
- Change Fund End Item
- Change Fund Replenishment Item
- Description & Default Value
Audit Log tab
- This tab contains the all logs happen in this store.
Click Save to proceed.
| Expand | ||
|---|---|---|
| ||
Here are the steps on how to create a Store: |
Note: For 21.1 and higher versions
|
|
Overview
Content Tools