...
- Log in as Admin user
- On user’s menu panel, go to System Manager folder then click User Roles
- Select and open a User Role on Search User Roles
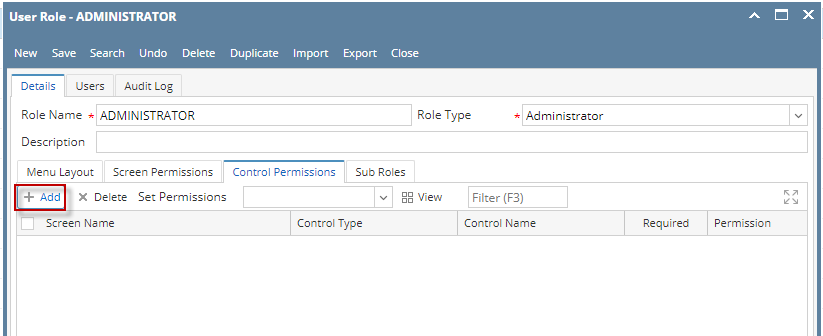
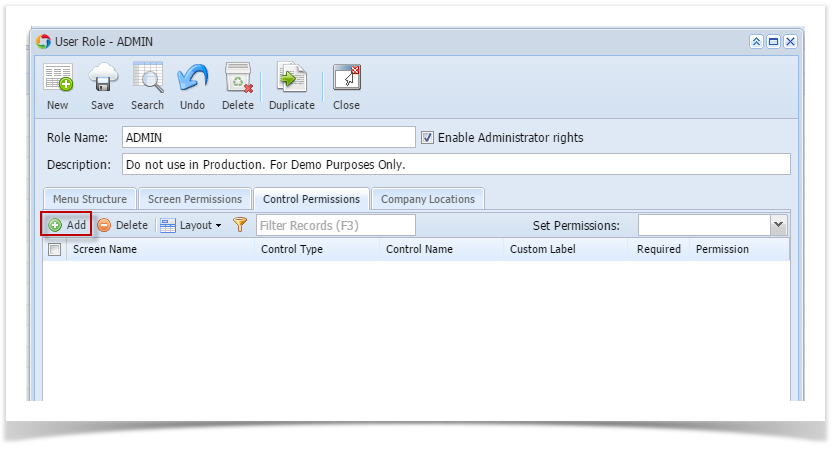
- Click the Control Permissions tab
- Click the Add button.
 Image Removed
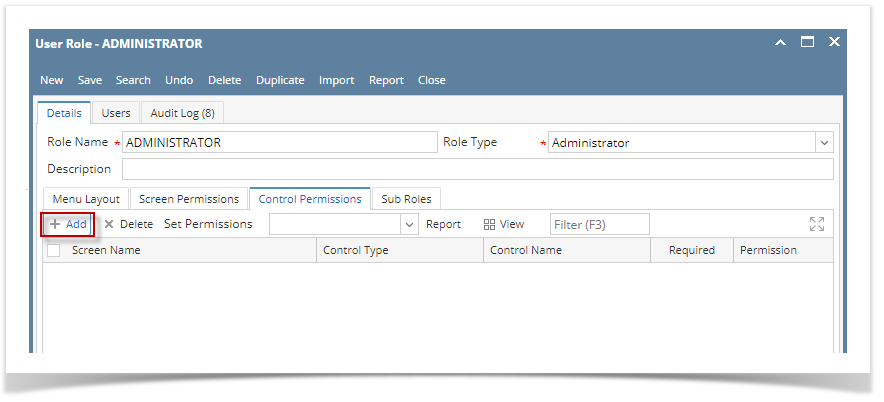 Image Added
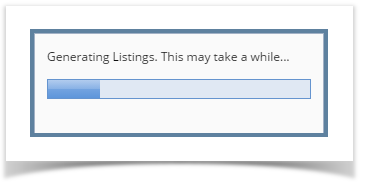
If the add button is clicked for the first time on the build, Generating of listings will appear before Add Control Permissions screen
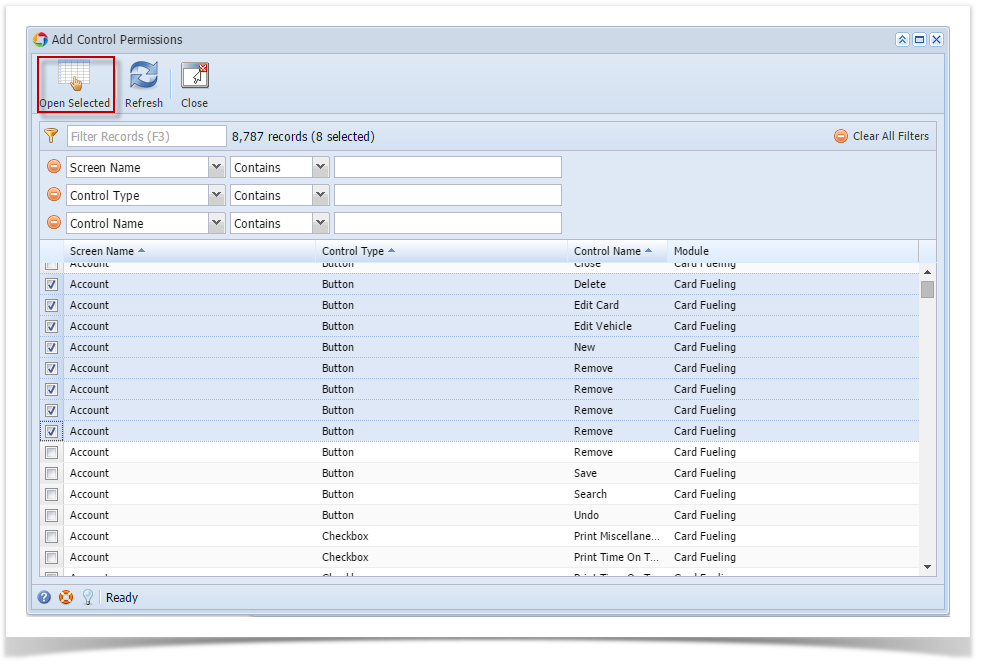
- Select controls from the list on Add Control Permissions screen, then click Open Selectedtoolbar button
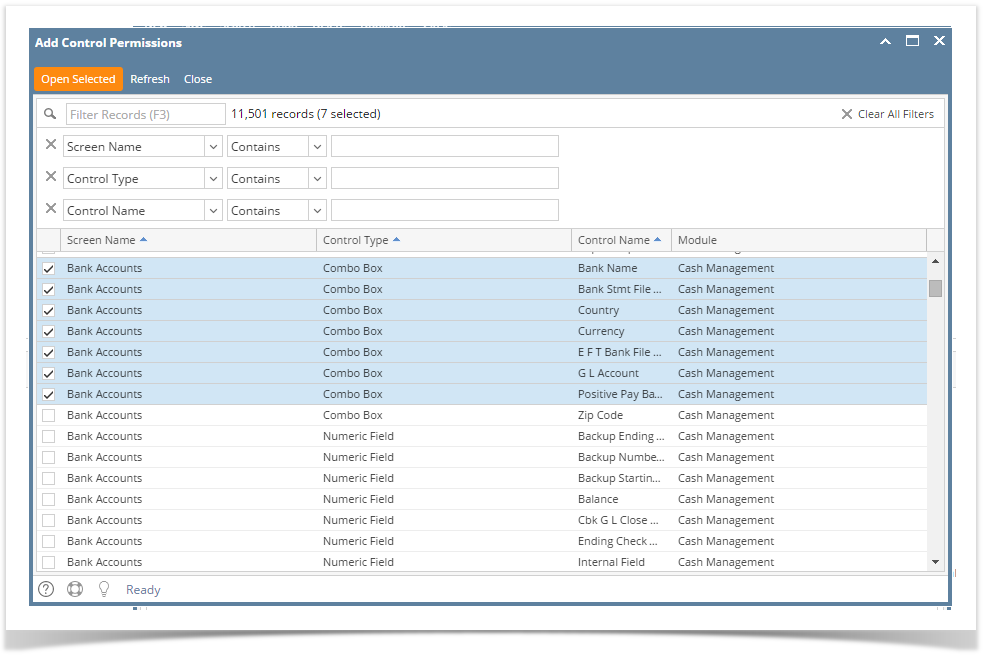 Image RemovedSelect Permission of
 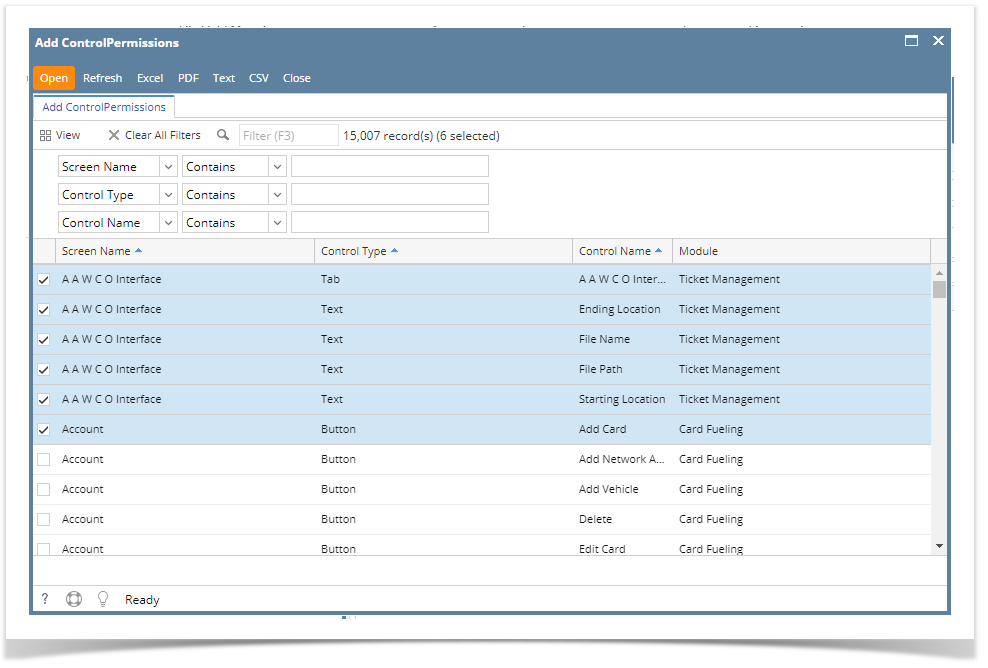 Image Added
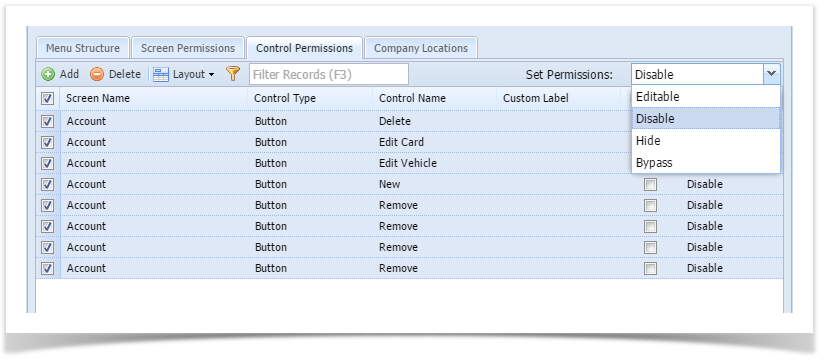
 - Select Permission of the control:
- Editable - Allows a user to edit data in the control.
- Disable - Makes a field read-only or a button/tab disabled.
- Hide - Hides/Removes a field, button or tab from the screen.
- Bypass - Applies to fields where you do not want the cursor to appear when tabbing through the fields.
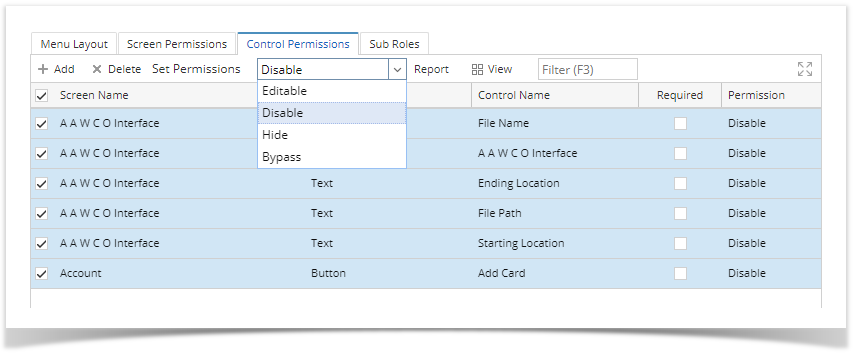 Image Added
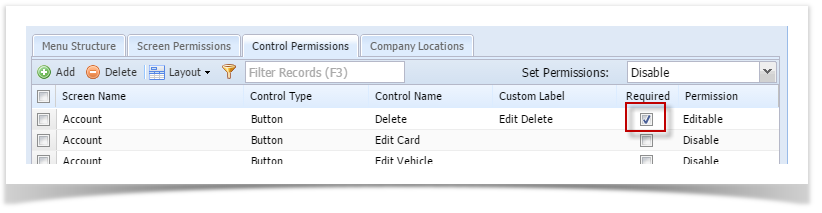
- To set a control to be a required field, tick the check box under Required column.
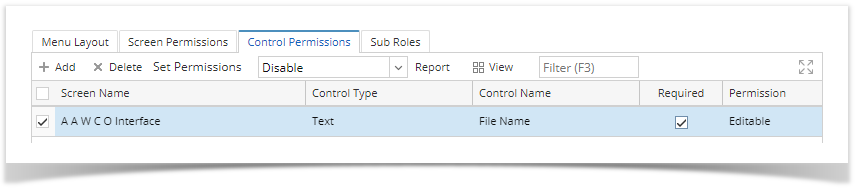 Image Added
 - Click Save toolbar button
NOTES:
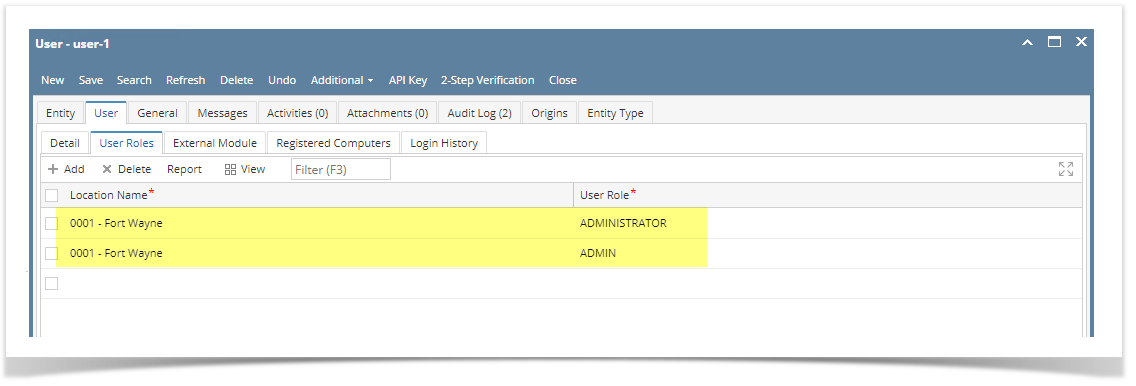 Image Added
- If the user has multiple roles setup in a location, and both roles has a restriction on a screen, there will be a prioritization in the permission
Control Permission prioritization order:
1. Bypass
2. Disable
3. Hide
4. Editable
| Role | Permission Setting | Expectation |
|---|
| Role 1 = Administrator | Editable | The control should be hidden / disabled |
| Role 2 = ADMIN | Hide / Disable |
- However, if one of the roles has permission and the other do not or has a full access
| Role | Permission Setting | Expectation |
|---|
| Role 1 = Administrator | None / Full access | The control should be hidden / disabled |
| Role 2 = ADMIN | Hide / Disable |
...
- column and enter the desired label.
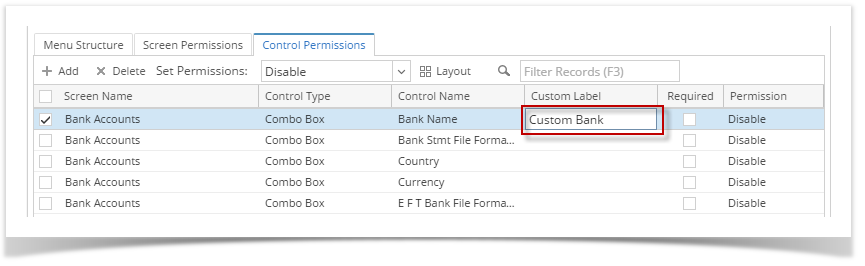 Image Modified Image Modified - To set a control to be a required field, tick the check box
|
...
...
- column.
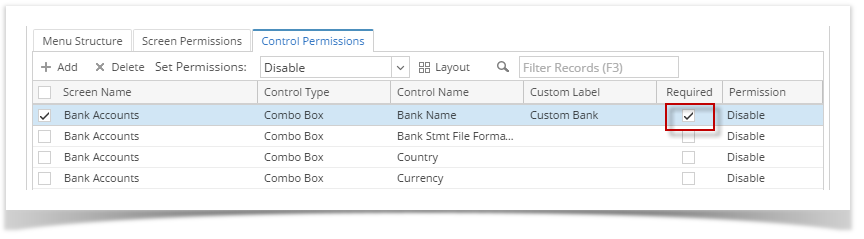 Image Modified Image Modified - Click Save toolbar button
NOTES: 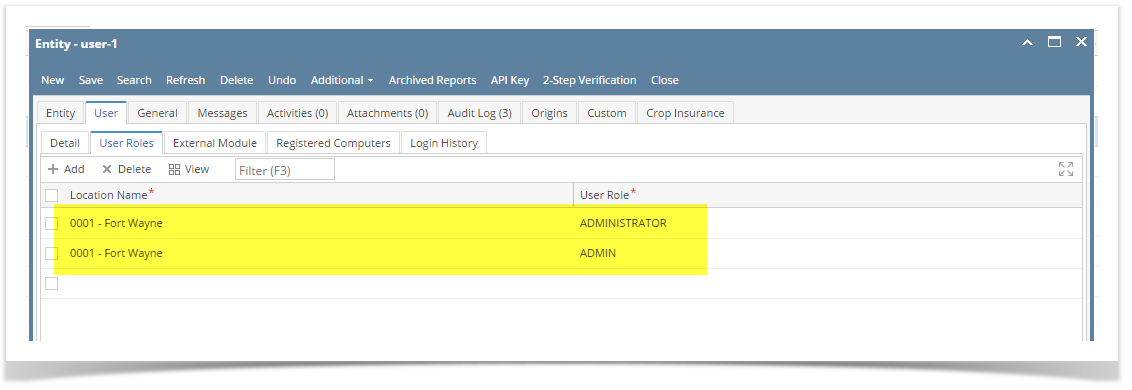 Image Added Image Added
- If the user has multiple roles setup in a location, and both roles has a restriction on a screen, there will be a prioritization in the permission
Control Permission prioritization order: 1. Bypass 2. Disable 3. Hide 4. Editable | Role | Permission Setting | Expectation |
|---|
| Role 1 = Administrator | Editable | The control should be hidden / disabled | | Role 2 = ADMIN | Hide / Disable |
- However, if one of the roles has permission and the other do not or has a full access
| Role | Permission Setting | Expectation |
|---|
| Role 1 = Administrator | None / Full access | The control should be hidden / disabled | | Role 2 = ADMIN | Hide / Disable |
|
| Expand |
|---|
|
Here are the steps on how to setup the Control Permissions: - Log in as Admin user
- On user’s menu panel, go to System Manager folder then click User Roles
- Select and open a User Role on Search User Roles
- Click the Control Permissions tab
- Click
|
...
- the Add button.
Image Added
If the add button is clicked for the first time on the build, Generating of listings will appear before Add Control Permissions screen
Image Added - Select controls from the list on Add Control Permissions screen, then click Open Selected toolbar button
Image Added - Select Permission of the control:
- Editable - Allows a user to edit data in the control.
- Disable - Makes a field read-only or a button/tab disabled.
- Hide - Hides/Removes a field, button or tab from the screen.
- Bypass - Applies to fields where you do not want the cursor to appear when tabbing through the fields.
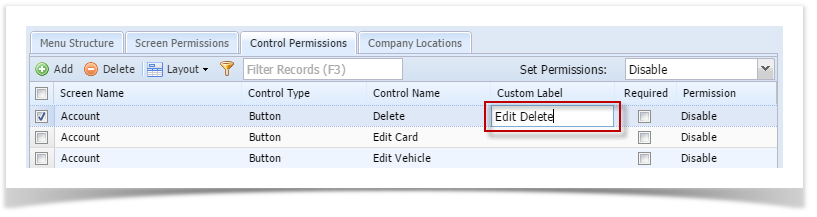
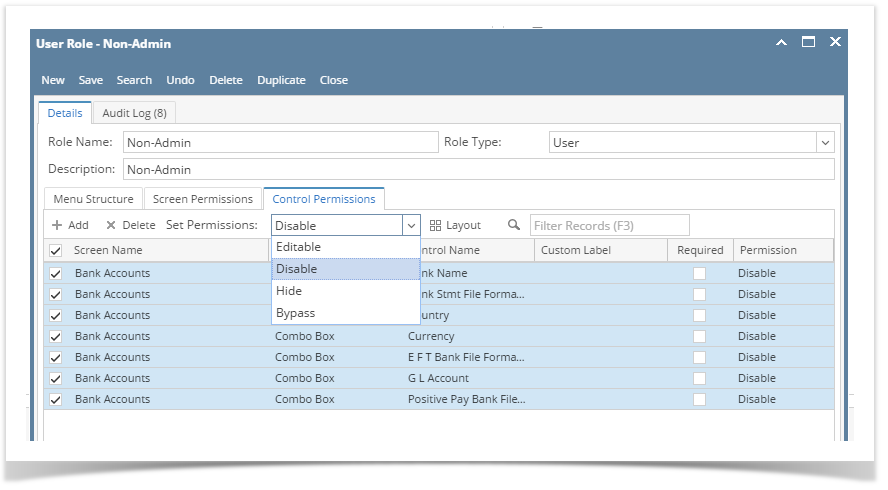 Image Added Image Added - To change the label of the control, click the field under Custom Label column and enter the desired label.
Image Added - To set a control to be a required field, tick the check box under Required column.
Image Added - Click Save toolbar button
NOTES: Image Modified - If the user has multiple roles setup in a location, and both roles has a restriction on a screen, there will be a prioritization in the permission
Control Permission prioritization order: 1. Bypass 2. Disable 3. Hide 4. Editable | Role | Permission Setting | Expectation |
|---|
| Role 1 = Administrator | Editable | The control should be hidden / disabled | | Role 2 = ADMIN | Hide / Disable |
- However, if one of the roles has permission and the other do not or has a full access
| Role | Permission Setting | Expectation |
|---|
| Role 1 = Administrator | None / Full access | The control should be hidden / disabled | | Role 2 = ADMIN | Hide / Disable |
|
...