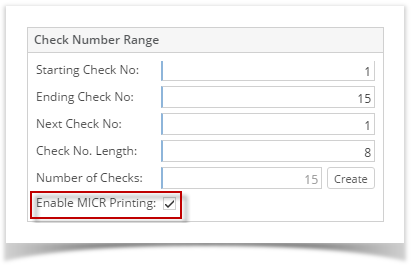
- Check the Enable MICR Printing checkbox.
 - Click the MICR toolbar button to open the MICR Setup screen.
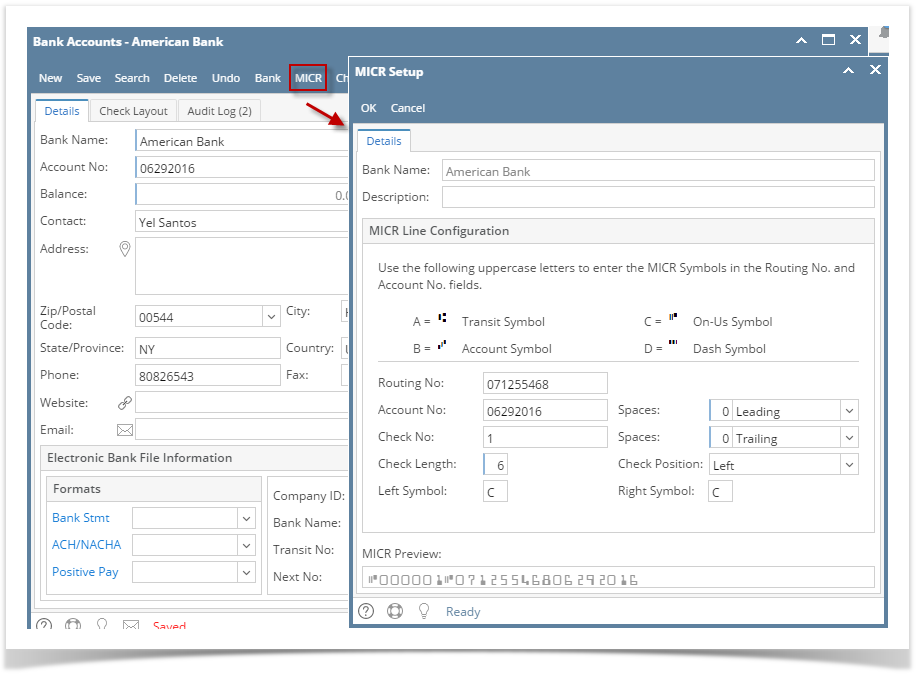 - When MICR Setup screen opens, configure the MICR line.
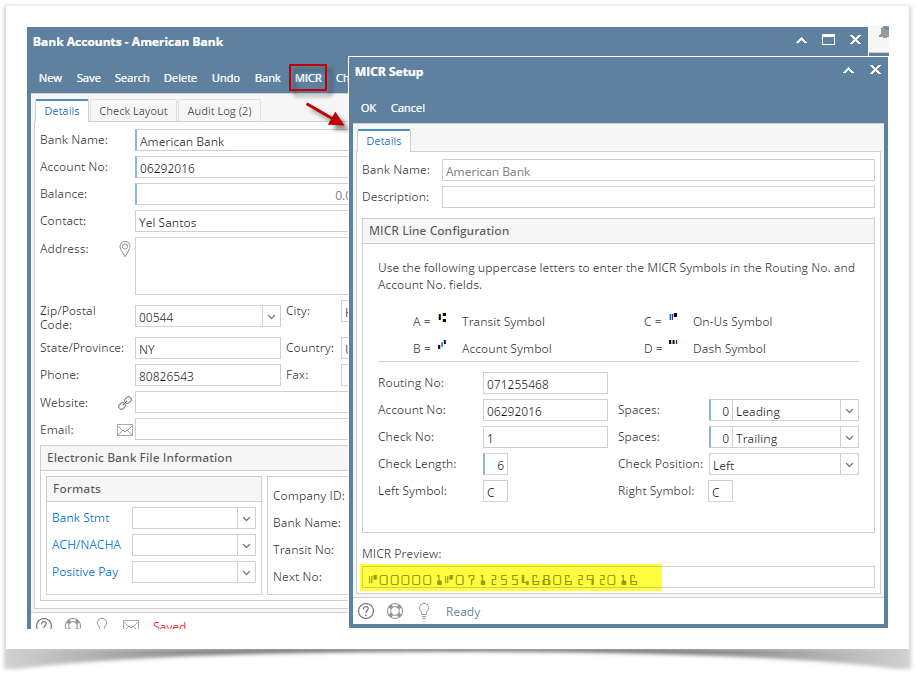
- In the Description field, enter a description for the MICR Setup.
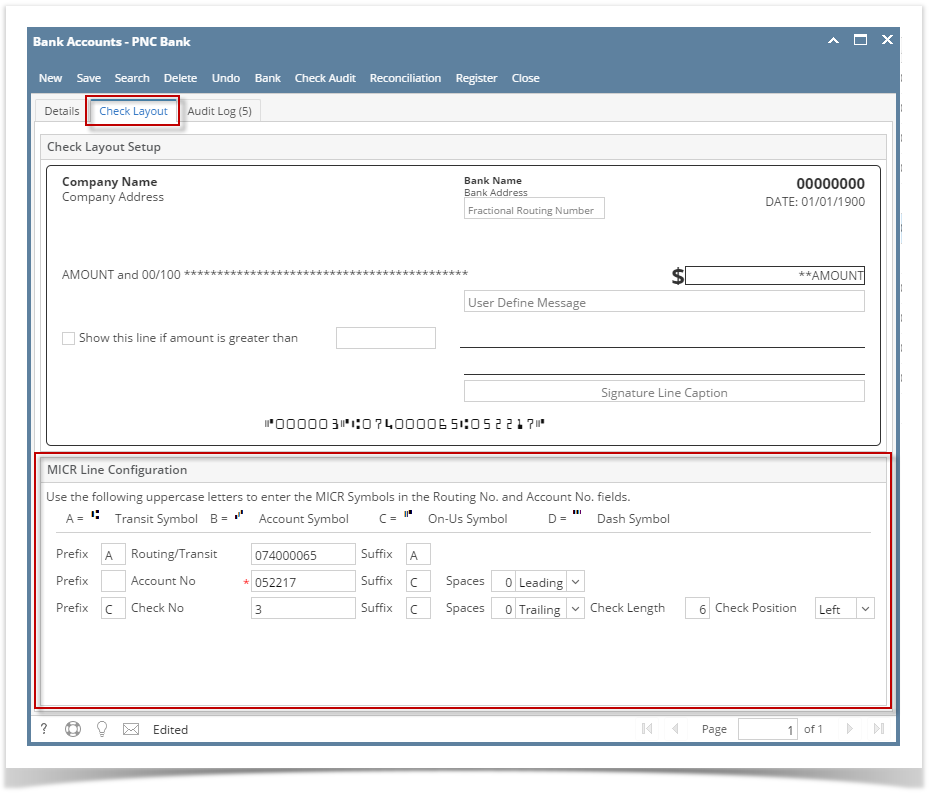
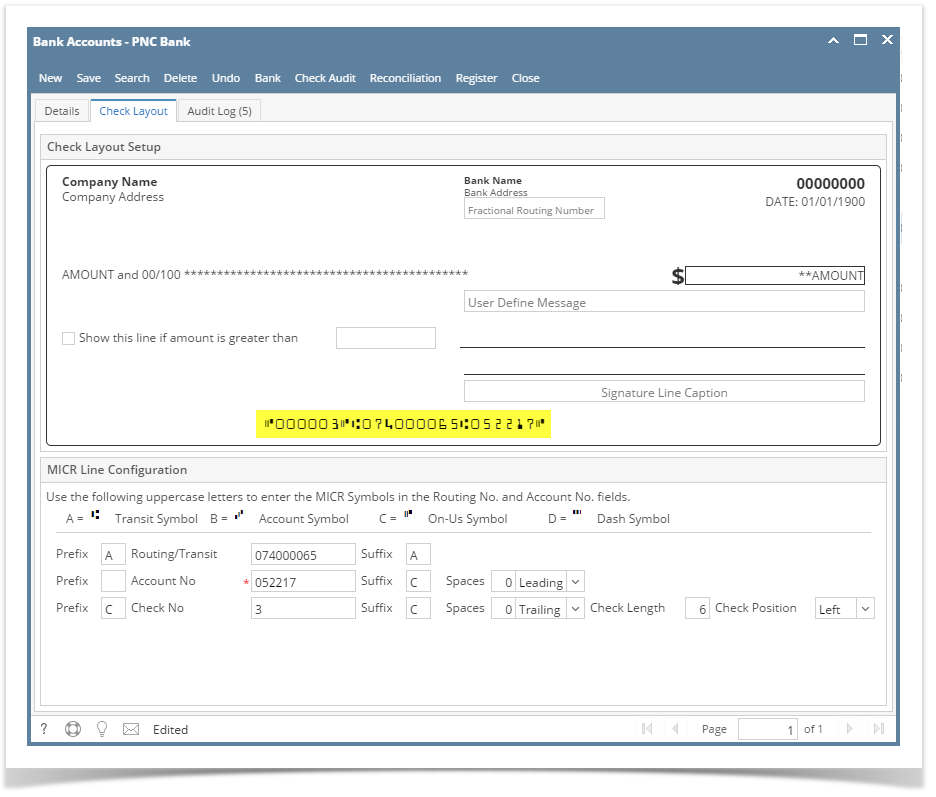
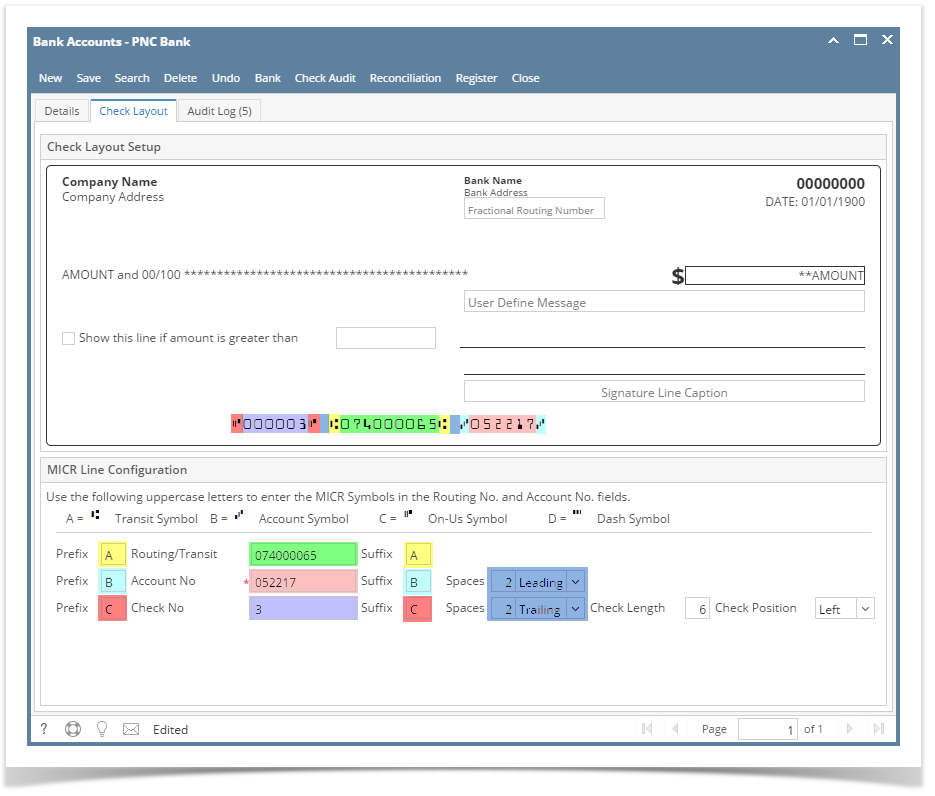
 - Configure the MICR Line. Below is a sample of how MICR line can be setup. The fields are colored and the same color is used to point the placement of each information in the MICR Preview.
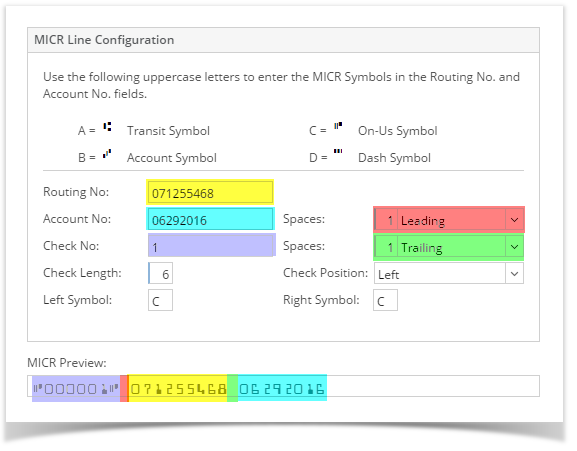
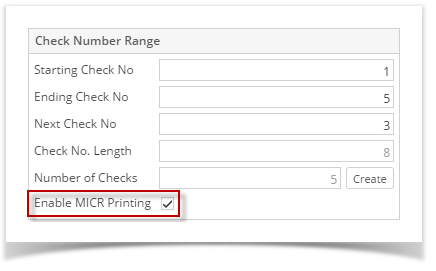
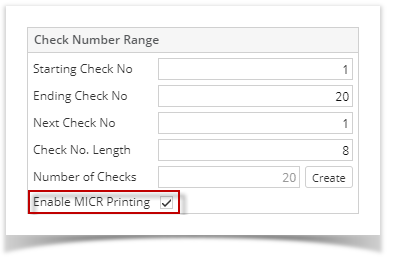
- The Check Length dictates how many characters to show in the MICR line for Check No. In the case where:
- Number of characters for the Check No configured is less than the number entered in the Check Length field, leading zero/es is placed to match the check length.
- If number of characters for the Check No configured is greater than the number entered in the Check Length field, it will cut the Check No to match the Check Length.
- The Check Position dictates the placement of the Check No in the MICR line. In this example, shown at the leftmost part.
- Click OK toolbar button to save and close the screen.
|