When verifying Schedules, it may be convenient to export the transactions into Excel spreadsheets, so you can leverage Excel's built-in functions to filter, sort, and summarize. In addition, exported spreadsheets can be archived as historical records.
To export Schedules, follow these steps:
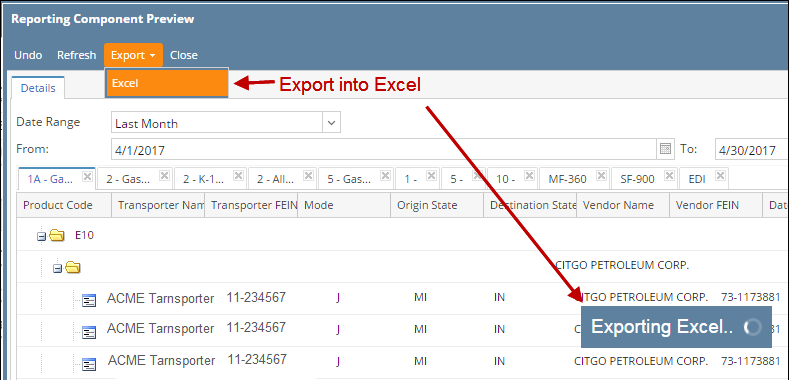
- After Schedules' results are displayed on Reporting Component Preview screen, click Export button, then click Excel. An "Exporting Excel..." message appears to indicate progress.
- When the export finishes, one of two things can happen, depending on your Chrome setting:
- The spreadsheet automatically opens up in Excel, or
- The spreadsheet is saved to your computer and an icon appears at the bottom of your Chrome. Click the ^ button next to the icon to expand the menu choices, from which you can open the file in Excel.

- Once the exported spreadsheet is opened in Excel, you need to click Enable Editing on the top before you can use it.

- The spreadsheet is named by the From and To Dates that you have specified before running the Schedules. For example, file name "20170401-20170430" means it has results from April 1, 2017 through April 30 2017. In addition, the file may have multiple sheets, each of them is for one Schedule. In this screenshot, there are five Schedules from two different Main Forms.

- You can move or save the spreadsheet into any folder of your choice for archiving purposes.
Overview
Content Tools