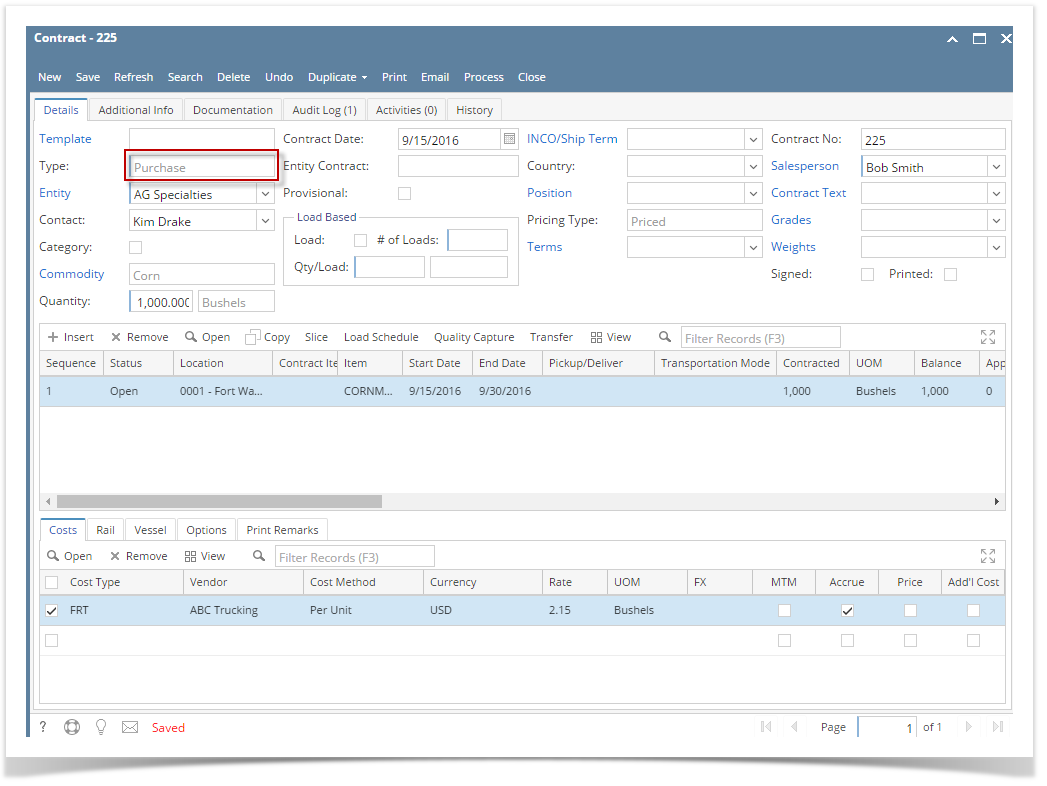
- Create Purchase Priced Contract from Contract Management > Contracts, click New.
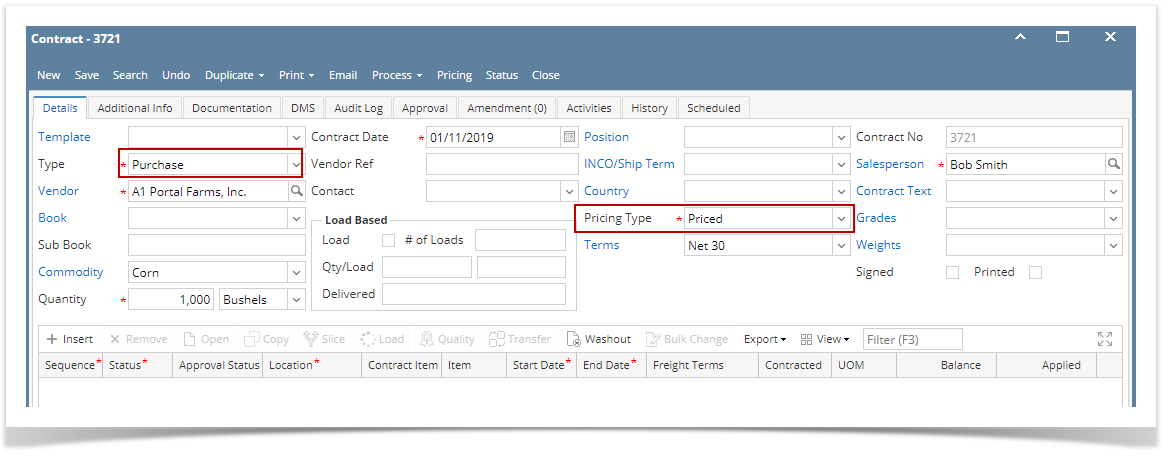
- Select Type 'Purchase'
- Select an Entity
- Select Commodity.
- Select Contract UOM and enter Contract Qty
- Select PricingType 'Priced'
- Select Salesperson
- Click the Save toolbar button.
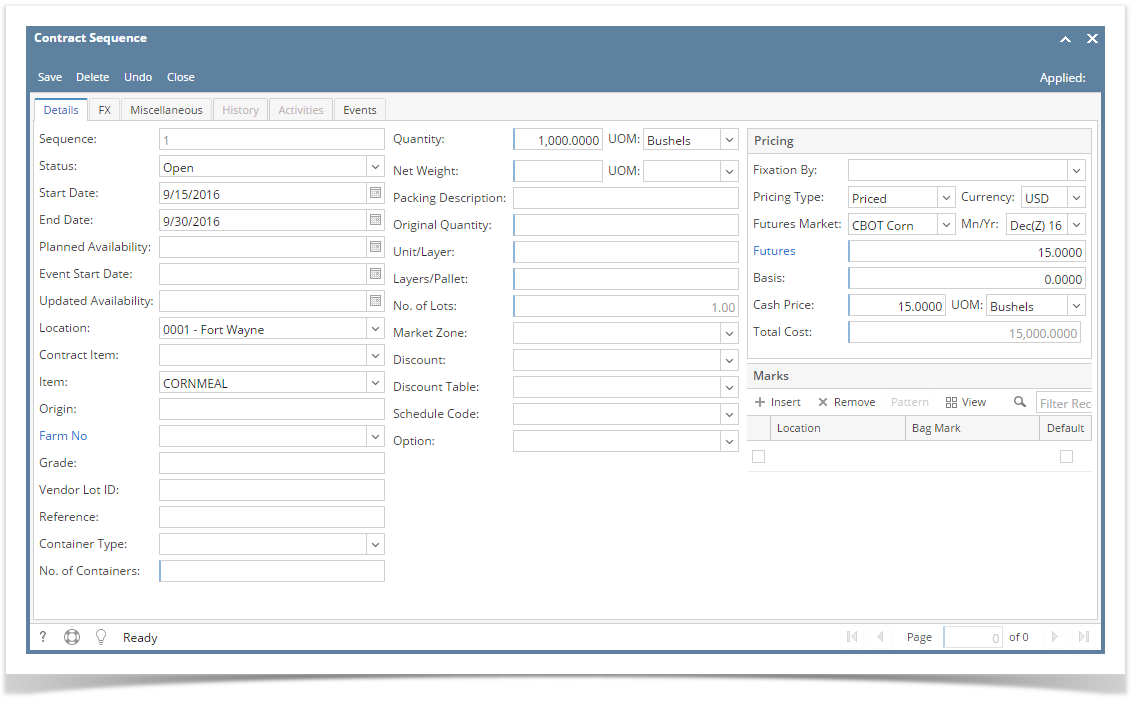
- .Click the Insert grid button to create Contract Sequence.
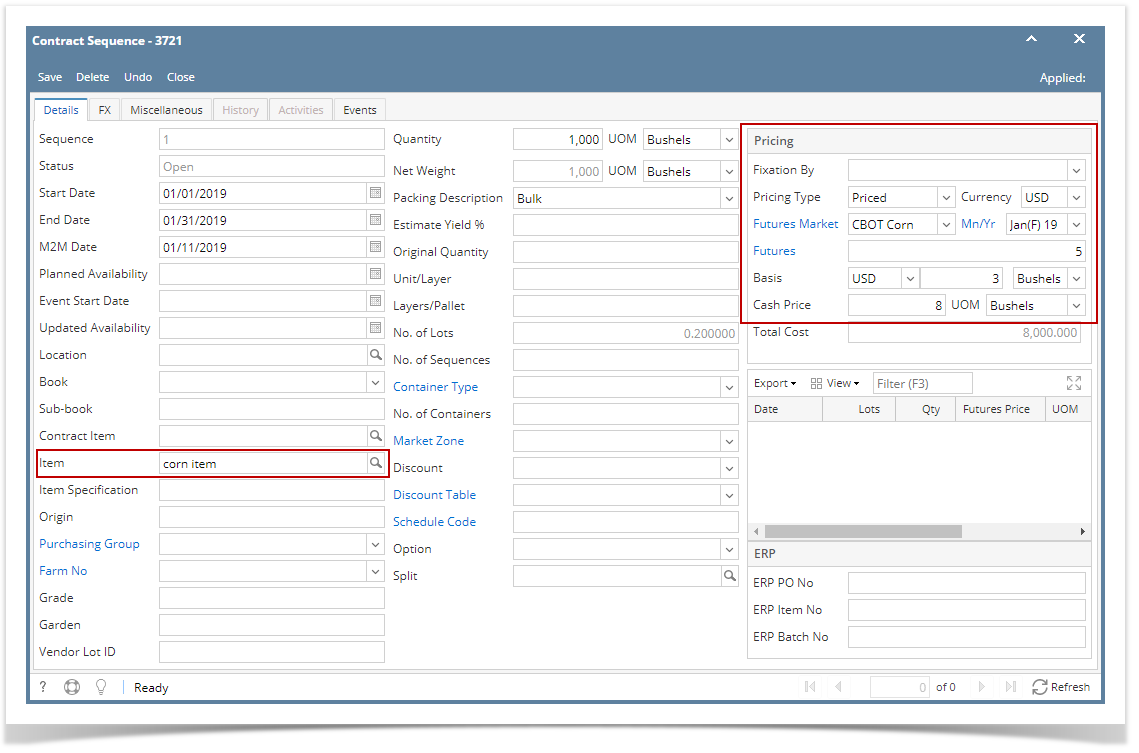
- Select Contract EndDate.
Select an Item.
Remember that the items listed from the Item combobox dropdown are only linked /associated to selected Commodity.
Quantity should display equal to the entered Contract Qty. If the Contract Sequence UOM was changed to other UOM (ex. LB), Quantity should be automatically converted to make it equal to Contract Qty.
- Enter Futures and Basis Price
- Click the Save toolbar button.
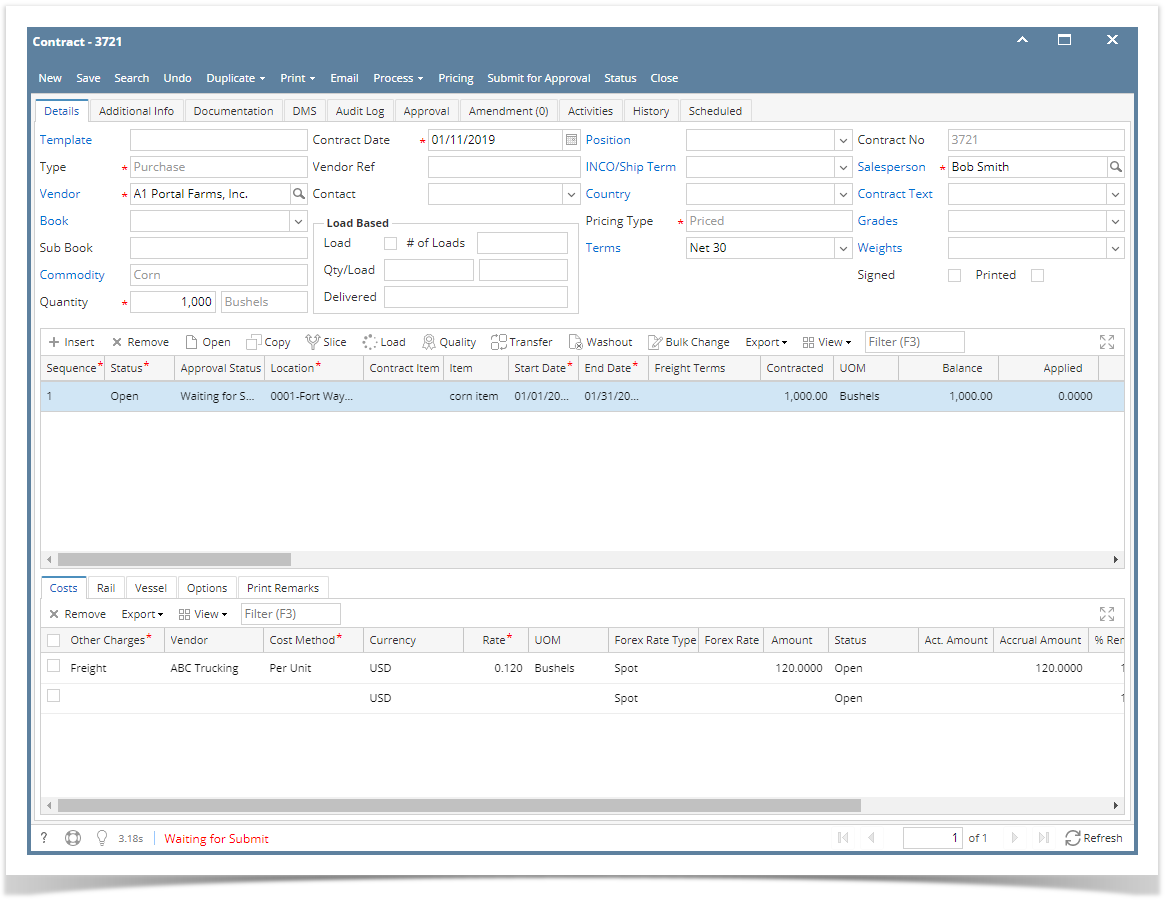
- Select Contract Freight charge under Cost tab of Purchase Contract header.
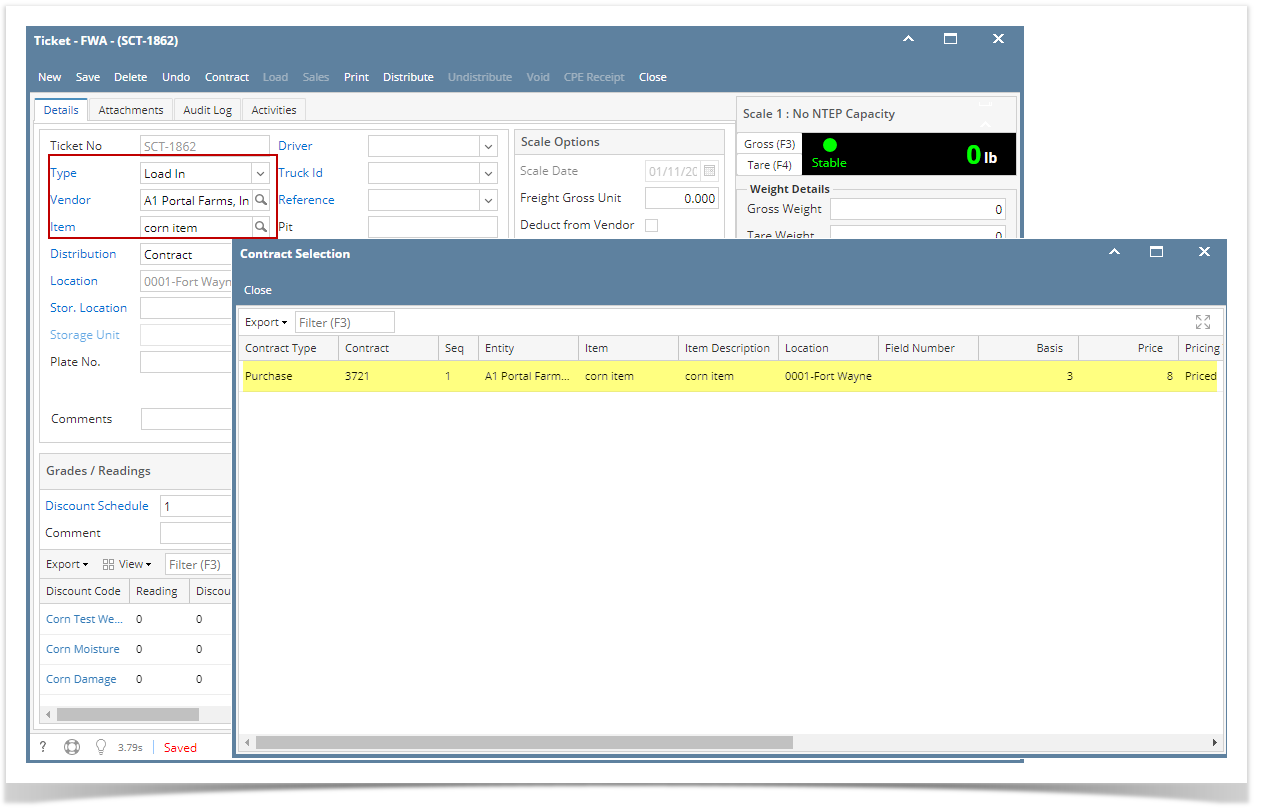
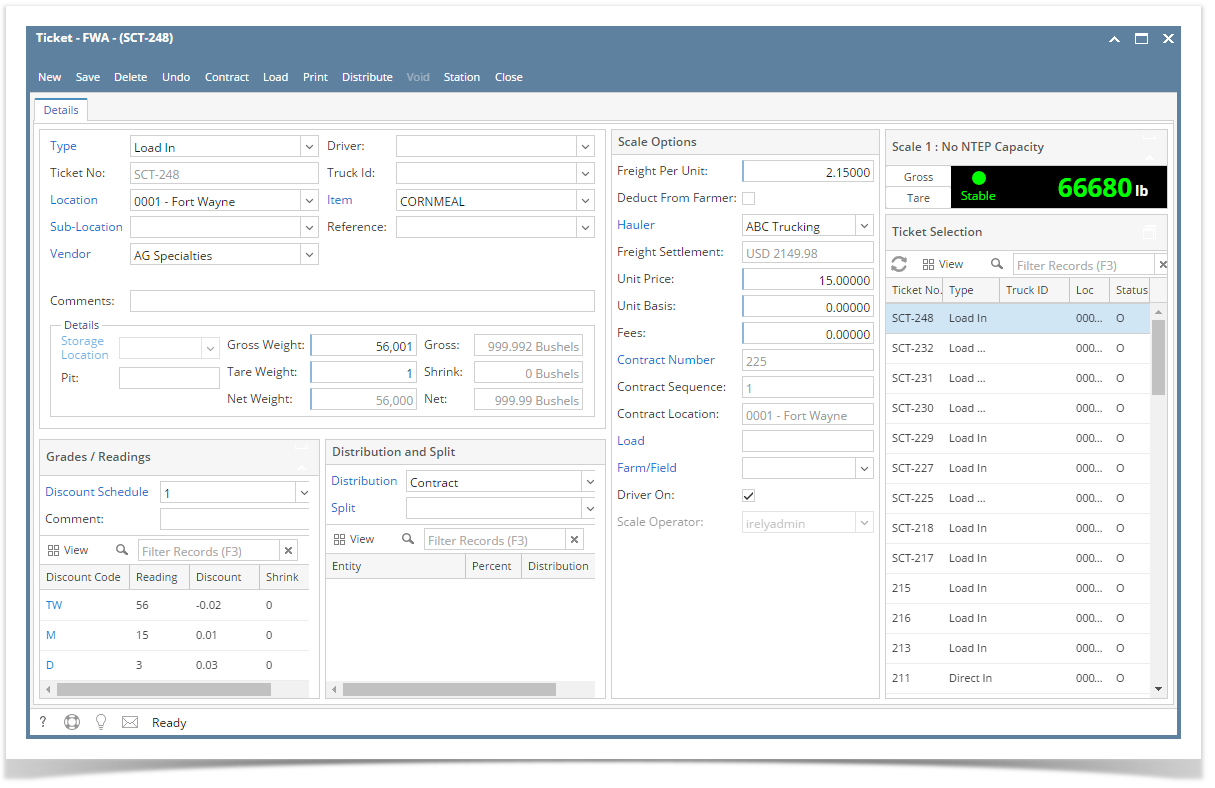
- From Ticket Management menu > Tickets, click New.
- Select Type: Load In
- Select Vendor.
- Select an Item.
- Select Distribution: Contract
- Contract Selection screen will open. Double-click the created Purchase Contract to automatically populated in Scale Ticket screen.
- Enter Discount Readings
- Enter Gross Weight and Tare Weight to automatically calculate the Net Units
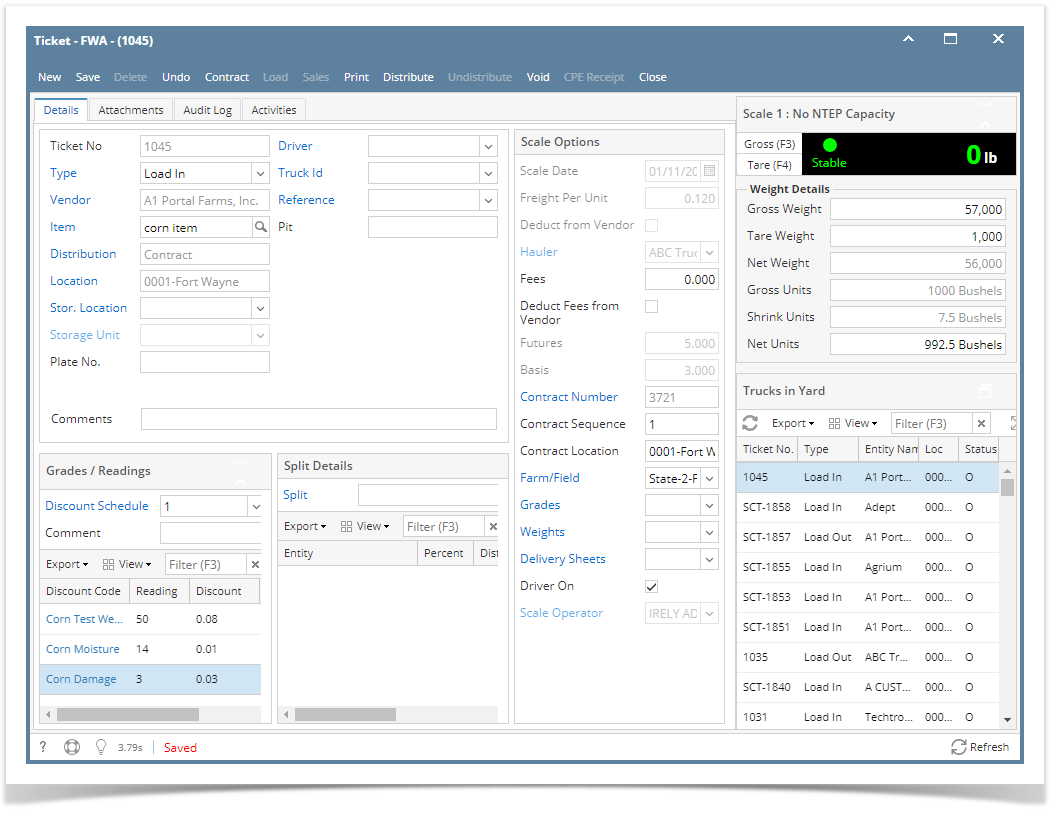
Freight Charge from the selected Contract should auto populate in Scale Ticket screen if the Default Freight from the used Scale Station are both matched. Else, Freight, Deduct from Vendor and Hauler fields are enabled.
- Click the Distribute toolbar button. This message will be shown.
- If the Ticket Completion Options checkbox from Ticket Pool is set to 'Auto', it will automatically distribute the Scale Ticket.
- If the Ticket Completion Options checkbox from Ticket Pool is set to 'Manual', Manually Distribute Tickets screen should be displayed. Units to be Distributed is automatically assigned to Unit Entry field in the Contracts panel.
- Click the Yes button.This message will be shown.
It will automatically create Inventory Receipt and Voucher transaction. - Open the created Inventory Receipt transaction.

- Order Type should be 'Purchase Contract'.
- Source Type should be 'Scale'
- Vendor display is the selected Vendor from Scale Ticket
- Location should be coming from the Scale Location.
- Qty to Receive is the total Load In Units distributed from Scale.
- Ownership Type should be 'Own'.
- Open the Voucher transaction from Purchasing | Voucher.
- Voucher Detail should contains the item and discount charges.
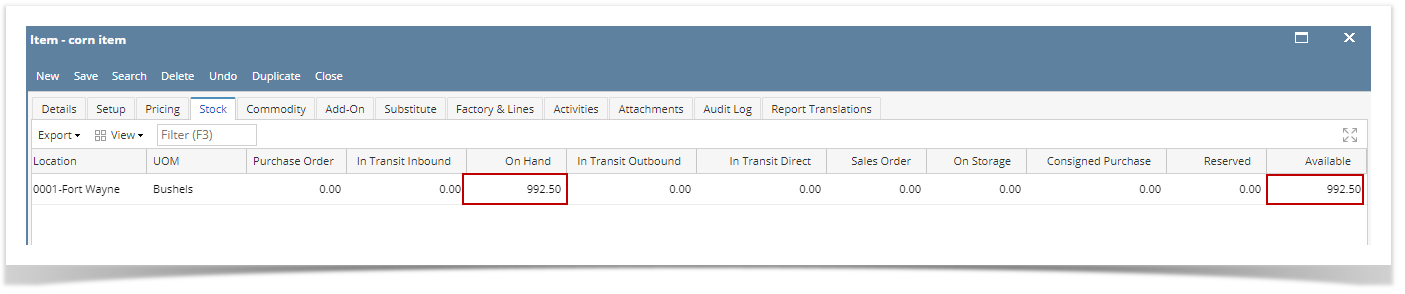
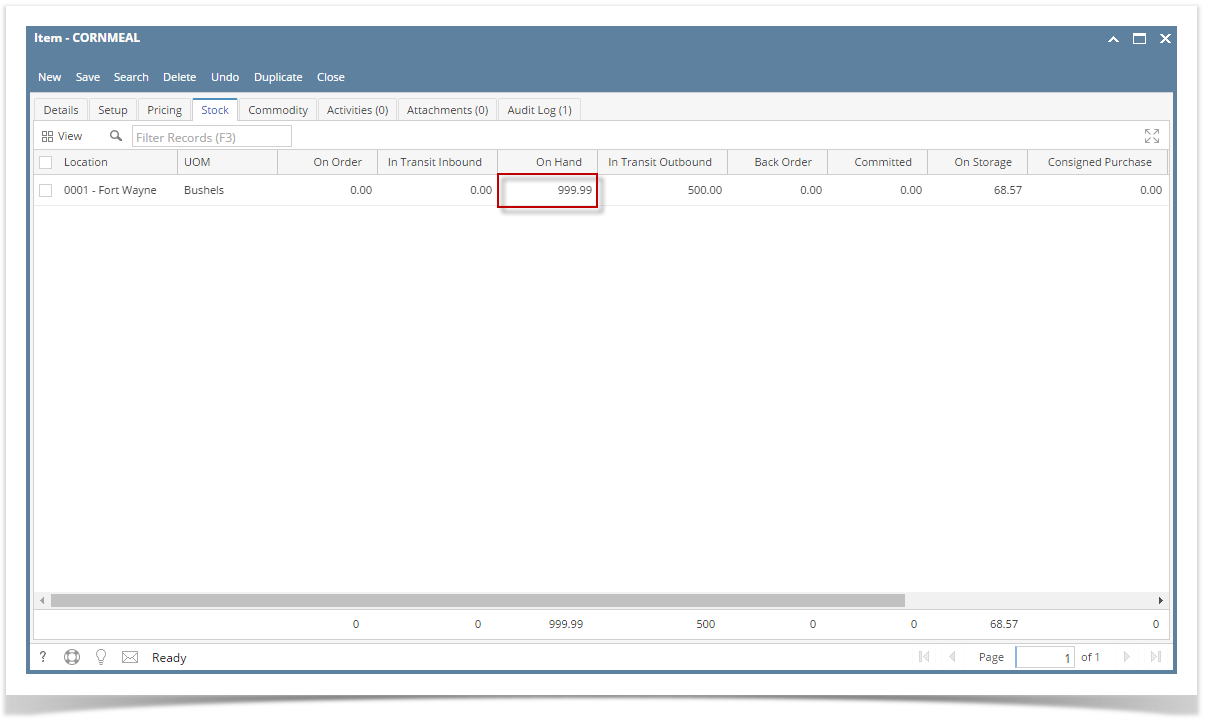
- Check the Item On Hand Units from Inventory menu > Items.
- Go to Stock tab. On Hands will be increased by the total Net Units distributed from Scale.
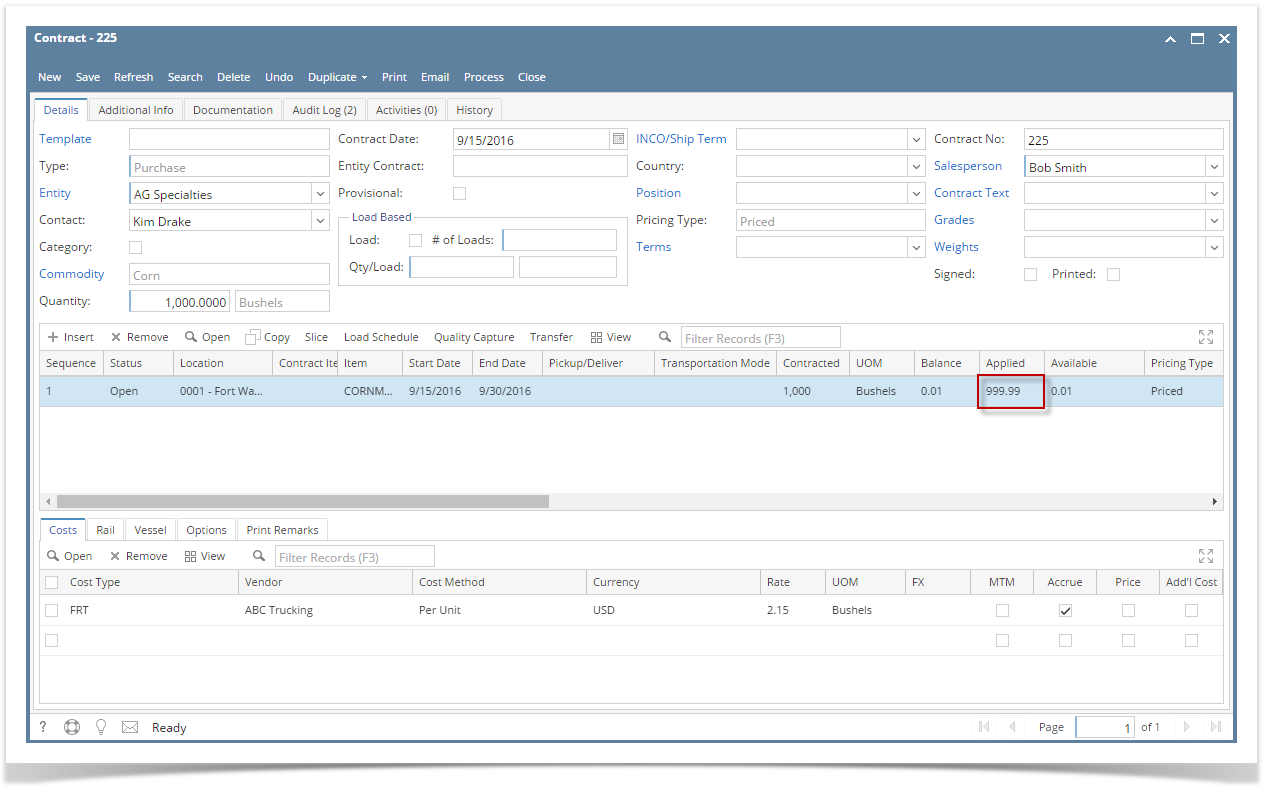
Open the existing Purchase Contract used and check the Applied and Available Units.
Applied units is the total Net units distributed.
Available units is the remaining contract units (Balance Units - Applied Units)
- You must have to create Purchase Contract from Contract Management > Contracts, click New.
- Select Type 'Purchase'.
- Select an Entity.
- Select Entity Contact.
- Select Commodity.
- Select Contract UOM and enter Contract Qty
- Select Salesperson.
- Select PricingType 'Priced'.
- Click the Save toolbar button.
- .Click the Insert grid button to create Contract Sequence.
- Select Contract EndDate.
Select an Item.
Remember that the items listed from the Item combobox dropdown are only linked /associated to selected Commodity.
- Quantity should display equal to the entered Contract Qty. If the Contract Sequence UOM was changed to other UOM (ex. LB), Quantity should be automatically converted to make it equal to Contract Qty.
- Enter Futures. This will be the Item Unit Price to be displayed in Scale Ticket.
- Click the Save toolbar button.
- Select Contract Freight charge under Cost tab of Purchase Contract header.
- From Ticket Management menu > Tickets, click New.
- Click Contract toolbar button. The Contract Selection screen will be displayed.

- Double-click the created Purchase Contract to automatically populated in Scale Ticket screen.
- In Gross Weight field, you can manually enter the gross weight or click the Gross button to get the reading.
- Enter Tare Weight.
- In Distribution field, Contract will be the default value.
- Contract Number and Contract Sequence will appear in Scale Ticket.
- Enter the Discount Reading if it is applicable.
- Click the Distribute toolbar button. This message will be shown.
- If the Ticket Completion Options checkbox from Ticket Pool is set to 'Manual', Manually Distribute Tickets screen should be displayed.
- Note that the Units to be Distributed is reserved/allotted to Unit Entry field in the Contract panel.
- If the Ticket Completion Options checkbox from Ticket Pool is set to 'Auto', it will automatically distribute the Scale Ticket.
- If the Ticket Completion Options checkbox from Ticket Pool is set to 'Manual', Manually Distribute Tickets screen should be displayed.
- Click the Yes button.This message will be shown.
It will automatically create Inventory Receipt and Voucher transaction. - Open the created Inventory Receipt transaction.
- Order Type should be 'Purchase Contract'.
- Source Type should be 'Scale'
- Vendor display is the selected Vendor from Scale Ticket
- Location should be coming from the Scale Location.
- Qty to Receive is the total Load In Units distributed from Scale.
- Ownership Type should be 'Own'.
- Open the Voucher transaction from Purchasing | Voucher.
- Voucher Detail should contains the item and discount charges.
- Check the Item On Hand Units from Inventory menu > Items.
- Go to Stock tab. On Hands will be increased by the total Net Units distributed from Scale.
Open the existing Purchase Contract used and check the Applied and Available Units.
Applied units is the total Net units distributed.
Available units is the remaining contract units (Balance Units - Applied Units)
- You must have to create Purchase Contract from Contract Management > Contracts, click New.
- Select Type 'Purchase'.
- Select an Entity.
- Select Entity Contact.
- Select Commodity.
- Select Contract UOM and enter Contract Qty
- Select Salesperson.
- Select PricingType 'Priced'.
- Click the Save toolbar button.
- .Click the Insert grid button to create Contract Sequence.
- Select Contract EndDate.
Select an Item.
Remember that the items listed from the Item combobox dropdown are only linked /associated to selected Commodity.
- Quantity should display equal to the entered Contract Qty. If the Contract Sequence UOM was changed to other UOM (ex. LB), Quantity should be automatically converted to make it equal to Contract Qty.
- Enter Futures. This will be the Item Unit Price to be displayed in Scale Ticket.
- Click the Save toolbar button.
- Select Contract Freight charge under Cost tab of Purchase Contract header.
- From Ticket Management menu > Tickets, click New.
- Click Contract toolbar button. The Contract Selection screen will be displayed.
- Double-click the created Purchase Contract to automatically populated in Scale Ticket screen.
- In Gross Weight field, you can manually enter the gross weight or click the Gross button to get the reading.
- Enter Tare Weight.
- In Distribution field, Contract will be the default value.
- Contract Number and Contract Sequence will appear in Scale Ticket.
- Enter the Discount Reading if it is applicable.
- Click the Distribute toolbar button. This message will be shown.
- Click the Yes button.This message will be shown.
It will automatically create Inventory Receipt transaction. - Open the created Inventory Receipt transaction.
- Order Type should be 'Purchase Contract'.
- Source Type should be 'Scale'
- Vendor display is the selected Vendor from Scale Ticket
- Location should be coming from the Scale Location.
- Qty to Receive is the total Load In Units distributed from Scale.
- Ownership Type should be 'Own'.
- Check the Item On Hand Units from Inventory menu > Items.
- Go to Stock tab. On Hands will be increased by the total Net Units distributed from Scale.
- Open the existing Purchase Contract used and check the Applied and Available Units.
Applied units is the total Net units distributed.
Available units is the remaining contract units (Balance Units - Applied Units)
- You must have to create Purchase Contract from Contract Management > Contracts, click New.
- You must have to create Purchase Contract from Contract Management > Contracts, click New.
- Select Type 'Purchase'.
- Select an Entity.
- Select Entity Contact.
- Select Commodity.
- Select Contract UOM and enter Contract Qty
- Select Salesperson.
- Select PricingType 'Priced'.
- Click the Save toolbar button.
- .Click the Insert grid button to create Contract Sequence.
- Select Contract EndDate.
Select an Item.
Remember that the items listed from the Item combobox dropdown are only linked /associated to selected Commodity.
- Quantity should display equal to the entered Contract Qty. If the Contract Sequence UOM was changed to other UOM (ex. LB), Quantity should be automatically converted to make it equal to Contract Qty.
- Enter Futures. This will be the Item Unit Price to be displayed in Scale Ticket.
- Click the Save toolbar button.
- Select Contract Freight charge under Cost tab of Purchase Contract header.
- From Ticket Management menu > Tickets, click New.
- Click Contract toolbar button. The Contract Selection screen will be displayed.
- Double-click the created Purchase Contract to automatically populated in Scale Ticket screen.
- In Gross Weight field, you can manually enter the gross weight or click the Gross button to get the reading.
- Enter Tare Weight.
- In Distribution field, Contract will be the default value.
- Contract Number and Contract Sequence will appear in Scale Ticket.
- Enter the Discount Reading if it is applicable.
- Click the Distribute toolbar button. This message will be shown.
- Click the Yes button.This message will be shown.
It will automatically create Inventory Receipt transaction. - Open the created Inventory Receipt transaction.
- Order Type should be 'Purchase Contract'.
- Source Type should be 'Scale'
- Vendor display is the selected Vendor from Scale Ticket
- Location should be coming from the Scale Location.
- Qty to Receive is the total Load In Units distributed from Scale.
- Ownership Type should be 'Own'.
- Check the Item On Hand Units from Inventory menu > Items.
- Go to Stock tab. On Hands will be increased by the total Net Units distributed from Scale.
- Open the existing Purchase Contract used and check the Applied and Available Units.
Applied units is the total Net units distributed.
Available units is the remaining contract units (Balance Units - Applied Units)
- You must have to create Purchase Contract from Contract Management > Contracts, click New.
Overview
Content Tools