You can use the following link to register to re-watch the webinar where this training material was presented on 6/17/2020.
- Update to version 19.1 or higher if on an older version i21 Card Fueling
- This is optional, but recommended for additional error reporting on Tax X-Ref setup.
- You can find your version on your i21 login screen.
- Familiarize yourself with this documentation and the timing of the steps that need to occur.
- Update to version 19.1 or higher if on an older version i21 Card Fueling
- Select Card Fueling > Setup Menu
- Select Network and Open PacPride record
Select Detail Tab
- Change Type of Network to "CFN"
- Set New Participant Number
- See Host x-ref provided by PacPride for your new host number.

- Change Import Mapping for Trans to CFN
- Change Import Mapping for Cards

- This should not need changed if you are currently importing Cards, as the CSU format was already in the new format.
- Change Import Mapping for Network Cost.
- Select Card Fueling > Setup Menu
- Select Network and Open PacPride record
- Select Site Tab
- Recommend searching for your Operated Sites and confirming that the Site Number Matches
- All Active Sites with a matching record in the PacPride Site X-Ref will be assigned a new number.
- Note any sites not included with PacPride X-ref will retain the old PacPride Alphabetic Site and are likey inactive.
- New Remote/Extended Remote Sites will continue to be automatically added when a transaction occurs.
- Note the PT file only has a Site State, and the other address fields will be blank.

- Select Card Fueling > Setup Menu
- Select Network and Open PacPride record
- Select CFN State Code Tab
- Verify Records exist and no changes should be necessary.

- Select Card Fueling > Setup Menu
- Select Network and Open PacPride record
- Select Tax Code Tab

- The New PT File separates out Federal Lust and Federal Environmental Fee
- This will cause errors if not setup
- On the user’s menu panel go to Common Info folder then click Tax Codes
- If there are existing records, Search Tax Codes screen will open
- If there is no existing record, the new Tax Codes screen will open
- From Search Tax Codes screen click New toolbar button
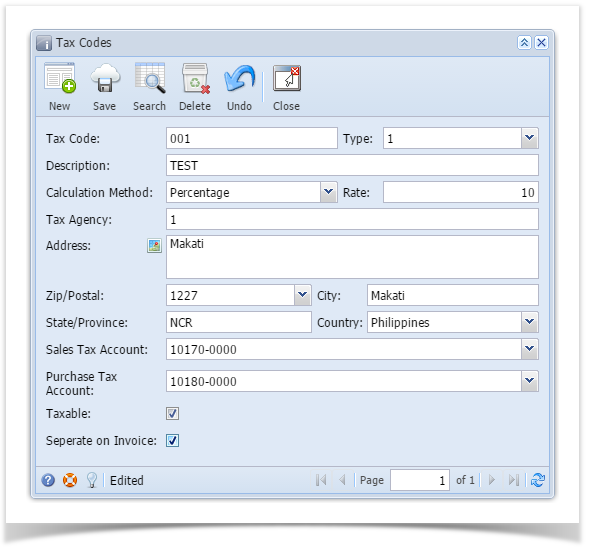
- Enter necessary details on the form
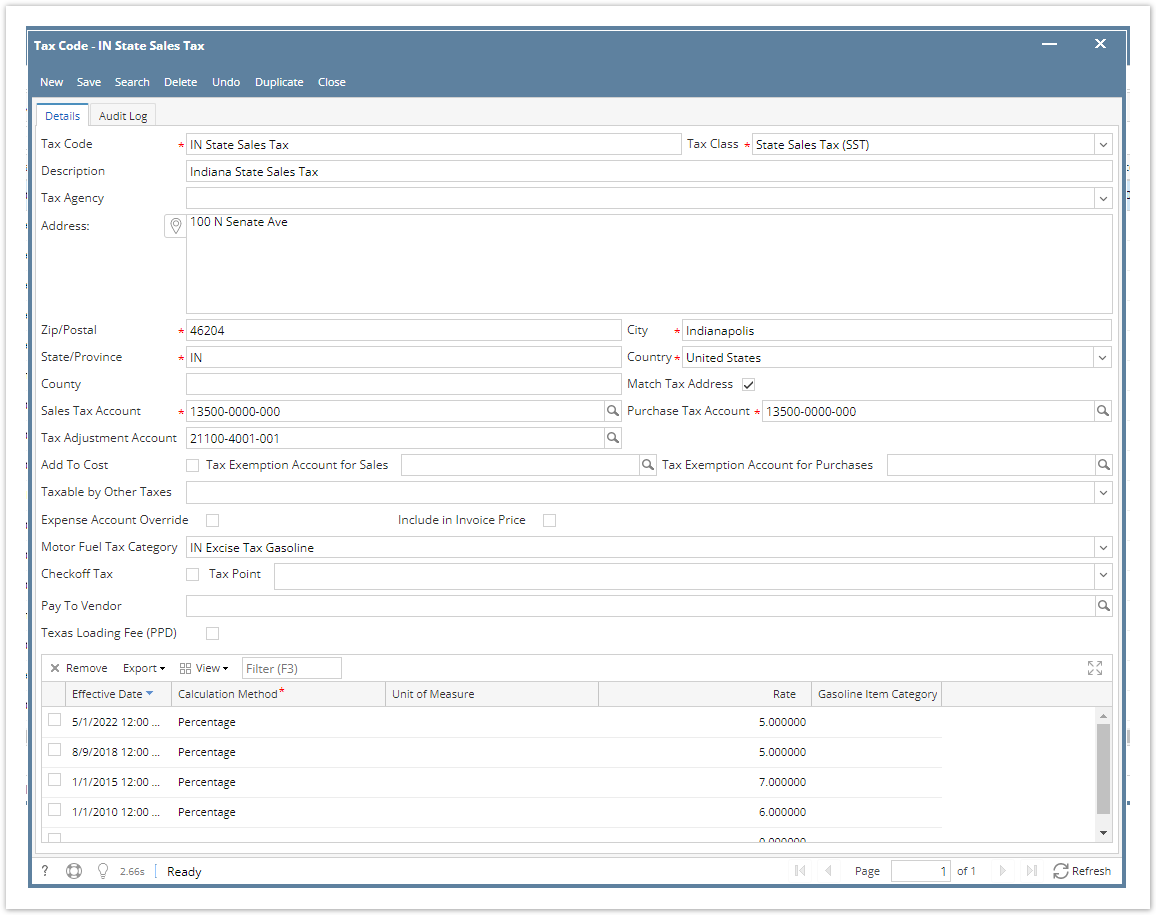
- Click Save toolbar button
Tax Code Tax code name (ie. Indiana Sales Tax) Description A more detailed description of the tax (optional) Tax Class User can select from different tax classes created in Tax Classes screen. Required field. Tax Agency This is who the tax check will be written to when payment is issued. This tax will be tracked to the tax agency. Address User enters address of tax agency. Zip/Postal Code Zip/Postal Code of the tax. Required field. State User can define the state associated with the tax. Needed to create templates from tax schedule. Required field. Country User can define the country associated with the tax. Needed to create templates from tax schedule. Required field. City User can define the city associated with the tax. Needed to create templates from tax schedule. Required field. County User can define the county associated with the tax. Match Tax Address Default to being checked. If unchecked, the system will not search for a match based on the address and will just tax if it is in the tax group list. Sales Tax Account Select from accounts under Sales Tax Account category and Purchase Tax Account category. Required field. Purchase Tax Account Select from accounts under Sales Tax Account category and Purchase Tax Account category. Required field. Tax Adjustment Account User can select the GL account for Tax Adjustment Account Add to Cost If the check box is checked, the tax amount will be added to Cost or COGS. Tax Exemption Account for Sales User can select the GL account for Tax Exemption of Sales Tax Tax Exemption Account for Purchase User can select the GL account for Tax Exemption of Purchase Tax Taxable by Other Taxes A list of other existing tax codes Tax Only / Balance - If tax only is checked, tax only the amount of the tax by the calculation.
- If balance is checked, tax the base amount plus the tax.
Expense Account Override Enable the customer to expense the tax on an item to the expense account. Include in invoice price If the check box is checked, tax will be included in the Invoice Price Motor Fuel Tax Category Displays values that matches the Tax Code's State/Province field Store Tax No. The tax code will be associated to the Store Tax No. entered used on Registers tracking Checkoff Tax If the check box is checked, the calculated amount will be offset into the invoice amount for that line item Pay To Vendor Selection of vendor entities Texas Loading Fee "Texas Loading Fee" or "Texas Petroleum Products Delivery Fee". In reality, this is a Tax levied by the State, but not a Fee/Surcharge initiated by a Vendor or iRely Customer.
Effective Date Date when tax rate will be effective Calculation Method Either % of total or an amount per dollar Rate Enter either the percentage or the amount per dollar - On the user’s menu panel go to Common Info folder then click Tax Codes
- If there are existing records, Search Tax Codes screen will open
- If there is no existing record, the new Tax Codes screen will open
- From Search Tax Codes screen click New toolbar button
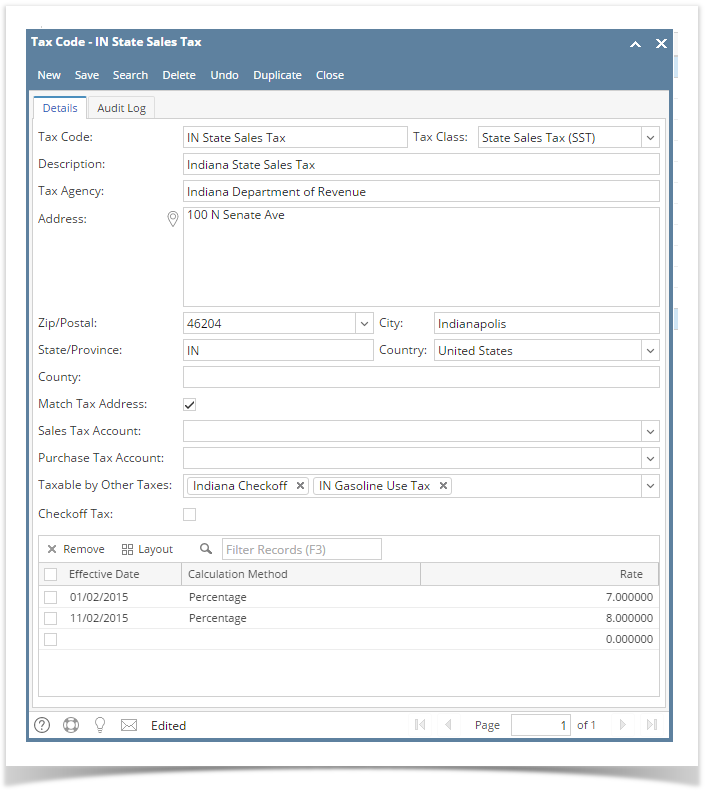
- Enter necessary details on the form

- Click Save toolbar button
Tax Code Tax code name (ie. Indiana Sales Tax) Description A more detailed description of the tax (optional) Tax Class User can select from different tax classes created in Tax Classes screen. Required field. Tax Agency This is who the tax check will be written to when payment is issued. This tax will be tracked to the tax agency. Address User enters address of tax agency. Zip/Postal Code Zip/Postal Code of the tax. Required field. State User can define the state associated with the tax. Needed to create templates from tax schedule. Required field. Country User can define the country associated with the tax. Needed to create templates from tax schedule. Required field. City User can define the city associated with the tax. Needed to create templates from tax schedule. Required field. County User can define the county associated with the tax. Match Tax Address Default to being checked. If unchecked, the system will not search for a match based on the address and will just tax if it is in the tax group list. Sales Tax Account Select from accounts under Sales Tax Account category and Purchase Tax Account category. Required field. Purchase Tax Account Select from accounts under Sales Tax Account category and Purchase Tax Account category. Required field. Taxable by Other Taxes A list of other existing tax codes Checkoff Tax If the check box is checked, the calculated amount will be offset into the invoice amount for that line item Motor Fuel Tax Category Displays values that matches the Tax Code's State/Province field Store Tax No. The tax code will be associated to the Store Tax No. entered used on Registers tracking Effective Date Date when tax rate will be effective Calculation Method Either % of total or an amount per dollar Rate Enter either the percentage or the amount per dollar - On the user’s menu panel go to Common Info folder then click Tax Codes
- If there are existing records, Search Tax Codes screen will open
- If there is no existing record, the new Tax Codes screen will open
- From Search Tax Codes screen click New toolbar button
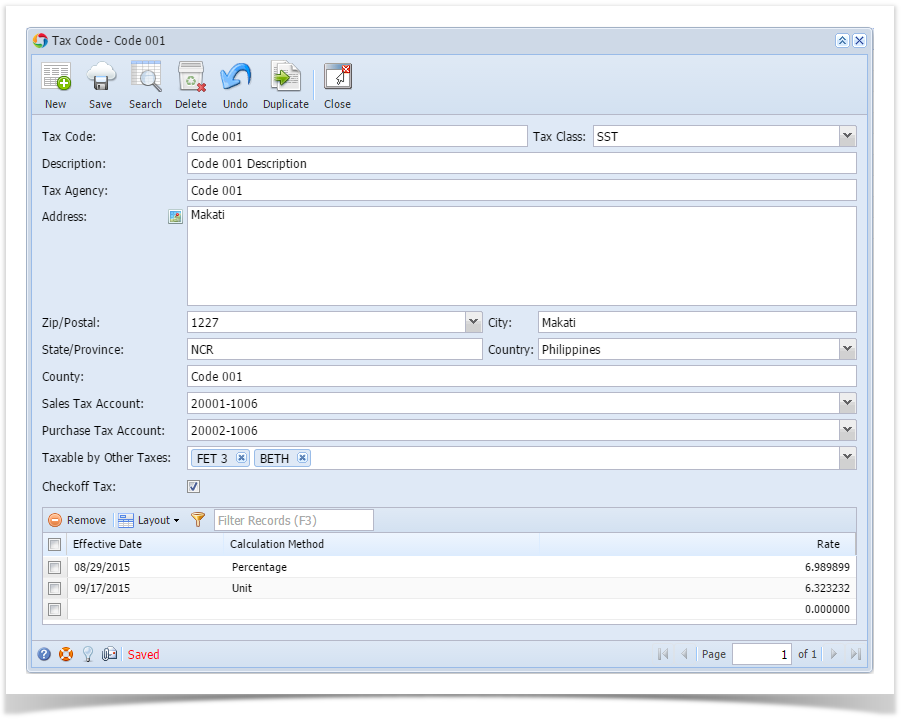
- Enter necessary details on the form

- Click Save toolbar button
- On the user’s menu panel go to Common Info folder then click Tax Codes
- If there are existing records, Search Tax Codes screen will open
- If there is no existing record, the new Tax Codes screen will open
- From Search Tax Codes screen click New toolbar button
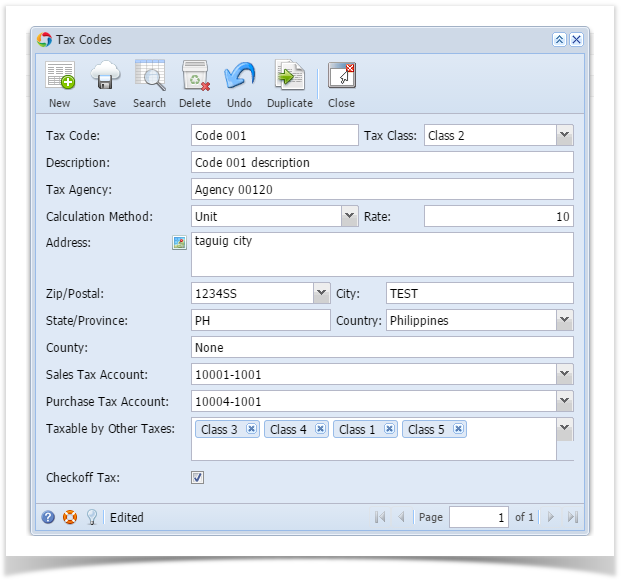
- Enter necessary details on the form
- Click Save toolbar button
- On the user’s menu panel go to Common Info folder then click Tax Codes
- If there are existing records, Search Tax Codes screen will open
- If there is no existing record, the new Tax Codes screen will open
- From Search Tax Codes screen click New toolbar button
- Enter necessary details on the form
Click Save toolbar button
- On the user’s menu panel go to Common Info folder then click Tax Codes
- If there are existing records, Search Tax Codes screen will open
- If there is no existing record, the new Tax Codes screen will open
- From Search Tax Codes screen click New toolbar button
- Enter necessary details on the form
- Click Save toolbar button
- From Common Info folder, double click Tax Code
- If there are existing records, Search Tax Codes screen will open
- If there is no existing record, the new Tax Codes screen will open
- From Search Tax Codes screen click New toolbar button
- Enter necessary details on the form
- Click Save toolbar button
- On the user’s menu panel go to Common Info folder then click Tax Codes
- From Card Fueling module, click Setup. The Setup screen will be displayed.
The default tab on Setup screen is the Network tab screen.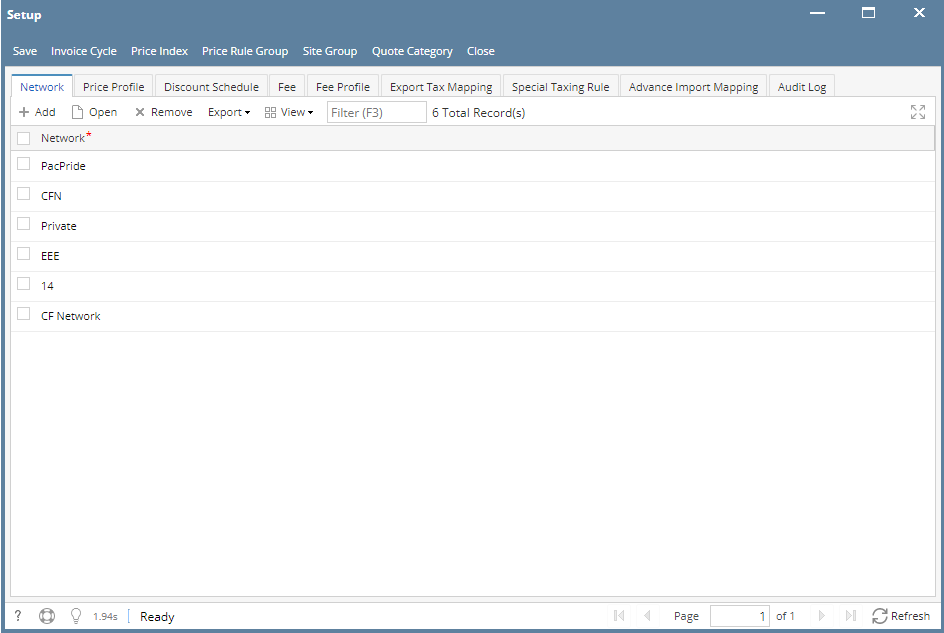
- Select a Network and click Open toolbar button. Network detail screen will be displayed.
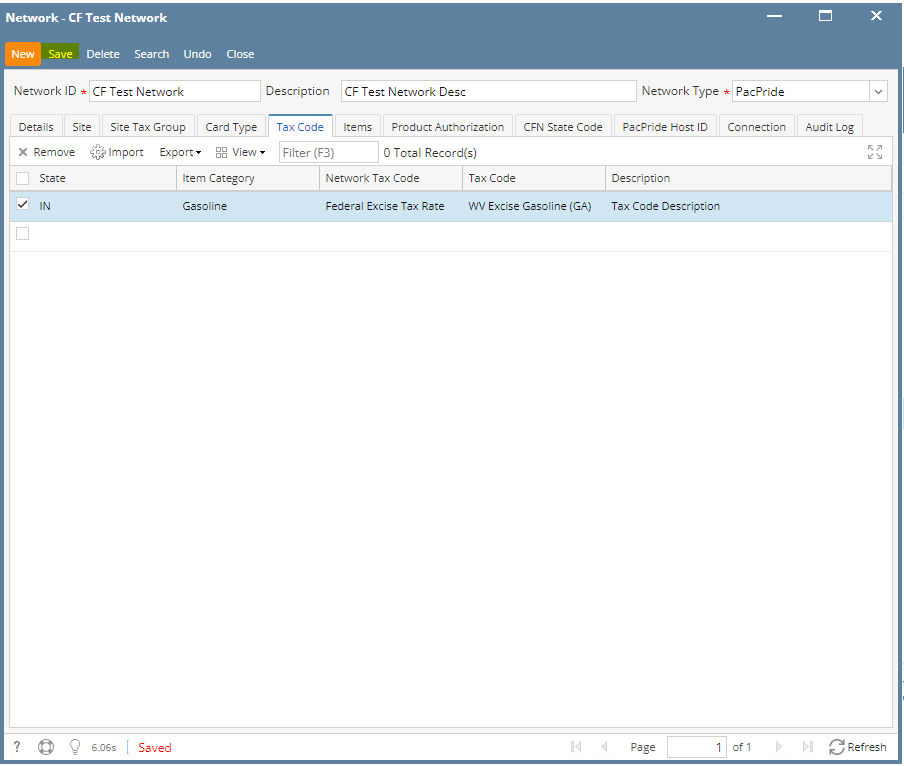
Navigate to Tax Code tab.
- Create a new Tax Code by entering field values on the first blank grid row then click Save toolbar button.
- From Card Fueling module, click Setup. The Setup screen will be displayed.
- The New PT File separates out Federal Lust and Federal Environmental Fee
Setup Index Pricing for Local Transactions as needed
You will not be able to setup pricing in the controller any longer
You will not be able to do Transfer Cost + Markup any longer
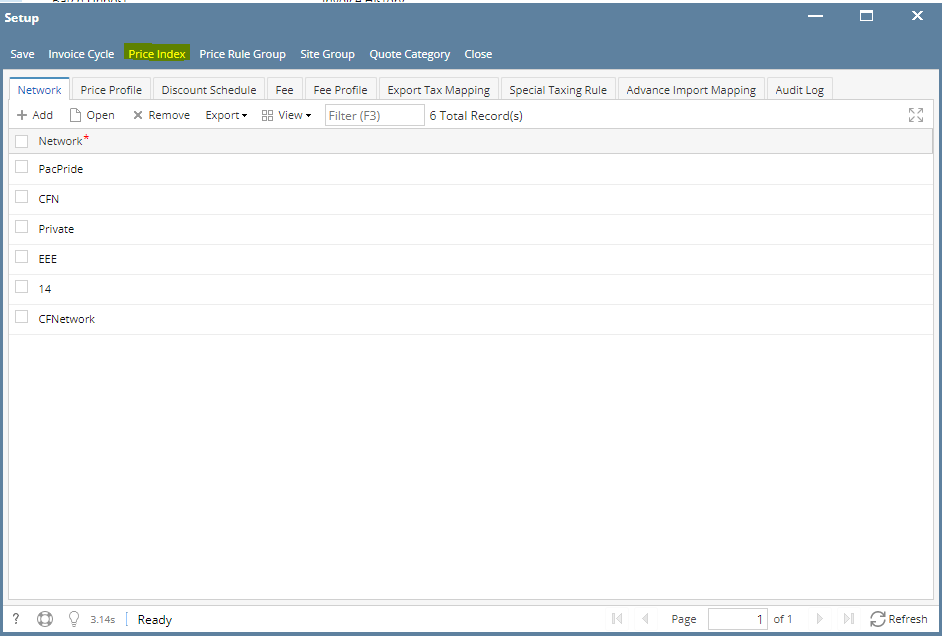
- From Card Fueling module, click Setup. The Setup screen will be displayed.
Click Price Index button. Price Index screen will be displayed.
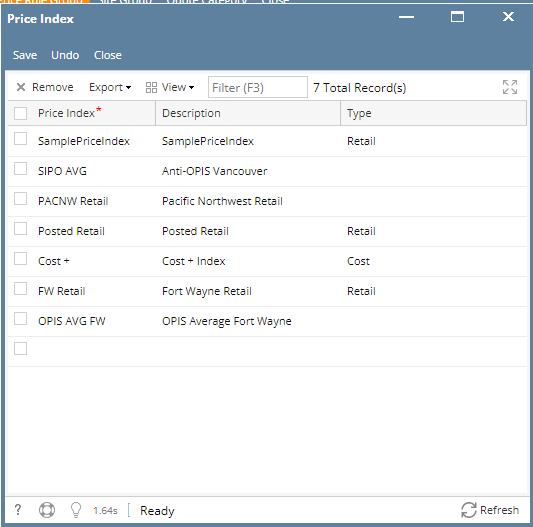
2. Click on the blank cell to enable typing action. Enter Price Index name, Description and Type.
Type has 3 selections: Retail, Cost, Fixed.
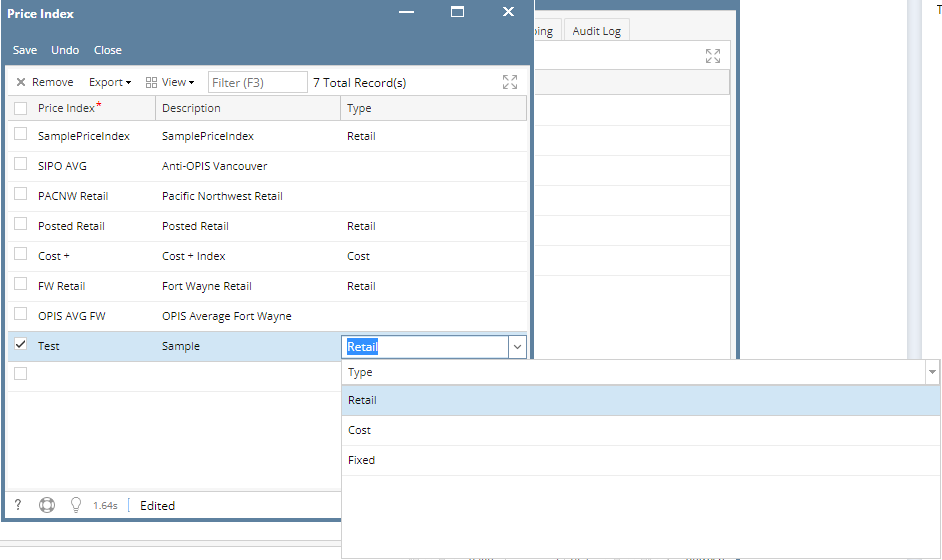
3. Click Save toolbar button to save created Price Index.
Then click the Close toolbar button or X button.- From Card Fueling module, click Setup. The Setup screen will be displayed.
- From Card Fueling module, click Setup. The Setup screen will be displayed.
The default tab on Setup screen is the Network tab screen.
- Select a Network and click Open toolbar button. Network detail screen will be displayed.
Navigate to Site tab.
- Select a Site then click Open grid button. The Site detail screen will be displayed.


- Modify any of the Site fields and/or columns. Click Save toolbar button and the changes will be saved.

- From Card Fueling module, click Setup. The Setup screen will be displayed.
- From Card Fueling module, click Setup. The Setup screen will be displayed.
Navigate to Price Profile tab. Select a Price Profile where you want to setup Price Index. Click Open toolbar button to open Price Profile details.
2. On Price Profile detail screen, you can find the Index column.Click on the drop down symbol to display all available Price Profile. Records will be coming from Card Fueling > Setup > Price Index.

3. Select Price Profile then click Save toolbar button.
Then click the Close toolbar button or X button.- From Card Fueling module, click Setup. The Setup screen will be displayed.
- From Card Fueling module, click Index Pricing By Site Groups. The Index Pricing By Site Group search screen will be displayed.

- Click New toolbar button. The Daily Index Prices screen will be displayed.


- Enter/Select the following required fields: Pricing Index ID, Site Group, Date.
Fill in the grid columns: A/R Product, Index Price
- Click Save toolbar button. The Pricing Index ID will append on the screen title.
Then click the Close toolbar button or X button.
- In the Index Pricing By Site Group search screen, the created Daily Index Price will be listed.

- From Card Fueling module, click Index Pricing By Site Groups. The Index Pricing By Site Group search screen will be displayed.

- Thoroughly Verify Transactions Grid for Pricing and Taxes
- Post Like Normal
- Invoicing will Run Like Normal


Overview
Content Tools