Here are the steps on how to batch post transactions using the Batch Posting screen shown above:
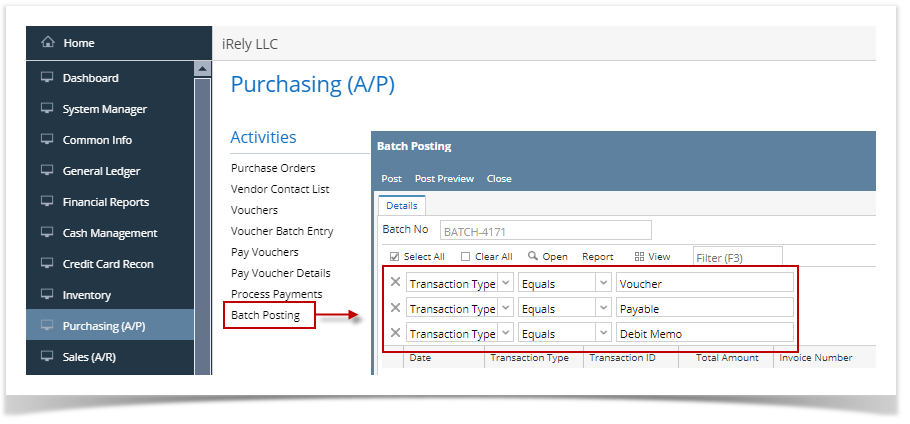
- Click Purchasing (A/P) from the main menu and click on Batch Posting under Activities list to open the screen.
Since the screen is opened under Purchasing module, transactions will be filtered by default by Voucher, Payable and Debit Memo transaction type.
If "Allow User to only Post Transactions they created" option from User Security is turned On for the User, the transactions created by other users will NOT be displayed on the grid. See How to Set User to Only Post Transactions they Created in Users Screen
Select the transactions you want to post and then click Post button. Batch Posting Details screen will open showing if selected transaction failed or is successfully posted.
Here are the steps on how to batch post transactions using the Batch Posting screen shown above:
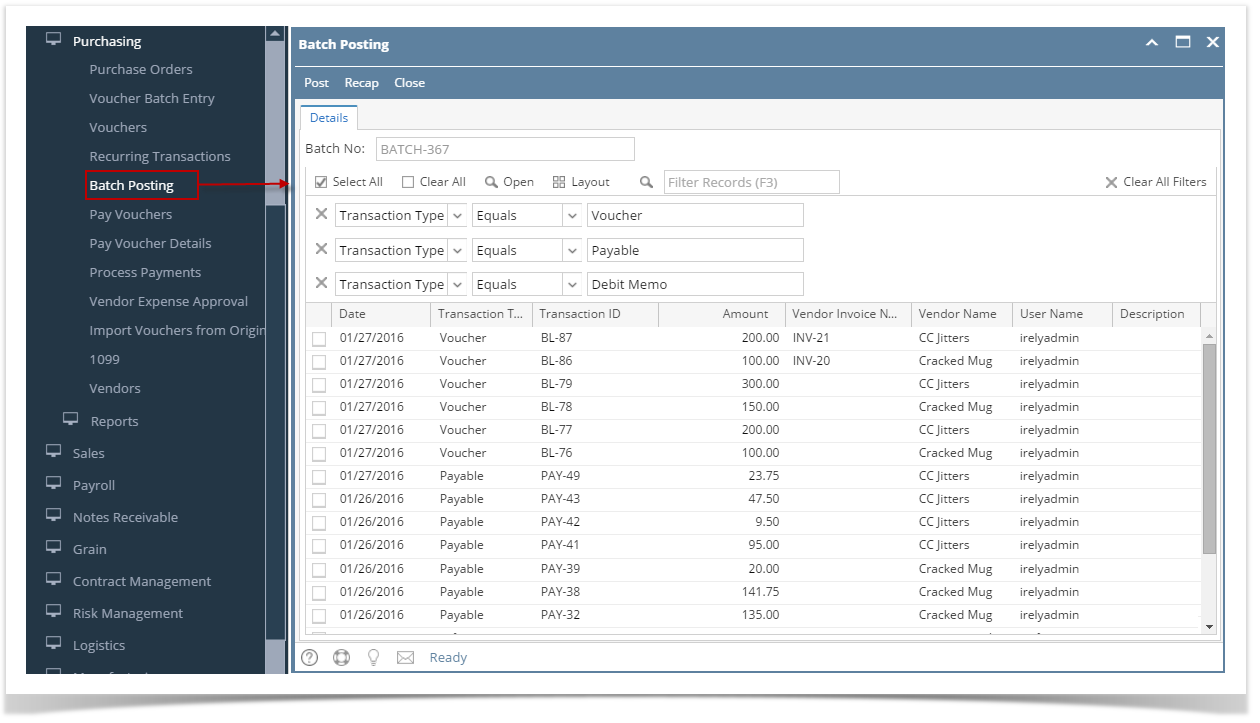
- Expand Purchasing menu and click on Batch Posting to open the screen.
Since the screen is opened under Purchasing module, transactions will be filtered by default by Voucher, Payable and Debit Memo transaction type.
If "Allow User to only Post Transactions they created" option from User Security is turned On for the User, changing of user is not allowed. See How to Set User to Only Post Transactions they Created in Users Screen
- Select the transaction and then click Post button. Batch Posting Details screen will open showing if selected transaction failed or is successfully posted.

Here are the steps on how to batch post transactions using the Batch Posting screen shown above:
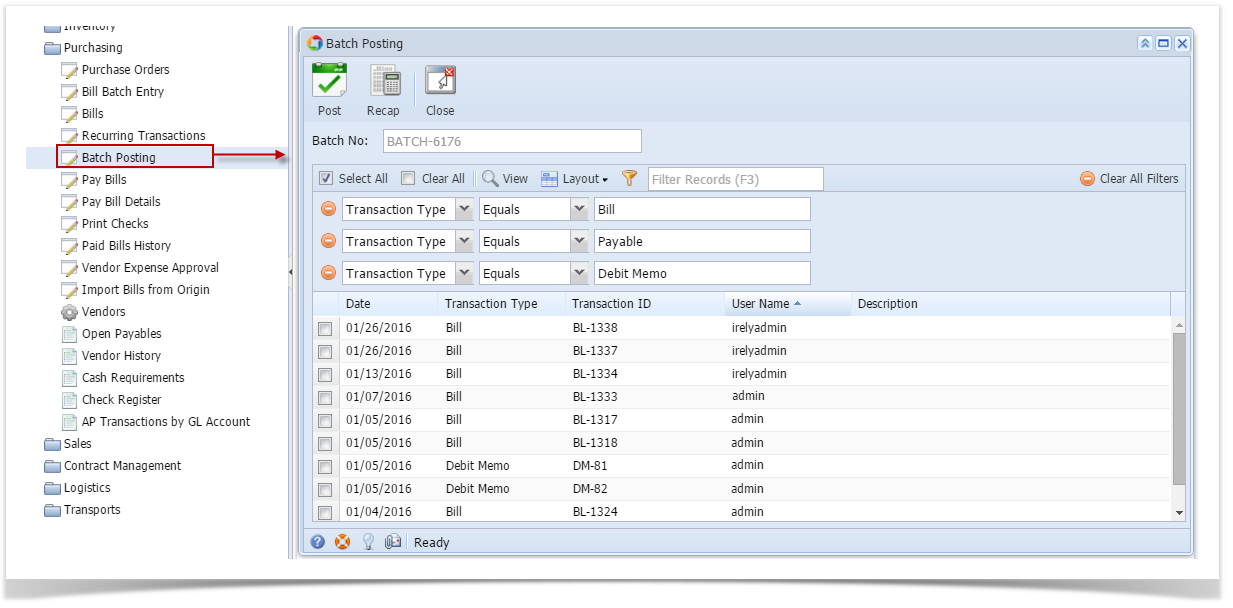
- Expand Purchasing menu and click on Batch Posting to open the screen.
Since the screen is opened under Purchasing module, transactions will be filtered by default by Bill, Payable and Debit Memo transaction type.
If "Allow User to only Post Transactions they created" option from User Security is turned On for the User, changing of user is not allowed. See How to Set User to Only Post Transactions they Created in Users Screen
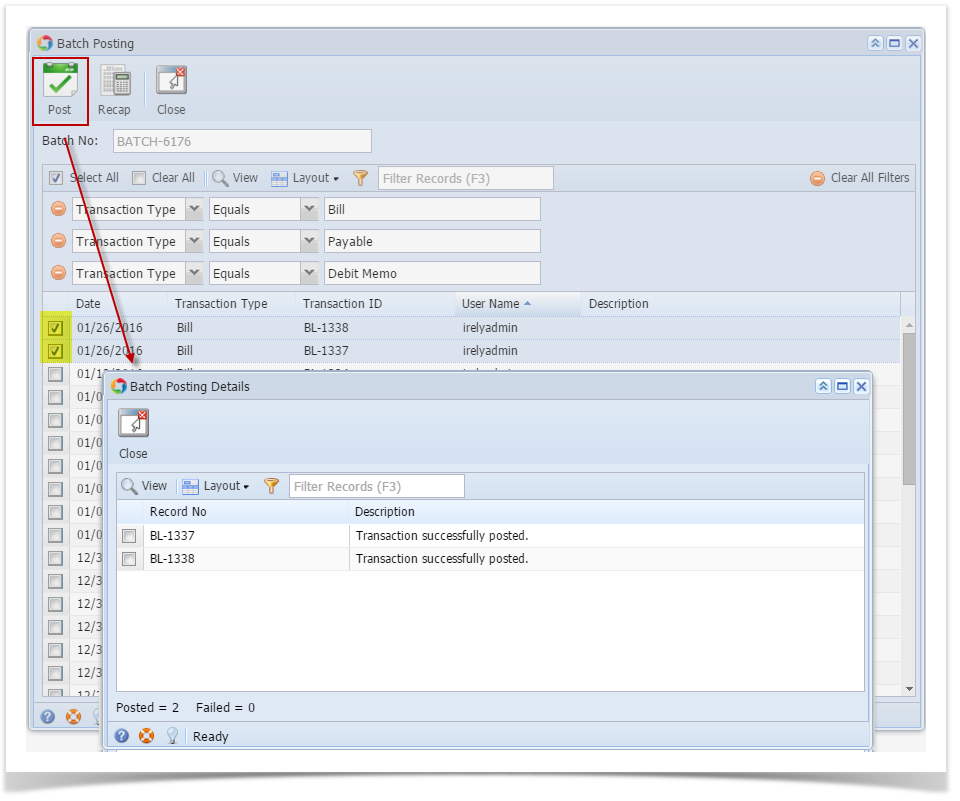
- Select the transaction and then click Post button. Batch Posting Details screen will open showing if selected transaction failed or is successfully posted.
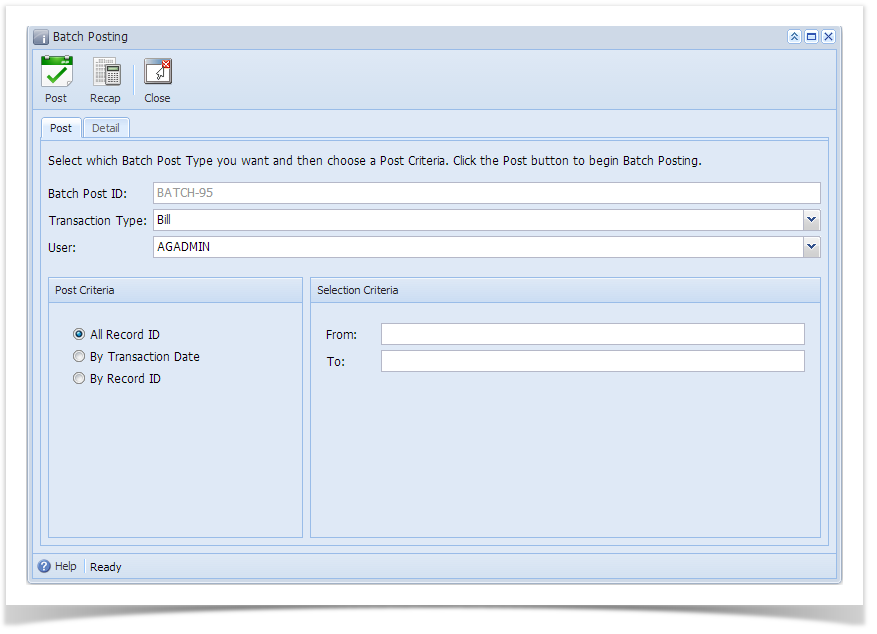
Here are the steps on how to batch post transactions using the Batch Posting screen shown above:
- Open Batch Posting screen by clicking Batch Posting from Accounts Payable > Activities menu.
- By default, Transaction Type is set to Bill. Click on the combo box button and select different type if you are going to batch post different transaction types.
User Name by default is set to the user you are currently logged in. To change user, click on the combo box button and select different user from the combo box list.
If "Allow User to only Post Transactions they created" option from User Security is turned On for the User, changing of user is not allowed. See How to Set User to Only Post Transactions they Created in Users Screen
- Set the Post Criteria.
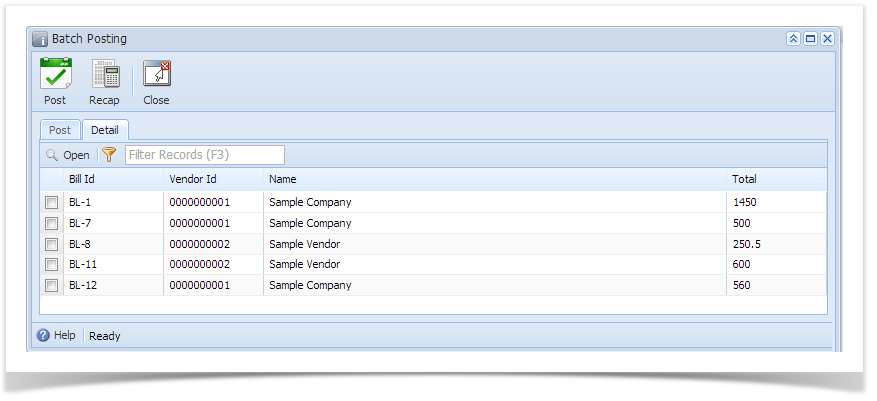
Batch posting All Record ID- If All Record ID is selected, all unposted journals under the selected type as long as it is balanced will be displayed on the Details tab.
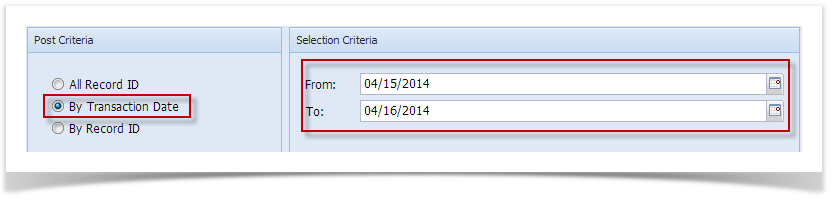
- If By Transaction Date is selected, you have to enter From and To Date on Selection Criteria panel.
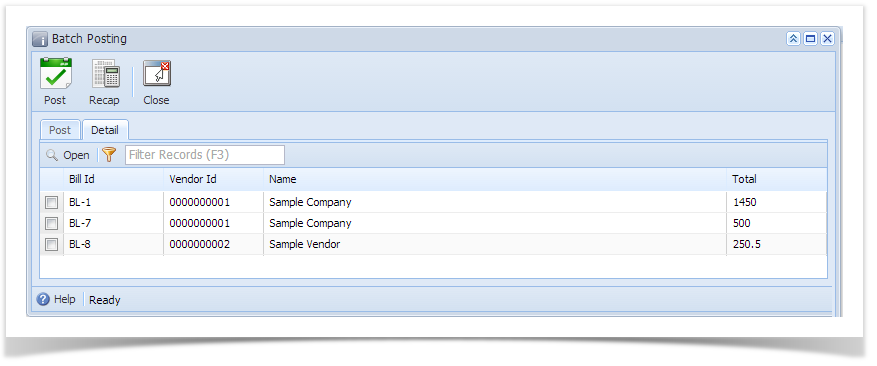
- Click on the combo box button and select From and To Date from the mini calendar screen or manually enter dates. In this scenario, all transactions within the selected date range will be displayed on the Details tab.
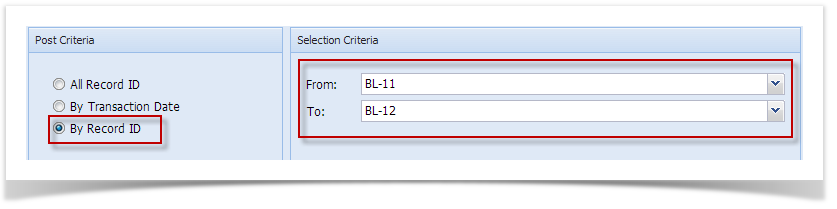
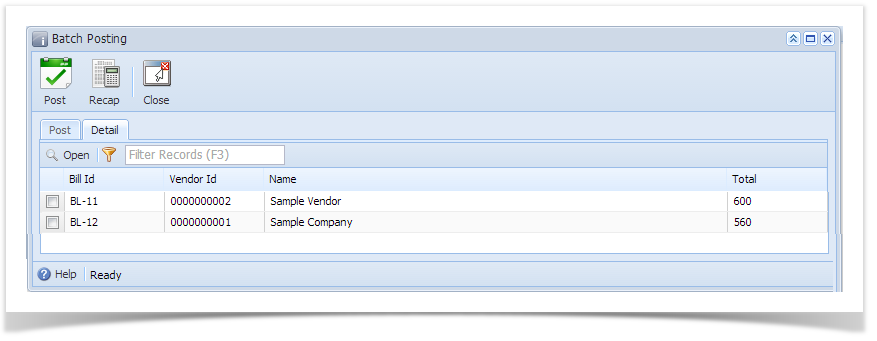
- If By Record ID is selected, you have to enter From and To Journal ID on Selection Criteria panel.
- Click on the combo box button to open the combo box where you can select unposted transactions from the list. In this scenario, all transactions within the selected Journal ID range will displayed in the Details tab.
- If All Record ID is selected, all unposted journals under the selected type as long as it is balanced will be displayed on the Details tab.
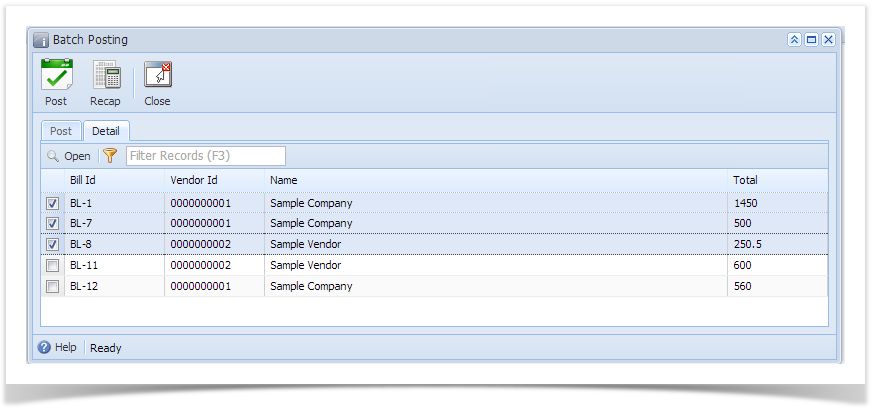
- On the Details tab, check the filtered transactions you want to batch post and click Post toolbar button.
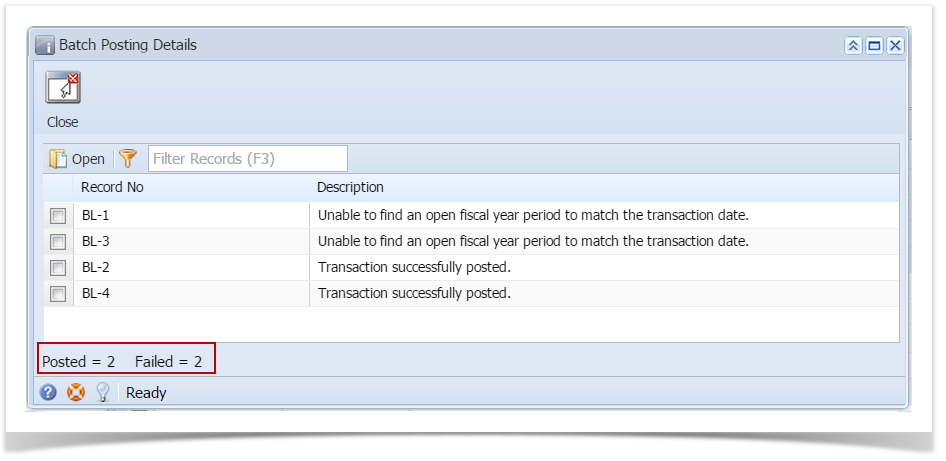
After batch posting has been completed, Batch Posting Details screen will open showing how many transactions were posted and how many fails.
Overview
Content Tools