| Module | Description | How To | ||
|---|---|---|---|---|
| Payroll | Payroll Setup | |||
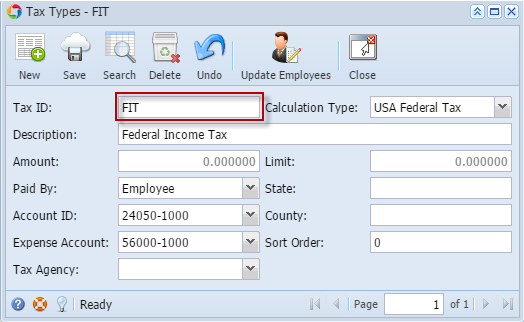
| Go to Payroll menu > Tax Types | |||
Enter the Tax ID, select the Calculation Type from the list. Select the Paid By that will indicate if this is an Employee or Company Tax Fill in the other fields and click the Save button
| ||||
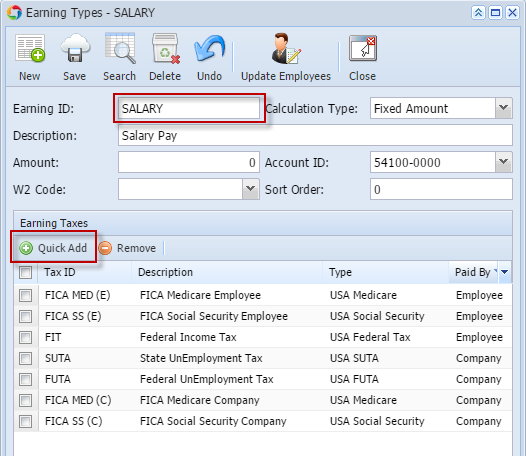
| 2. Create Earning Type | Go to Payroll menu > Earning Types | |||
Enter the Earning ID and select the Calculation Type from the list. Click the Quick Add grid button to add the created Tax type so that when you select the Earning ID in the Employee screen, Taxes will automatically populated.
| ||||
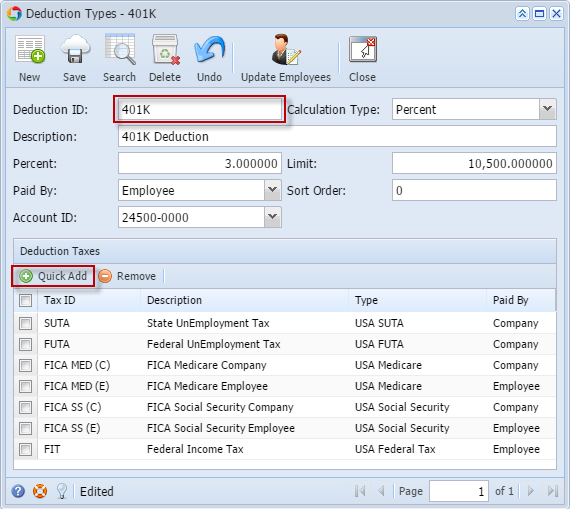
| 3. Create Deduction Type | Go to Payroll menu > Deduction Types | |||
Enter the Deduction ID and select the Calculation Type from the list. Click the Quick Add grid button to add the Employee and Company Taxes so that when this Deduction ID is selected in the Employee screen,Taxes will automatically populated.
| ||||
| 4. Create Employee Pay Group | From Payroll menu > Employee Pay Groups | |||
Enter the Pay Group, Description and select the Cash Account in the Bank Account field that will be the default when you create an Employee Paycheck | ||||
| 5. Create Employee | Go to Payroll menu > Employees | |||
Enter an Employee No and the Employee details. Select the Pay Period.
| ||||
| Under Taxes tab | Click the Add grid button to add all the Employee and Company Taxes to be used when you create Paycheck | |||
| After adding the Taxes, select the Federal Tax (Ex.FIT) then change the Federal Filing Status. The system will check the Filing status to auto compute the Employee and Company Taxes in Paycheck. | ||||
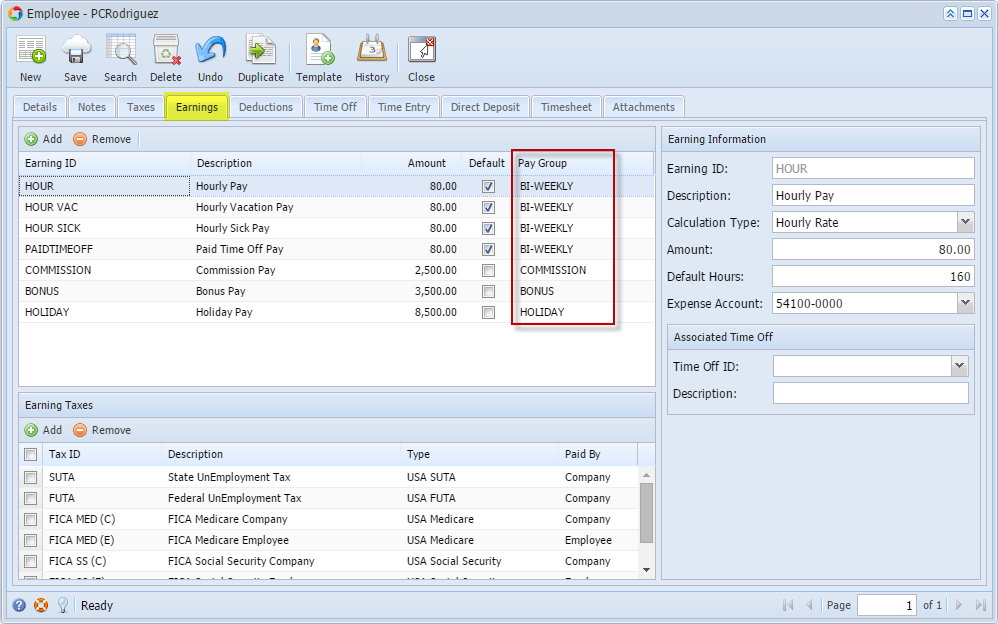
| Under Earnings tab | Click the Add grid button to select the Employee Earning ID's. Select Pay Group on each of the Employee Earnings.
| |||
| Select the added Earning Id and enter the Amount and Default Hours that will automatically use when you create Paycheck | ||||
| Under Deductions tab | Click the Add grid button to add the Deduction ID | |||
| Create single Employee Paycheck | ||||
| Create Employee Paycheck | Go to Payroll > Paychecks, click the New toolbar button and select the Employee | |||
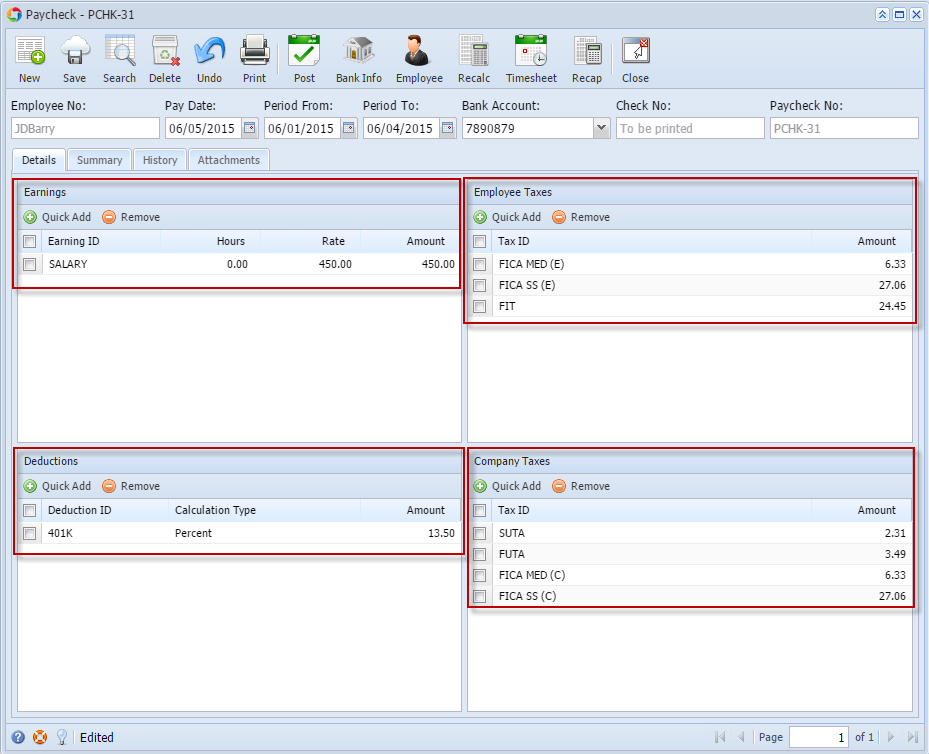
Employee Paycheck screen will open with the auto-computed Taxes
| ||||
| You can manually change the Rate of the EarningID then click the Recalc toolbar button to recalculate the Taxes | ||||
| Hit the Post button. | ||||
| Use of Timecard for Employee Time Entries | ||||
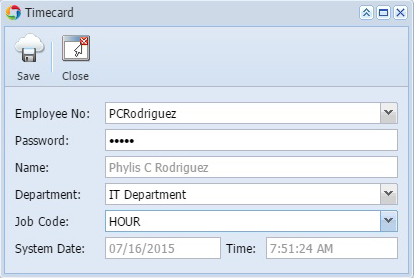
| Punch In and Out | From Payroll module, click the Timecard | |||
Select the Employee No., enter the Password, select the Department and Job Code.
| ||||
| Click the Save button to punch IN (Time In) and to punch OUT (Time Out) | ||||
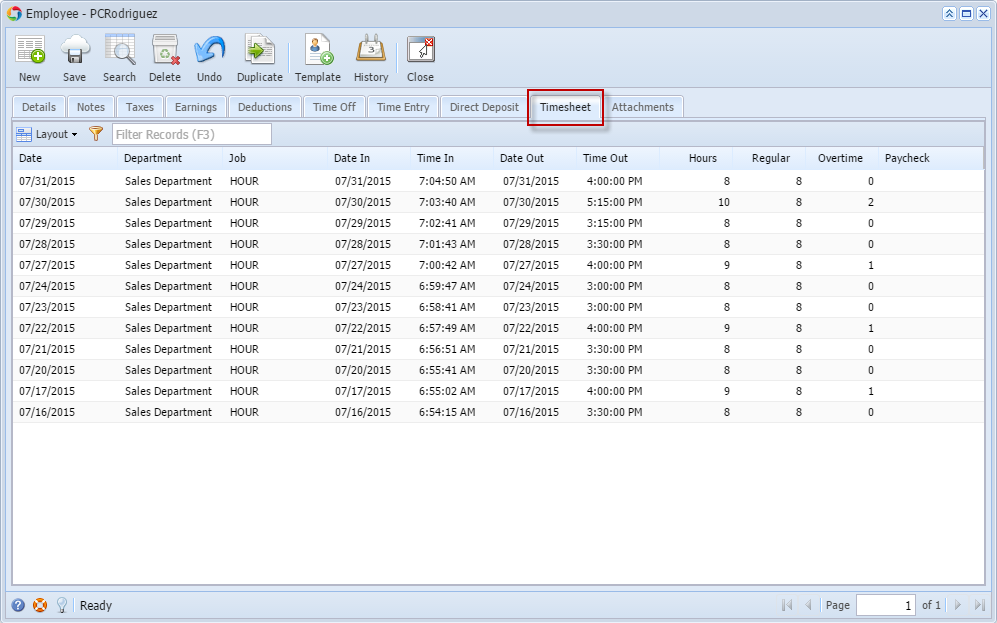
Employee Time Entries are displaying in Employee screen > Timesheet tab.
| ||||
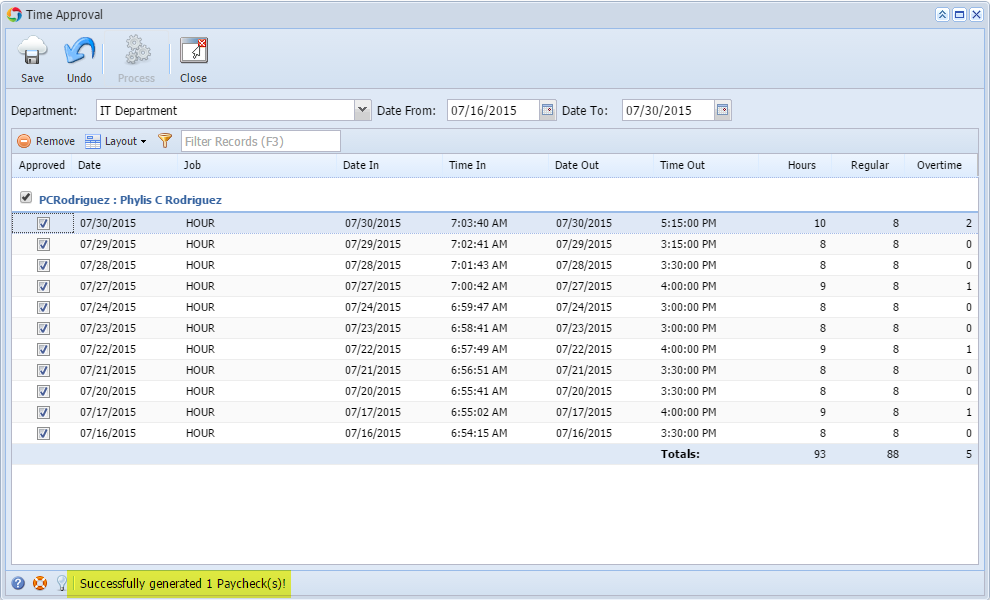
| Time Approval, Approving Employee Time Entries by the Supervisor | ||||
| Employee Supervisor (per Department) must approved the Employee Time Entries. | ||||
| From Payroll module, click the Time Approval | ||||
The Supervisor must select the Department, filter the Date Range and allows to modify the Employee Time Entries then click the checkbox to Approve. | ||||
| Hit the Save toolbar button. | ||||
| Time Approval - Create Employee Paychecks by the Payroll Admin | ||||
| From the Payroll module, click the Time Approval | ||||
| Payroll Admin should only allowed to create / process Employee Paychecks based on the Approved Time Entries. | ||||
Click the Process toolbar button.
| ||||
| Process Pay Groups - Create multiple Employee Paychecks per selected Pay Group | ||||
| From Payroll module, click the Process Pay Groups. | ||||
| Select the Pay Groups that you would want to process for creating of paychecks. | ||||
Click the Process toolbar button to create Paychecks
| ||||
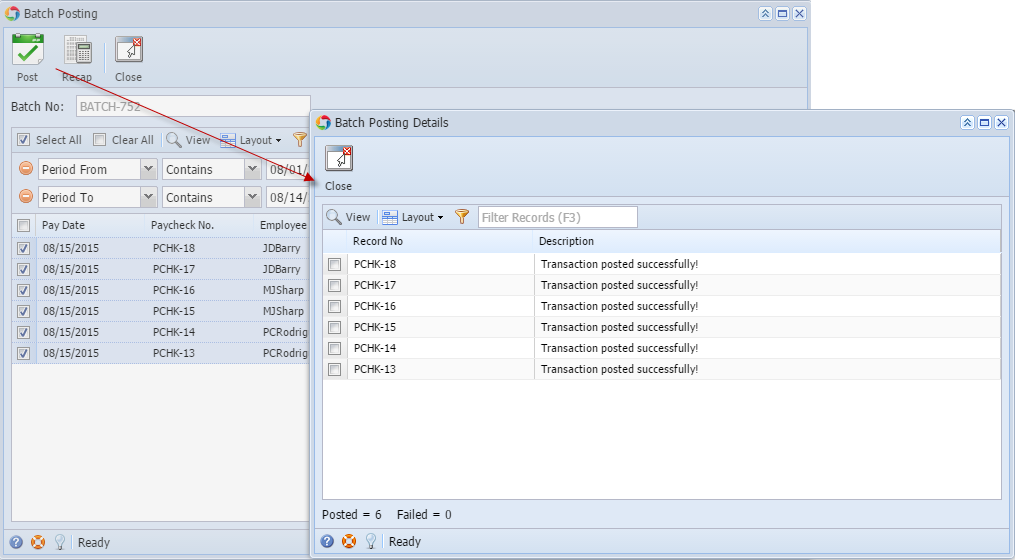
| Batch Post - Multiple Unposted Paychecks | ||||
| From Payroll module, click the Batch Post | ||||
| All unposted paychecks are displaying. Check the checkbox to select the Paychecks to batch post. | ||||
Click the Post toolbar button
| ||||
| Selected paychecks were posted. | ||||
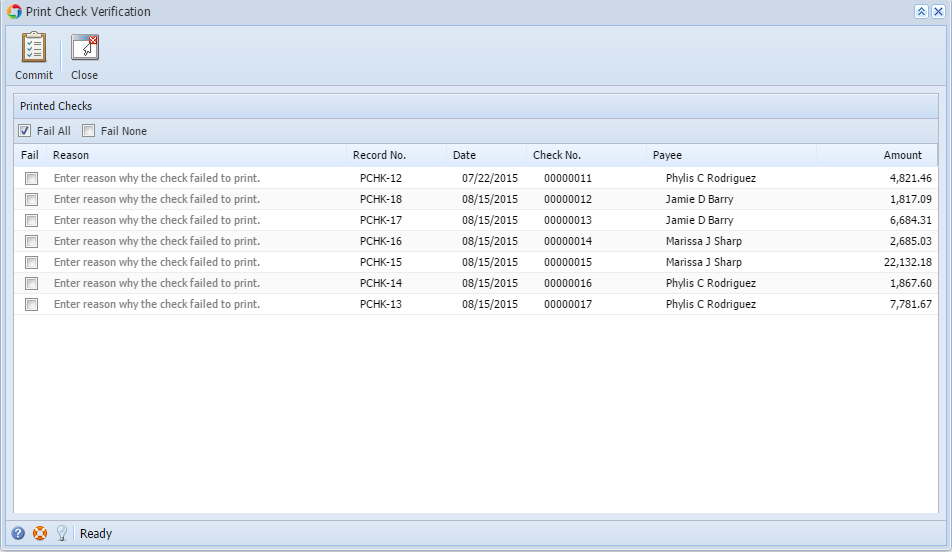
| Print Checks - Multiple posted paychecks | ||||
| From Payroll module, click the Print Checks | ||||
| Select the Bank Account ID to display the list of posted Paychecks to be Printed | ||||
Select the Paychecks by checking the checkboxes.
| ||||
| Select the Check Format report and click the Preview toolbar button to preview the paycheck reports. | ||||
Print the paychecks and the Print Check Verification screen will be shown.
| ||||
| Click the Commit toolbar button. | ||||
| Paychecks should be tagged as Printed and Posted with an assigned Check Nos. |


Overview
Content Tools