Page History
...
- From Cash Management > click on Bank File Formats
- If this is a first record, it will default to new Bank File Formats screen to add the bank file format record. Otherwise, it will open the Search Bank File Formats search screen. Click the New toolbar button to open the new Bank File Formats screen.
- In new Bank File Formats screen,
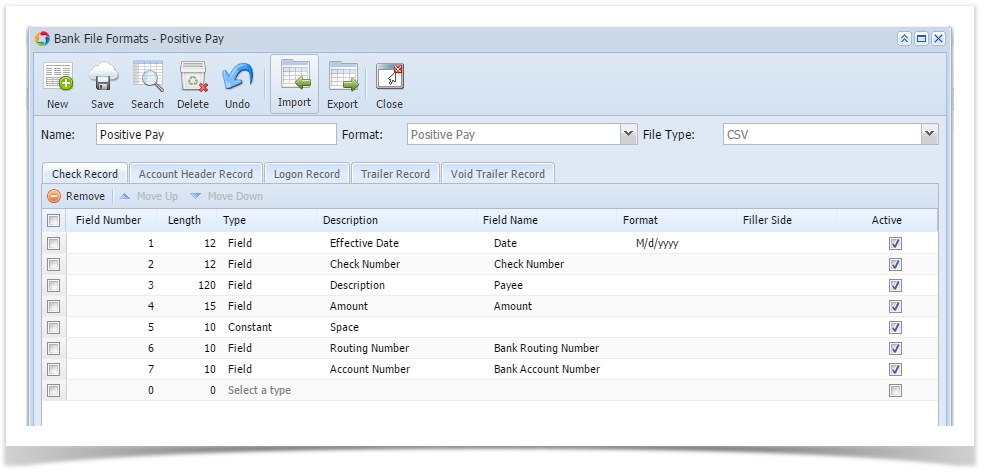
- Fill in the Name to call the Bank File Formats record in the Name field.
i.e. Positive Pay - In Format combo box field select Positive Pay.
- In File Type combo box field select CSV.
- In the grid area > Check Record tab, specify your Positive Pay setup. This is an example how a setup would be.
- Click Save toolbar button to save the bank file format record.
- Click Close toolbar button to close the screen.
a. Under Electronic Bank File Information, select the bank file format "Positive Pay" created from step 3.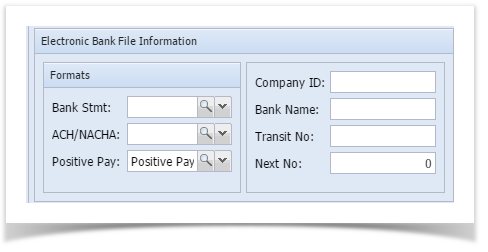
b. Click Save toolbar button to save the bank accounts record.
c. Click Close toolbar button to close the screen.
Note:
Positive Pay transaction should be:
a. Posted
b. Printed
c. Payment Method is not Cash and ACH
5. From Cash Management > click on Bank File Export
a. Select the bank account you wish to generate the report file from.
b. To filter the transaction record/s, click on From and To fied.
c. Select Positive Pay on Type field.
d. Select the transaction/s on the grid to generate. The selected transaction will be process and will automatically download the generated file.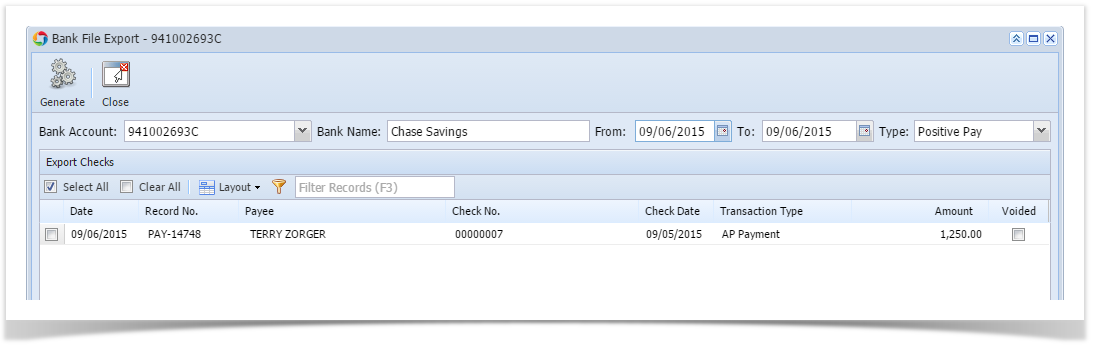
- Fill in the Name to call the Bank File Formats record in the Name field.
...
Overview
Content Tools