Page History
...
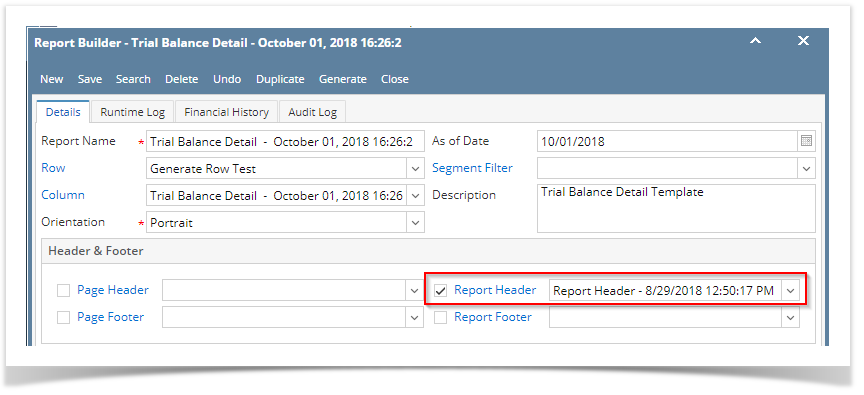
This is how Printed Time header/footer setup will look like.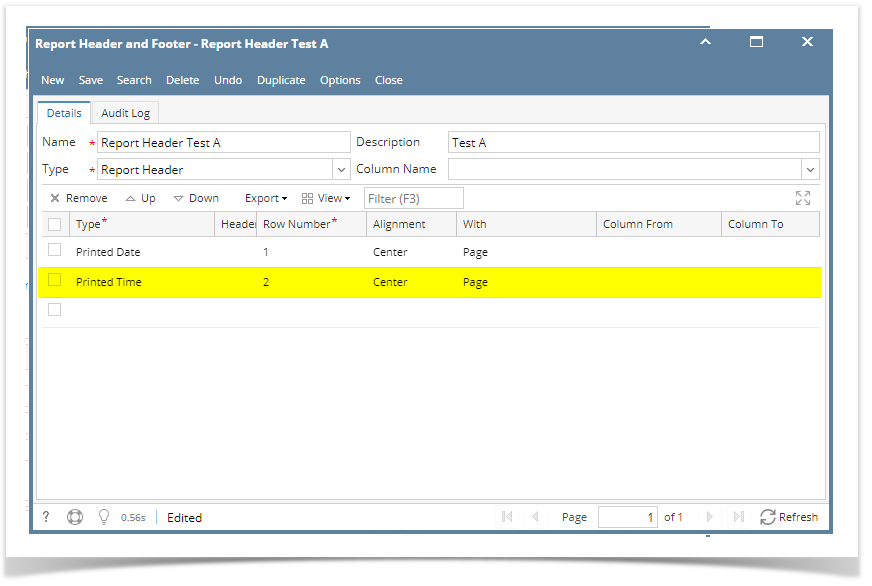
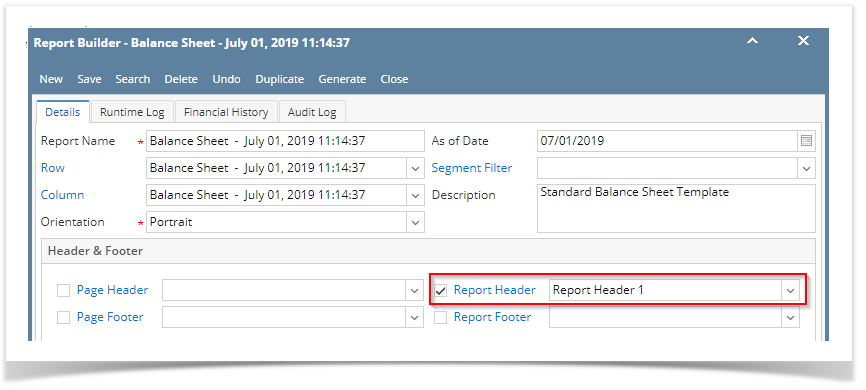
Select this Report Footer in the Report Builder and make sure that the checkbox before it is checked when printing/previewing the report.
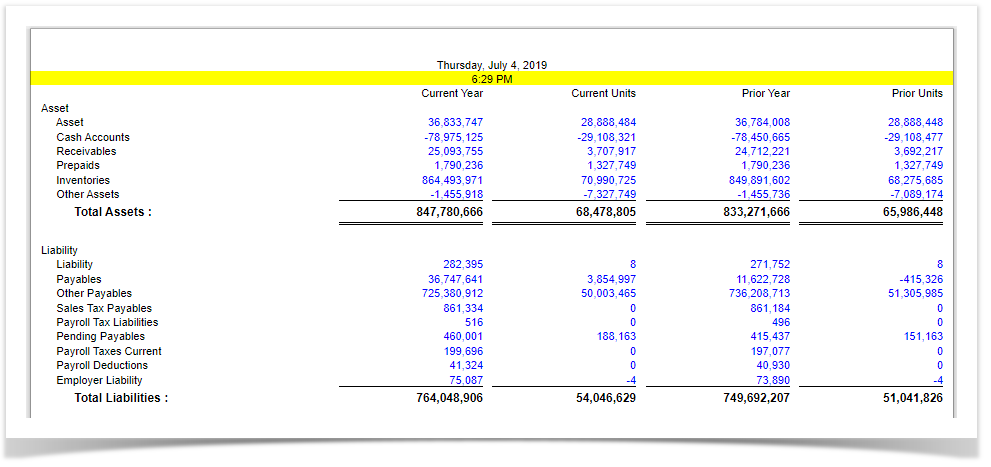
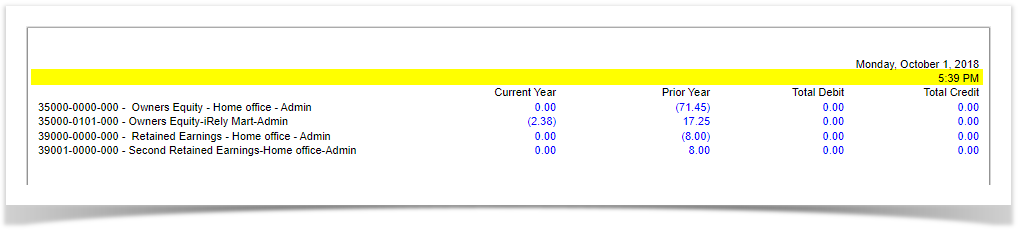
Here's how it is shown when report is previewed/printed. Highlighted section is the Printed Time type header/footer. Since this is a report header, this will show on the first page of the report only.
You can enhance this header/footer by setting its Font Properties and Row Height. See How to Configure header and footer font properties and row height topic to guide you on how to do this.
| Expand | ||
|---|---|---|
| ||
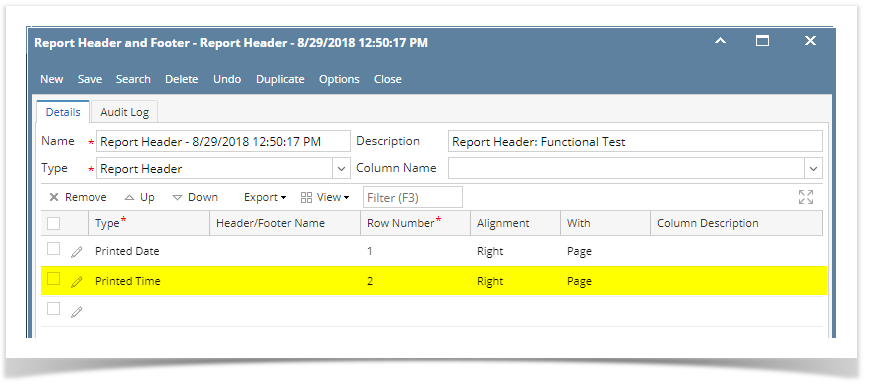
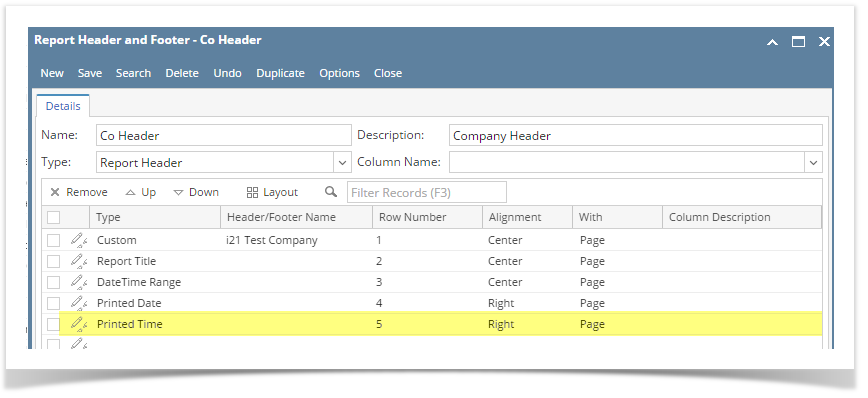
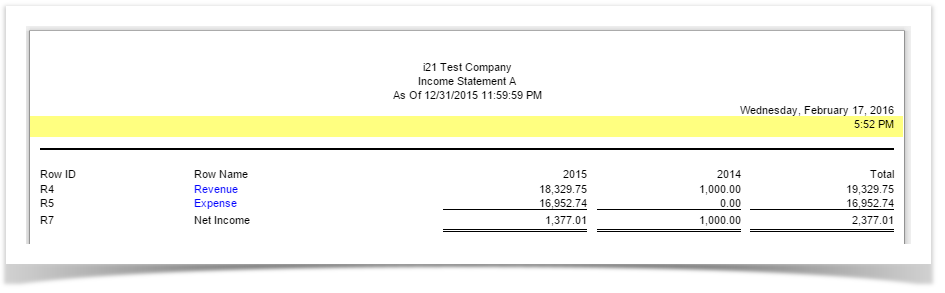
The Printed Time header/footer is used to add a date when the financial report was printed. Follow the steps below to guide you on how to add printed Date report footer.
This is how Printed Time header/footer setup will look like. Select this Report Footer in the Report Builder and make sure that the checkbox before it is checked when printing/previewing the report.
Here's how it is shown when report is previewed/printed. Highlighted section is the Printed Time type header/footer. Since this is a report header, this will show on the first page of the report only.
You can enhance this header/footer by setting its Font Properties and Row Height. See How to Configure header and footer font properties and row height topic to guide you on how to do this. |
| Expand | ||
|---|---|---|
| ||
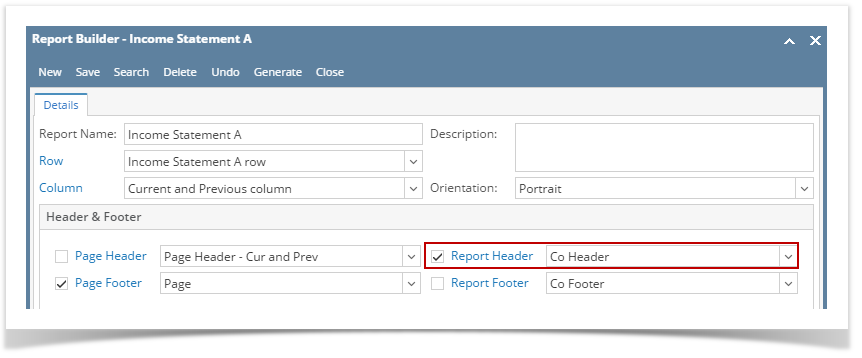
The Printed Time header/footer is used to add a date when the financial report was printed. Follow the steps below to guide you on how to add printed Date report footer.
This is how Printed Time header/footer setup will look like. Select this Report Footer in the Report Builder and make sure that the checkbox before it is checked when printing/previewing the report.
Here's how it is shown when report is previewed/printed. Highlighted section is the Printed Time type header/footer. Since this is a report header, this will show on the first page of the report only.
You can enhance this header/footer by setting its Font Properties and Row Height. See How to Configure header and footer font properties and row height topic to guide you on how to do this. |
...
Overview
Content Tools