This install procedure is applicable installing i21 for the first time with new database or new i21 with an existing database.
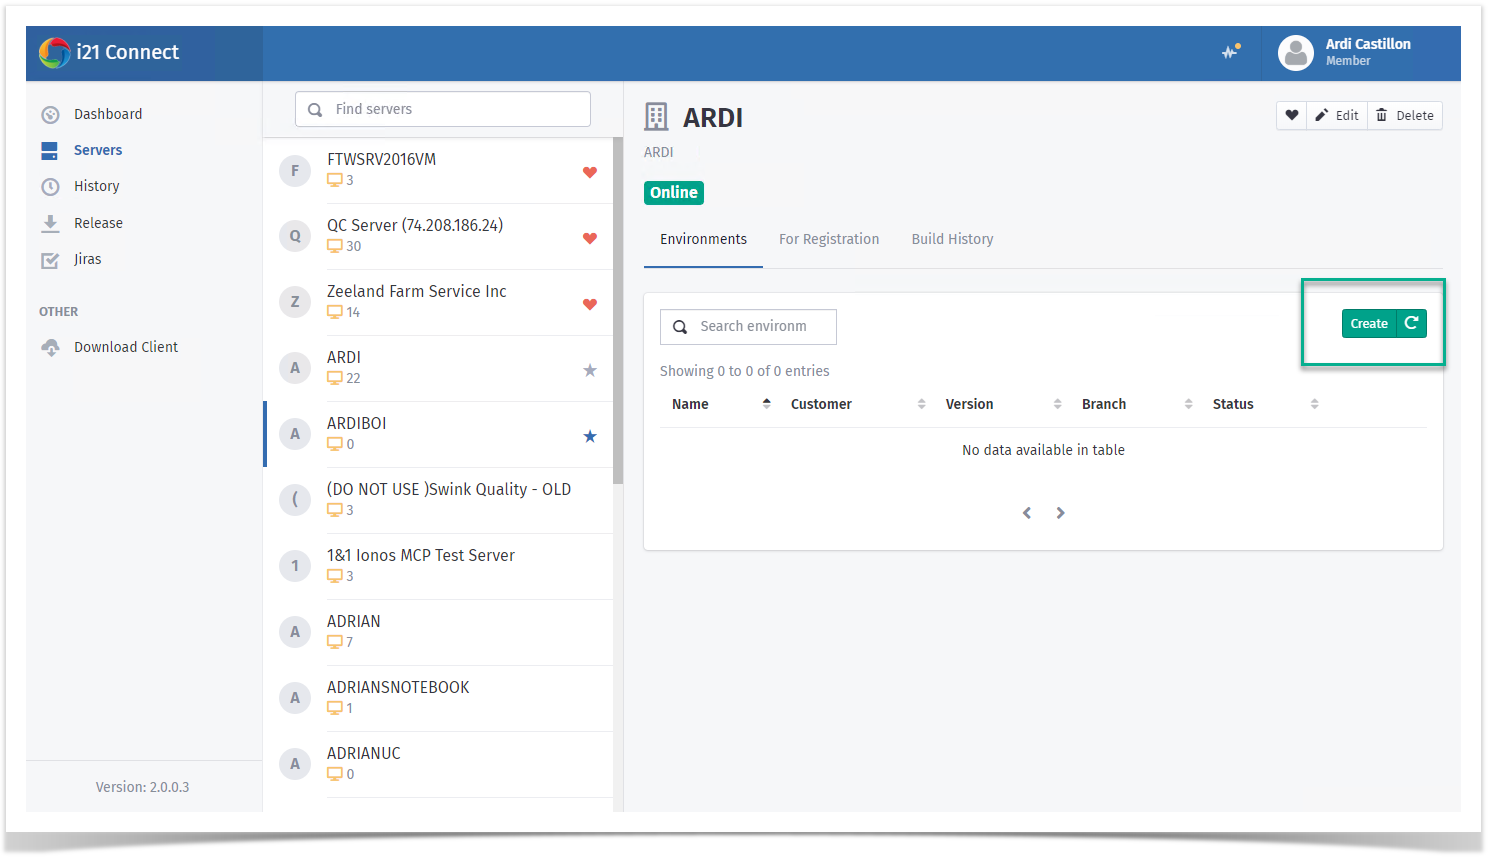
1. Login to i21 Connect and click Servers. Locate your server by typing in the name on the search box. Click on the Create button.
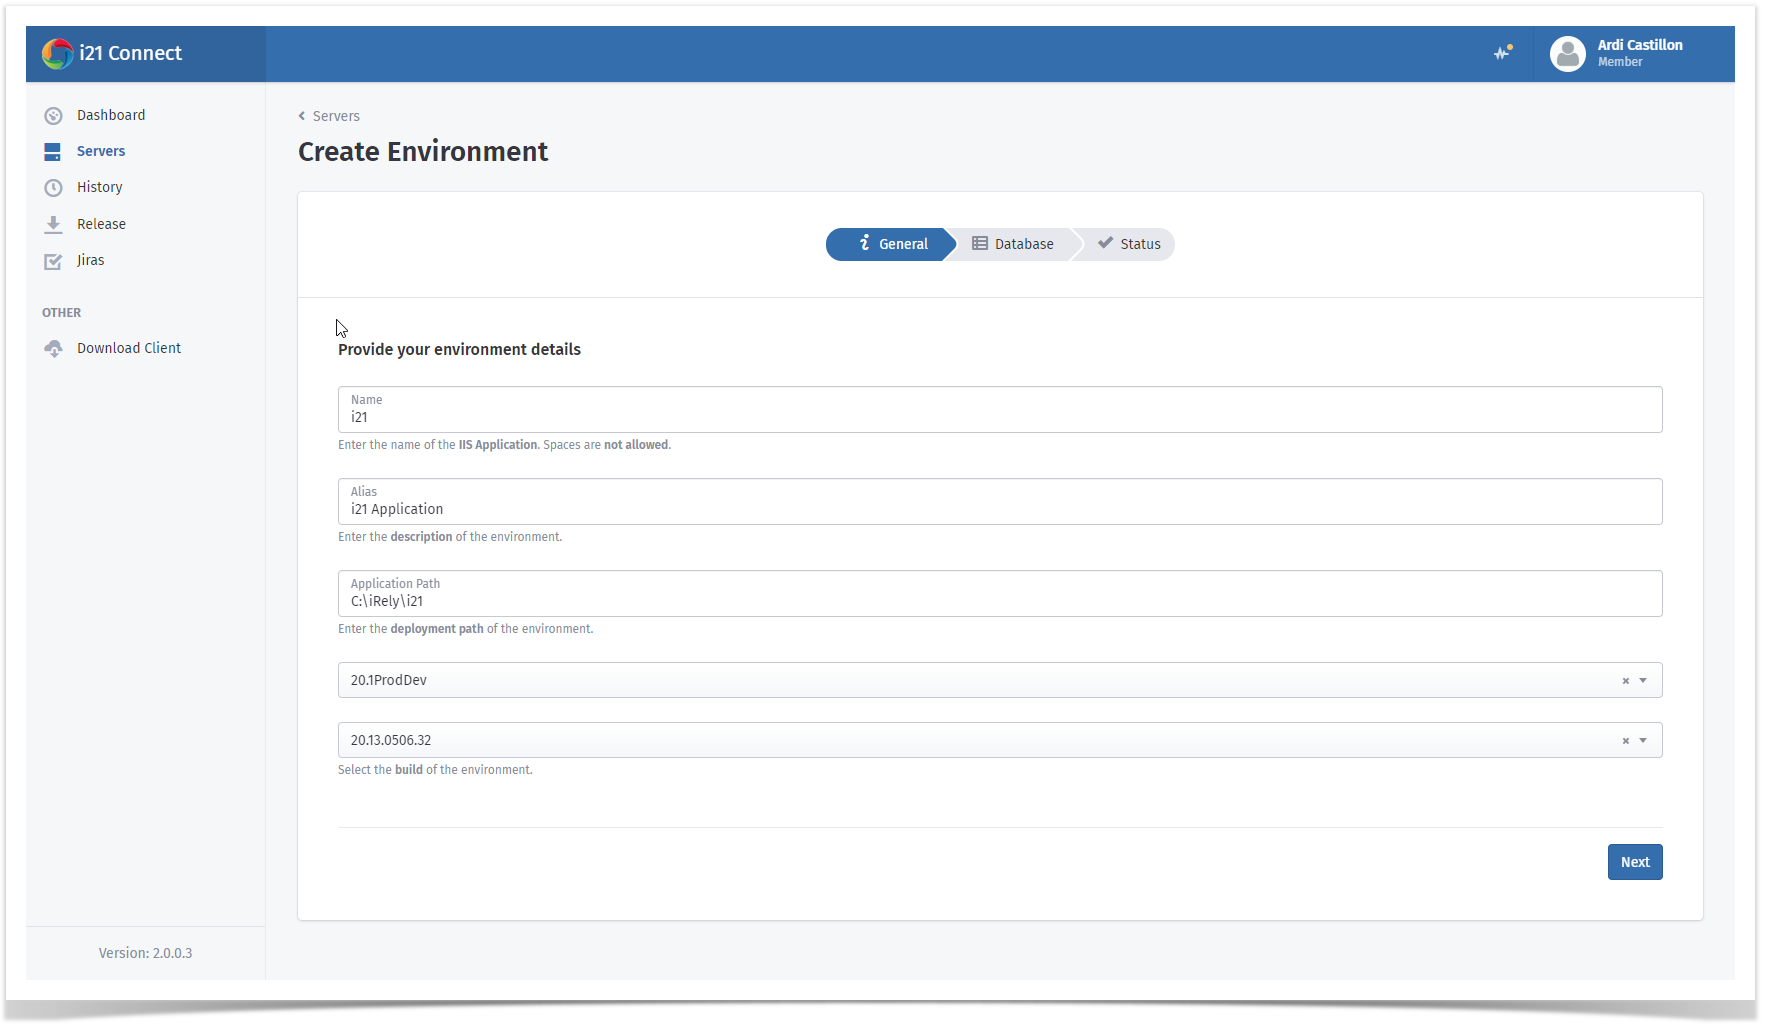
2. Provide the following details:
- Name: Defines the IIS name of the application. Spaces are not allowed.
- Alias: Environment description
- Application Path: Enter the deployment path here. i21 Connect automatically creates the folder based on the entered application path.
- i21 Version: select the i21 version.
- i21 Build Number: select the i21 build number. The latest build will always appear first.
Click Next.
3. Enter the database details. Always note that New Database is selected by default for fresh database creation. Click Next.
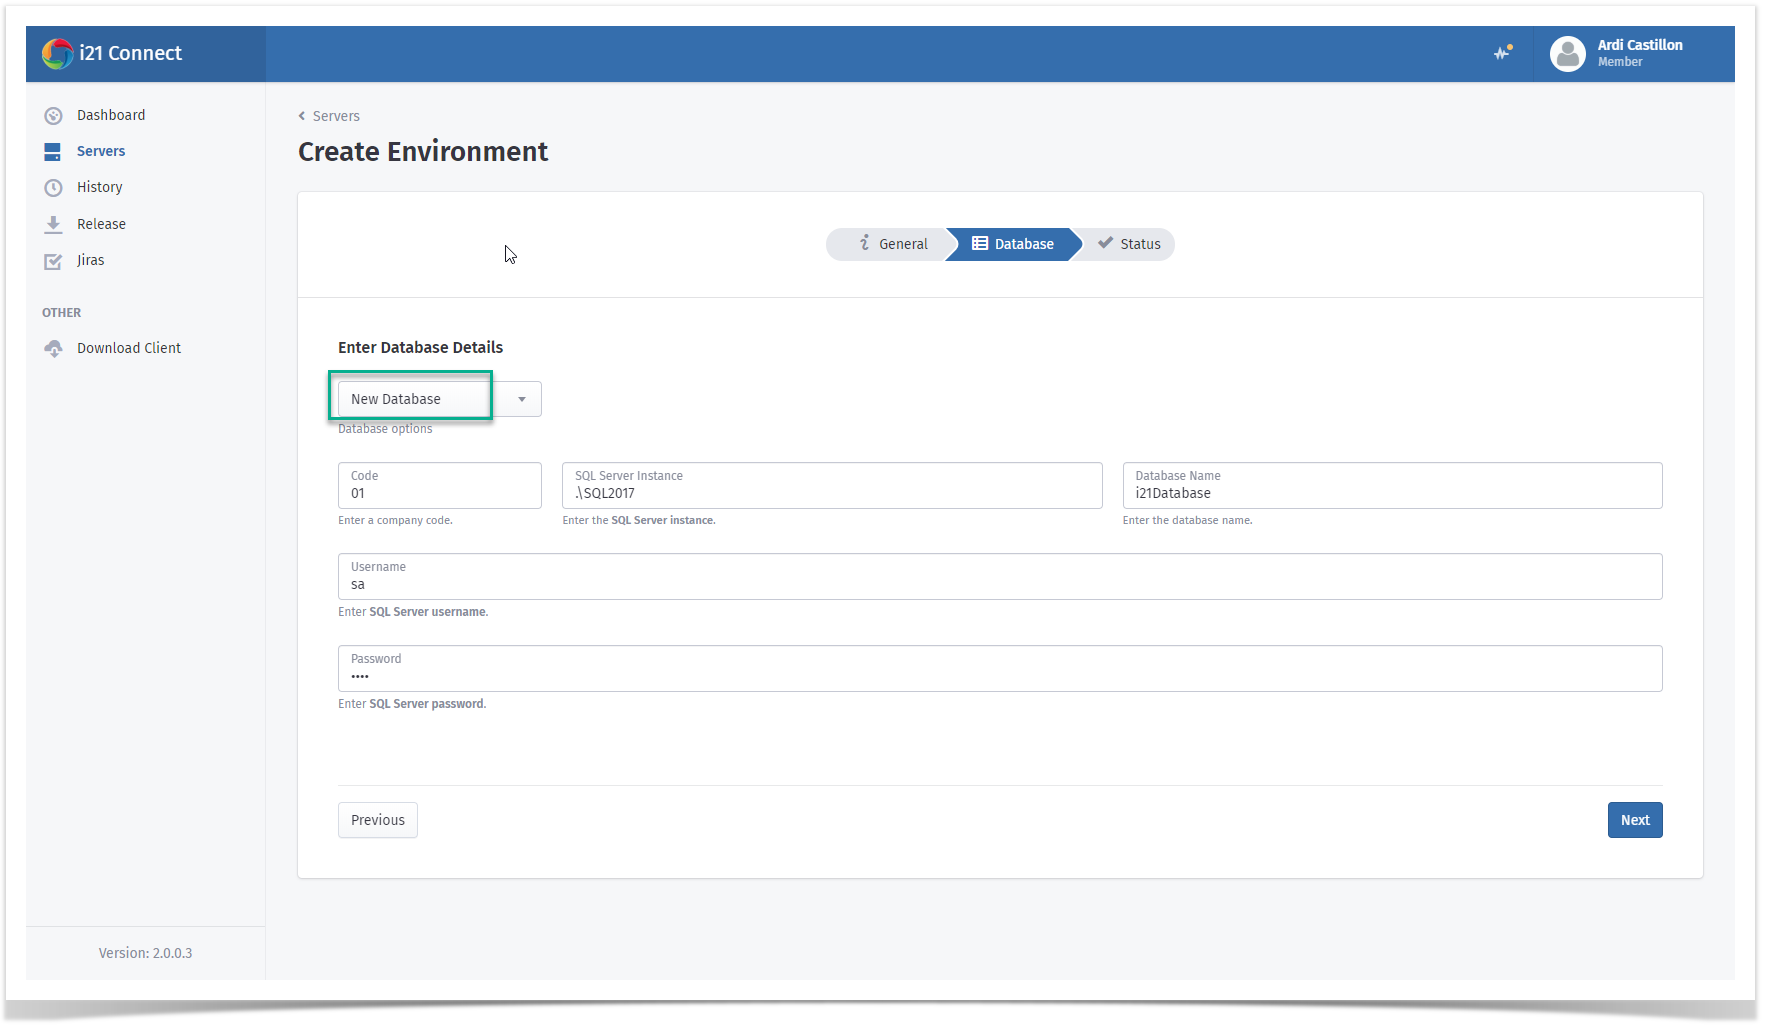
- Code: Assign Code for the company database. Eg. 01, 02, 99, 98 or TE
- SQL Server instance: Name of sql server instance name.
- Database Name: Name of database to create or existing database name that is already restored in sql server.
- User Name: SQL User Name to connect to sql server.
- Password : SQL Password to connect to sql server.
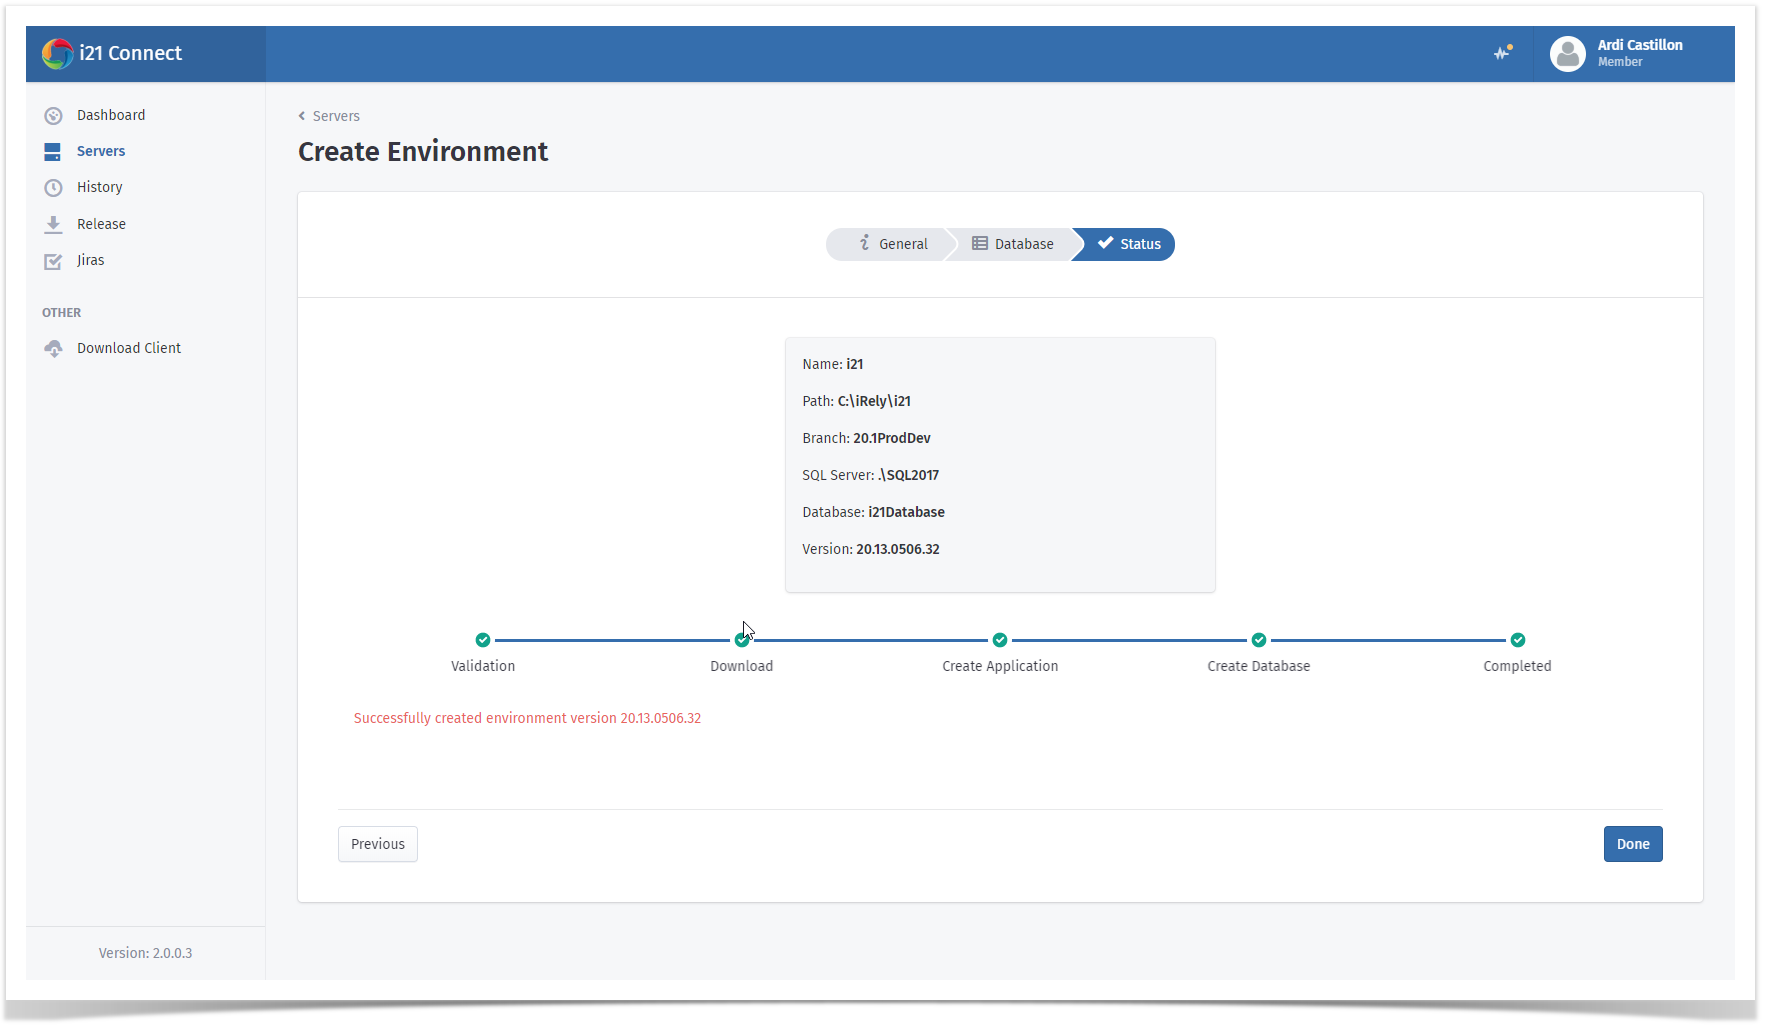
4. The environment creation summary will be displayed here. Click Create and click Yes when prompted.
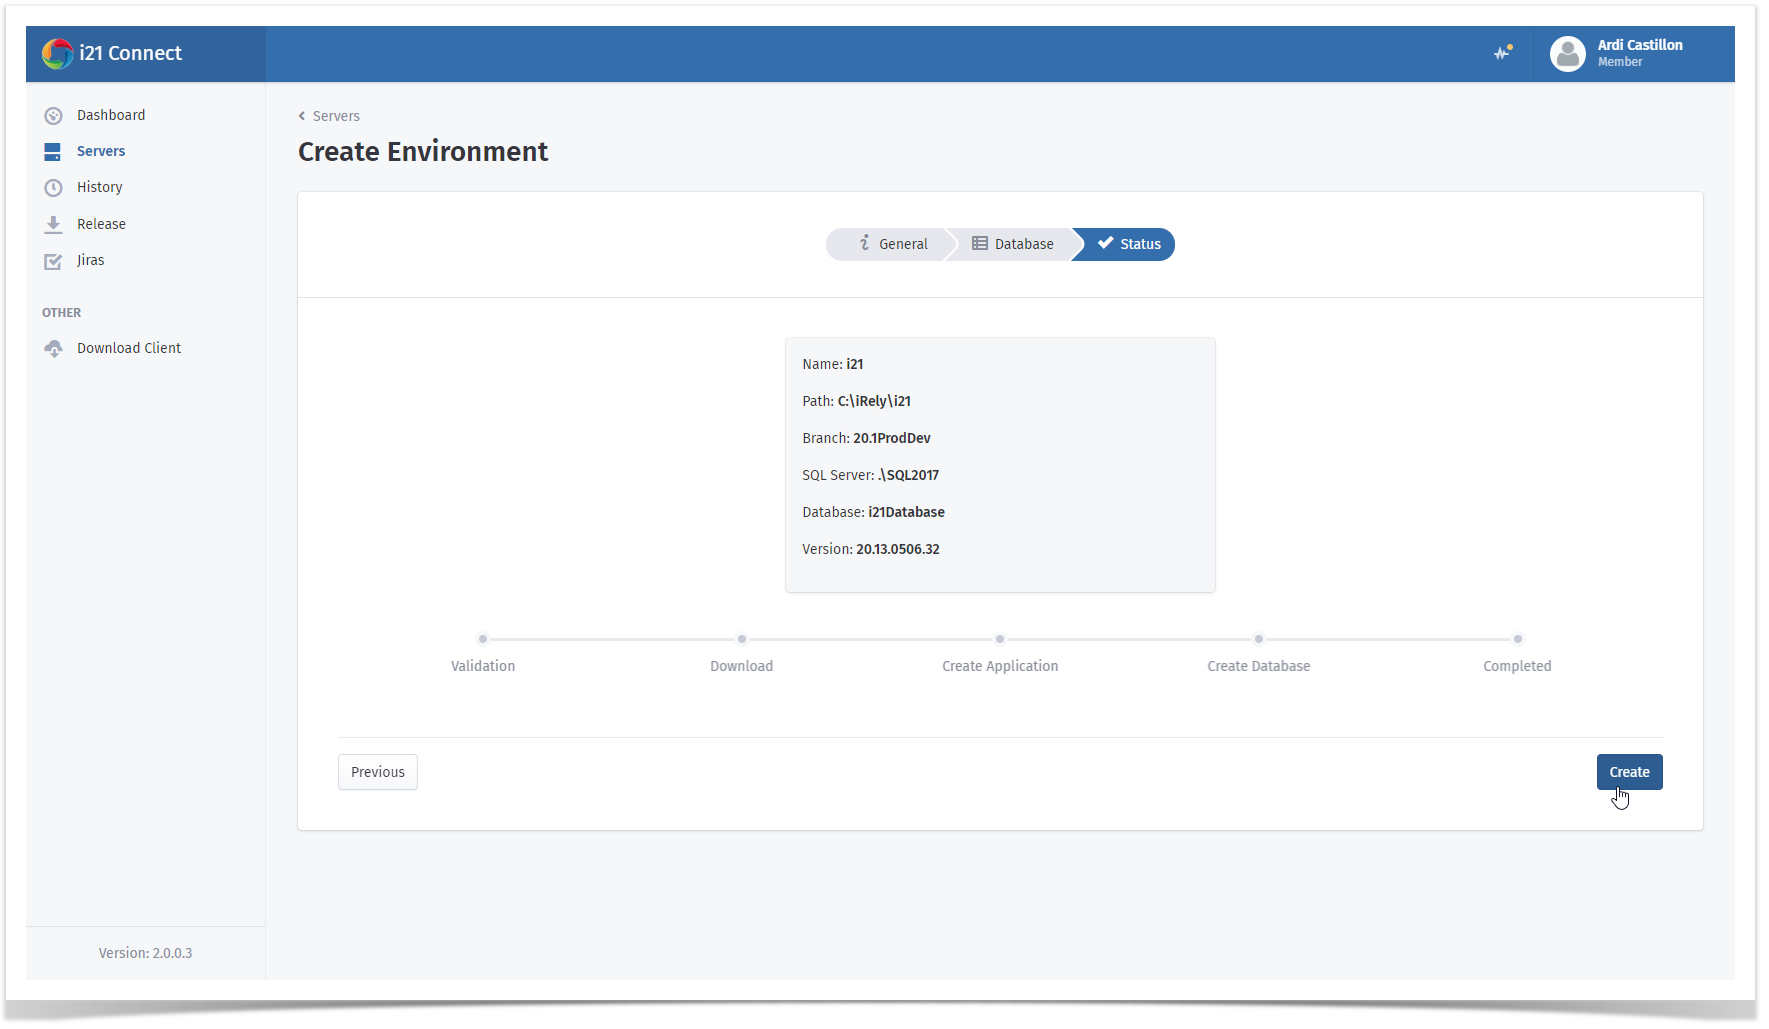
5. Wait for the progress to finish. Your new i21 build is now available.
Overview
Content Tools