Configure the i21 User
- Log into i21
- Select System Manager and then the Users menu.
- Find and open the user who will use the VoIPstudio integration.
- Click the User tab.
- In the VoIPstudio Settings, enter the email address, Password, and phone number of your VoIPstudio account.
- Make sure you enter the phone number with the area code and no spaces or other characters (ex: 12602390982)
- Click the Connect button and you should see the following confirmation message.
- Then you should see the following status.


Testing with a Customer
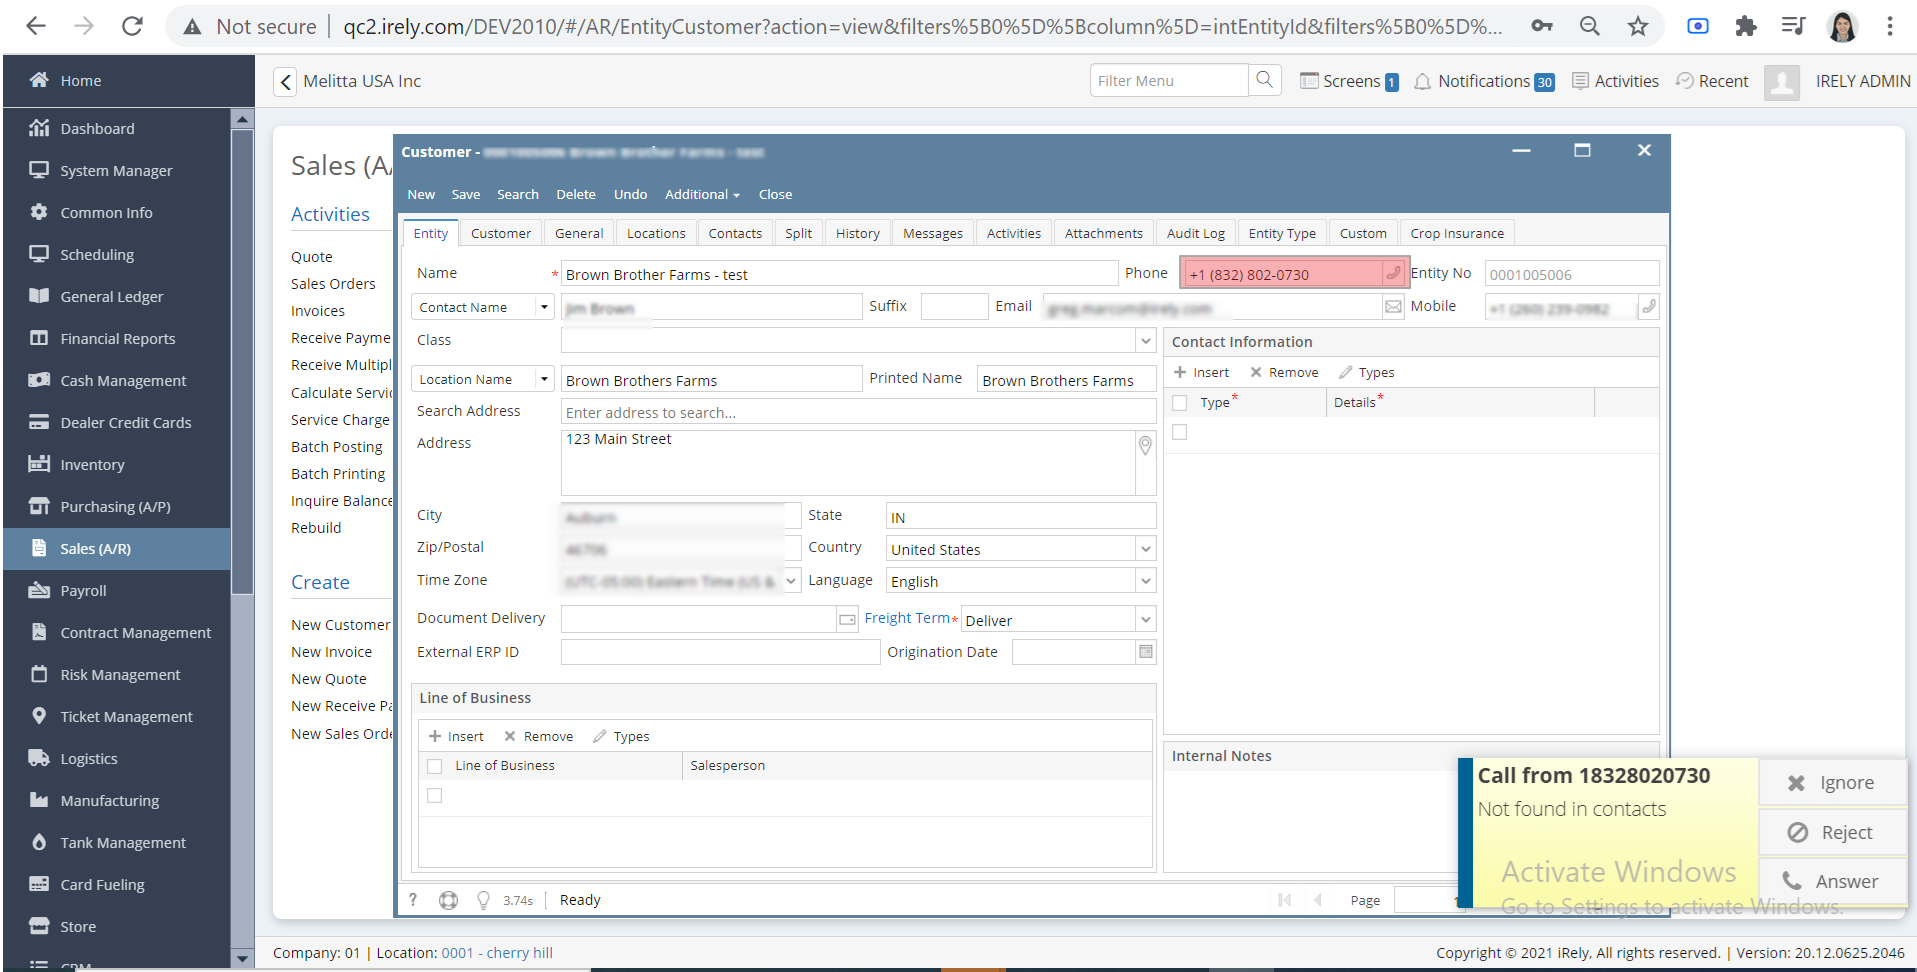
- Add phone number on Customer screen, on the user’s menu panel go to Sales (A/R) folder then click Customers
- Note, you can add phone/mobile number on Vendor, Employee, Ship Via, etc wherever you want as long that the phone number should be added only at one user with one or many Entity Type. And if that Entity is using the same phone number (ex. +1 (260) 239-0982) there is should no problem displaying the screen.
- Open the specific customer by filtering the Entity No. and click the Open Selected button
- On the selected customer's screen go to Entity tab beside Customer tab.
- Update the phone number(ex. +1 (260) 239-0982) and click the Save button then close the customer/active screens
- Open the VoIPstudio application on Windows and enter the Email and Password, credentials should be the same as in step 5
- Open the VoIPstudio application on Mobile and enter the Email and Password
- In Mobile VoIPstudio, enter the number you have entered in the Customer screen(the same number entered on step 10) then click the Call button
- There should be a notification to the i21 users with the number of the caller and the Customer screen is should be open.
Note: Please make sure you are using VOIPStudio v3.1.1 or later.
Overview
Content Tools