| Module | Description | How To | |||
|---|---|---|---|---|---|
| Tank Management |
| Go to Tank Management menu > Devices | |||
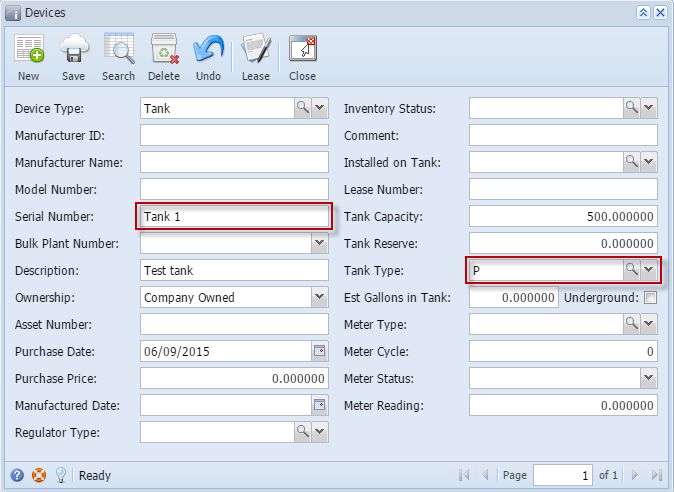
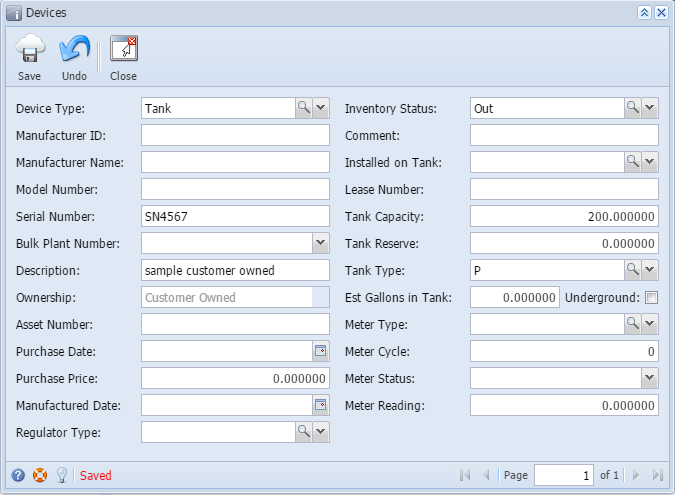
Click the New toolbar button. Enter the Serial Number and Tank Capacity. Select the Tank Type Fill in the other fields and click the Save button
Note: The highlighted are the required fields for Devices screen. Serial Number can't be duplicated. If serial number exist, kindly enter another serial number and save. | |||||
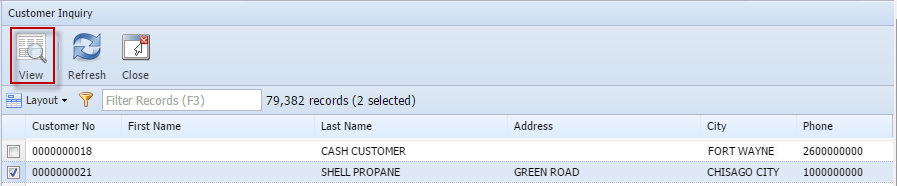
| 2. Create a Consumption Site | Go to Tank Management menu > Customer Inquiry | ||||
Select a customer and click View toolbar button
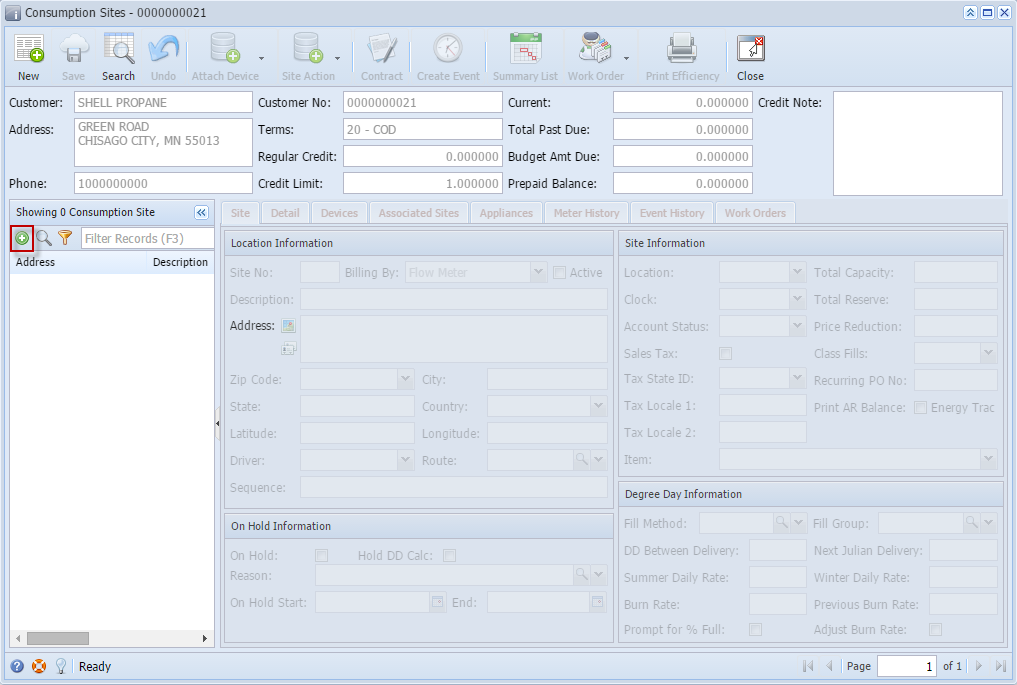
On Customer Inquiry screen, click Site button
| |||||
Click the New Site button to add a site. This is the + button on the Address panel.
| |||||
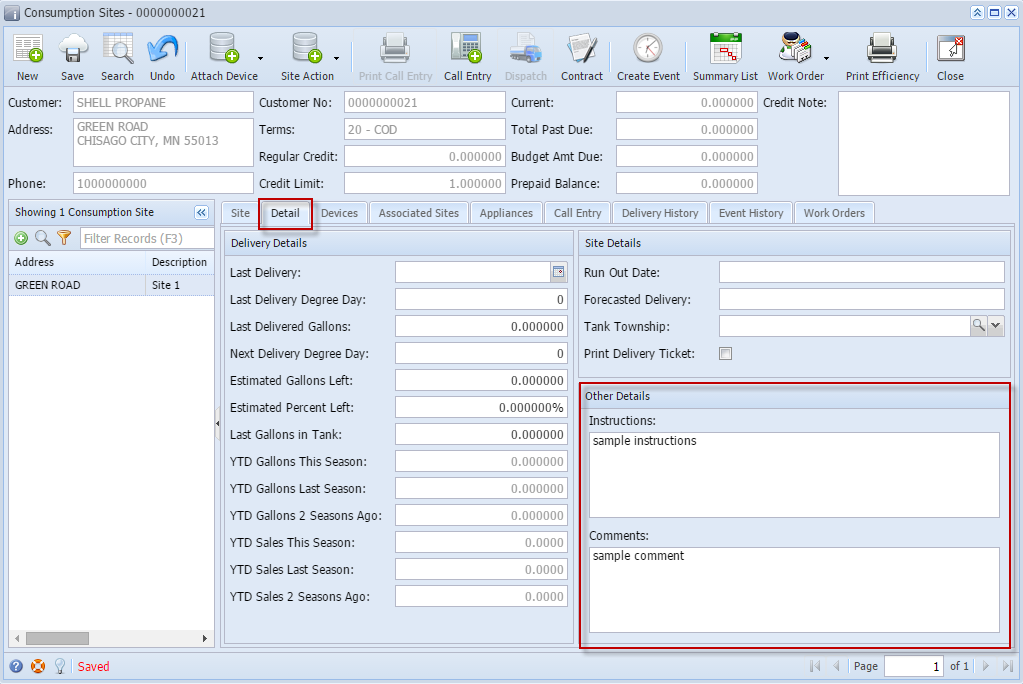
Enter the details on Site tab. The Description and Address entered on the site tab should be the same with the Description and Address displayed on the grid of the Address panel. Use Copy Customer Address button to copy the Address, Zip Code, City, State and Country of the customer on the site fields. Select a value for the ff: Driver, Route, Location, Clock, Account Status, Tax State ID, Class Fills, Item and Fill Method. Enable/Check Sales Tax Option.
| |||||
| 3. Attach Devices to Consumption Site | Go to Tank Management menu > Consumption Site | ||||
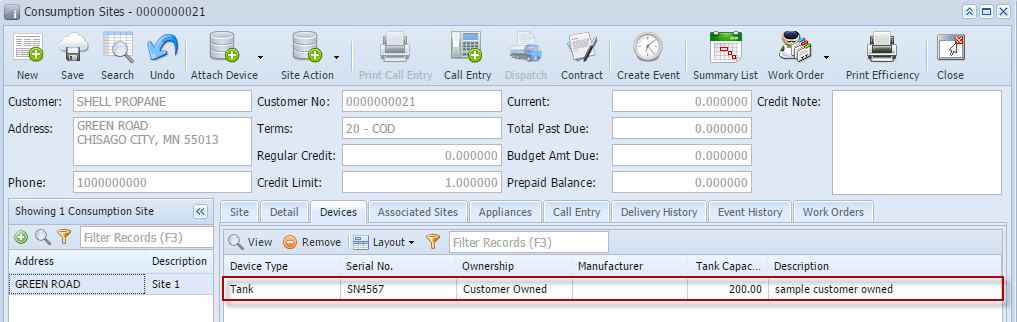
| a. Attach Customer Owned | Select the site you have created on Search Consumption Site screen. Click View toolbar button to open the site. Attach a customer owned device on the site by clicking Attach Device menu button and select Attach Customer Owned.
Enter details and select a Tank Type. Click Save button.
The device will be displayed on the Devices tab grid.
| ||||
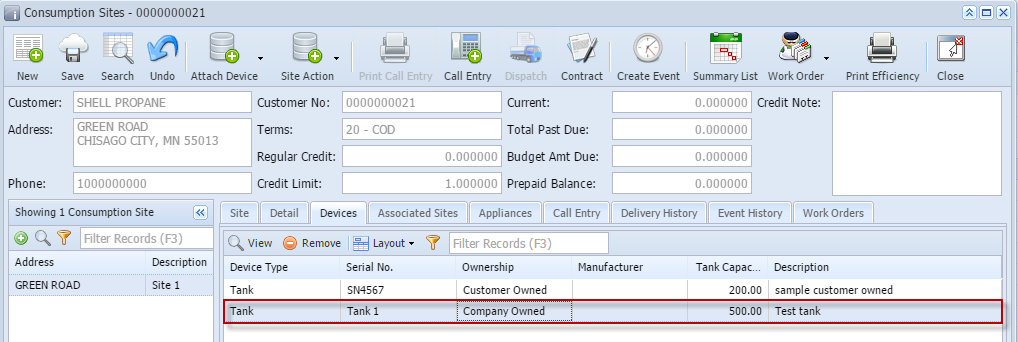
| b. Attach Company Owned. | Attach a company owned device on the site by clicking Attach Device menu button and select Attach Company Owned.
Search for the tank that has been created in Step #1. Select the device and click Open Selected button to attach the device. The device will be displayed on the Devices tab grid.
| ||||
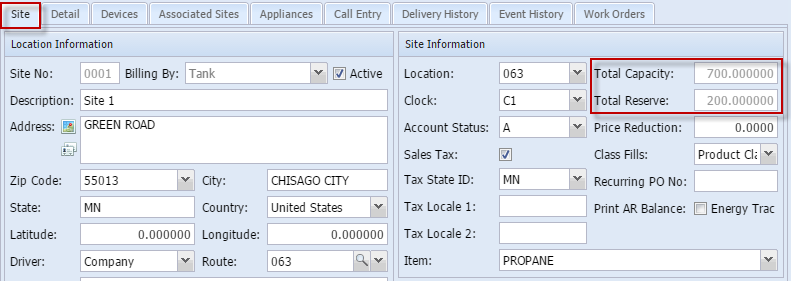
| Under Site tab | Navigate to Site tab. Total Capacity and Total Reserve will display the sum of the devices attached to the site.
| ||||
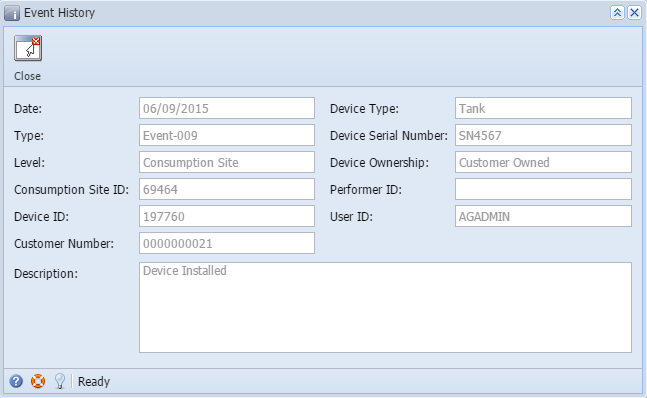
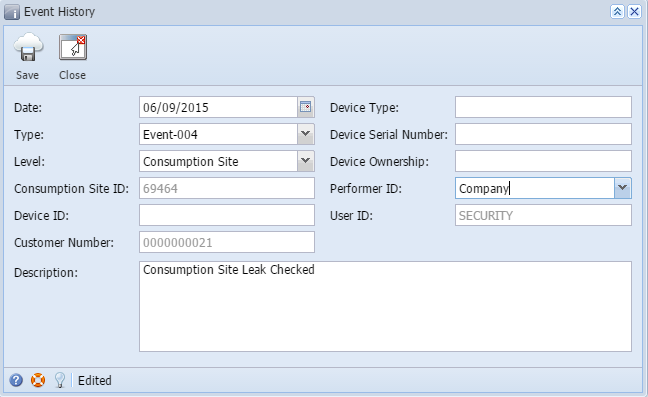
| Under Events tab | Navigate to Event History tab. History of the devices attached will be displayed in grid.
Select an event and click View button. Event History form for the selected device event will display.
| ||||
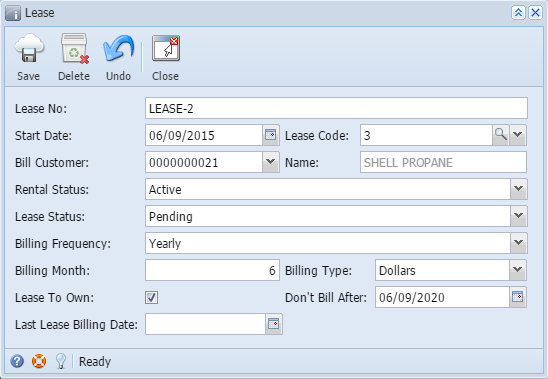
| c. Add a Lease | Go back to Devices tab and select the Company Owned device on the grid. Click View button.This will open the Devices screen. Click Lease button. Enter and fill in the needed details and Save. Close the Lease screen. Lease No will display in Lease Number field of the Devices form.
| ||||
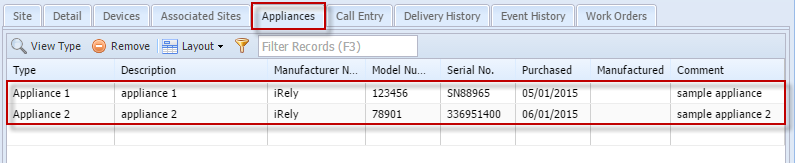
| 4. Add Appliances | Navigate to Appliances tab. Add and select 2 appliance type and enter the remaining details on the grid. Save the site form.
| ||||
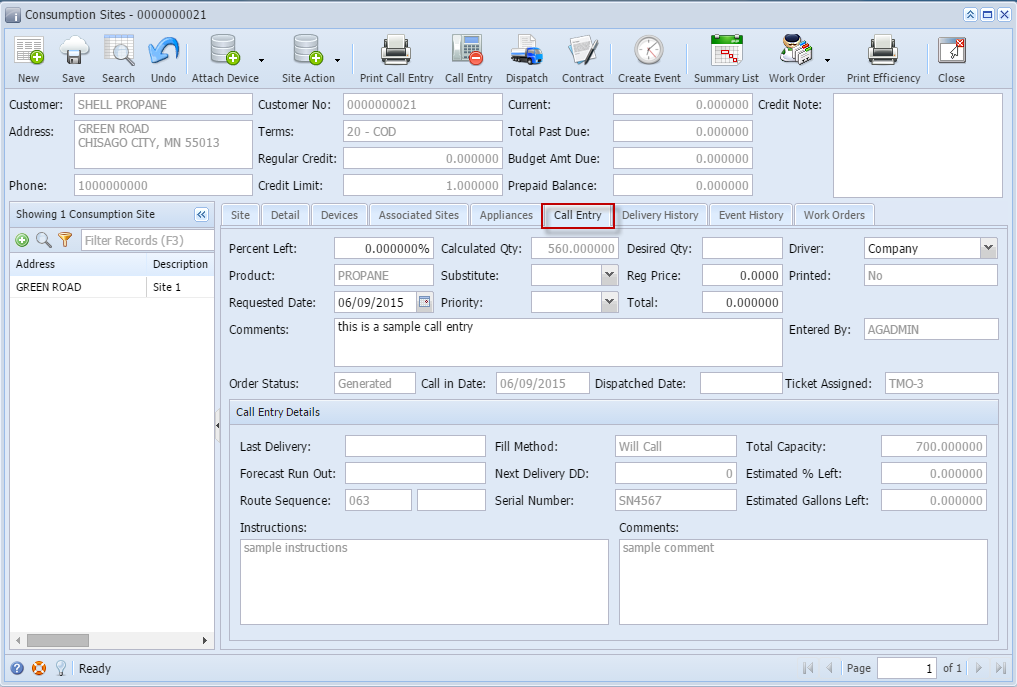
| 5. Create a Call in Order | Using the same customer site, click Call Entry toolbar button. Tab focus will be on the Call Entry tab. Enter details in Comments field. Click Save toolbar button.
| ||||
| 6. Create a Consumption Site Event | Click Create Events toolbar button.
| ||||
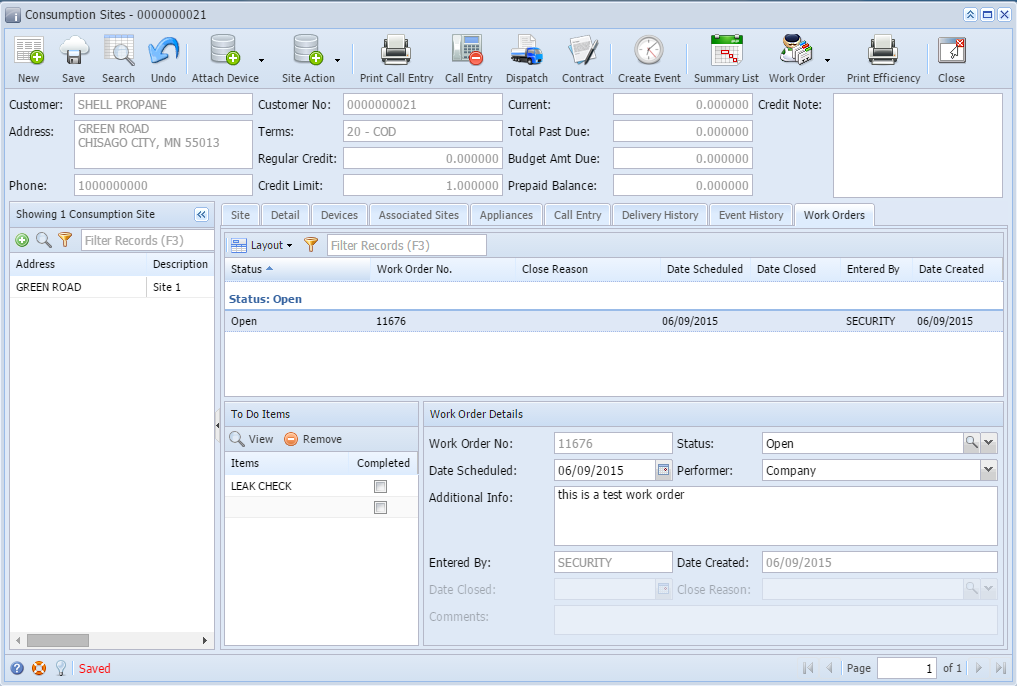
| 7. Add Work Order | Navigate to Work Order tab. Click Work Order and select Add Work Order. Add date in Date Scheduled field and enter details in Additional Info field. Select a work order item in To Do Items panel. Save the work order.
| ||||
| 8. |


Overview
Content Tools