This will show you on how to setup for the freight type = Rate.
- From the Sales module > Customers then select a customer that you want to have a setup.
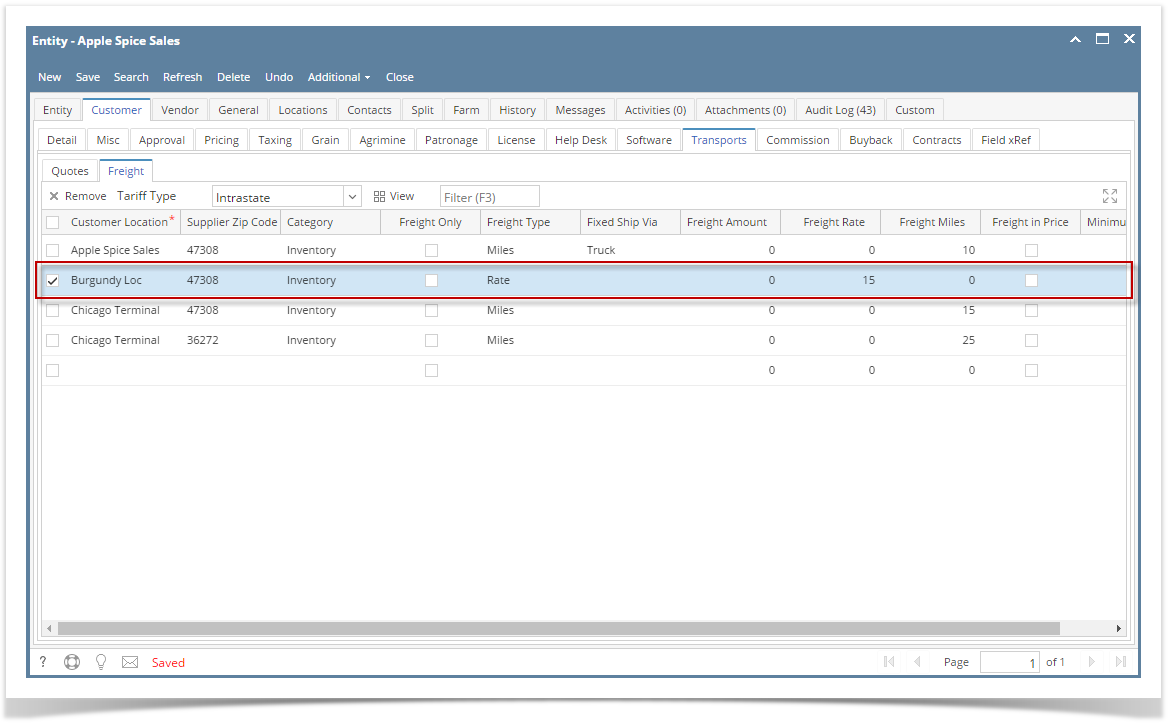
- Go to the Customer tab > Transports tab > Freight tab.
Select a Customer Location, Supplier Zip code, Category and enter the freight rate. Freight type should be Rate then Click Save.
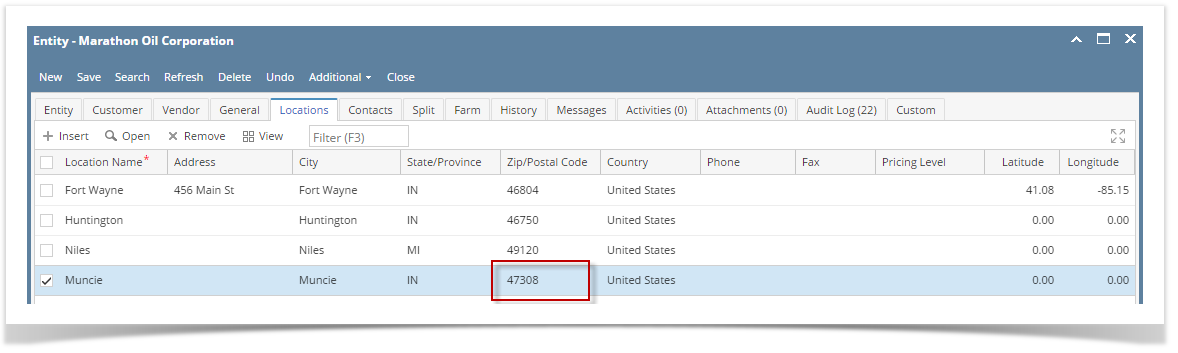
3. In the Purchasing module > Vendors Look for the Supplier Zip code that you entered on the Customer setup
Location should also be the same as the supplier zip code.
This is needed to effectively reflect the freight rate setup of the customer to the Transport load
4. After the steps above, Go to Transport > Transport load and create a Terminal to Customer using the vendor and customer that has setup above.
5. As soon as Receipt Link is selected freight setup of the customer(distribution) and vendor(receipt) will be populated.
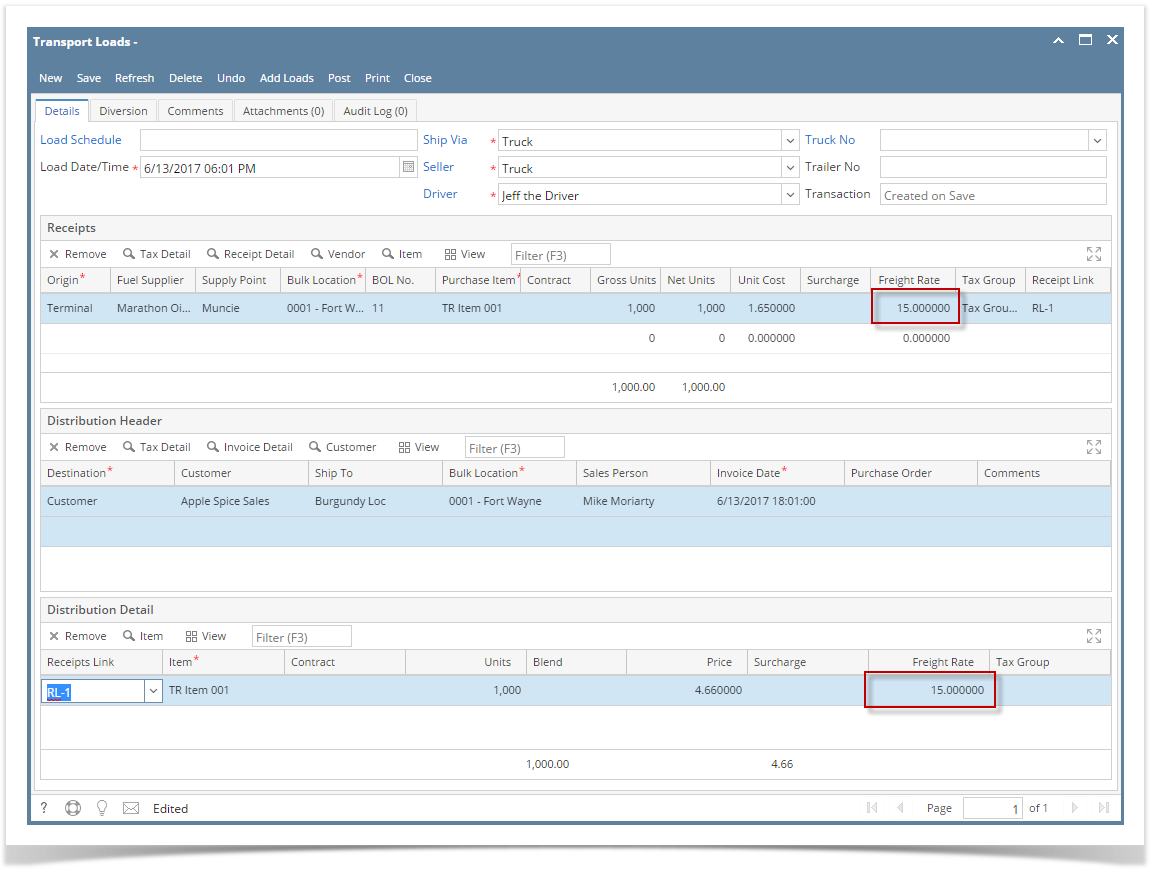
6. Click Save.
This will show you on how to setup for the freight type = Rate.
- From the Sales module > Customers then select a customer that you want to have a setup.
- Go to the Customer tab > Transports tab > Freight tab.
Select a Customer Location, Supplier Zip code, Category and enter the freight rate. Freight type should be Rate then Click Save.

3. In the Purchasing module > Vendors Look for the Supplier Zip code that you entered on the Customer setup
Location should also be the same as the supplier zip code.
This is needed to effectively reflect the freight rate setup of the customer to the Transport load
4. After the steps above, Go to Transport > Transport load and create a Terminal to Customer using the vendor and customer that has setup above.
5. Put the cursor to the units then click anywhere on the grid to show the freight setup of the customer then enter a surcharge value.

6. Click Save.
Overview
Content Tools