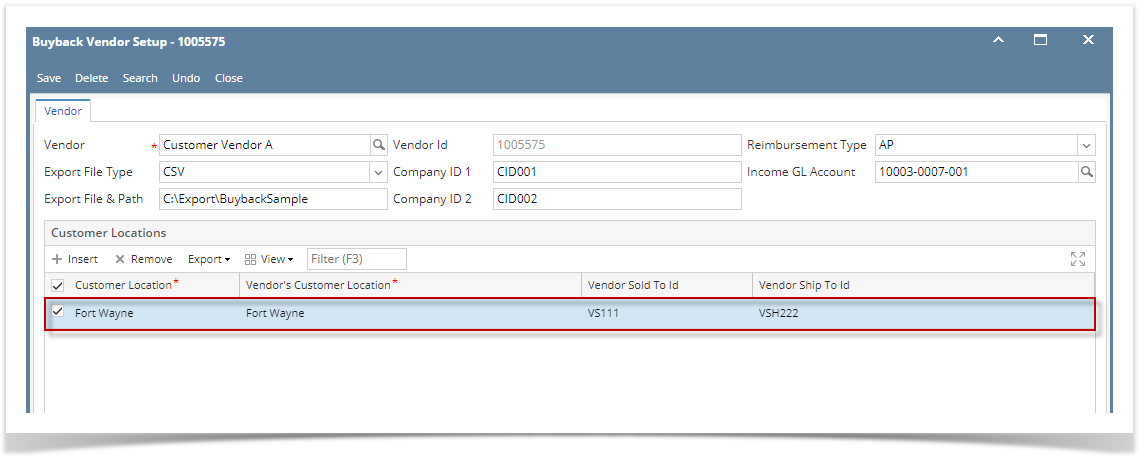
- From Sales > Customers, create a customer - vendor entity. Enter the necessary details.
- On Location tab, add all delivery locations. These are customer locations to which deliveries are made for the invoices.
- Add Vendor type in Entity tab. This will open the Vendor screen.
- Enter the details needed, then click Save button.
- From Buybacks menu > Setup, click New button.
- Enter the following details.
- Vendor - customer/vendor entity.
- Export File Type - specific export file type (csv, xml, text)
- Export File & Path - specific path + filename of the file without the extension
- Company ID 1 - user inputs company Id 1
- Company ID 2 - user inputs company Id 2
- Reimbursement Type - user selects if the reimbursement type - AP or AR
- Income GL Account - displays GL Accounts
- In Customer Locations panel, click Insert button. The Customer Locations search screen will display. This will list all the locations that were setup for the customer.
- Select the specific location and click Open Selected button. Selected customer locations will be displayed on the grid.
- Enter values for Vendor Sold To Id and Vendor Ship To Id.
- Click Save button.
Overview
Content Tools

